Arduino Laser Emitter Control Circuit
Circuit Documentation
Summary
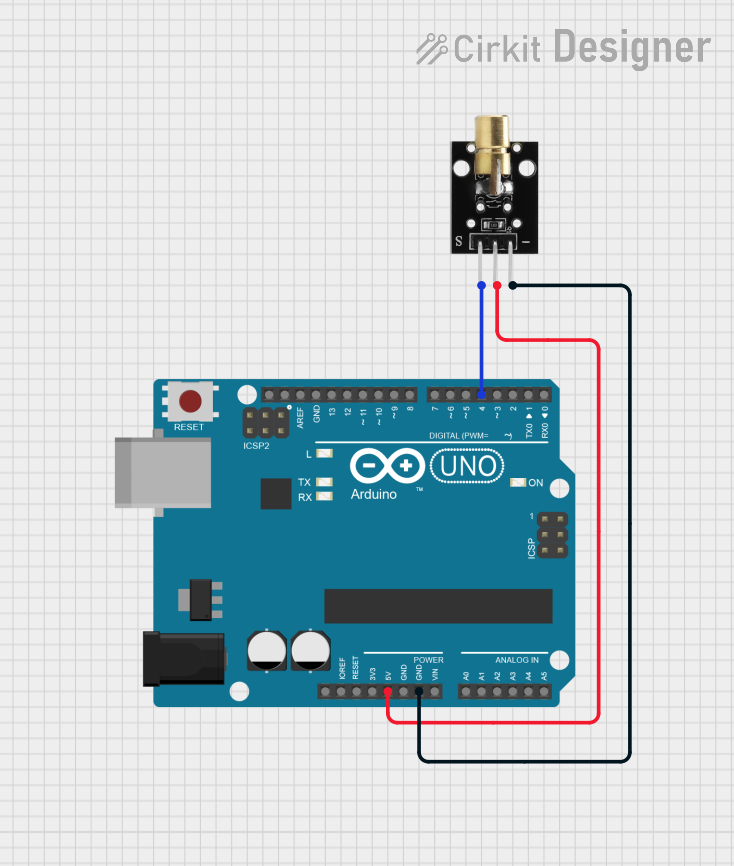
This circuit consists of an Arduino UNO microcontroller and a KY-008 Laser Emitter. The Arduino UNO serves as the main control unit, while the KY-008 Laser Emitter is used to emit a laser signal. The components are interconnected to allow the Arduino to control the laser emitter through a digital signal.
Component List
Arduino UNO
- Description: A popular microcontroller board based on the ATmega328P. It is used for building digital devices and interactive objects that can sense and control the physical world.
- Purpose in Circuit: Acts as the main control unit to manage the operation of the KY-008 Laser Emitter.
KY-008 Laser Emitter
- Description: A small laser emitter module that can be controlled by a microcontroller to emit a laser beam.
- Purpose in Circuit: Emits a laser signal when activated by the Arduino UNO.
Wiring Details
Arduino UNO
5V Pin: Connected to the 5V pin of the KY-008 Laser Emitter.
GND Pin: Connected to the GND pin of the KY-008 Laser Emitter.
D4 Pin: Connected to the SIG pin of the KY-008 Laser Emitter.
KY-008 Laser Emitter
5V Pin: Connected to the 5V pin of the Arduino UNO.
GND Pin: Connected to the GND pin of the Arduino UNO.
SIG Pin: Connected to the D4 pin of the Arduino UNO.
Documented Code
Arduino Code
void setup() {
  // put your setup code here, to run once:

}

void loop() {
  // put your main code here, to run repeatedly:

}
Documentation
This section is reserved for additional documentation related to the code and circuit operation. Currently, there is no additional documentation provided.
This concludes the documentation for the circuit involving the Arduino UNO and KY-008 Laser Emitter.