Arduino UNO Controlled Servo Motor
Circuit Documentation
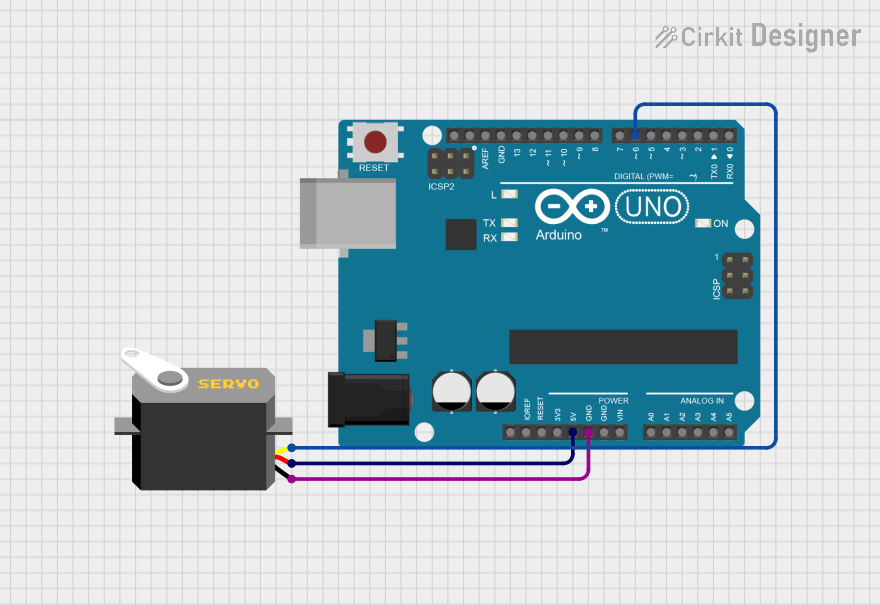
Summary of the Circuit
This circuit consists of an Arduino UNO microcontroller board interfaced with a servo motor. The Arduino UNO provides control signals to the servo motor, allowing it to move to a specified angle. The servo motor is powered directly from the Arduino's 5V output pin, and the ground is shared between the two devices. The control signal for the servo is generated by one of the Arduino's digital pins using the Servo library in the Arduino IDE.
Component List
Arduino UNO
- Description: A microcontroller board based on the ATmega328P.
- Pins: UNUSED, IOREF, Reset, 3.3V, 5V, GND, Vin, A0-A5, SCL, SDA, AREF, D0-D13
- Purpose: Acts as the main controller for the circuit, providing logic and power to the servo motor.
Servo
- Description: An actuator that can rotate to a specified position using a control signal.
- Pins: gnd, vcc, pulse
- Purpose: Receives control signals from the Arduino to move to desired angles.
Wiring Details
Arduino UNO
- 5V connected to Servo's vcc pin for power supply.
- GND connected to Servo's gnd pin for a common ground reference.
- D6 connected to Servo's pulse pin to provide control signals.
Servo
- vcc connected to Arduino UNO's 5V pin for power supply.
- gnd connected to Arduino UNO's GND pin for a common ground reference.
- pulse connected to Arduino UNO's D6 pin to receive control signals.
Documented Code
sketch.ino
#include <Servo.h>

Servo myServo;

void setup() {
    myServo.attach(6); // Attach the servo to pin D6
}

void loop() {
    myServo.write(180); // Move the servo to 180 degrees
    delay(1000); // Wait for 1 second
}
Description: This code initializes a Servo object and attaches it to pin D6 of the Arduino UNO. In the main loop, the servo is instructed to move to 180 degrees and then the system pauses for 1 second. This cycle repeats indefinitely.
documentation.txt
No additional documentation provided for the code.
Note: The code provided is minimal and serves as a basic example of how to control a servo motor using an Arduino. For a more comprehensive application, additional functionality and error handling would be required.