
ESP32 CAM and Ultrasonic Sensor-Based Wi-Fi Controlled Robotic Vehicle
View and Edit Project In Cirkit Designer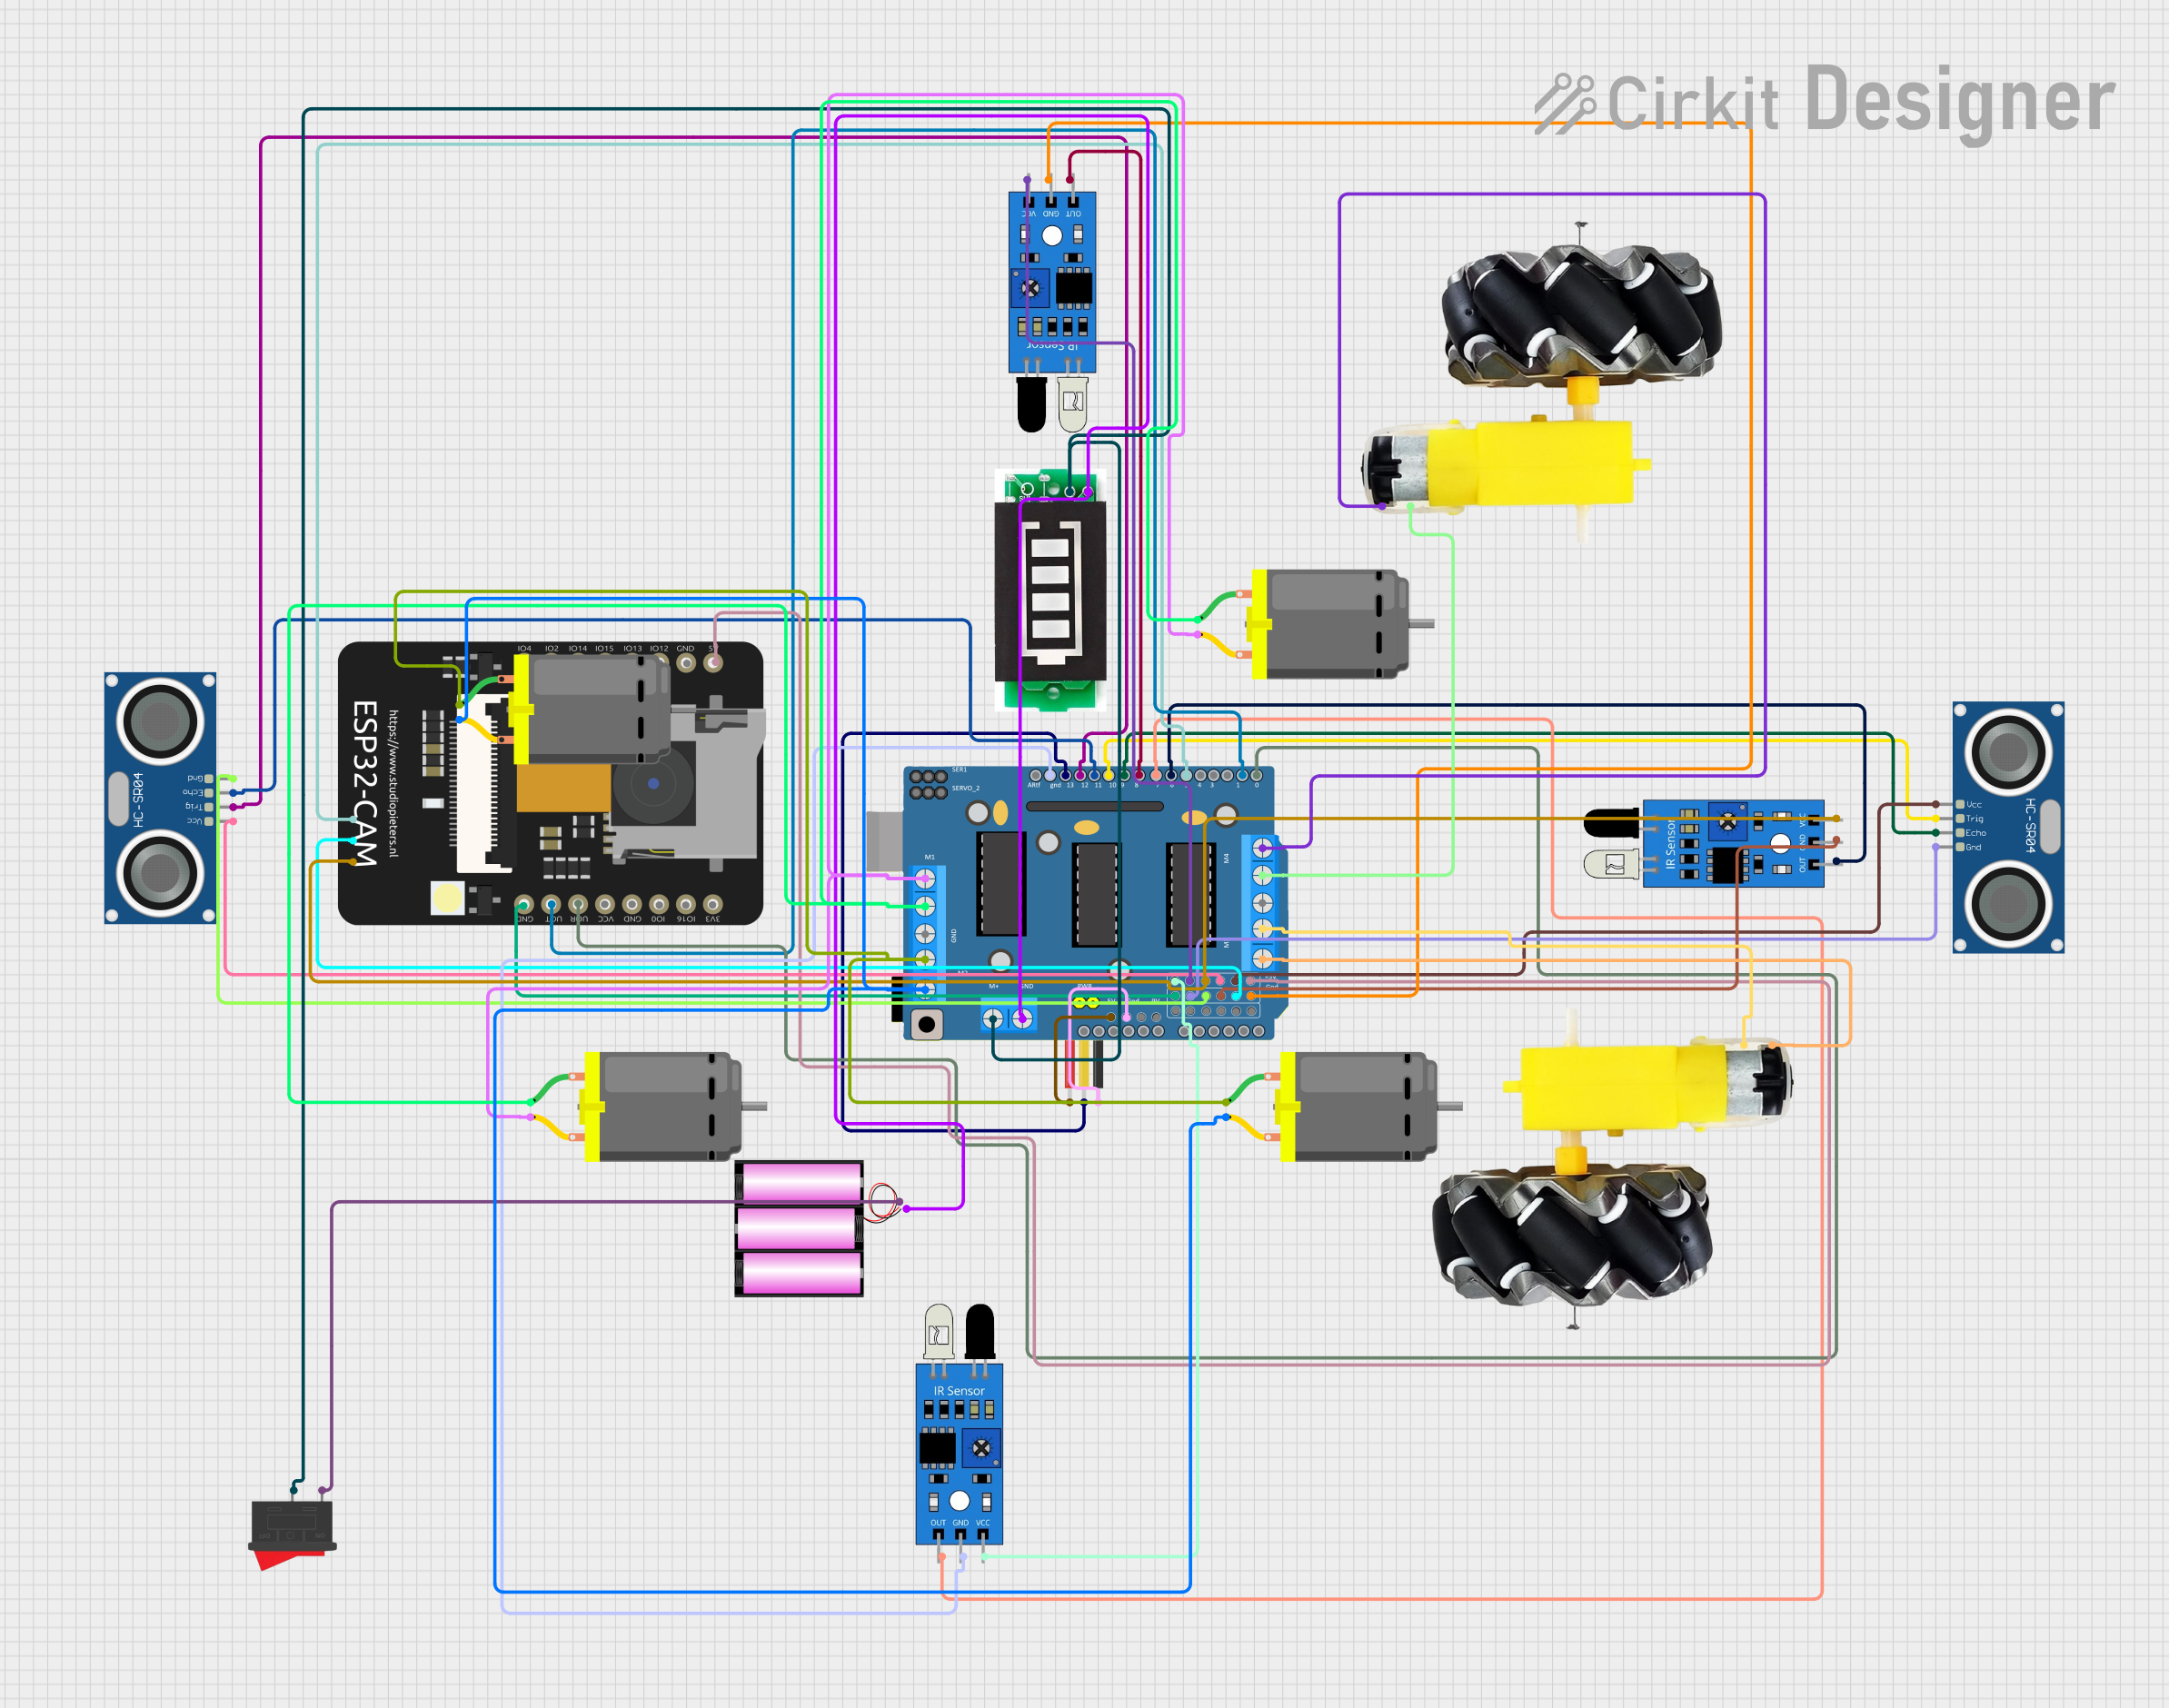
Circuit Documentation
Summary
This document provides a detailed overview of a circuit that includes various sensors, motors, a driver shield, and a microcontroller. The circuit is designed to interface with multiple sensors and control motors, likely for a robotic or automation application. The components are interconnected through a driver shield, which also serves as the main microcontroller unit.
Component List
HC-SR04 Ultrasonic Sensor
- Pins: VCC, TRIG, ECHO, GND
- Description: Ultrasonic distance sensor used for measuring distance by using ultrasonic waves.
IR Sensor
- Pins: out, gnd, vcc
- Description: Infrared sensor used for detecting objects or obstacles.
ESP32 CAM
- Pins: 5V, GND, GPIO12, GPIO13, GPIO15, GPIO14, GPIO2, GPIO4, 3.3V, GPIO16, GPIO0, 3.3V / 5V / P_OUT, GPIO3 / RX, GPIO1 / TX
- Description: Microcontroller with built-in camera module for capturing images and video.
Motor and Wheels
- Pins: vcc, GND
- Description: Motor and wheel assembly for movement.
DC Motor
- Pins: pin 1, pin 2
- Description: Direct current motor for rotational movement.
PIR Sensor
- Pins: VDD, SIG, GND
- Description: Passive infrared sensor for motion detection.
DRIVER SHIELD L293D
- Pins: RESET, 3.3V, 5V, GND, VIN, 9V, A0, A1, A2, A3, A4, A5, M2 (+), M2 GND (-), M1 (+), M1 GND (-), M3 (+), M3 GND (-), M4 GND (-), M4 (+), SERVO_2, SERVO_1, RX/D0, TX/D1, D2, D3, D4, D5, D6, D7, D8, D9, D10, D11, ARef, D13, D12, VCC (External Power Supply), GND (External Power Supply)
- Description: Motor driver shield for controlling multiple motors and interfacing with sensors.
Rocker Switch
- Pins: 1, 2
- Description: Switch for turning the circuit on and off.
Battery 12V
- Pins: +, -
- Description: Power supply for the circuit.
Battery Indicator
- Pins: +, -
- Description: Indicator for battery status.
Wiring Details
HC-SR04 Ultrasonic Sensor
- VCC connected to 5V on DRIVER SHIELD L293D
- TRIG connected to D12 on DRIVER SHIELD L293D
- ECHO connected to D11 on DRIVER SHIELD L293D
- GND connected to GND on DRIVER SHIELD L293D
HC-SR04 Ultrasonic Sensor
- VCC connected to 5V on DRIVER SHIELD L293D
- TRIG connected to D10 on DRIVER SHIELD L293D
- ECHO connected to D9 on DRIVER SHIELD L293D
- GND connected to GND on DRIVER SHIELD L293D
IR Sensor
- out connected to D8 on DRIVER SHIELD L293D
- gnd connected to GND on DRIVER SHIELD L293D
- vcc connected to 5V on DRIVER SHIELD L293D
IR Sensor
- out connected to D6 on DRIVER SHIELD L293D
- gnd connected to GND on DRIVER SHIELD L293D
- vcc connected to 5V on DRIVER SHIELD L293D
IR Sensor
- out connected to D5 on DRIVER SHIELD L293D
- gnd connected to GND on DRIVER SHIELD L293D
- vcc connected to 5V on DRIVER SHIELD L293D
IR Sensor
- out connected to D7 on DRIVER SHIELD L293D
- gnd connected to GND on DRIVER SHIELD L293D
- vcc connected to 5V on DRIVER SHIELD L293D
PIR Sensor
- GND connected to GND on DRIVER SHIELD L293D
- VDD connected to 5V on DRIVER SHIELD L293D
- SIG connected to D13 on DRIVER SHIELD L293D
ESP32 CAM
- GND connected to GND on DRIVER SHIELD L293D
- 5V connected to 5V on DRIVER SHIELD L293D
- GPIO3 / RX connected to RX/D0 on DRIVER SHIELD L293D
- GPIO1 / TX connected to TX/D1 on DRIVER SHIELD L293D
DC Motor
- pin 2 connected to M2 (+) on DRIVER SHIELD L293D
- pin 1 connected to M2 GND (-) on DRIVER SHIELD L293D
DC Motor
- pin 2 connected to M1 (+) on DRIVER SHIELD L293D
- pin 1 connected to M1 GND (-) on DRIVER SHIELD L293D
Motor and Wheels
- vcc connected to M3 (+) on DRIVER SHIELD L293D
- GND connected to M3 GND (-) on DRIVER SHIELD L293D
Motor and Wheels
- vcc connected to M4 (+) on DRIVER SHIELD L293D
- GND connected to M4 GND (-) on DRIVER SHIELD L293D
Rocker Switch
- 2 connected to + on Battery Indicator and VCC (External Power Supply) on DRIVER SHIELD L293D
- 1 connected to + on Battery 12V
Battery 12V
- - connected to - on Battery Indicator and GND (External Power Supply) on DRIVER SHIELD L293D
Documented Code
sketch.ino
void setup() {
  // put your setup code here, to run once:

}

void loop() {
  // put your main code here, to run repeatedly:

}
documentation.txt