
Arduino UNO Sound Sensor with LED Indicator - Battery Powered
View and Edit Project In Cirkit Designer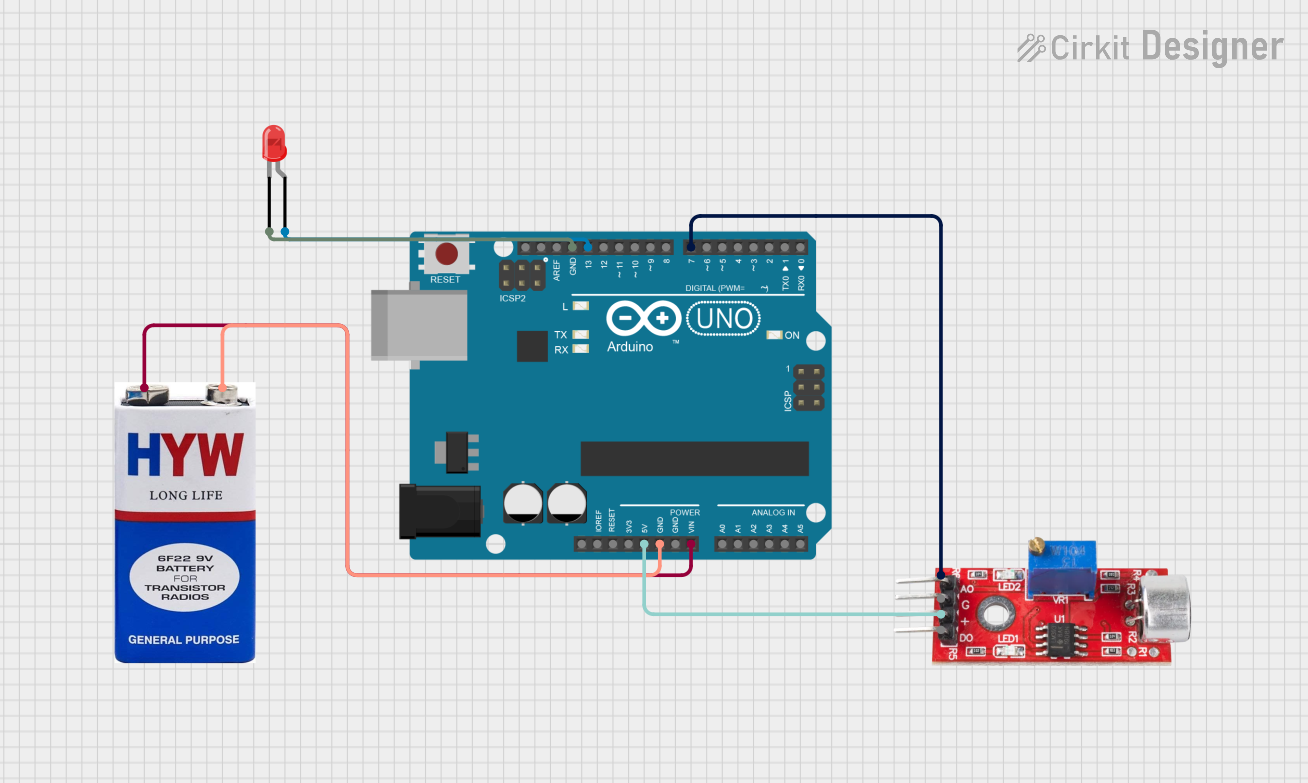
Circuit Documentation
Summary
This circuit consists of a sound sensor, an Arduino UNO microcontroller, a red LED, and a 9V battery. The sound sensor detects sound levels and sends the data to the Arduino UNO. The Arduino UNO processes this data and controls the LED based on the sound levels. The 9V battery powers the entire circuit.
Component List
Sound Sensor
- Description: A sensor that detects sound levels.
- Pins: Analog, GND, VCC, Digital
Arduino UNO
- Description: A microcontroller board based on the ATmega328P.
- Pins: UNUSED, IOREF, Reset, 3.3V, 5V, GND, Vin, A0, A1, A2, A3, A4, A5, SCL, SDA, AREF, D13, D12, D11, D10, D9, D8, D7, D6, D5, D4, D3, D2, D1, D0
LED: Two Pin (red)
- Description: A red LED with two pins.
- Pins: cathode, anode
9V Battery
- Description: A 9V battery used to power the circuit.
- Pins: +, -
Wiring Details
Sound Sensor
- Analog pin connected to D7 pin of Arduino UNO
- VCC pin connected to 5V pin of Arduino UNO
Arduino UNO
- D7 pin connected to Analog pin of Sound Sensor
- 5V pin connected to VCC pin of Sound Sensor
- GND pin connected to - pin of 9V Battery
- Vin pin connected to + pin of 9V Battery
- GND pin connected to cathode pin of LED
- D13 pin connected to anode pin of LED
LED: Two Pin (red)
- cathode pin connected to GND pin of Arduino UNO
- anode pin connected to D13 pin of Arduino UNO
9V Battery
- - pin connected to GND pin of Arduino UNO
- + pin connected to Vin pin of Arduino UNO
Documented Code
Arduino UNO Code (sketch.ino)
void setup() {
  // put your setup code here, to run once:

}

void loop() {
  // put your main code here, to run repeatedly:

}
Documentation (documentation.txt)
This documentation provides a comprehensive overview of the circuit, including a summary, detailed component list, wiring details, and the code used in the Arduino UNO microcontroller.