
Circuit Documentation
Summary
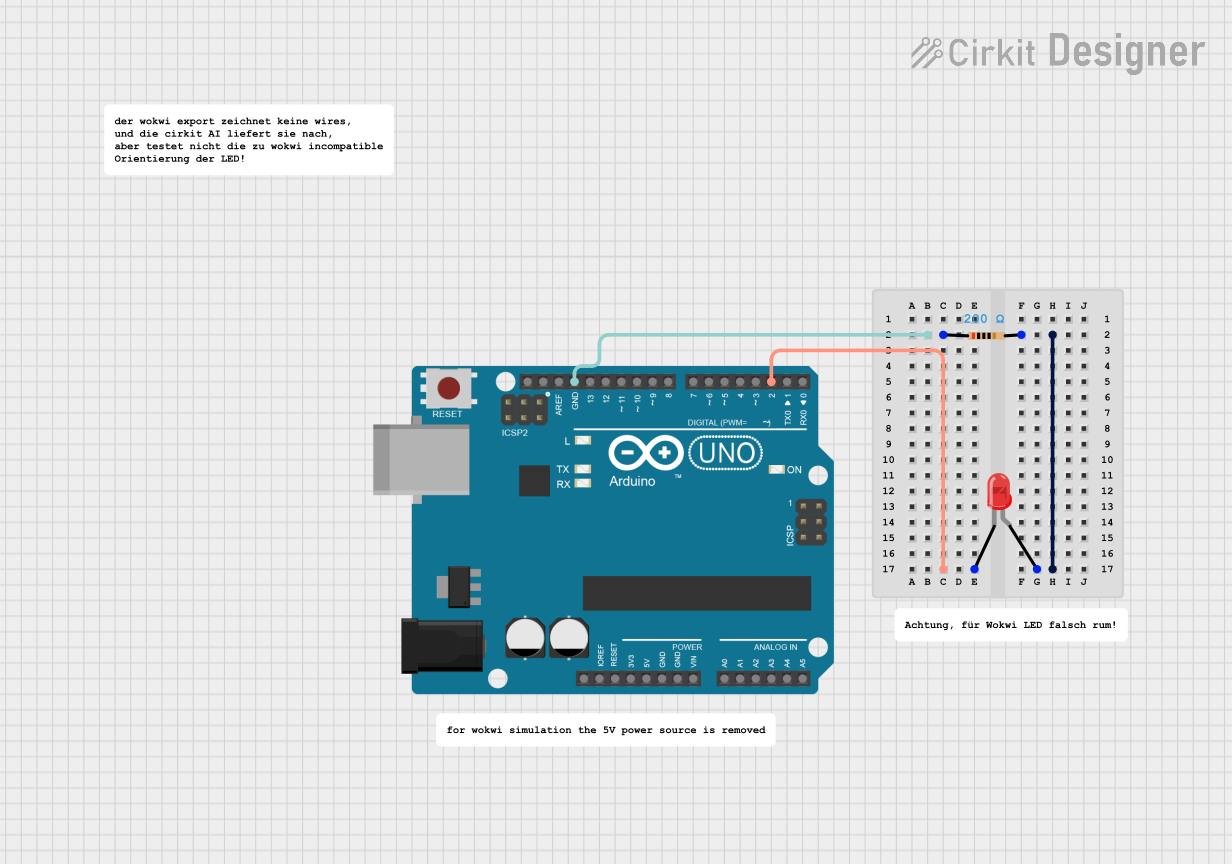
This circuit consists of an Arduino UNO microcontroller, a resistor, and a red LED. The Arduino UNO controls the LED, making it blink at regular intervals. The resistor is used to limit the current flowing through the LED to prevent damage.
Component List
Resistor
- Component Name: Resistor
- Description: A passive electrical component that limits the flow of electric current.
- Pins: pin1, pin2
- Properties:
- Resistance: 200 Ohms
Arduino UNO
- Component Name: Arduino UNO
- Description: A microcontroller board based on the ATmega328P. It has 14 digital input/output pins, 6 analog inputs, and a USB connection.
- Pins: UNUSED, IOREF, Reset, 3.3V, 5V, GND, Vin, A0, A1, A2, A3, A4, A5, SCL, SDA, AREF, D13, D12, D11, D10, D9, D8, D7, D6, D5, D4, D3, D2, D1, D0
LED: Two Pin (red)
- Component Name: LED: Two Pin (red)
- Description: A light-emitting diode that emits red light when current flows through it.
- Pins: cathode, anode
Comment
- Component Name: Comment
- Description: Placeholder for comments in the circuit design.
- Pins: None
Wiring Details
Resistor
- pin1 is connected to GND of Arduino UNO
- pin2 is connected to anode of LED: Two Pin (red)
Arduino UNO
- GND is connected to pin1 of Resistor
- D2 is connected to cathode of LED: Two Pin (red)
LED: Two Pin (red)
- anode is connected to pin2 of Resistor
- cathode is connected to D2 of Arduino UNO
Code Documentation
Arduino UNO Code
const int externalLED = 2; // Pin D2

void setup() {
  pinMode(LED_BUILTIN, OUTPUT);
  pinMode(externalLED, OUTPUT);
}

void loop() {
  digitalWrite(LED_BUILTIN, HIGH);
  digitalWrite(externalLED, HIGH);
  delay(1000);
  digitalWrite(LED_BUILTIN, LOW);
  digitalWrite(externalLED, LOW);
  delay(1000);
}
This code is written for the Arduino UNO microcontroller. It defines pin D2 as externalLED and sets it as an output pin in the setup() function. The loop() function toggles the built-in LED and the external LED connected to pin D2 on and off every second, creating a blinking effect.