
ESP8266-Controlled Dual Gearmotor System with L298N Driver and Ultrasonic Sensing
View and Edit Project In Cirkit Designer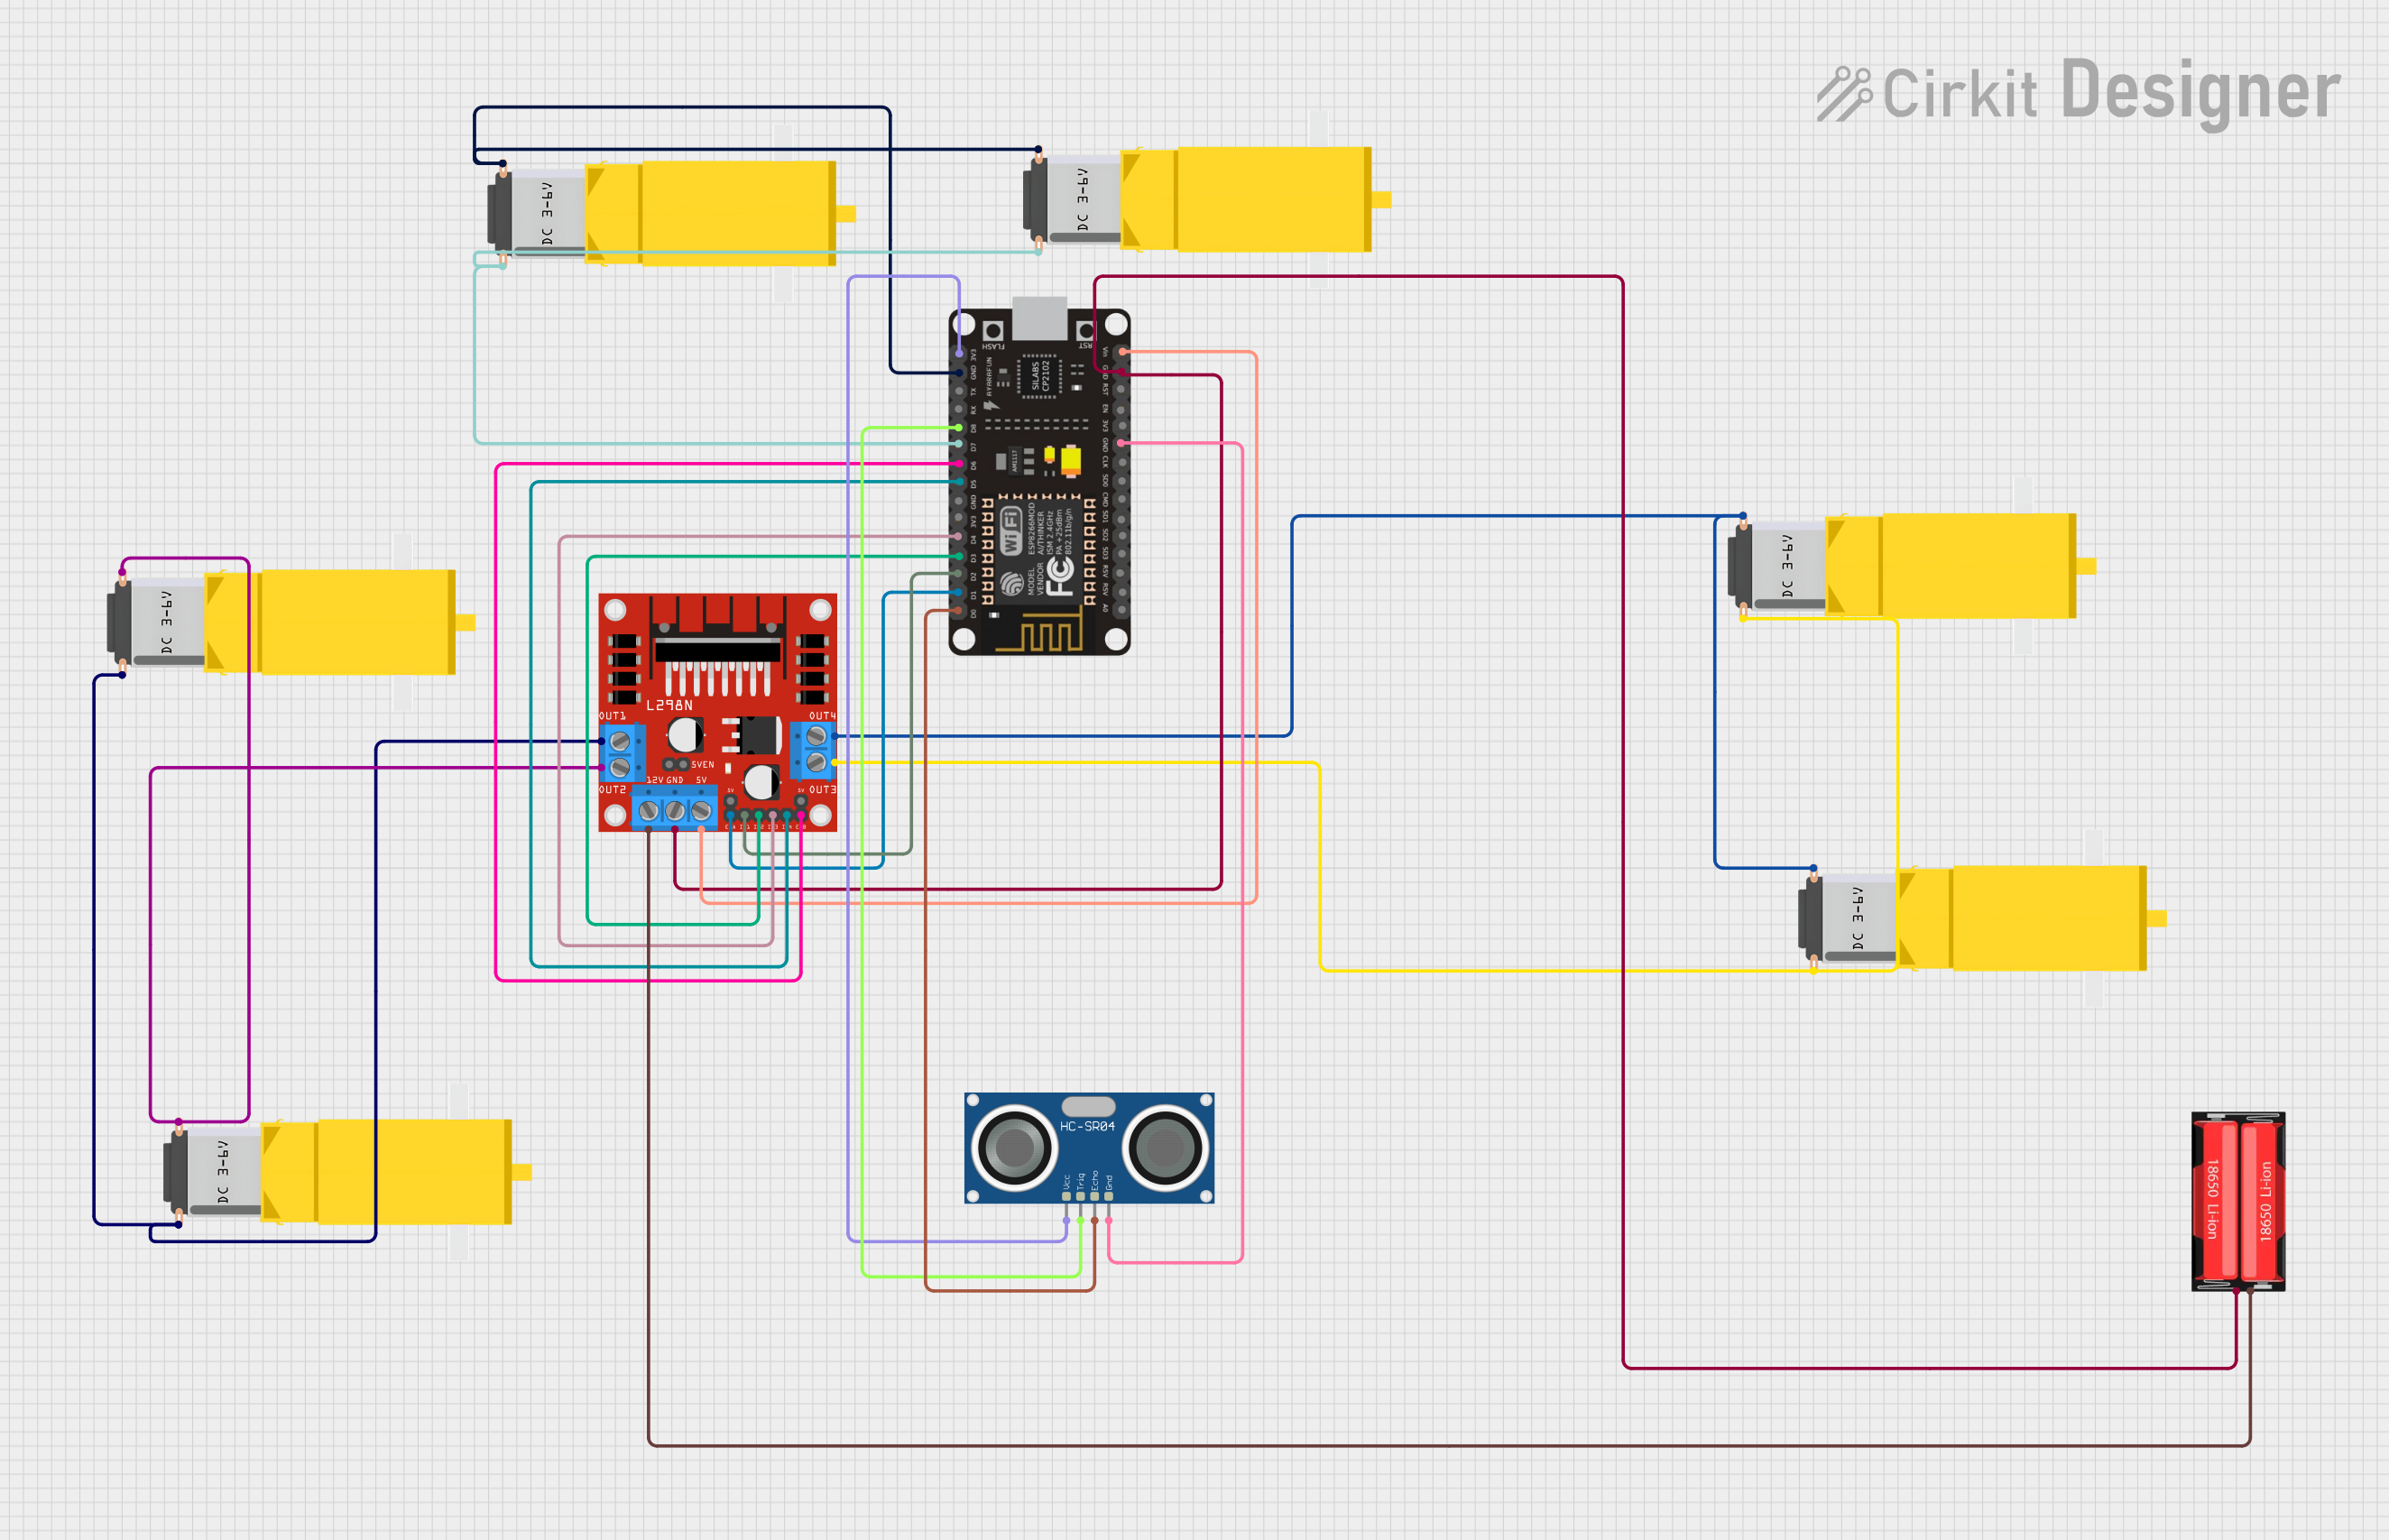
Circuit Documentation
Summary
The circuit in question is designed to control multiple DC gearmotors using an L298N DC motor driver, which is interfaced with an ESP8266 NodeMCU microcontroller. The circuit also includes an HC-SR04 Ultrasonic Sensor for distance measurement and is powered by an 18650 Li-Ion battery. The ESP8266 NodeMCU is responsible for controlling the motor driver inputs to manipulate the motor speeds and directions, as well as reading the ultrasonic sensor for distance sensing.
Component List
Gearmotor DC / Motorreductor
- Description: A DC gearmotor used for providing rotational motion.
- Pins: Pin1, Pin2
18650 Li-Ion Battery
- Description: A rechargeable lithium-ion battery used as the power source for the circuit.
- Pins: Positive, Negative
L298N DC Motor Driver
- Description: A motor driver module capable of driving up to two DC motors.
- Pins: OUT1, OUT2, 12V, GND, 5V, OUT3, OUT4, 5V-ENA-JMP-I, 5V-ENA-JMP-O, +5V-J1, +5V-J2, ENA, IN1, IN2, IN3, IN4, ENB
ESP8266 NodeMCU
- Description: A microcontroller board with Wi-Fi capability.
- Pins: D0, D1, D2, D3, D4, 3V3, GND, D5, D6, D7, D8, RX, TX, A0, RSV, SD3, SD2, SD1, CMD, SD0, CLK, EN, RST, VIN
HC-SR04 Ultrasonic Sensor
- Description: An ultrasonic sensor used for measuring distances.
- Pins: VCC, TRIG, ECHO, GND
Wiring Details
Gearmotor DC / Motorreductor
- Pin1: Connected to L298N DC motor driver OUT2 or OUT4
- Pin2: Connected to L298N DC motor driver OUT1 or OUT3
18650 Li-Ion Battery
- Positive: Connected to L298N DC motor driver 12V
- Negative: Connected to L298N DC motor driver GND
L298N DC Motor Driver
- OUT1, OUT2, OUT3, OUT4: Connected to corresponding pins on Gearmotor DC / Motorreductor
- 12V: Connected to 18650 Li-Ion battery Positive
- GND: Connected to 18650 Li-Ion battery Negative and ESP8266 NodeMCU GND
- 5V: Connected to ESP8266 NodeMCU VIN
- ENA, ENB: Connected to ESP8266 NodeMCU D1, D6 respectively
- IN1, IN2, IN3, IN4: Connected to ESP8266 NodeMCU D2, D3, D4, D5 respectively
ESP8266 NodeMCU
- VIN: Connected to L298N DC motor driver 5V
- GND: Connected to L298N DC motor driver GND and HC-SR04 Ultrasonic Sensor GND
- D0, D8: Connected to HC-SR04 Ultrasonic Sensor ECHO, TRIG respectively
- 3V3: Connected to HC-SR04 Ultrasonic Sensor VCC
- D1, D2, D3, D4, D5, D6, D7: Connected to L298N DC motor driver ENA, IN1, IN2, IN3, IN4, ENB, and Gearmotor DC / Motorreductor Pin2 respectively
HC-SR04 Ultrasonic Sensor
- VCC: Connected to ESP8266 NodeMCU 3V3
- TRIG: Connected to ESP8266 NodeMCU D8
- ECHO: Connected to ESP8266 NodeMCU D0
- GND: Connected to ESP8266 NodeMCU GND
Documented Code
ESP8266 NodeMCU - sketch.ino
void setup() {
  // put your setup code here, to run once:

}

void loop() {
  // put your main code here, to run repeatedly:

}
This is the basic structure of an Arduino sketch for the ESP8266 NodeMCU. The setup() function is called once when the microcontroller is powered on or reset. It is used to initialize the pins and set up the communication protocols. The loop() function is called repeatedly and contains the main logic of the program. This is where the code to control the motor driver and read the ultrasonic sensor would be implemented.