
Arduino UNO-Based Health Monitoring and Communication System
View and Edit Project In Cirkit Designer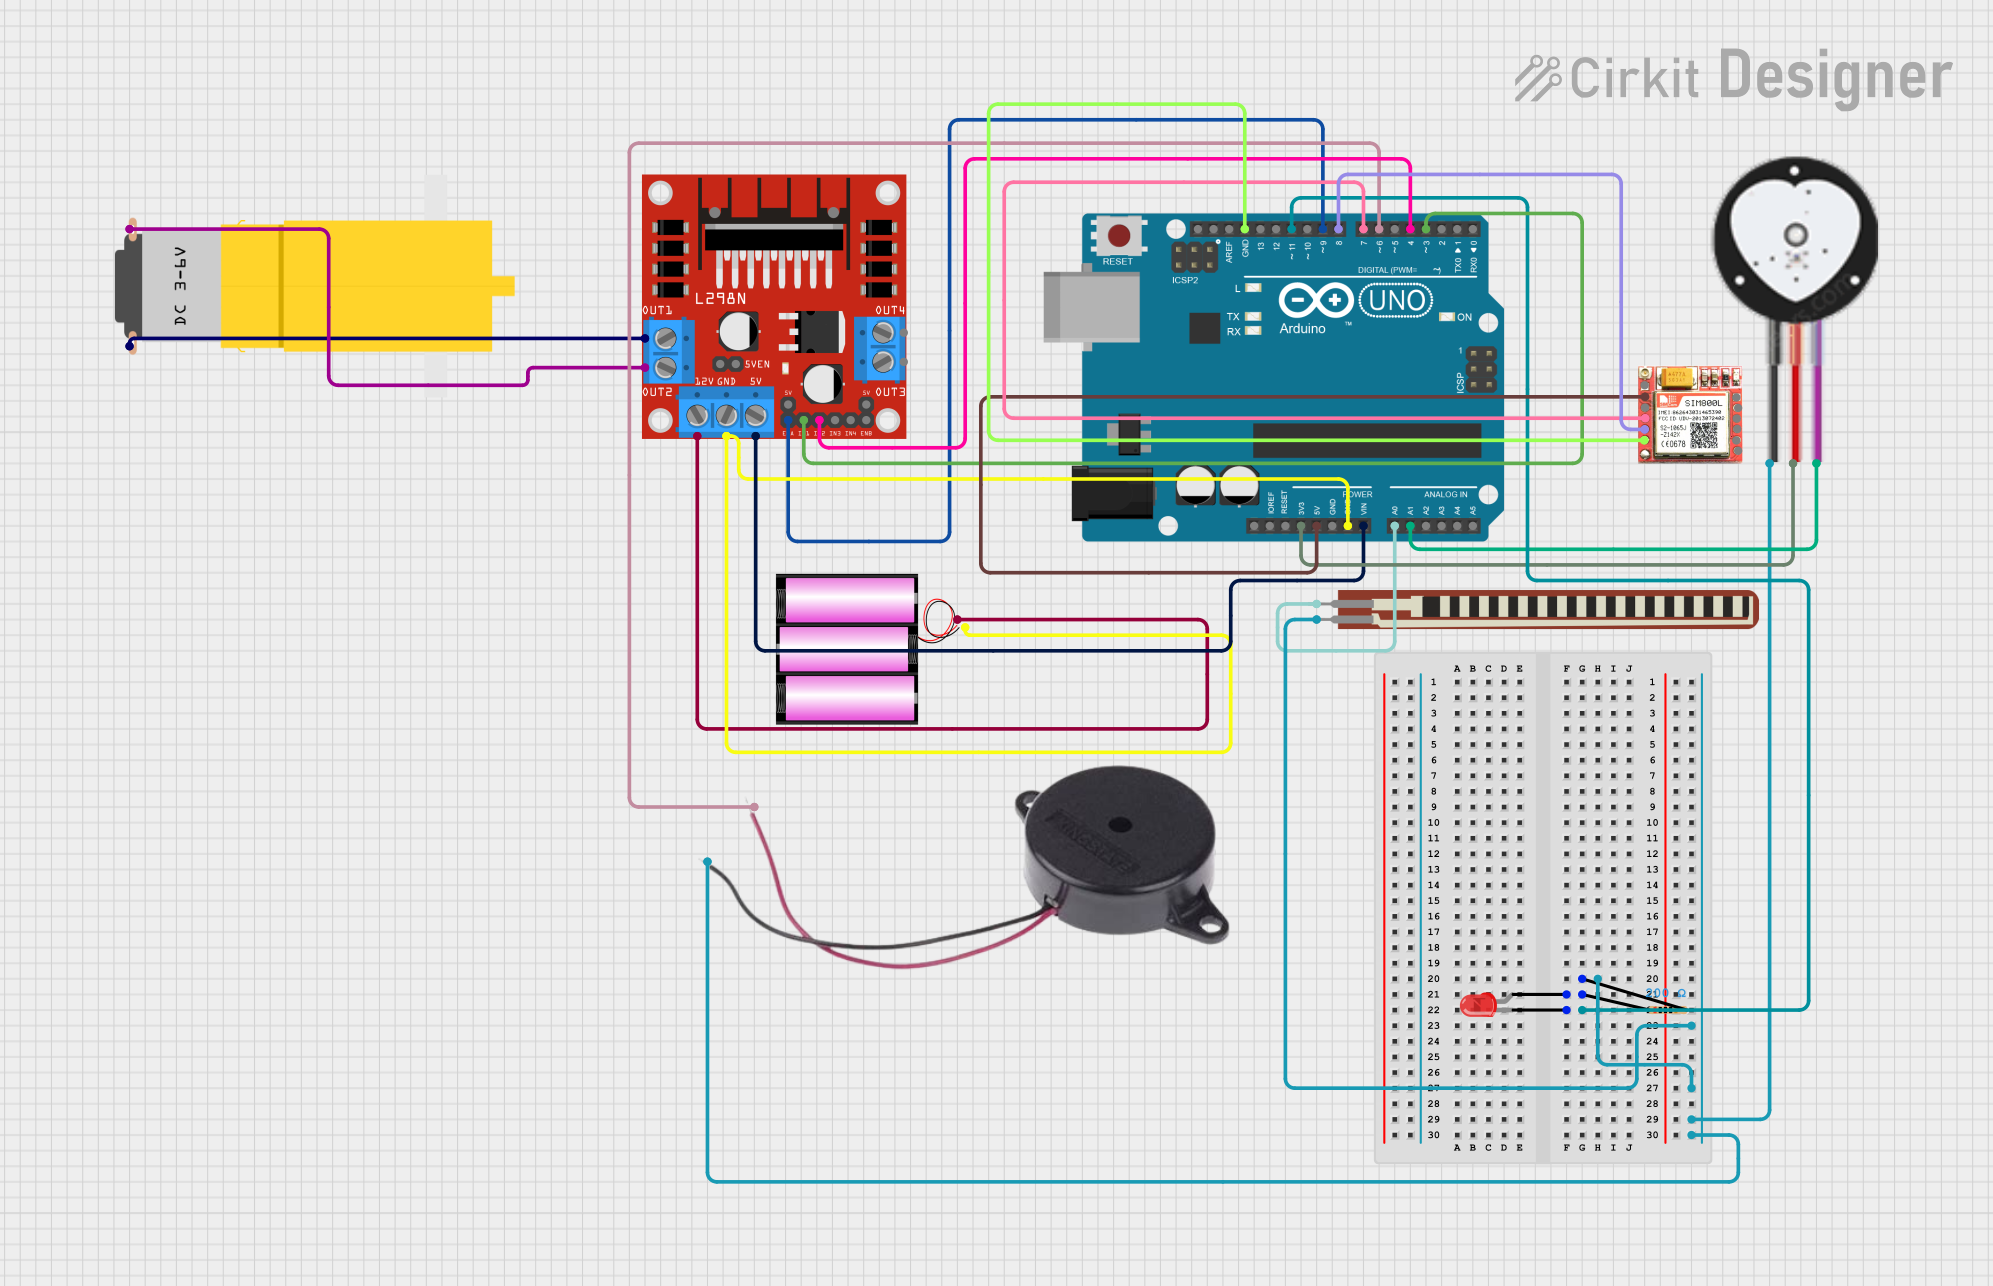
Circuit Documentation
Summary
This document provides a detailed overview of a circuit designed to interface various components with an Arduino UNO microcontroller. The circuit includes a red LED, a resistor, a SIM800L GSM module, a 12V battery, a heart pulse sensor, a flex resistor, an L298N DC motor driver, a hobby motor, and a buzzer. The Arduino UNO serves as the central processing unit, controlling and interfacing with the other components. The circuit is powered by the 12V battery, with voltage regulation provided by the Arduino for certain components. The heart pulse sensor and flex resistor provide input to the Arduino, while the motor driver controls the hobby motor. The SIM800L module enables GSM communication, and the buzzer and LED serve as output indicators.
Component List
LED: Two Pin (red)
- Description: A red LED used as an indicator light.
- Pins: cathode, anode
Resistor
- Description: A resistor with a resistance value of 200 Ohms.
- Pins: pin1, pin2
Arduino UNO
- Description: A microcontroller board based on the ATmega328P.
- Pins: UNUSED, IOREF, Reset, 3.3V, 5V, GND, Vin, A0, A1, A2, A3, A4, A5, SCL, SDA, AREF, D13, D12, D11, D10, D9, D8, D7, D6, D5, D4, D3, D2, D1, D0
SIM800L
- Description: A GSM/GPRS module for mobile communication.
- Pins: NFT, RING, VCC, DTR, RST, MIC +, RXD, MIC-, TXD, SPK+, GND, SPK-
Battery 12V
- Description: A 12V battery providing power to the circuit.
- Pins: +, -
Heart Pulse Sensor
- Description: A sensor for detecting heartbeats.
- Pins: GND, VCC, SIGNAL
2.2 inch Basic Flex Resistor
- Description: A flex sensor that changes resistance when bent.
- Pins: Pin 2, pin 1
L298N DC Motor Driver
- Description: A motor driver module for controlling DC motors.
- Pins: OUT1, OUT2, 12V, GND, 5V, OUT3, OUT4, 5V-ENA-JMP-I, 5V-ENA-JMP-O, +5V-J1, +5V-J2, ENA, IN1, IN2, IN3, IN4, ENB
Motor Amarillo Motorreductor Hobby
- Description: A hobby motor for mechanical movement.
- Pins: vcc, GND
Buzzer
- Description: An audio signaling device.
- Pins: POSITIVE, NEGATIVE
Wiring Details
LED: Two Pin (red)
- Cathode connected to Arduino UNO D11
- Anode connected to one terminal of the Resistor
Resistor
- One terminal connected to the anode of the LED
- Other terminal connected to the common ground net
Arduino UNO
- 3.3V connected to Heart Pulse Sensor VCC
- 5V connected to SIM800L VCC
- GND connected to common ground net
- Vin connected to L298N DC Motor Driver 5V
- A0 connected to 2.2 inch Basic Flex Resistor Pin 2
- A1 connected to Heart Pulse Sensor SIGNAL
- D3 connected to L298N DC Motor Driver IN1
- D4 connected to L298N DC Motor Driver IN2
- D6 connected to Buzzer POSITIVE
- D7 connected to SIM800L RXD
- D8 connected to SIM800L TXD
- D9 connected to L298N DC Motor Driver ENA
- D11 connected to LED cathode
SIM800L
- VCC connected to Arduino UNO 5V
- GND connected to common ground net
- TXD connected to Arduino UNO D8
- RXD connected to Arduino UNO D7
Battery 12V
- Positive terminal connected to L298N DC Motor Driver 12V
- Negative terminal connected to common ground net
Heart Pulse Sensor
- GND connected to common ground net
- VCC connected to Arduino UNO 3.3V
- SIGNAL connected to Arduino UNO A1
2.2 inch Basic Flex Resistor
- Pin 1 connected to common ground net
- Pin 2 connected to Arduino UNO A0
L298N DC Motor Driver
- GND connected to common ground net
- 5V connected to Arduino UNO Vin
- ENA connected to Arduino UNO D9
- IN1 connected to Arduino UNO D3
- IN2 connected to Arduino UNO D4
- 12V connected to Battery 12V positive terminal
- OUT1 connected to Motor Amarillo Motorreductor Hobby GND
- OUT2 connected to Motor Amarillo Motorreductor Hobby vcc
Motor Amarillo Motorreductor Hobby
- GND connected to L298N DC Motor Driver OUT1
- VCC connected to L298N DC Motor Driver OUT2
Buzzer
- POSITIVE connected to Arduino UNO D6
- NEGATIVE connected to common ground net
Documented Code
Arduino UNO Code (sketch.ino)
void setup() {
  // put your setup code here, to run once:

}

void loop() {
  // put your main code here, to run repeatedly:

}
Additional Notes
- The provided code is a template and does not contain any functional implementation. It needs to be populated with the logic to control and interact with the connected components based on the requirements of the circuit's application.
- The
setup()function is used for initializing settings and theloop()function contains the main logic that will run continuously. - The code should be updated to configure the pin modes (e.g.,
pinMode(D11, OUTPUT);) and to implement the control logic for sensors, actuators, and communication modules.