
ESP8266 NodeMCU Controlled Red LED with Current Limiting Resistor
View and Edit Project In Cirkit Designer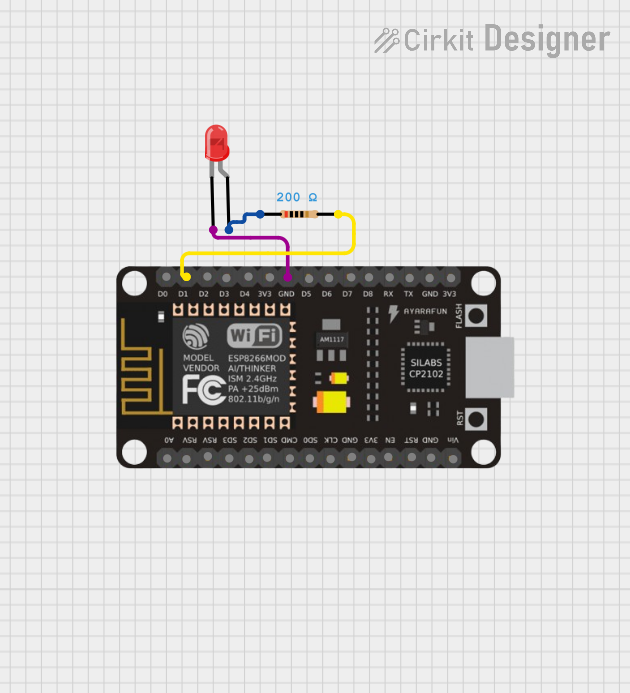
Circuit Documentation
Summary of the Circuit
This circuit appears to be a simple LED control circuit using an ESP8266 NodeMCU microcontroller. The LED is connected to the microcontroller through a resistor, which likely serves to limit the current to the LED to prevent it from burning out. The ESP8266 NodeMCU is a popular microcontroller with Wi-Fi capabilities, which suggests that this circuit could be used for IoT applications where remote LED control is required. However, without any embedded code provided, the specific functionality of the microcontroller in this circuit cannot be determined.
Component List
LED: Two Pin (red)
- Description: A basic red LED with two pins: anode and cathode.
- Purpose: To emit light when powered.
- Pins:
- Anode
- Cathode
Resistor
- Description: A passive two-terminal electrical component that implements electrical resistance as a circuit element.
- Purpose: To limit the current flowing through the LED.
- Pins:
- Pin1
- Pin2
- Properties:
- Resistance: 200 Ohms
ESP8266 NodeMCU
- Description: A low-cost Wi-Fi microchip with full TCP/IP stack and microcontroller capability.
- Purpose: To control the LED and potentially provide network connectivity for IoT applications.
- Pins:
- D0, D1, D2, D3, D4, 3V3, GND, D5, D6, D7, D8, RX, TX, A0, RSV, SD3, SD2, SD1, CMD, SD0, CLK, EN, RST, VIN
Wiring Details
LED: Two Pin (red)
- Anode connected to Resistor (Pin1)
- Cathode connected to ESP8266 NodeMCU (GND)
Resistor
- Pin1 connected to LED: Two Pin (red) (Anode)
- Pin2 connected to ESP8266 NodeMCU (D1)
ESP8266 NodeMCU
- D1 connected to Resistor (Pin2)
- GND connected to LED: Two Pin (red) (Cathode)
Documented Code
No code has been provided for the ESP8266 NodeMCU microcontroller. To control the LED, code would typically be written to configure the D1 pin as an output and then to toggle this pin to turn the LED on or off. Since no code is available, this section cannot be completed. If code becomes available, it should be documented here with explanations of its functionality and how it interacts with the hardware components listed above.