Cirkit Designer
Your all-in-one circuit design IDE
Home /
Project Documentation
Arduino UNO Based Automated Soil Irrigation System
Circuit Documentation
Summary
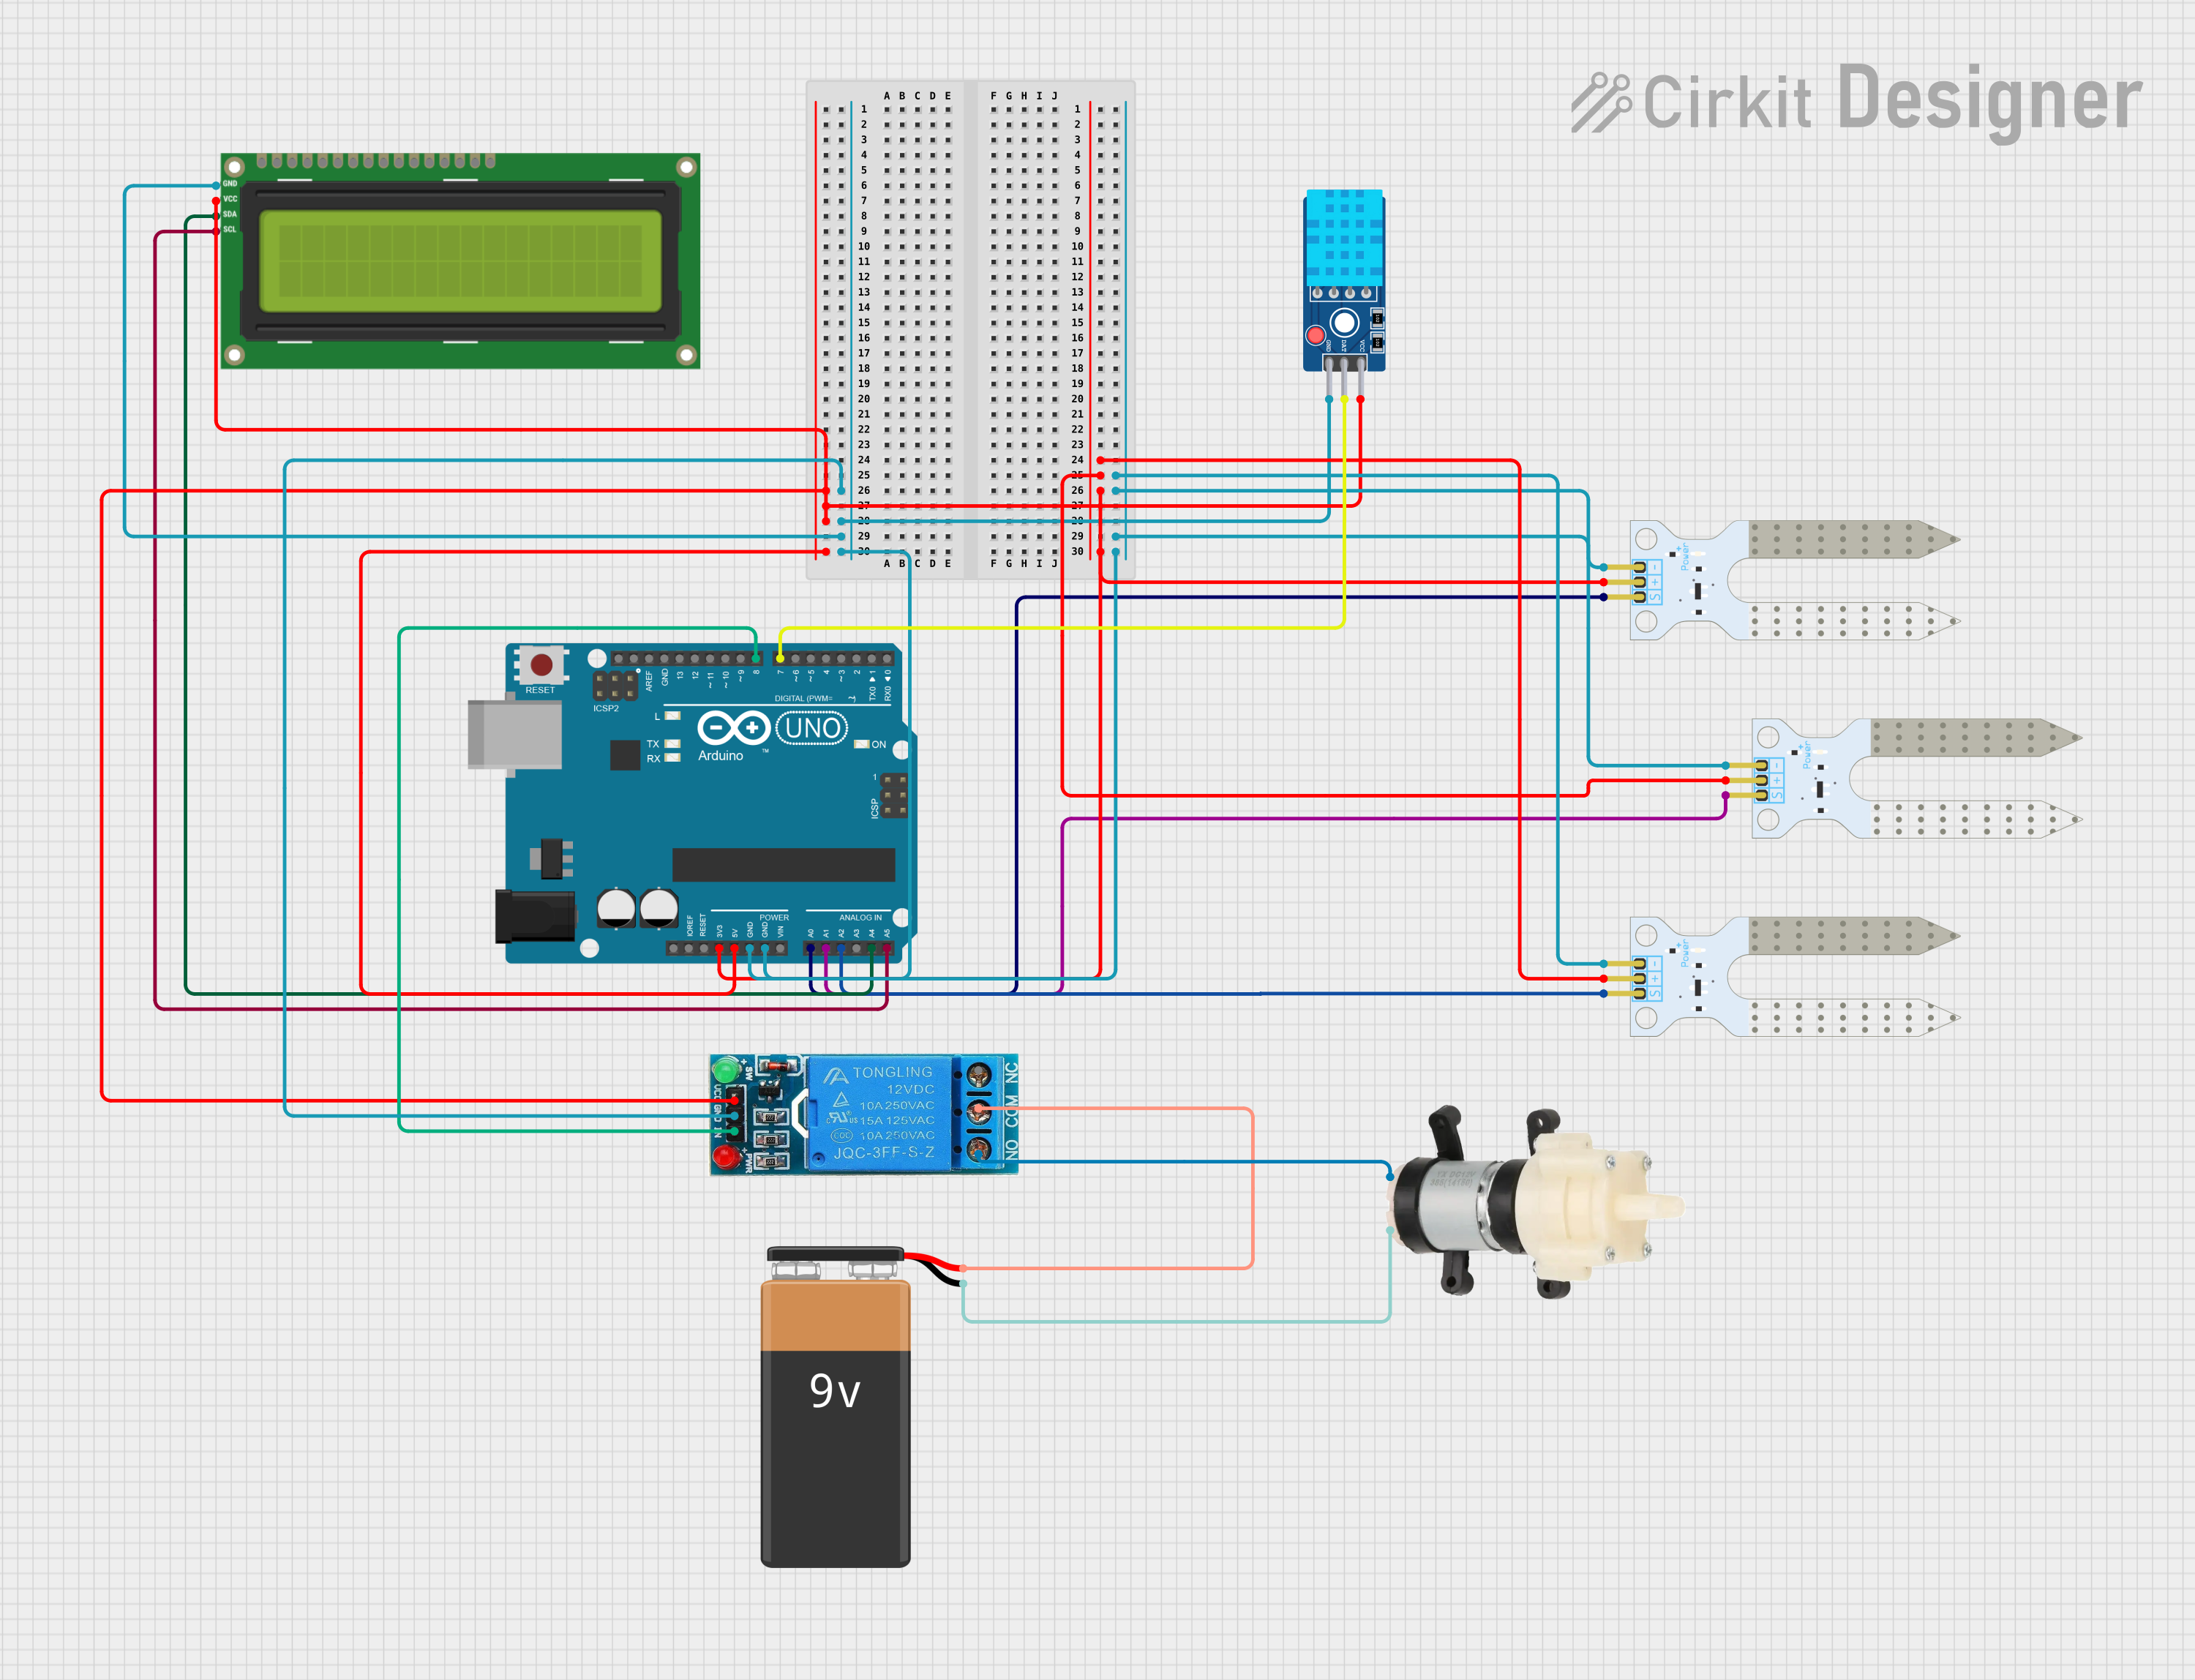
This circuit is designed to monitor soil moisture levels using multiple sensors and to control a water pump based on the sensor readings. The Arduino UNO serves as the central microcontroller, interfacing with soil moisture sensors, a temperature and humidity sensor (DHT11), an I2C LCD screen for display, and a relay to control the water pump. The system is powered by a 9V battery, and the relay switches the pump on and off as needed.
Component List
Arduino UNO
- Microcontroller board based on the ATmega328P
- It has 14 digital input/output pins, 6 analog inputs, a 16 MHz quartz crystal, a USB connection, a power jack, an ICSP header, and a reset button.
Soil Moisture Sensor (x3)
- Sensor that measures the volumetric content of water in the soil
- It has a VCC, GND, and SIG pin for power, ground, and signal output, respectively.
9V Battery
- Standard 9V battery used to provide power to the circuit.
12V Single Channel Relay
- An electromechanical switch used to control high power devices, such as the water pump.
- It has normally closed (NC), common (COM), and normally open (NO) terminals, as well as an input (IN), ground (GND), and VCC for control.
Mini Diaphragm Water Pump
- A pump used for moving water, typically controlled by a relay or a transistor.
- It has positive (+) and negative (-) terminals for power connection.
I2C LCD 16x2 Screen
- A 16x2 character LCD display that uses the I2C communication protocol.
- It has SCL and SDA pins for the I2C interface, VCC and GND for power, and additional pins for more direct control.
DHT11 Sensor V2
- A basic, ultra low-cost digital temperature and humidity sensor.
- It uses a capacitive humidity sensor and a thermistor to measure the surrounding air and outputs a digital signal on the data pin (no analog input pins needed).
Wiring Details
Arduino UNO
3.3Vconnected to VCC of all Soil Moisture Sensors5Vconnected to VCC of 12V Single Channel Relay, DHT11 Sensor V2, and I2C LCD 16x2 ScreenGNDconnected to GND of all Soil Moisture Sensors, 12V Single Channel Relay, DHT11 Sensor V2, and I2C LCD 16x2 ScreenA0connected to SIG of the first Soil Moisture SensorA1connected to SIG of the second Soil Moisture SensorA2connected to SIG of the third Soil Moisture SensorA4(SDA) connected to SDA of I2C LCD 16x2 ScreenA5(SCL) connected to SCL of I2C LCD 16x2 ScreenD7connected to DAT of DHT11 Sensor V2D8connected to IN of 12V Single Channel Relay
Soil Moisture Sensors
VCCconnected to3.3Von Arduino UNOGNDconnected toGNDon Arduino UNOSIGconnected toA0,A1, andA2on Arduino UNO (one sensor per pin)
9V Battery
-connected to Negative (-) of Mini Diaphragm Water Pump+connected to COM of 12V Single Channel Relay
12V Single Channel Relay
VCCconnected to5Von Arduino UNOGNDconnected toGNDon Arduino UNOINconnected toD8on Arduino UNOCOMconnected to+of 9V BatteryNOconnected to Positive (+) of Mini Diaphragm Water Pump
Mini Diaphragm Water Pump
Positive (+)connected to NO of 12V Single Channel RelayNegative (-)connected to-of 9V Battery
I2C LCD 16x2 Screen
SDAconnected toA4(SDA) on Arduino UNOSCLconnected toA5(SCL) on Arduino UNOVCC (5V)connected to5Von Arduino UNOGNDconnected toGNDon Arduino UNO
DHT11 Sensor V2
DATconnected toD7on Arduino UNOVCCconnected to5Von Arduino UNOGNDconnected toGNDon Arduino UNO
Documented Code
Arduino UNO Code (sketch.ino)
void setup() {
  // put your setup code here, to run once:

}

void loop() {
  // put your main code here, to run repeatedly:

}
Note: The provided code is a template and does not contain any functional code. It needs to be filled in with the logic for reading sensors, controlling the relay, and updating the display.