Arduino UNO Based Flame Detection System
Circuit Documentation
Summary of the Circuit
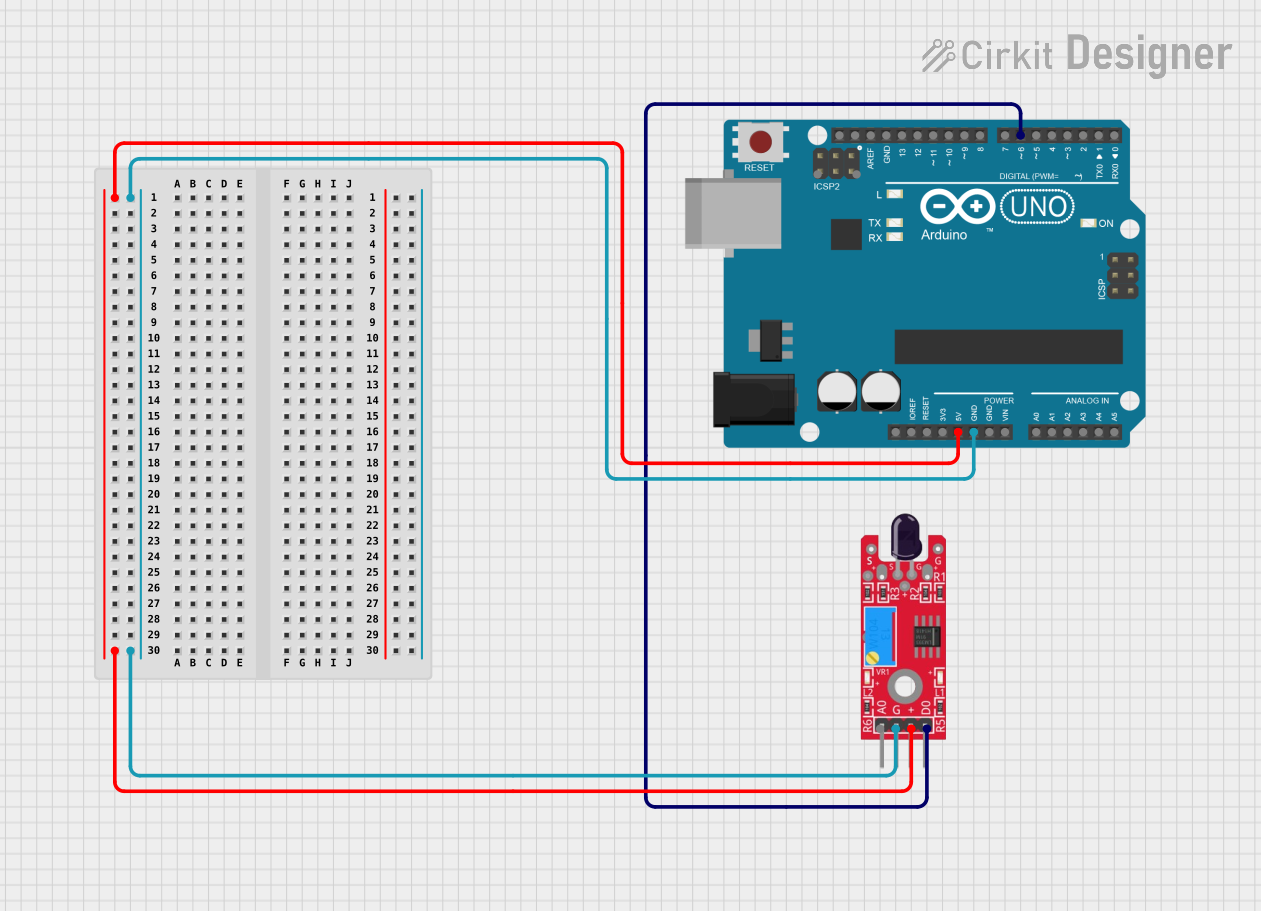
This circuit consists of an Arduino UNO microcontroller board interfaced with a KY-026 Flame Sensor. The Arduino UNO is responsible for controlling the operation of the circuit and processing the signals from the flame sensor. The flame sensor is used to detect the presence of a flame or fire. When a flame is detected, the sensor outputs a digital signal to the Arduino, which can then be used to trigger an alarm, activate a fire suppression system, or any other desired action.
Component List
Arduino UNO
- Description: A microcontroller board based on the ATmega328P.
- Pins: UNUSED, IOREF, Reset, 3.3V, 5V, GND, Vin, A0-A5, SCL, SDA, AREF, D0-D13.
- Purpose: Acts as the central processing unit of the circuit, reading inputs from sensors and controlling outputs.
KY-026 Flame Sensor
- Description: A sensor module designed to detect the presence of a flame or fire.
- Pins: AO (Analog Output), DO (Digital Output), GND (Ground), VCC (Power Supply).
- Purpose: Detects flames or fire and provides an output signal to the microcontroller.
Wiring Details
Arduino UNO
- 5V: Provides power to the KY-026 Flame Sensor.
- GND: Common ground with the KY-026 Flame Sensor.
- D6: Receives the digital output signal from the KY-026 Flame Sensor.
KY-026 Flame Sensor
- VCC: Connected to the 5V output from the Arduino UNO.
- GND: Connected to the ground (GND) on the Arduino UNO.
- DO: Sends a digital output signal to digital pin D6 on the Arduino UNO.
Documented Code
Arduino UNO Code (sketch.ino)
void setup() {
  // put your setup code here, to run once:

}

void loop() {
  // put your main code here, to run repeatedly:

}
This code is a template for the Arduino UNO and does not contain any specific functionality. It consists of two primary functions: setup() which runs once when the microcontroller is powered on or reset, and loop() which runs continuously as long as the microcontroller is powered.
To integrate the KY-026 Flame Sensor, the code needs to be updated to initialize the sensor's digital output pin as an input and to read the sensor's state in the loop() function. The following is an example of how the code could be modified to include functionality for the flame sensor:
const int flameSensorPin = 6; // KY-026 Flame Sensor DO pin connected to Arduino D6

void setup() {
  pinMode(flameSensorPin, INPUT); // Initialize the flame sensor pin as an input
}

void loop() {
  int flameDetected = digitalRead(flameSensorPin); // Read the flame sensor's digital output
  if (flameDetected == HIGH) {
    // Flame detected - perform an action (e.g., activate an alarm)
  } else {
    // No flame detected - system in normal state
  }
  // Additional code to run repeatedly
}
This example code sets up the flame sensor's digital output pin as an input and reads its state in the loop() function. If a flame is detected (digital output is HIGH), it performs an action, such as activating an alarm. If no flame is detected, the system remains in its normal state. Additional functionality can be added as required for the specific application.