
Circuit Documentation
Summary
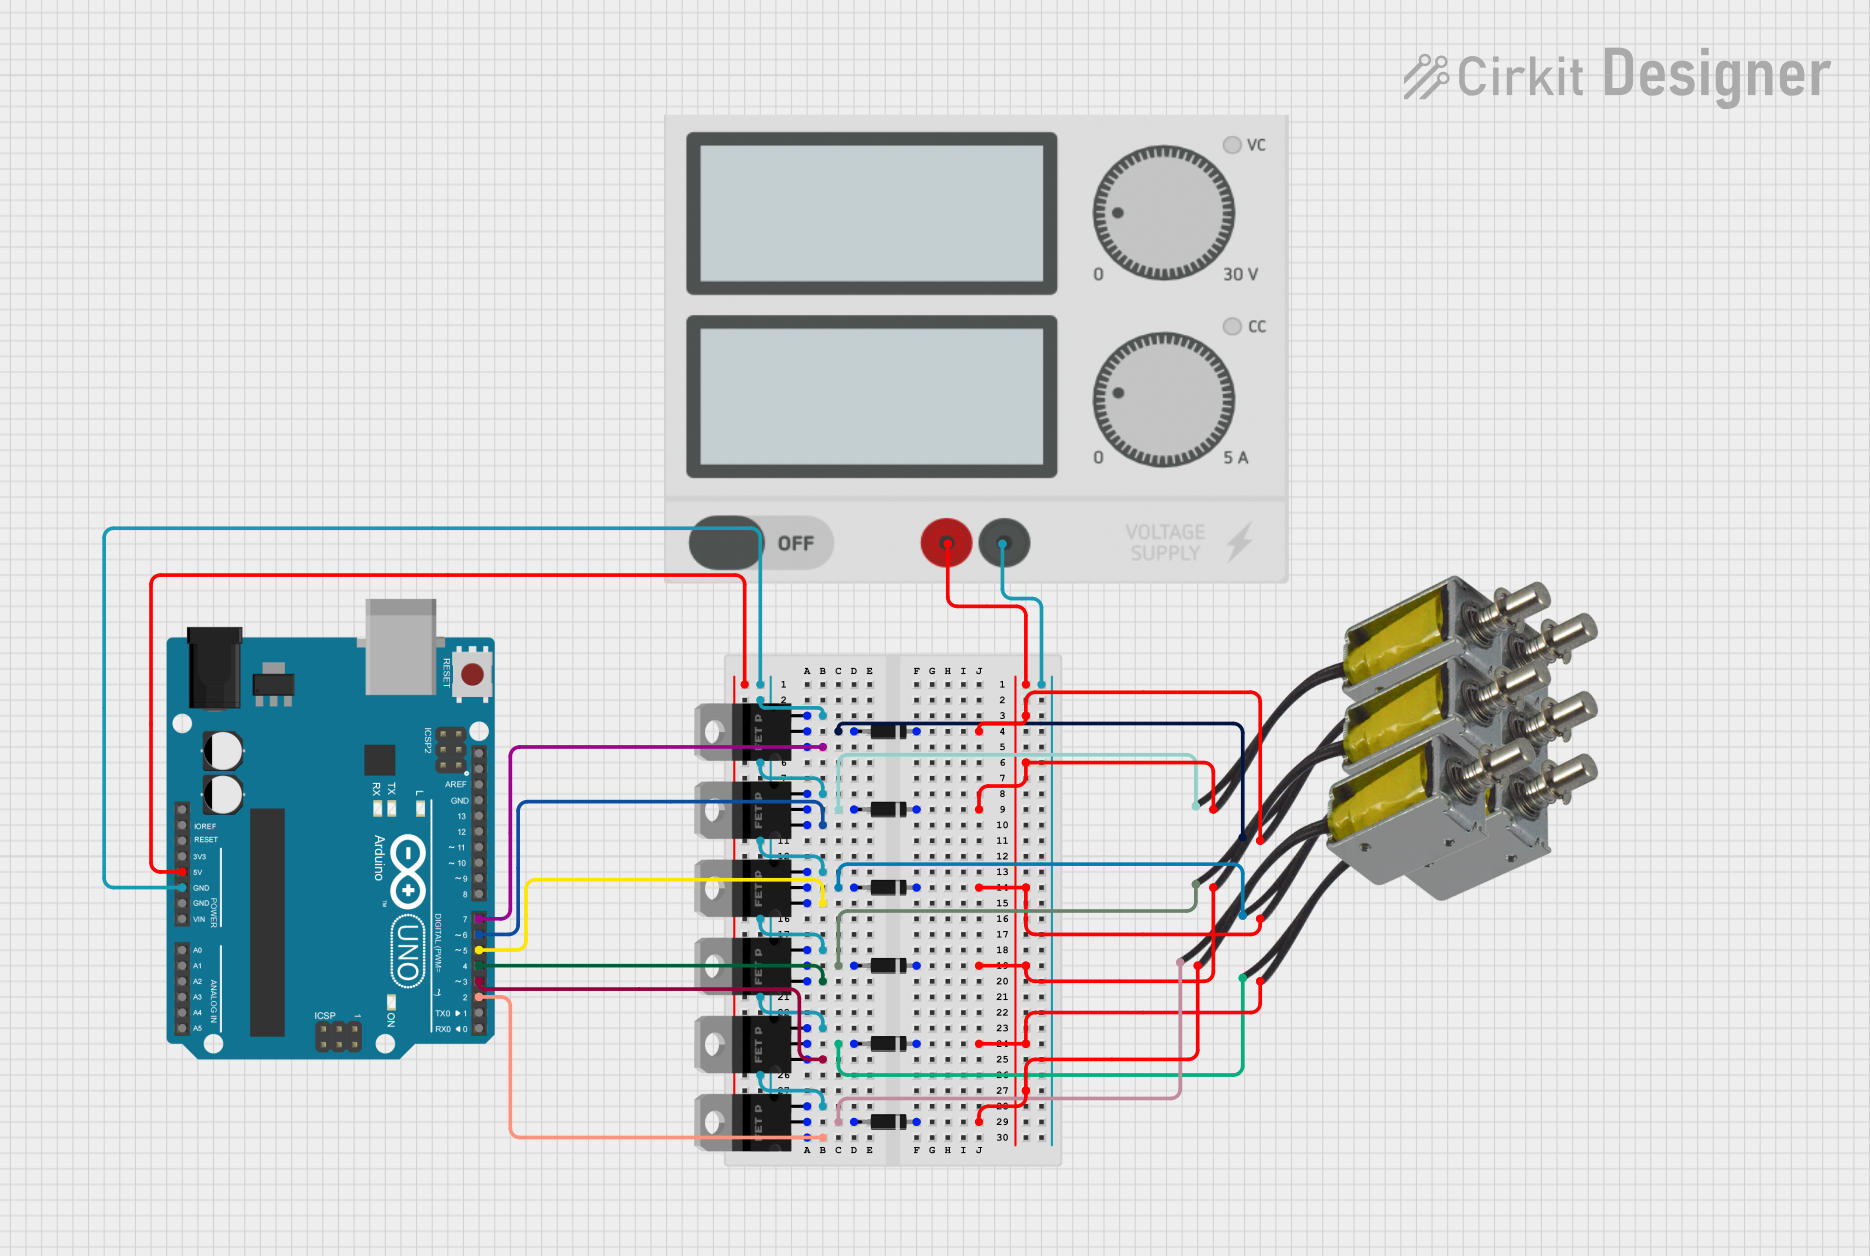
The circuit in question appears to be designed to control multiple push-pull solenoids using an Arduino UNO microcontroller. Each solenoid is driven by a pMOS transistor (MOSFET) which is controlled by a digital output pin from the Arduino. Diodes are used in parallel with the solenoids to protect the circuit from voltage spikes caused by the inductive load when the solenoid is turned off (flyback diodes). The power supply provides the necessary voltage and current to drive the solenoids.
Component List
Push Pull Solenoid
- Description: An electromechanical device used to create a linear motion when energized.
- Pins: +ve, -ve
Power Supply
- Description: Provides the required voltage and current to the circuit.
- Pins: +, -
Arduino UNO
- Description: A microcontroller board based on the ATmega328P, used for controlling the logic of the circuit.
- Pins: UNUSED, IOREF, Reset, 3.3V, 5V, GND, Vin, A0-A5, SCL, SDA, AREF, D13-D0
Diode
- Description: A semiconductor device that allows current to flow in one direction only, used as flyback diodes in this circuit.
- Pins: cathode, anode
pMOS Transistor (MOSFET)
- Description: A type of field-effect transistor used as a switch to control the power to the solenoids.
- Pins: gate, drain, source
Wiring Details
Push Pull Solenoid
- +ve: Connected to the anode of a diode and to the positive terminal of the power supply.
- -ve: Connected to the drain of a pMOS transistor.
Power Supply
- +: Connected to the anode of diodes and the +ve pin of solenoids.
- -: Connected to the GND pin of the Arduino UNO.
Arduino UNO
- GND: Connected to the source pins of all pMOS transistors.
- Digital Pins (D2-D7): Each connected to the gate of a pMOS transistor to control the solenoids.
- 5V: Unused in the provided net list.
Diode
- cathode: Connected to the +ve pin of a solenoid.
- anode: Connected to the drain of a pMOS transistor.
pMOS Transistor (MOSFET)
- gate: Connected to a digital pin on the Arduino UNO.
- drain: Connected to the -ve pin of a solenoid and the cathode of a diode.
- source: Connected to the GND pin of the Arduino UNO.
Documented Code
Arduino UNO Code (sketch.ino)
void setup() {
  // put your setup code here, to run once:

}

void loop() {
  // put your main code here, to run repeatedly:

}
Additional Notes (documentation.txt)
No additional documentation provided for the code.
This documentation provides an overview of the circuit components, their connections, and the initial code structure for the Arduino UNO. Further details, such as the specific logic for controlling the solenoids, would be required to complete the documentation.