
Circuit Documentation
Summary of the Circuit
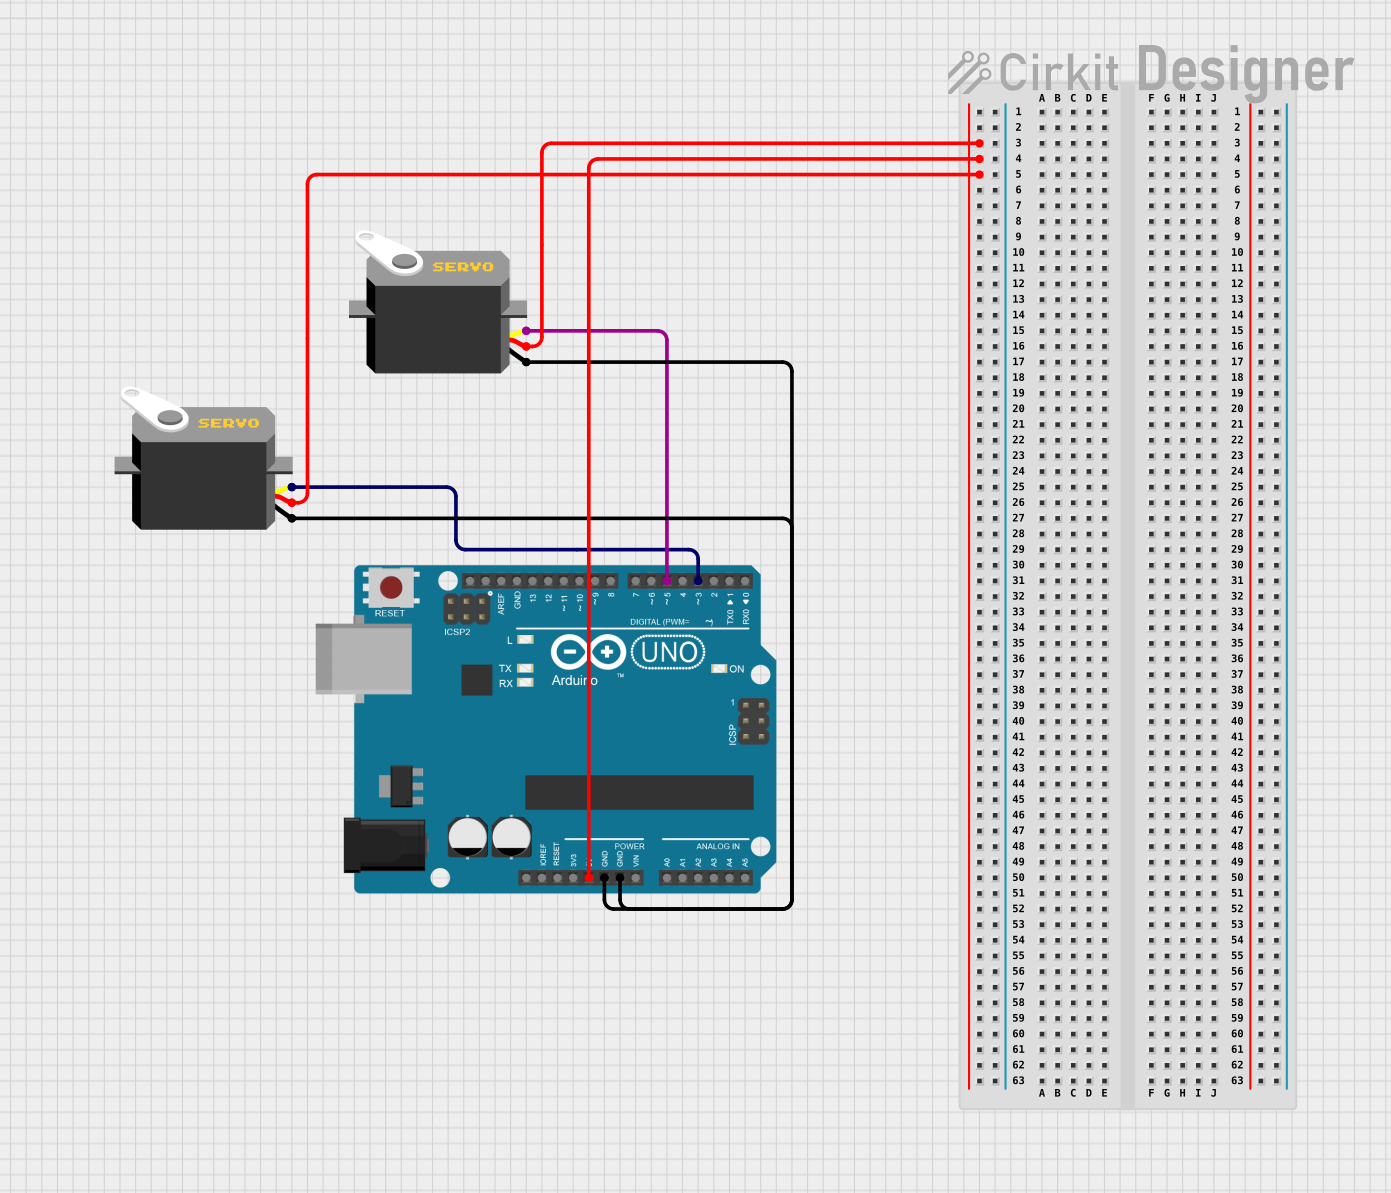
This circuit consists of an Arduino UNO microcontroller board and two servo motors. The Arduino UNO is used to control the position of the servo motors by sending pulse width modulation (PWM) signals. The servo motors are powered by the 5V output from the Arduino UNO, and the ground connections are shared between the microcontroller and the servos.
Component List
Arduino UNO
- Description: A microcontroller board based on the ATmega328P.
- Pins Used:
5V: Provides power to the servo motors.GND: Common ground for the circuit.D5: PWM output to control one servo motor.D3: PWM output to control the other servo motor.
Servo Motor 1
- Description: A rotary actuator that allows for precise control of angular position.
- Pins:
gnd: Ground connection.vcc: Power supply (5V).pulse: PWM signal input to control the position.
Servo Motor 2
- Description: A rotary actuator that allows for precise control of angular position.
- Pins:
gnd: Ground connection.vcc: Power supply (5V).pulse: PWM signal input to control the position.
Wiring Details
Arduino UNO
5Vconnected tovccon both Servo Motor 1 and Servo Motor 2.GNDconnected togndon both Servo Motor 1 and Servo Motor 2.D5connected topulseon Servo Motor 1.D3connected topulseon Servo Motor 2.
Servo Motor 1
vccconnected to5Von Arduino UNO.gndconnected toGNDon Arduino UNO.pulseconnected toD5on Arduino UNO.
Servo Motor 2
vccconnected to5Von Arduino UNO.gndconnected toGNDon Arduino UNO.pulseconnected toD3on Arduino UNO.
Documented Code
Arduino UNO Code (sketch.ino)
void setup() {
  // put your setup code here, to run once:

}

void loop() {
  // put your main code here, to run repeatedly:

}
Note: The provided code is a template and does not contain specific instructions for controlling the servo motors. The user should add the necessary code to initialize the servo objects and write to the corresponding pins to control the servo positions within the setup() and loop() functions.