
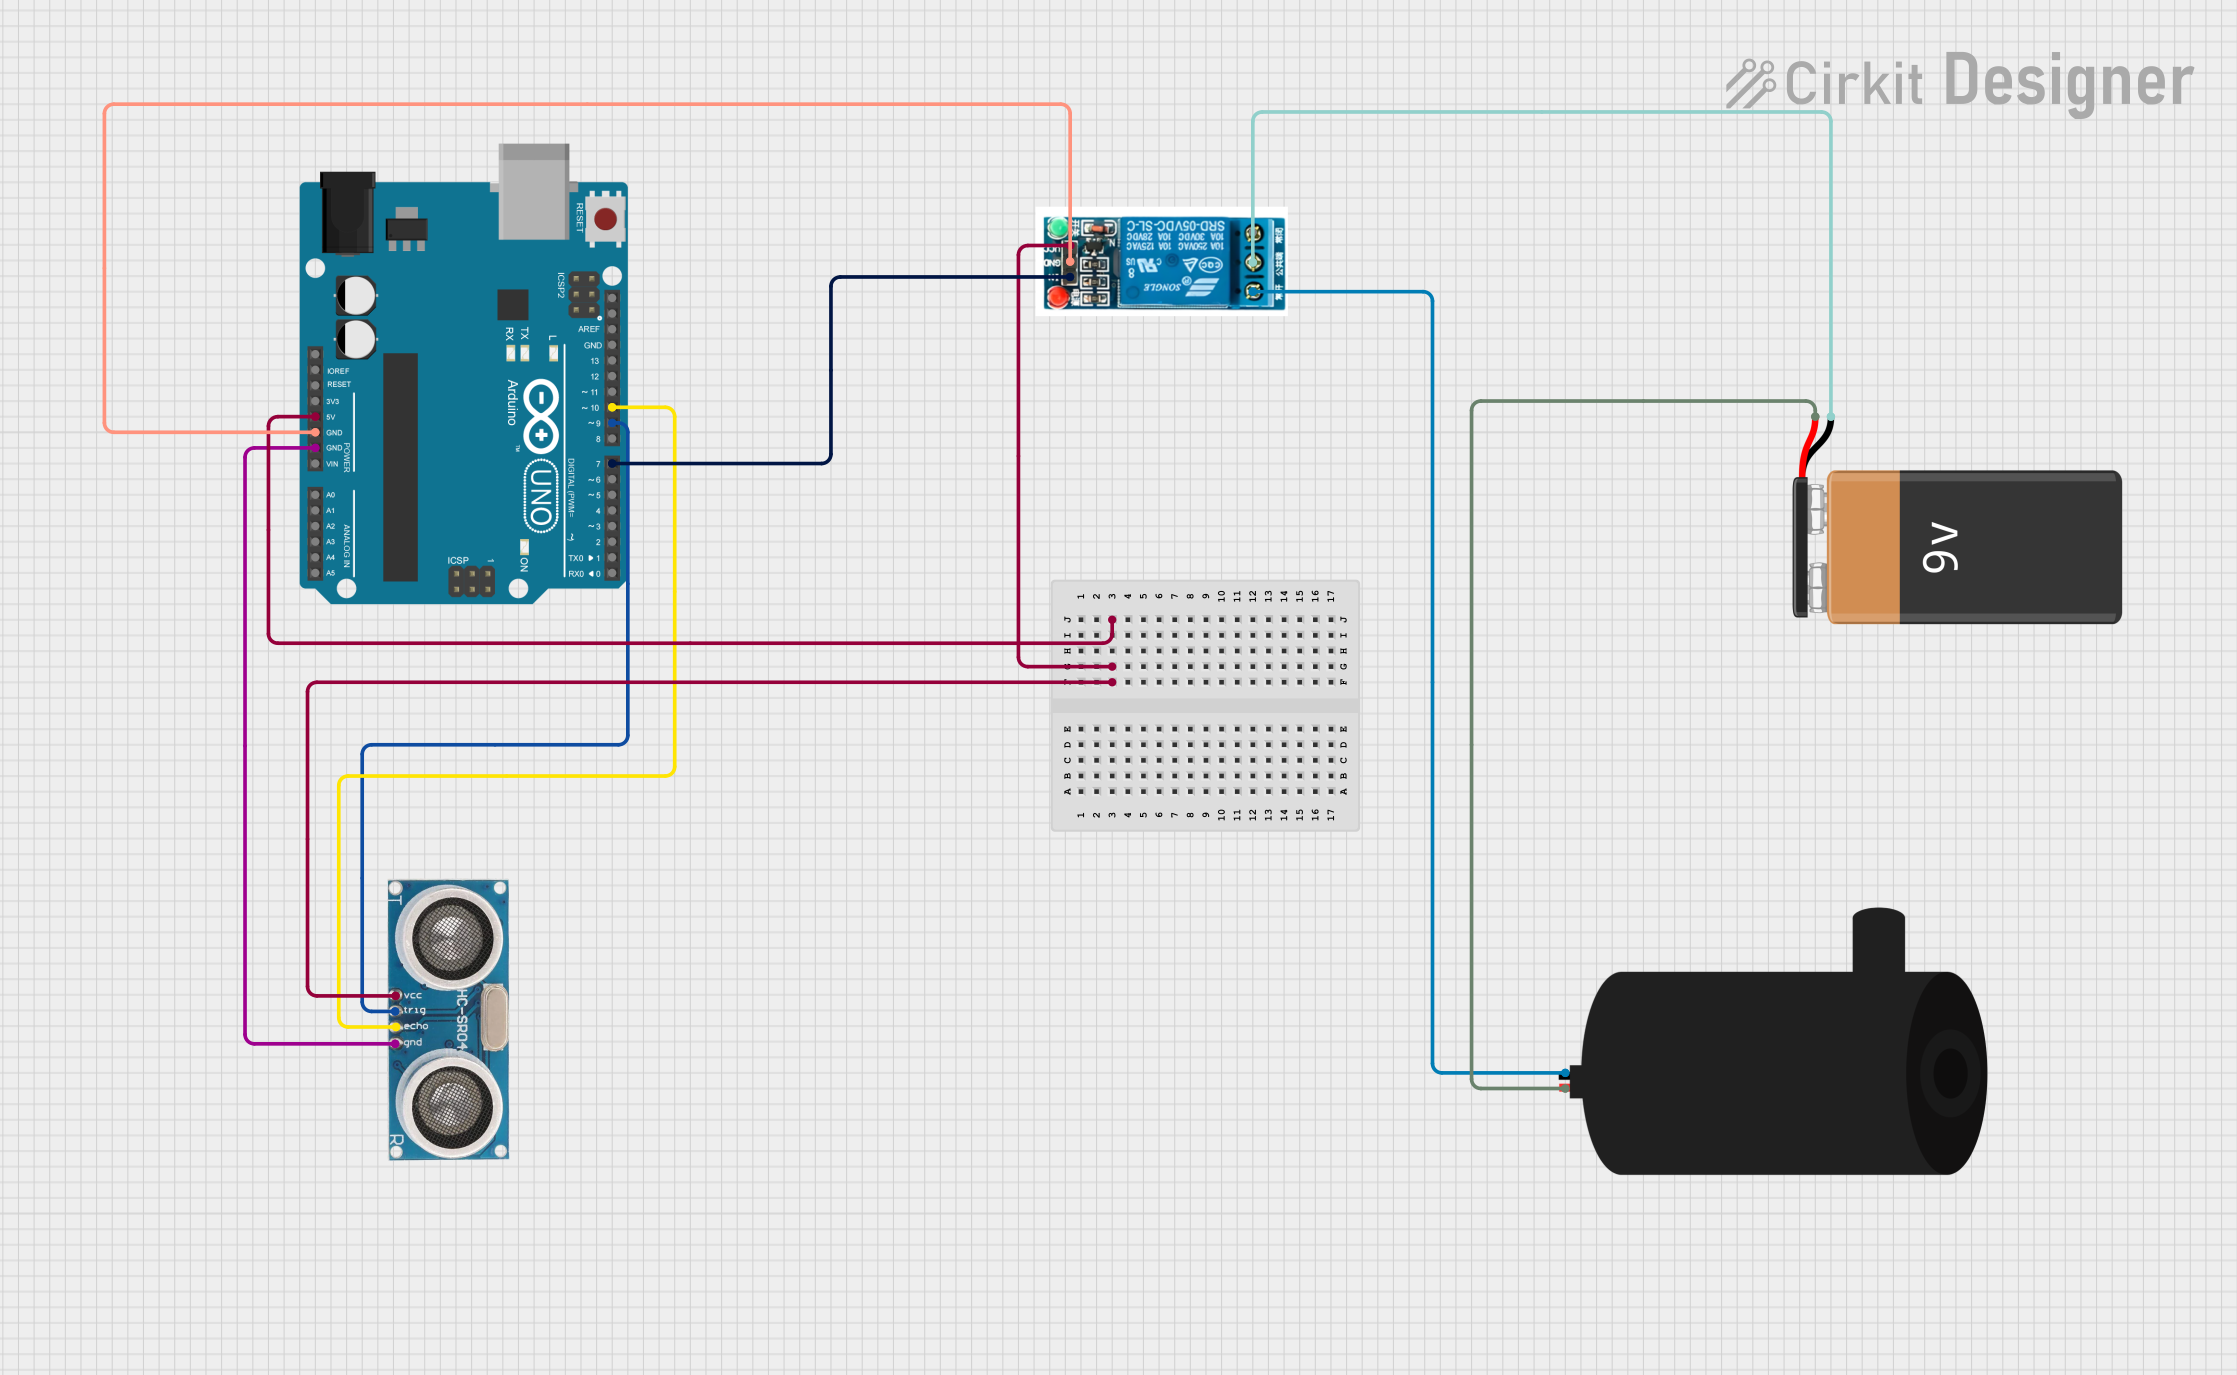
Circuit Documentation
Summary of the Circuit
This circuit is designed to interface an Arduino UNO with an ultrasonic sensor, a 5V relay, and a water pump, powered by a 9V battery. The ultrasonic sensor is used to measure distance, and its output can be used to control the water pump via the relay. The Arduino UNO serves as the central processing unit, reading sensor data and controlling the relay based on programmed logic.
Component List
Arduino UNO
- Description: A microcontroller board based on the ATmega328P.
- Pins: UNUSED, IOREF, Reset, 3.3V, 5V, GND, Vin, A0-A5, SCL, SDA, AREF, D0-D13.
5V Relay
- Description: An electromechanical switch that allows a low-power circuit to switch a relatively high current/voltage load.
- Pins: Normally Open, Common terminal, Normally Closed, In, GND, VCC.
Water Pump
- Description: An electric pump for moving water.
- Pins: Positive, Negative.
Ultrasonic Sensor
- Description: A sensor that measures distance by emitting ultrasonic waves and measuring the time taken for the echo to return.
- Pins: +VCC, Trigger, Echo, GND.
9V Battery
- Description: A standard 9V battery used to provide power to the circuit.
- Pins: + (positive), - (negative).
Wiring Details
Arduino UNO
- 5V connected to Ultrasonic Sensor VCC and 5V Relay VCC.
- GND connected to Ultrasonic Sensor GND, 5V Relay GND.
- D10 connected to Ultrasonic Sensor Echo.
- D9 connected to Ultrasonic Sensor Trigger.
- D7 connected to 5V Relay In.
5V Relay
- VCC connected to Arduino UNO 5V.
- GND connected to Arduino UNO GND.
- In connected to Arduino UNO D7.
- Normally Open connected to Water Pump Negative.
- Common Terminal connected to 9V Battery Negative.
Water Pump
- Positive connected to 9V Battery Positive.
- Negative connected to 5V Relay Normally Open.
Ultrasonic Sensor
- +VCC connected to Arduino UNO 5V.
- Trigger connected to Arduino UNO D9.
- Echo connected to Arduino UNO D10.
- GND connected to Arduino UNO GND.
9V Battery
- + (Positive) connected to Water Pump Positive.
- - (Negative) connected to 5V Relay Common Terminal.
Documented Code
Arduino UNO Code (sketch.ino)
void setup() {
  // put your setup code here, to run once:

}

void loop() {
  // put your main code here, to run repeatedly:

}
Note: The provided code is a template and does not contain any functional logic. It needs to be populated with the setup and loop functions to control the relay based on the ultrasonic sensor readings.