
Arduino UNO Solar-Powered Light-Tracking System with LDR and Servo
View and Edit Project In Cirkit Designer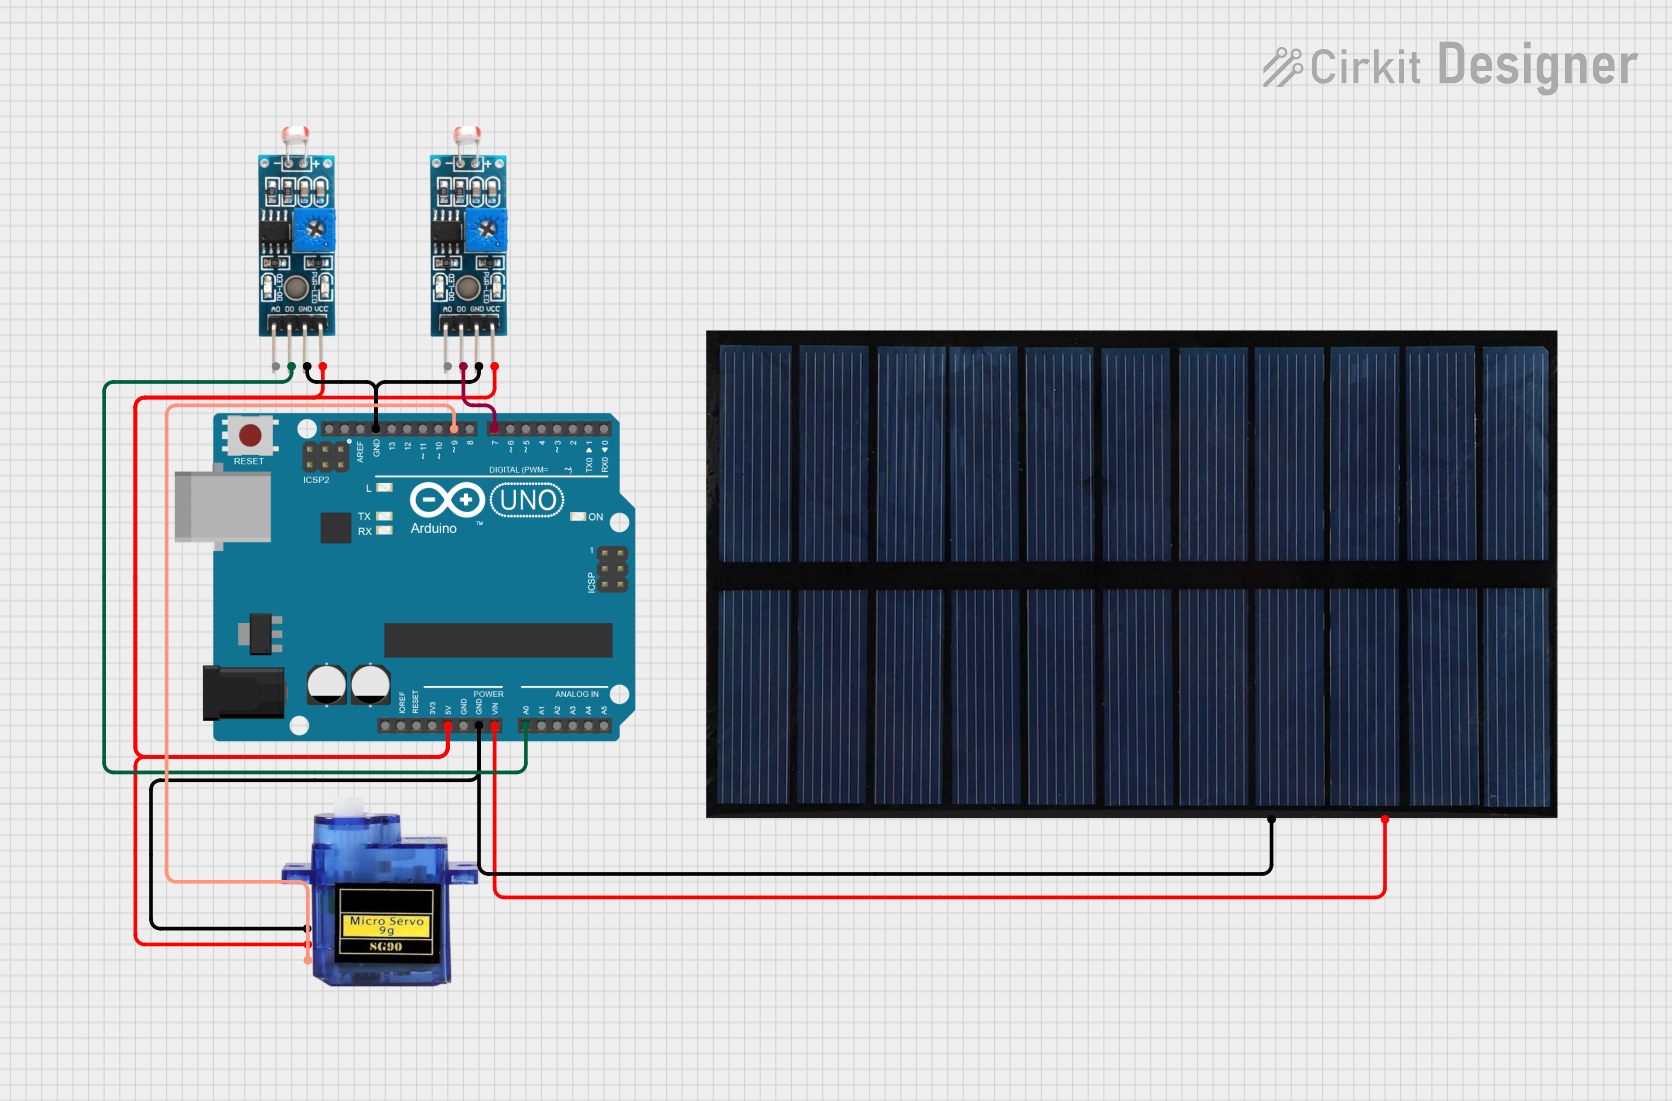
Circuit Documentation
Summary
This circuit is designed to interface an Arduino UNO with two Light Dependent Resistor (LDR) modules, a solar cell, and a micro servo motor. The Arduino UNO serves as the central microcontroller, reading data from the LDR modules and controlling the servo motor. The solar cell provides power to the circuit.
Component List
Arduino UNO
- Description: A microcontroller board based on the ATmega328P.
- Pins: UNUSED, IOREF, Reset, 3.3V, 5V, GND, Vin, A0, A1, A2, A3, A4, A5, SCL, SDA, AREF, D13, D12, D11, D10, D9, D8, D7, D6, D5, D4, D3, D2, D1, D0
Solar Cell
- Description: A device that converts light energy into electrical energy.
- Pins: +, -
Module LDR (Light Dependent Resistor)
- Description: A sensor module that changes its resistance based on the light intensity.
- Pins: VCC, GND, DO, AO
Micro Servo 9G
- Description: A small servo motor used for precise control of angular position.
- Pins: GND, +5V, PWM
Wiring Details
Arduino UNO
- 5V: Connected to VCC of both LDR modules and +5V of the Micro Servo 9G.
- GND: Connected to GND of both LDR modules, GND of the Micro Servo 9G, and - of the Solar Cell.
- Vin: Connected to + of the Solar Cell.
- A0: Connected to DO of the first LDR module.
- D7: Connected to DO of the second LDR module.
- D9: Connected to PWM of the Micro Servo 9G.
Solar Cell
- +: Connected to Vin of the Arduino UNO.
- -: Connected to GND of the Arduino UNO and GND of the Micro Servo 9G.
Module LDR (First Instance)
- VCC: Connected to 5V of the Arduino UNO.
- GND: Connected to GND of the Arduino UNO.
- DO: Connected to A0 of the Arduino UNO.
- AO: Not connected.
Module LDR (Second Instance)
- VCC: Connected to 5V of the Arduino UNO.
- GND: Connected to GND of the Arduino UNO.
- DO: Connected to D7 of the Arduino UNO.
- AO: Not connected.
Micro Servo 9G
- GND: Connected to GND of the Arduino UNO and - of the Solar Cell.
- +5V: Connected to 5V of the Arduino UNO.
- PWM: Connected to D9 of the Arduino UNO.
Documented Code
Arduino UNO Code (sketch.ino)
void setup() {
  // put your setup code here, to run once:

}

void loop() {
  // put your main code here, to run repeatedly:

}
Additional Documentation (documentation.txt)
This documentation provides a comprehensive overview of the circuit, including a summary, detailed component list, wiring details, and the code used in the Arduino UNO.