
Arduino UNO Voice Assistant with KY-037 Microphone and Speaker
View and Edit Project In Cirkit Designer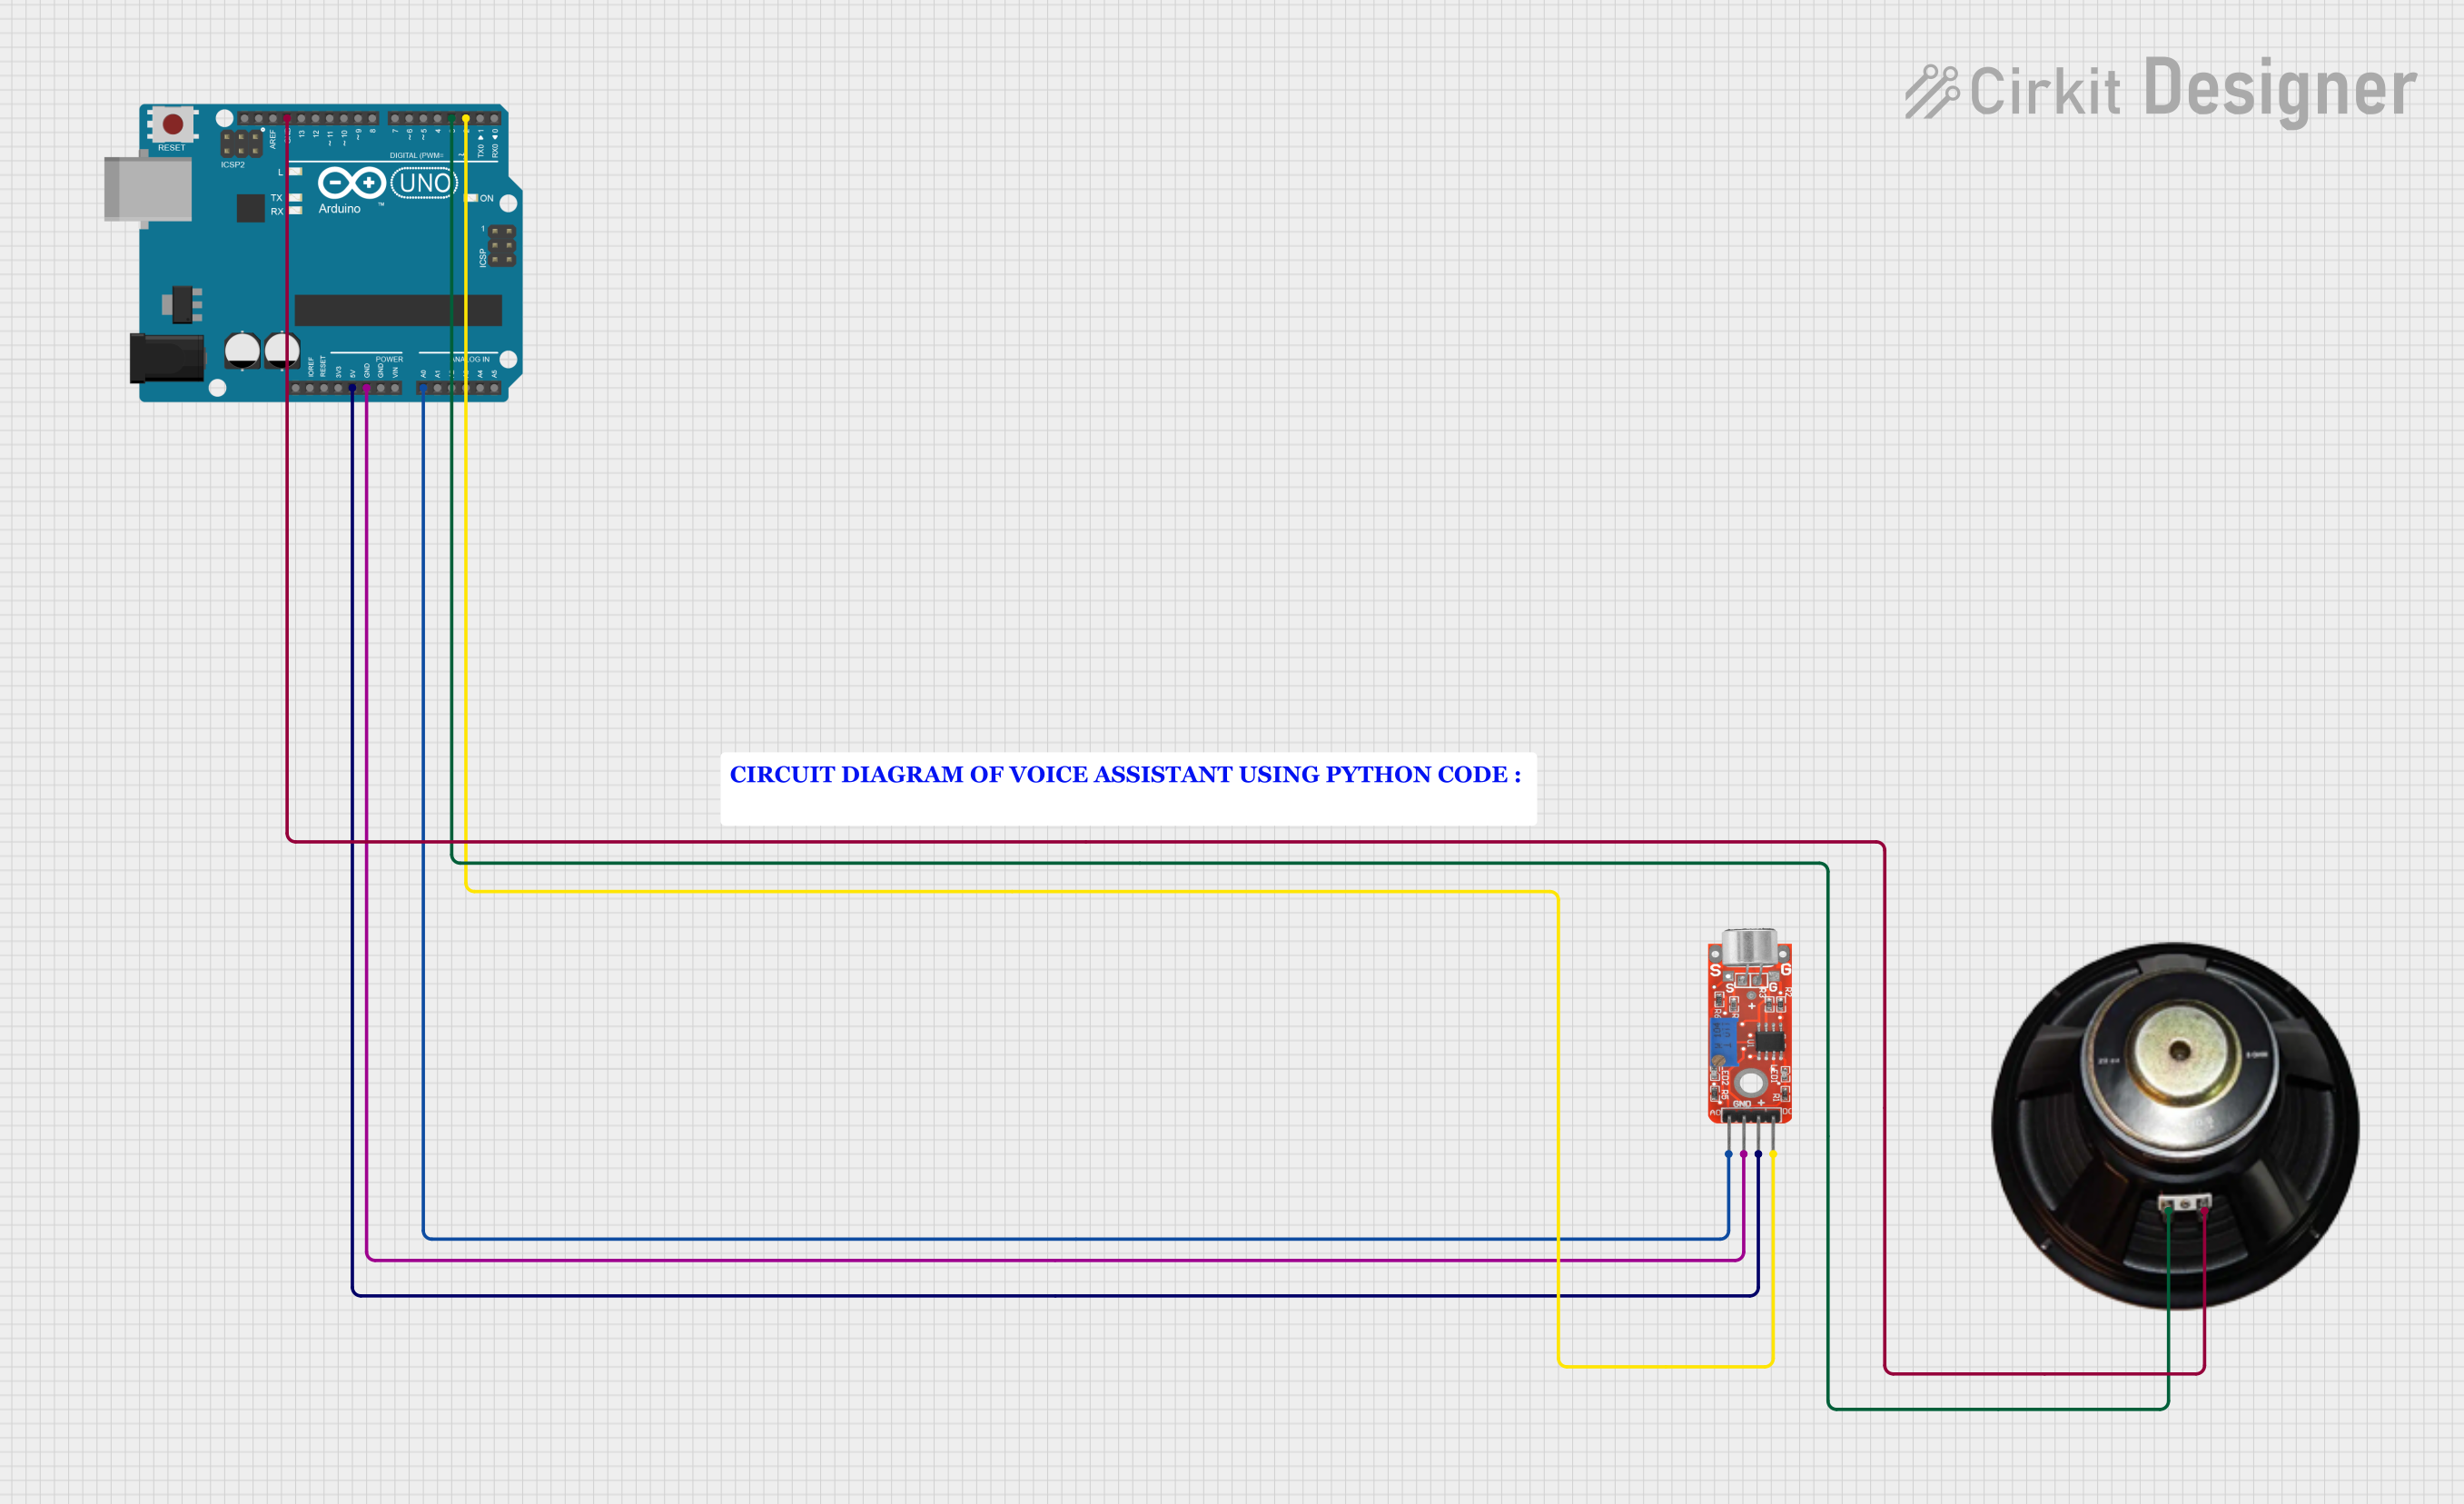
Circuit Documentation
Summary
This project is a Voice Assistant system that uses an Arduino UNO microcontroller, a KY-037 microphone module, and a speaker. The microphone detects voice commands, and the speaker provides audio feedback. The microphone's analog output is read via the A0 pin, and its digital output is read via the D2 pin of the Arduino. The speaker is controlled via the D3 pin of the Arduino.
Component List
Arduino UNO
- Description: A microcontroller board based on the ATmega328P.
- Pins: UNUSED, IOREF, Reset, 3.3V, 5V, GND, Vin, A0, A1, A2, A3, A4, A5, SCL, SDA, AREF, D13, D12, D11, D10, D9, D8, D7, D6, D5, D4, D3, D2, D1, D0
KY-037 Microphone
- Description: A microphone module that provides both analog and digital outputs.
- Pins: Analog output, Ground, VCC, Digital output
Speaker
- Description: A simple speaker for audio output.
- Pins: +, -
Comment
- Description: Placeholder for comments or notes.
- Pins: None
Wiring Details
Arduino UNO
- 5V: Connected to VCC of KY-037 Microphone
- GND: Connected to Ground of KY-037 Microphone and - of Speaker
- A0: Connected to Analog output of KY-037 Microphone
- D2: Connected to Digital output of KY-037 Microphone
- D3: Connected to + of Speaker
KY-037 Microphone
- VCC: Connected to 5V of Arduino UNO
- Ground: Connected to GND of Arduino UNO
- Analog output: Connected to A0 of Arduino UNO
- Digital output: Connected to D2 of Arduino UNO
Speaker
- +: Connected to D3 of Arduino UNO
- -: Connected to GND of Arduino UNO
Code Documentation
/*
 * Voice Assistant Project
 * This Arduino sketch interfaces with a KY-037 microphone to detect voice commands
 * and a speaker to provide audio feedback. The microphone's analog output is read
 * via A0, and its digital output is read via D2. The speaker is controlled via D3.
 * The goal is to detect specific voice commands and trigger corresponding actions.
 */

// Pin definitions
const int micAnalogPin = A0;
const int micDigitalPin = 2;
const int speakerPin = 3;

void setup() {
  // Initialize serial communication
  Serial.begin(9600);

  // Initialize pins
  pinMode(micDigitalPin, INPUT);
  pinMode(speakerPin, OUTPUT);

  // Initial state of the speaker
  digitalWrite(speakerPin, LOW);
}

void loop() {
  // Read the analog value from the microphone
  int micValue = analogRead(micAnalogPin);

  // Read the digital value from the microphone
  int micDigitalValue = digitalRead(micDigitalPin);

  // Print the analog value to the serial monitor
  Serial.print("Analog Value: ");
  Serial.println(micValue);

  // Print the digital value to the serial monitor
  Serial.print("Digital Value: ");
  Serial.println(micDigitalValue);

  // Check for a specific voice command (this is a placeholder)
  if (micDigitalValue == HIGH) {
    // Trigger the speaker as feedback
    digitalWrite(speakerPin, HIGH);
    delay(500); // Keep the speaker on for 500ms
    digitalWrite(speakerPin, LOW);
  }

  // Add a small delay to avoid overwhelming the serial monitor
  delay(100);
}
This code initializes the microphone and speaker, reads the analog and digital values from the microphone, and triggers the speaker when a specific voice command is detected. The analog and digital values are also printed to the serial monitor for debugging purposes.