
Arduino-Controlled Aquatic Vehicle with Environmental Sensors and Bluetooth Connectivity
View and Edit Project In Cirkit Designer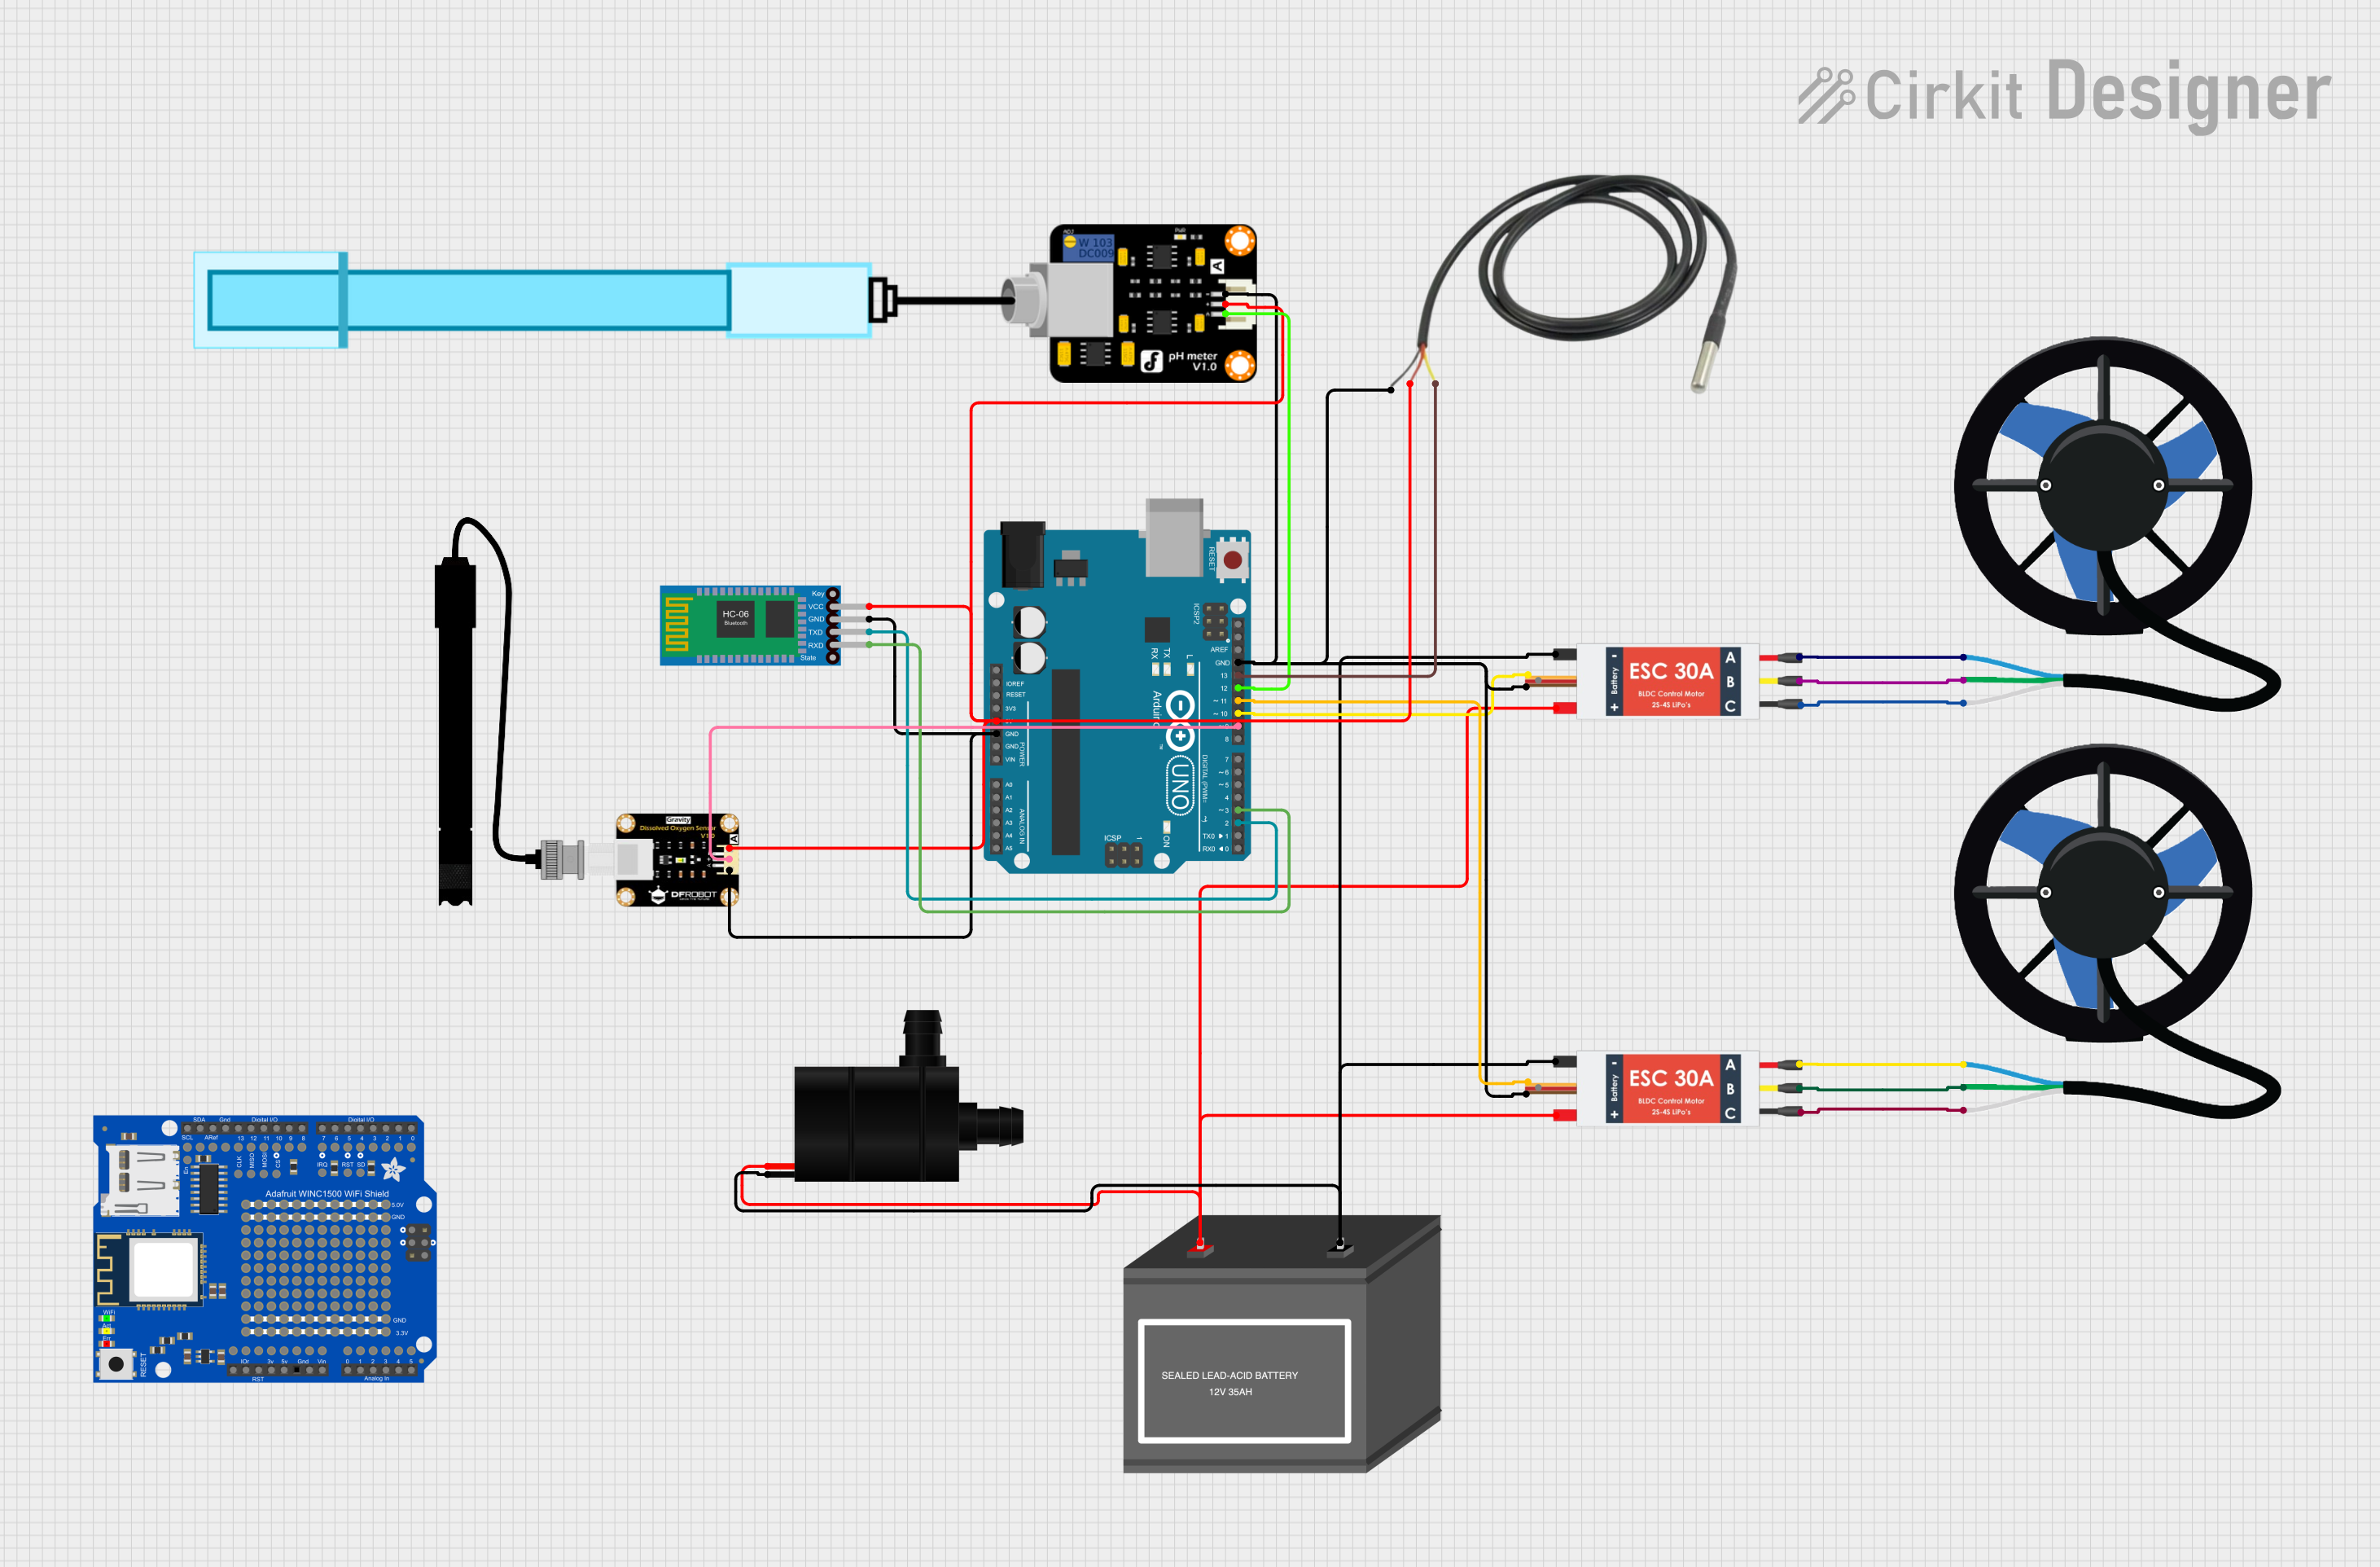
Circuit Documentation
Summary
The circuit in question is designed to control and monitor various components in an embedded system environment. It includes an Arduino UNO microcontroller as the central processing unit, which interfaces with a range of sensors and actuators. The system is powered by a 12V battery and includes two Electronic Speed Controllers (ESCs) to drive T200 Thrusters, a Bluetooth module for wireless communication, and sensors for temperature, dissolved oxygen (Do), and pH level monitoring. A water pump is also included in the circuit for fluid movement.
Component List
Arduino UNO
- Microcontroller board based on the ATmega328P
- It has 14 digital input/output pins, 6 analog inputs, a 16 MHz quartz crystal, a USB connection, a power jack, an ICSP header, and a reset button.
Electronic Speed Controller (ESC)
- Provides an interface to control the speed of the T200 Thrusters
- It has connections for battery power, motor outputs, and a control signal input.
T200 Thruster
- An underwater thruster designed for marine robotics applications
- It has three connections for interfacing with the ESC.
12V Battery (mini)
- Provides the power source for the circuit
- It has a positive and a negative terminal.
Bluetooth HC-06
- A wireless communication module that allows for Bluetooth connectivity
- It has pins for power, ground, and serial communication (TX/RX).
PH Meter
- A sensor used to measure the pH level of a solution
- It has pins for signal output, power, and ground.
Temperature Sensor
- Measures the temperature of the environment
- It has pins for data communication, power, and ground.
Do Sensor
- Measures the dissolved oxygen level in a solution
- It has pins for signal output, power, and ground.
Water Pump
- Used to move fluids within the system
- It has connections for power and ground.
Adafruit WINC1500 Shield
- A WiFi shield for Arduino that provides internet connectivity
- It has numerous pins for interfacing with the Arduino UNO and the network.
Wiring Details
Arduino UNO
5Vpin connected to the VCC pins of the Do Sensor, Temperature Sensor, Bluetooth HC-06, and PH MeterGNDpin connected to the GND pins of the Do Sensor, Bluetooth HC-06, and various GND connections of the ESCsD13pin connected to the data pin of the Temperature SensorD12pin connected to the signal pin of the PH MeterD11andD10pins connected to the signal pins of the ESCsD9pin connected to the output pin of the Do SensorD3andD2pins connected to the RXD and TXD pins of the Bluetooth HC-06, respectively
Electronic Speed Controller (ESC)
Battery VCCandBattery GNDpins connected to the positive and negative terminals of the 12V Battery, respectivelySignalpins connected to theD11andD10pins of the Arduino UNOM1,M2, andM3pins connected to theA,B, andCpins of the T200 Thrusters5v outandGND outpins provide power to the Arduino UNO and other components
T200 Thruster
A,B, andCpins connected to theM1,M2, andM3pins of the ESCs
12V Battery (mini)
+and-terminals provide power to the ESCs and Water Pump
Bluetooth HC-06
VCCandGNDpins connected to the5VandGNDpins of the Arduino UNOTXDandRXDpins connected to theD2andD3pins of the Arduino UNO for serial communication
PH Meter
Signalpin connected to theD12pin of the Arduino UNOVCCandGNDpins connected to the5VandGNDpins of the Arduino UNO
Temperature Sensor
Temp DQ Data Yellowpin connected to theD13pin of the Arduino UNOTemp VDD RedandTemp GND Blackpins connected to the5VandGNDpins of the Arduino UNO
Do Sensor
Outpin connected to theD9pin of the Arduino UNOVccandGndpins connected to the5VandGNDpins of the Arduino UNO
Water Pump
VCCandGNDpins connected to the positive and negative terminals of the 12V Battery
Documented Code
Arduino UNO Code (sketch.ino)
void setup() {
  // put your setup code here, to run once:

}

void loop() {
  // put your main code here, to run repeatedly:

}
Note: The provided code is a template and does not contain any functional code. It is expected that the user will add the necessary setup and loop code to control and monitor the connected components.