
Arduino and ESP8266 Nodemcu Controlled Environment Monitoring System with Solar Charging
View and Edit Project In Cirkit Designer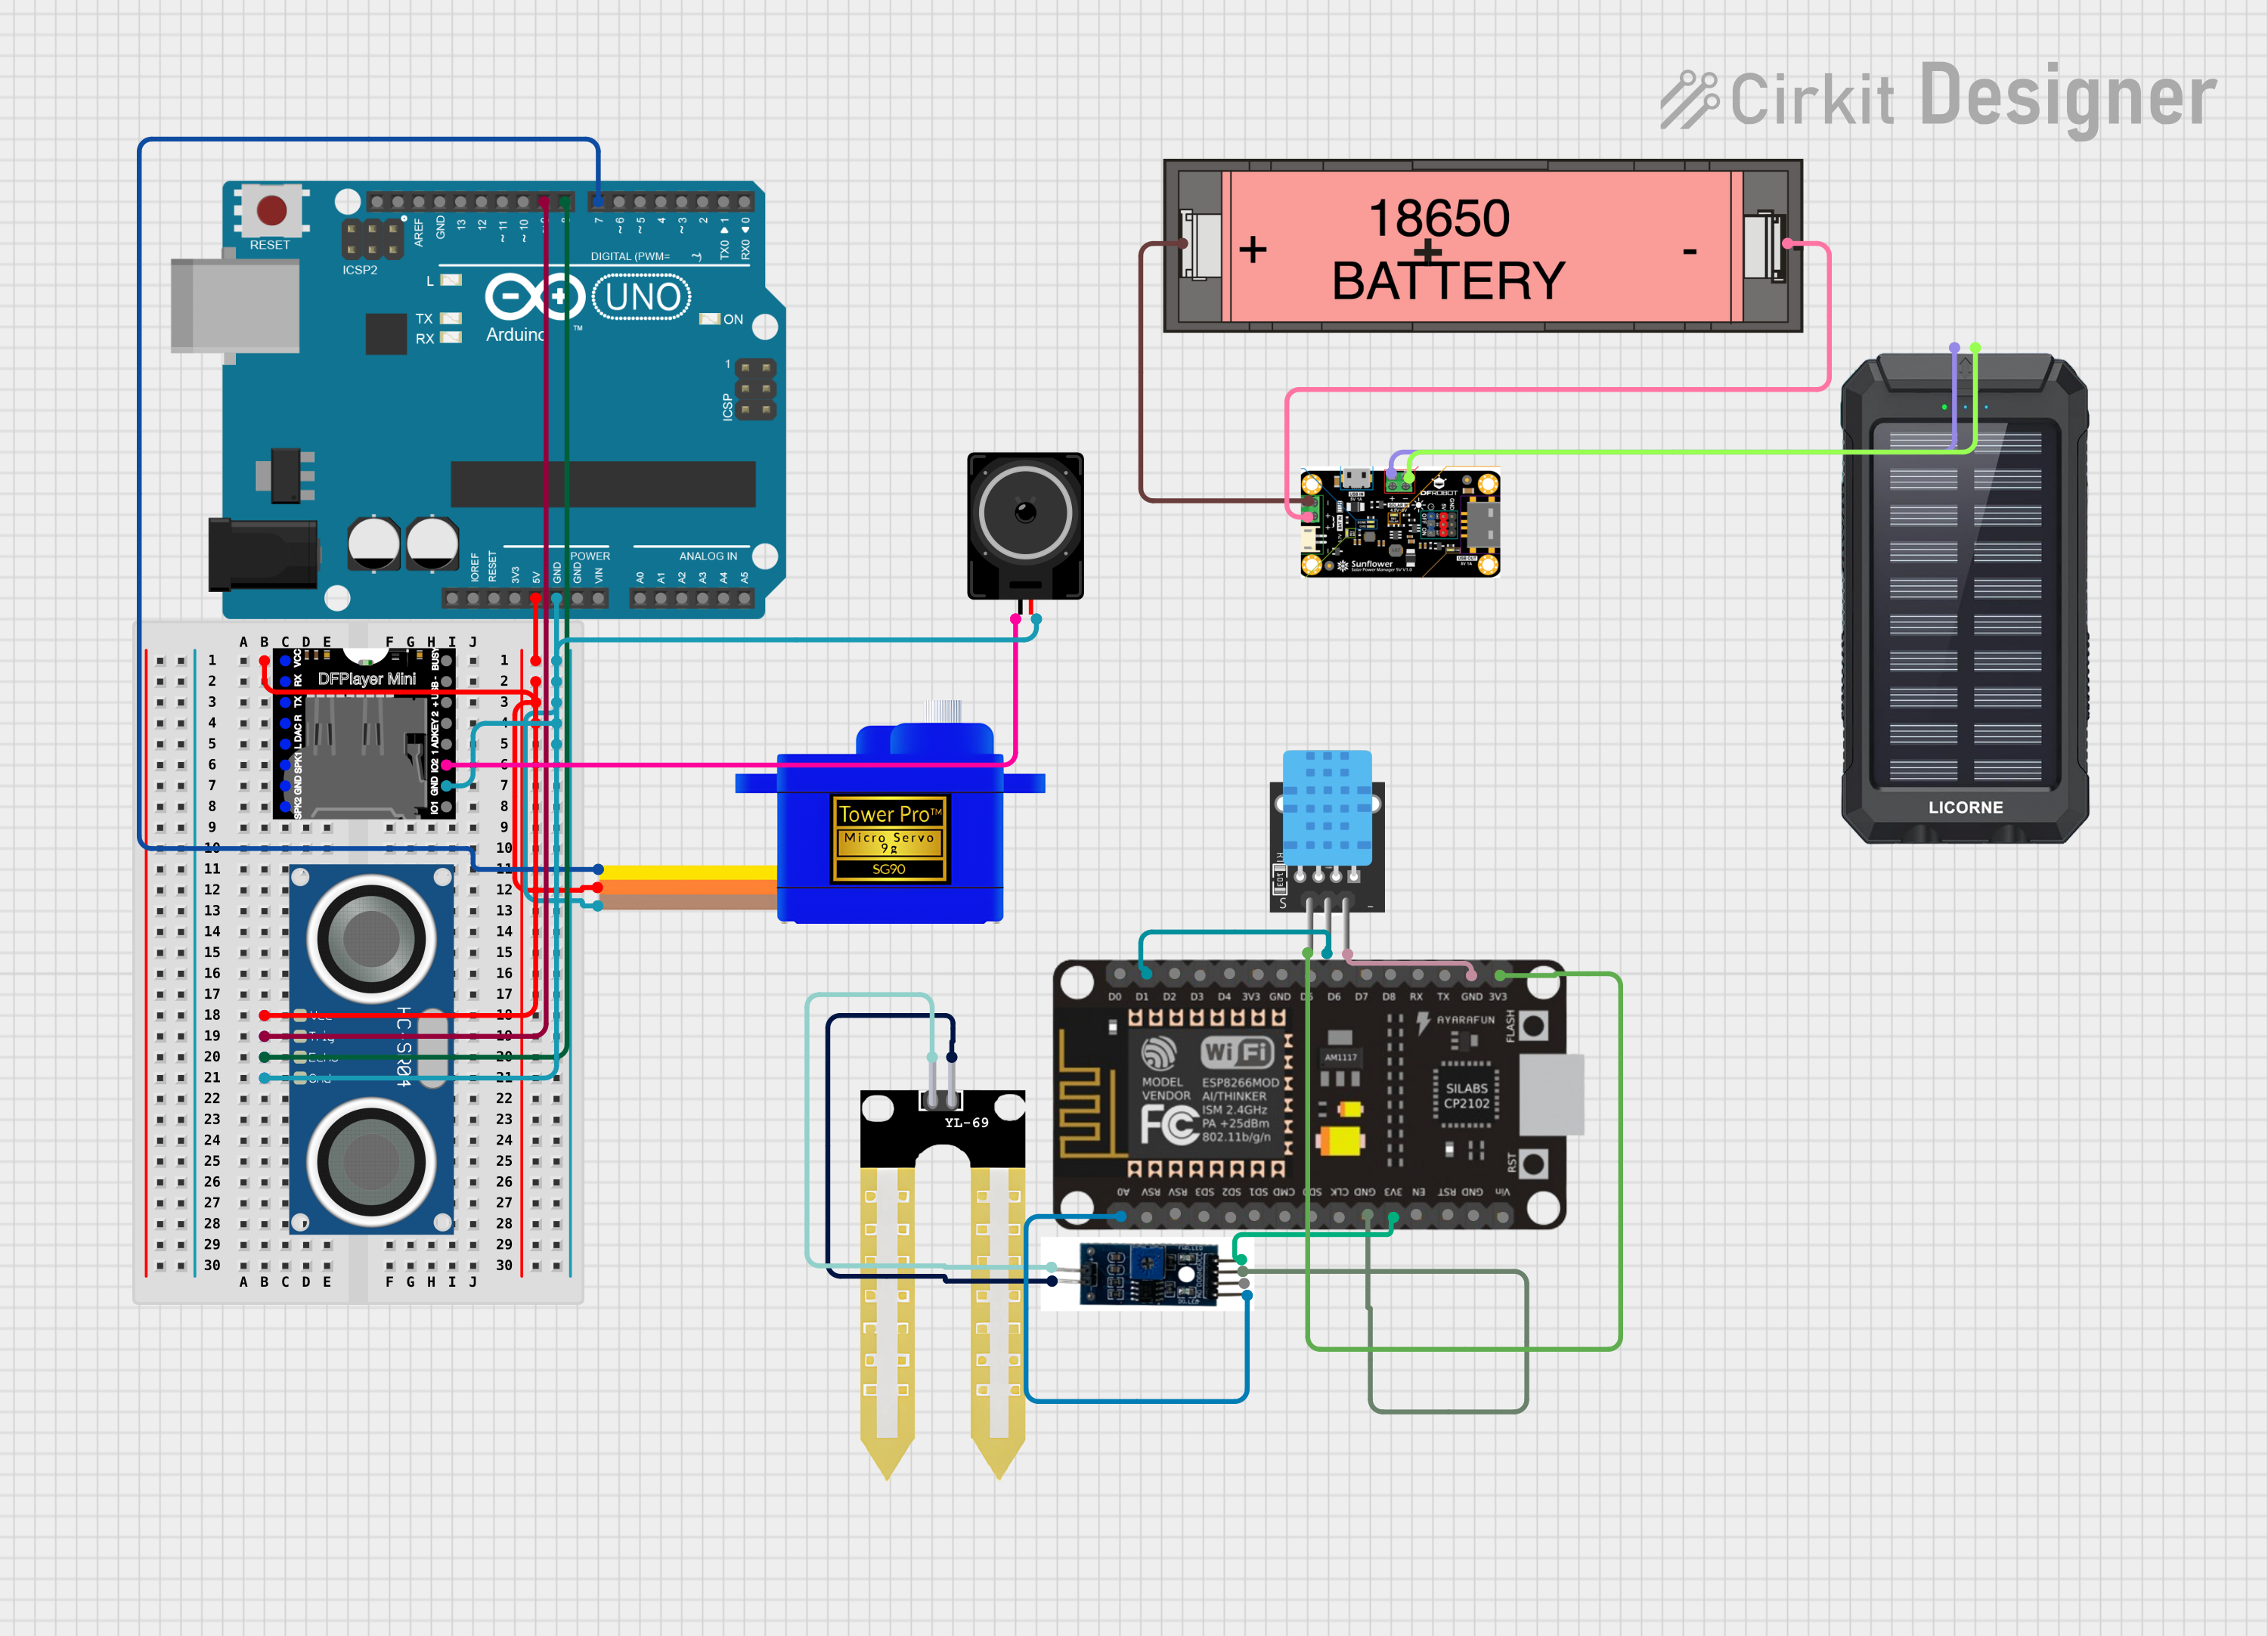
Circuit Documentation
Summary
This document provides a detailed overview of a circuit designed to interface various sensors, actuators, and modules with microcontrollers. The circuit includes an HC-SR04 Ultrasonic Sensor, a KY-015 DHT11 temperature and humidity sensor, a Servomotor SG90, a DFPlayer MINI MP3 module, a YL-69 soil moisture sensor, an ESP8266 NodeMCU Wi-Fi module, an Arduino UNO, a resistance voltage conversion module, a loudspeaker, a solar charger power bank, a Li-ion 18650 battery, and a solar power manager. The circuit is designed to collect environmental data, control a servomotor, play audio files, and manage power from solar energy.
Component List
HC-SR04 Ultrasonic Sensor
- Pins: VCC, TRIG, ECHO, GND
- Description: A sensor for measuring distance using ultrasonic waves.
KY-015 DHT11 Temperature and Humidity Sensor
- Pins: 5V, S, GND
- Description: A sensor for measuring ambient temperature and humidity.
Servomotor SG90
- Pins: SIG, VCC, GND
- Description: A small and lightweight servo for precise control of motion.
DFPlayer MINI MP3 Module
- Pins: VCC, BUSY, RX, USB -, TX, USB +, DAC_R, K2/ADC_KEY, DAC_L, K1/ADC_KEY, SPK1, IO 2, GND, SPK2, IO 1
- Description: A compact audio player module for playing MP3 files.
YL-69 Soil Moisture Sensor
- Pins: +, -
- Description: A sensor for detecting the moisture content in soil.
ESP8266 NodeMCU Wi-Fi Module
- Pins: D0, D1, D2, D3, D4, 3V3, GND, D5, D6, D7, D8, RX, TX, A0, RSV, SD3, SD2, SD1, CMD, SD0, CLK, EN, RST, VIN
- Description: A Wi-Fi module with integrated microcontroller for IoT applications.
Arduino UNO
- Pins: UNUSED, IOREF, Reset, 3.3V, 5V, GND, Vin, A0, A1, A2, A3, A4, A5, SCL, SDA, AREF, D13, D12, D11, D10, D9, D8, D7, D6, D5, D4, D3, D2, D1, D0
- Description: A microcontroller board based on the ATmega328P for building digital devices and interactive objects.
Resistance Voltage Conversion Module
- Pins: V, gnd, a0, vcc, d0, Gnd
- Description: A module for converting a resistance change to a voltage change, often used with sensors.
Loudspeaker
- Pins: pin1, pin2
- Description: An electroacoustic transducer for producing sound.
Solar Charger Power Bank
- Pins: +, -
- Description: A device for storing electrical energy from solar panels.
Li-ion 18650 Battery
- Pins: -, +
- Description: A rechargeable battery commonly used in portable electronics.
Solar Power Manager
- Pins: vcc, Gnd
- Description: A module for managing the charging and discharging of batteries using solar power.
Wiring Details
HC-SR04 Ultrasonic Sensor
- VCC: Connected to 5V power supply from Arduino UNO.
- TRIG: Connected to digital pin D9 on Arduino UNO.
- ECHO: Connected to digital pin D8 on Arduino UNO.
- GND: Connected to ground.
KY-015 DHT11 Temperature and Humidity Sensor
- 5V: Connected to 3V3 power supply from ESP8266 NodeMCU.
- S: Connected to digital pin D1 on ESP8266 NodeMCU.
- GND: Connected to ground.
Servomotor SG90
- SIG: Connected to digital pin D7 on Arduino UNO.
- VCC: Connected to 5V power supply from Arduino UNO.
- GND: Connected to ground.
DFPlayer MINI MP3 Module
- VCC: Connected to 5V power supply from Arduino UNO.
- GND: Connected to ground.
- IO 2: Connected to pin1 on Loudspeaker.
YL-69 Soil Moisture Sensor
- +: Connected to V on resistance voltage conversion module.
- -: Connected to gnd on resistance voltage conversion module.
ESP8266 NodeMCU Wi-Fi Module
- 3V3: Connected to 5V power supply from KY-015 DHT11 and vcc on resistance voltage conversion module.
- A0: Connected to a0 on resistance voltage conversion module.
- GND: Connected to ground and Gnd on resistance voltage conversion module.
Loudspeaker
- pin1: Connected to IO 2 on DFPlayer MINI MP3 Module.
- pin2: Connected to ground.
Solar Charger Power Bank
- +: Connected to vcc on solar power manager.
- -: Connected to Gnd on solar power manager.
Li-ion 18650 Battery
- -: Connected to Gnd on solar power manager.
- +: Connected to vcc on solar power manager.
Documented Code
Arduino UNO Code (sketch.ino)
void setup() {
  // put your setup code here, to run once:

}

void loop() {
  // put your main code here, to run repeatedly:

}
Note: The provided code for the Arduino UNO is a template and does not contain any functional code. It is expected that the user will fill in the setup and loop functions with the desired behavior for the circuit.