
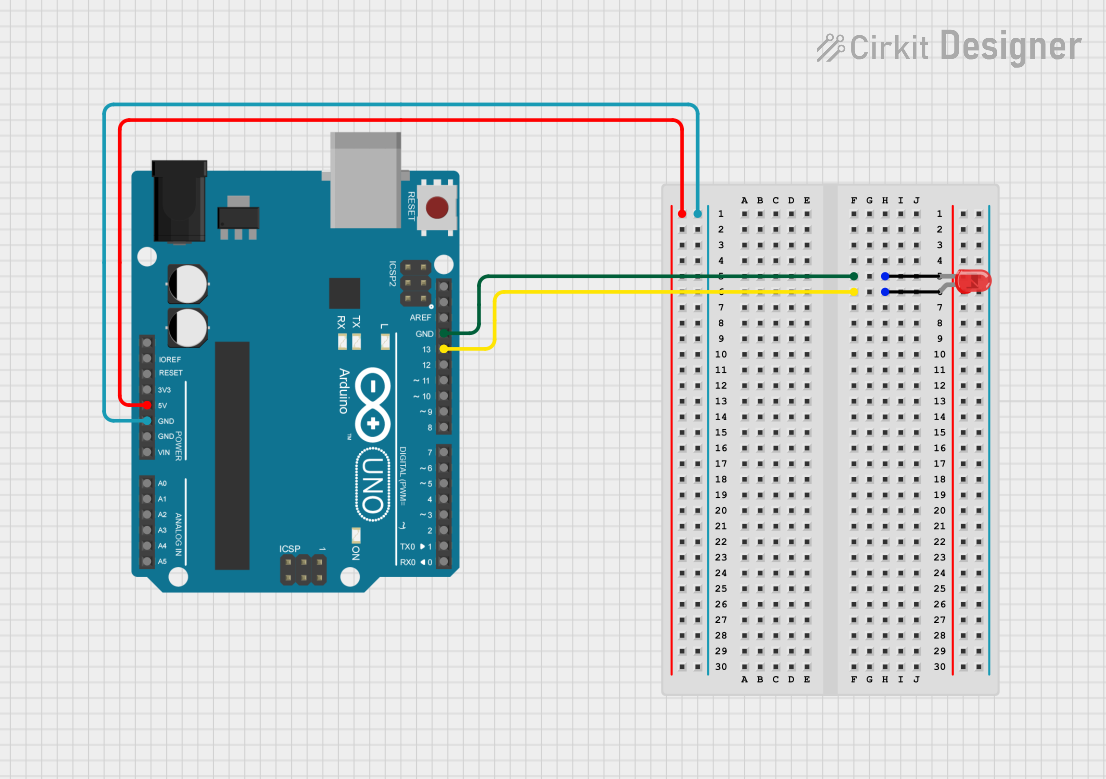
Circuit Documentation
Summary of the Circuit
This circuit consists of an Arduino UNO microcontroller board and a two-pin red LED. The Arduino UNO is programmed to control the LED, making it blink on and off with a one-second interval. The LED is connected to the digital pin 13 (D13) of the Arduino UNO for control signal and to the ground (GND) for completing the circuit.
Component List
Arduino UNO
- Description: A microcontroller board based on the ATmega328P.
- Pins Used:
5V: Provides the operating voltage for the LED.GND: Common ground for the circuit.D13: Digital output to control the LED.
LED: Two Pin (red)
- Description: A basic red light-emitting diode.
- Pins Used:
anode: Positive pin connected to the control signal (D13 of Arduino UNO).cathode: Negative pin connected to the ground (GND of Arduino UNO).
Wiring Details
Arduino UNO
5V(Power Supply): Not connected in this circuit.GND(Ground): Connected to the cathode of the LED.D13(Digital Output): Connected to the anode of the LED.
LED: Two Pin (red)
anode: Connected to D13 on the Arduino UNO.cathode: Connected to GND on the Arduino UNO.
Documented Code
/*
 * Arduino Sketch for auto_led project
 * This code controls an LED connected to pin 13 of the Arduino UNO.
 * The LED will blink on and off with a delay of 1 second.
 */

void setup() {
  // Initialize digital pin 13 as an output.
  pinMode(13, OUTPUT);
}

void loop() {
  // Turn the LED on (HIGH is the voltage level)
  digitalWrite(13, HIGH);
  // Wait for a second
  delay(1000);
  // Turn the LED off by making the voltage LOW
  digitalWrite(13, LOW);
  // Wait for a second
  delay(1000);
}
- File Name:
sketch.ino - Description: The code sets up pin 13 as an output and then continuously turns the LED on and off every second.