
Circuit Documentation
Summary
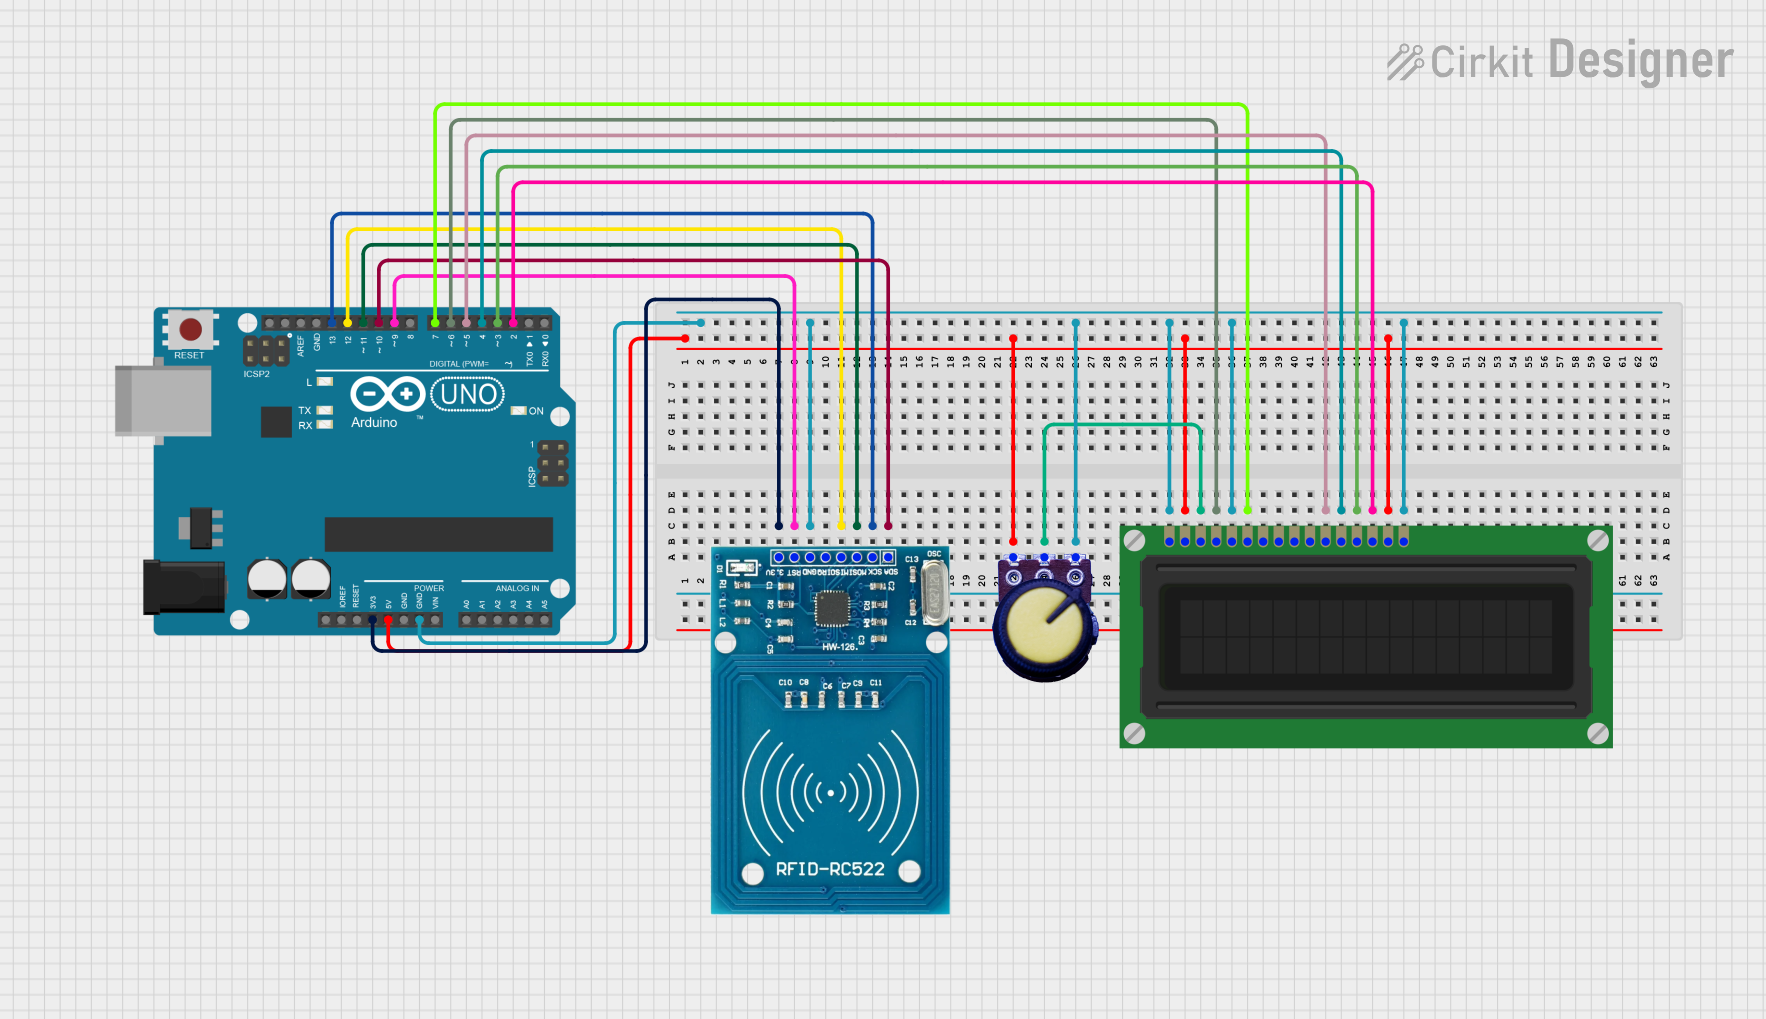
This circuit integrates an Arduino UNO microcontroller with an RFID-RC522 module, a potentiometer, and an LCD display. The Arduino UNO serves as the central processing unit, interfacing with the RFID module for tag reading capabilities and the LCD display for output visualization. The potentiometer is used to adjust the contrast of the LCD display. The RFID-RC522 module is powered by the 3.3V output from the Arduino, while the LCD display and the potentiometer are powered by the 5V output. Ground connections are shared among all components.
Component List
Arduino UNO
- Microcontroller board based on the ATmega328P
- Provides digital I/O pins, analog inputs, and various power outputs
RFID-RC522
- RFID reader/writer module
- Operates at 13.56 MHz for communication with RFID tags
Potentiometer
- Variable resistor with three terminals
- Used to adjust the contrast of the LCD display
LCD Display (16 pin)
- Alphanumeric liquid crystal display
- Capable of displaying 16 characters per line
Wiring Details
Arduino UNO
- 3.3V supplies power to the RFID-RC522 module
- 5V supplies power to the Potentiometer and the LCD Display (VDD and A pins)
- GND is connected to the ground pins of all components
- Digital Pins (D2-D13) are used for interfacing with the RFID-RC522 module and the LCD Display
RFID-RC522
- VCC (3.3V) connected to Arduino UNO 3.3V
- RST connected to Arduino UNO D9
- GND connected to Arduino UNO GND
- IRQ not connected
- MISO connected to Arduino UNO D12
- MOSI connected to Arduino UNO D11
- SCK connected to Arduino UNO D13
- SDA connected to Arduino UNO D10
Potentiometer
- GND connected to Arduino UNO GND
- Output connected to LCD Display VO
- VCC connected to Arduino UNO 5V
LCD Display (16 pin)
- VSS connected to Arduino UNO GND
- VDD connected to Arduino UNO 5V
- VO connected to Potentiometer Output
- RS connected to Arduino UNO D6
- R_W connected to Arduino UNO GND
- E connected to Arduino UNO D7
- DB4-DB7 connected to Arduino UNO D5-D2 respectively
- A connected to Arduino UNO 5V
- K connected to Arduino UNO GND
Documented Code
void setup() {
  // put your setup code here, to run once:

}

void loop() {
  // put your main code here, to run repeatedly:

}
The provided code is a template with empty setup() and loop() functions, which are the entry points for Arduino sketches. The setup() function is called once when the sketch starts and is used for initializing settings or pin modes. The loop() function is called repeatedly and contains the main logic of the sketch. Additional code is required to implement the functionality of interfacing with the RFID-RC522 module and controlling the LCD display.