
Circuit Documentation
Summary
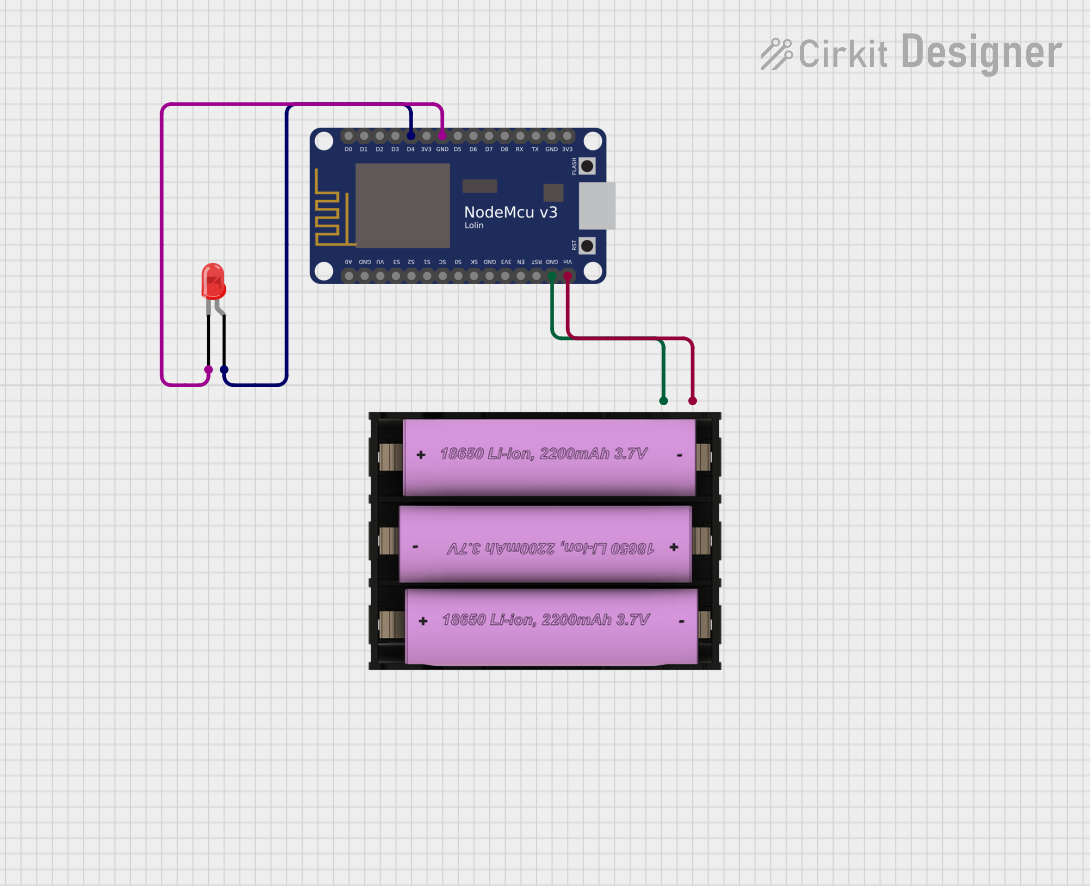
This circuit consists of a NodeMCU V3 ESP8266 microcontroller, a red LED, and a 7V battery. The NodeMCU is powered by the battery and controls the LED, making it blink at 1-second intervals.
Component List
NodeMCU V3 ESP8266
- Description: A microcontroller board based on the ESP8266 WiFi module.
- Pins: A0, GND, VU, S3, S2, S1, SC, S0, SK, 3V3, EN, RST, Vin, D0, D1, D2, D3, D4, D5, D6, D7, D8, RX, TX
- Purpose in Circuit: Acts as the main controller, powering the LED and running the embedded code.
LED: Two Pin (red)
- Description: A standard red LED with two pins.
- Pins: Cathode, Anode
- Purpose in Circuit: Provides visual feedback by blinking.
Set battery (7V)
- Description: A 7V battery used to power the NodeMCU.
- Pins: +, -
- Purpose in Circuit: Supplies power to the NodeMCU.
Wiring Details
NodeMCU V3 ESP8266
- GND: Connected to the negative terminal (-) of the 7V battery.
- Vin: Connected to the positive terminal (+) of the 7V battery.
- D4: Connected to the anode of the red LED.
- GND: Connected to the cathode of the red LED.
LED: Two Pin (red)
- Anode: Connected to pin D4 of the NodeMCU.
- Cathode: Connected to GND of the NodeMCU.
Set battery (7V)
- +: Connected to Vin of the NodeMCU.
- -: Connected to GND of the NodeMCU.
Code Documentation
NodeMCU V3 ESP8266 Code
#define led D4

void setup() {
  // put your setup code here, to run once:
  pinMode(led, OUTPUT);
}

void loop() {
  // put your main code here, to run repeatedly:
  digitalWrite(led, HIGH);
  delay(1000);
  digitalWrite(led, LOW);
  delay(1000);
}
This code is written for the NodeMCU V3 ESP8266 microcontroller. It defines pin D4 as the LED pin and sets it as an output in the setup() function. The loop() function then toggles the LED on and off with a 1-second delay between each state, making the LED blink.