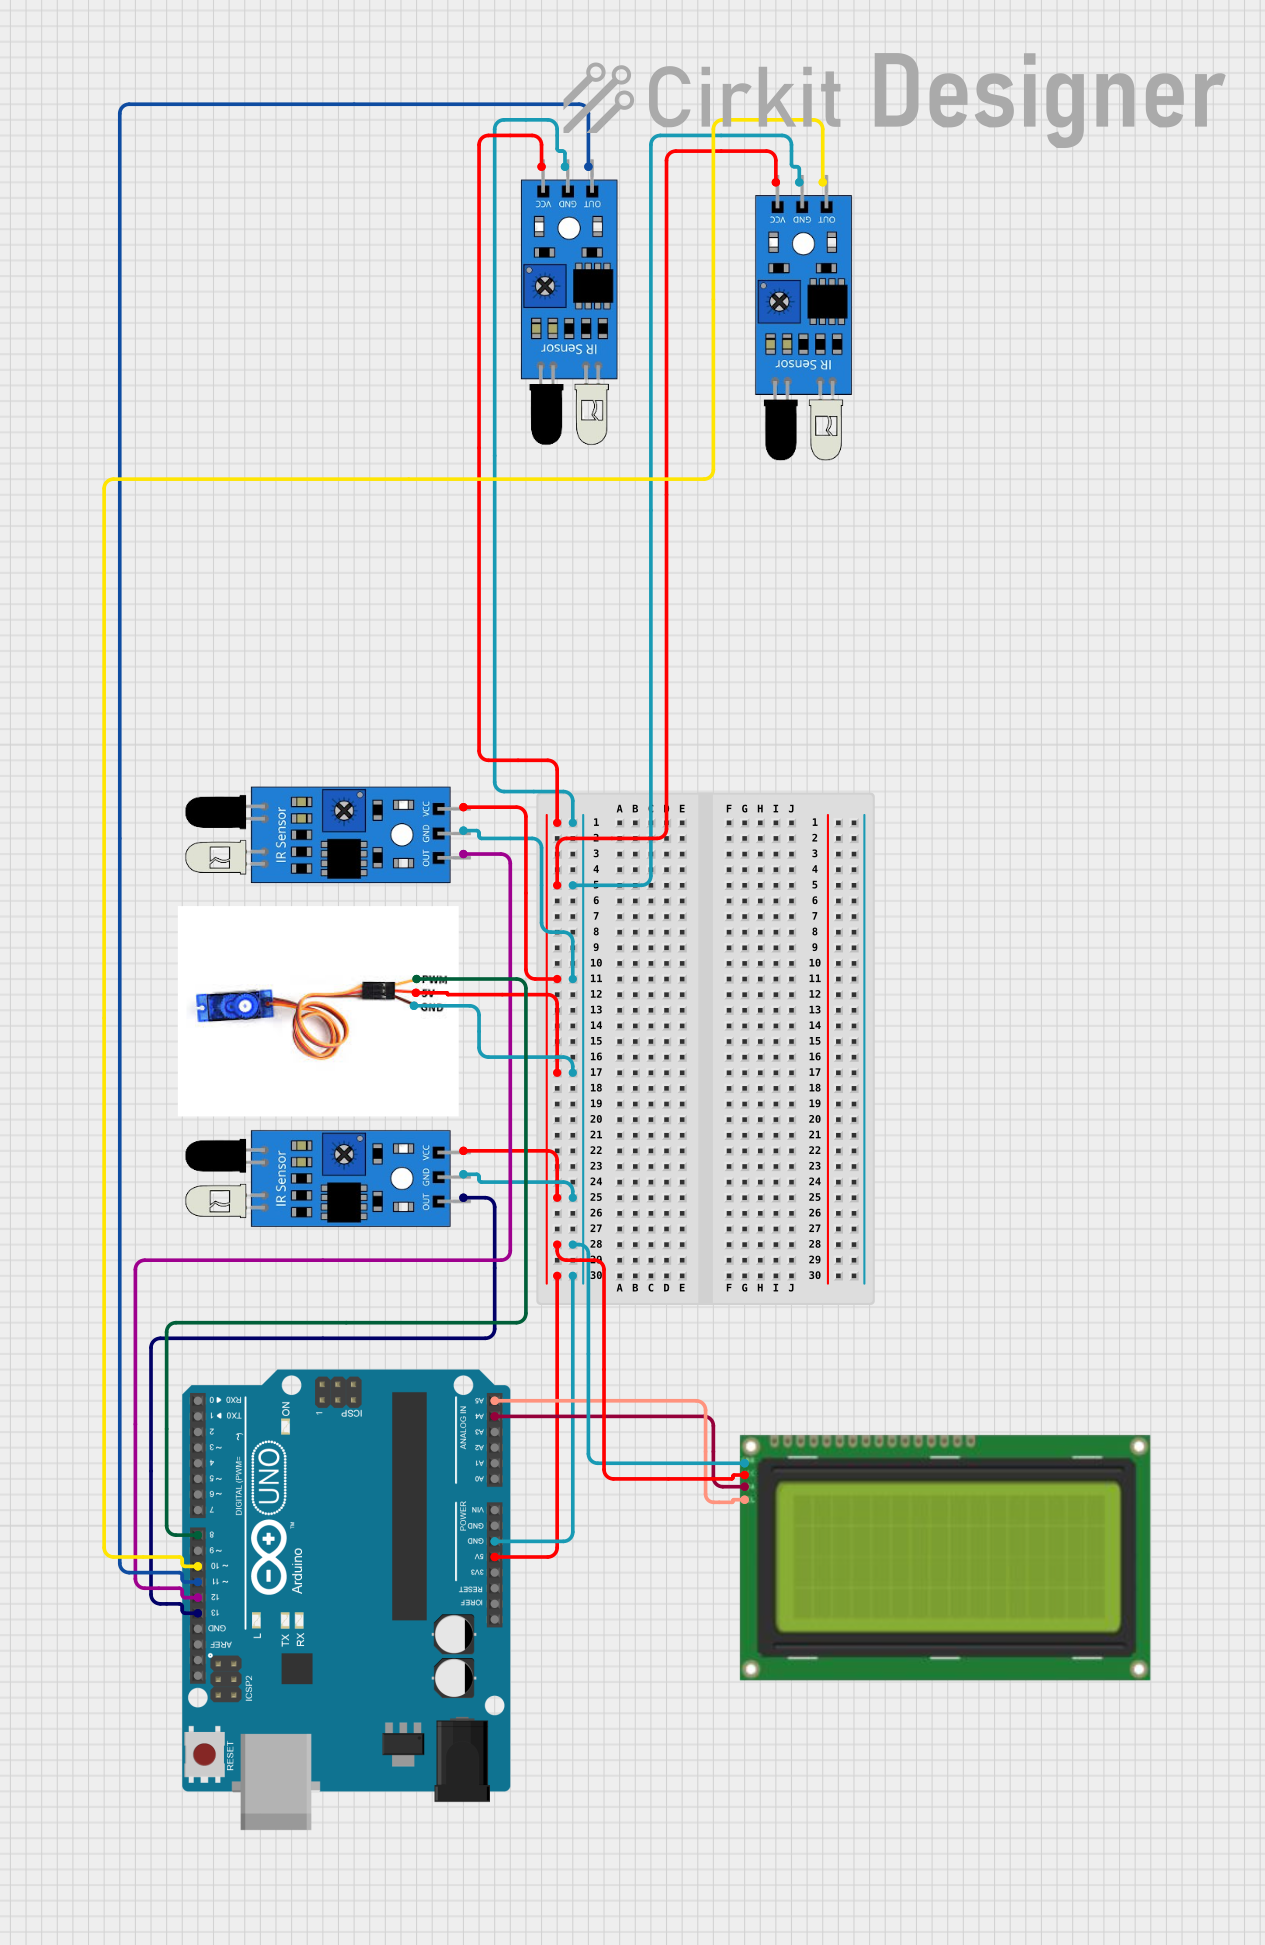
Arduino UNO Controlled IR Sensor Array with Servo Motor and I2C LCD Display

Circuit Documentation
Summary of the Circuit
This circuit is designed to interface multiple IR sensors with an Arduino UNO microcontroller, which also controls an SG90 servo motor and displays information on an LCD 20x4 I2C module. The IR sensors are used to detect the presence or absence of objects, and their outputs are connected to digital pins on the Arduino. The servo motor is controlled via a PWM signal from the Arduino. The LCD module, which uses I2C communication, displays data based on the inputs from the IR sensors and the status of the servo motor.
Component List
IR Sensor
- Description: An infrared sensor capable of detecting the presence of objects.
- Pins:
out,gnd,vcc
Arduino UNO
- Description: A microcontroller board based on the ATmega328P.
- Pins:
UNUSED,IOREF,Reset,3.3V,5V,GND,Vin,A0toA5,SCL,SDA,AREF,D0toD13
SG90 Servo Motor
- Description: A small and lightweight servo motor suitable for a wide range of applications.
- Pins:
PWM,5V,GND
Lcd 20x4 i2c
- Description: A 20x4 character LCD display with an I2C interface.
- Pins:
GND,5v,SCA,SCL
Wiring Details
IR Sensors
- VCC: Connected to the 5V pin on the Arduino UNO.
- GND: Connected to the GND pin on the Arduino UNO.
- OUT: Each IR sensor's output is connected to a separate digital pin on the Arduino UNO (D12, D11, D13, D10).
Arduino UNO
- 5V: Provides power to the IR sensors, SG90 servo motor, and the LCD 20x4 I2C module.
- GND: Common ground for all components.
- D12, D11, D13, D10: Connected to the output of the IR sensors.
- A4 (SDA), A5 (SCL): I2C communication pins connected to the LCD 20x4 I2C module.
- D8: PWM output to control the SG90 servo motor.
SG90 Servo Motor
- PWM: Connected to the D8 pin on the Arduino UNO for PWM control.
- 5V: Powered by the 5V pin on the Arduino UNO.
- GND: Connected to the GND pin on the Arduino UNO.
Lcd 20x4 i2c
- GND: Connected to the GND pin on the Arduino UNO.
- 5V: Powered by the 5V pin on the Arduino UNO.
- SCA: Connected to the A4 pin on the Arduino UNO.
- SCL: Connected to the A5 pin on the Arduino UNO.
Documented Code
Arduino UNO Code (sketch.ino)
void setup() {
  // put your setup code here, to run once:

}

void loop() {
  // put your main code here, to run repeatedly:

}
Note: The provided code is a template and does not contain any functional code. It is expected that the user will fill in the setup and loop functions with the necessary code to read the IR sensors, control the servo motor, and update the LCD display.