
Arduino UNO Controlled Multi-Servo Robotic Arm with Joystick and Push Button Interface
View and Edit Project In Cirkit Designer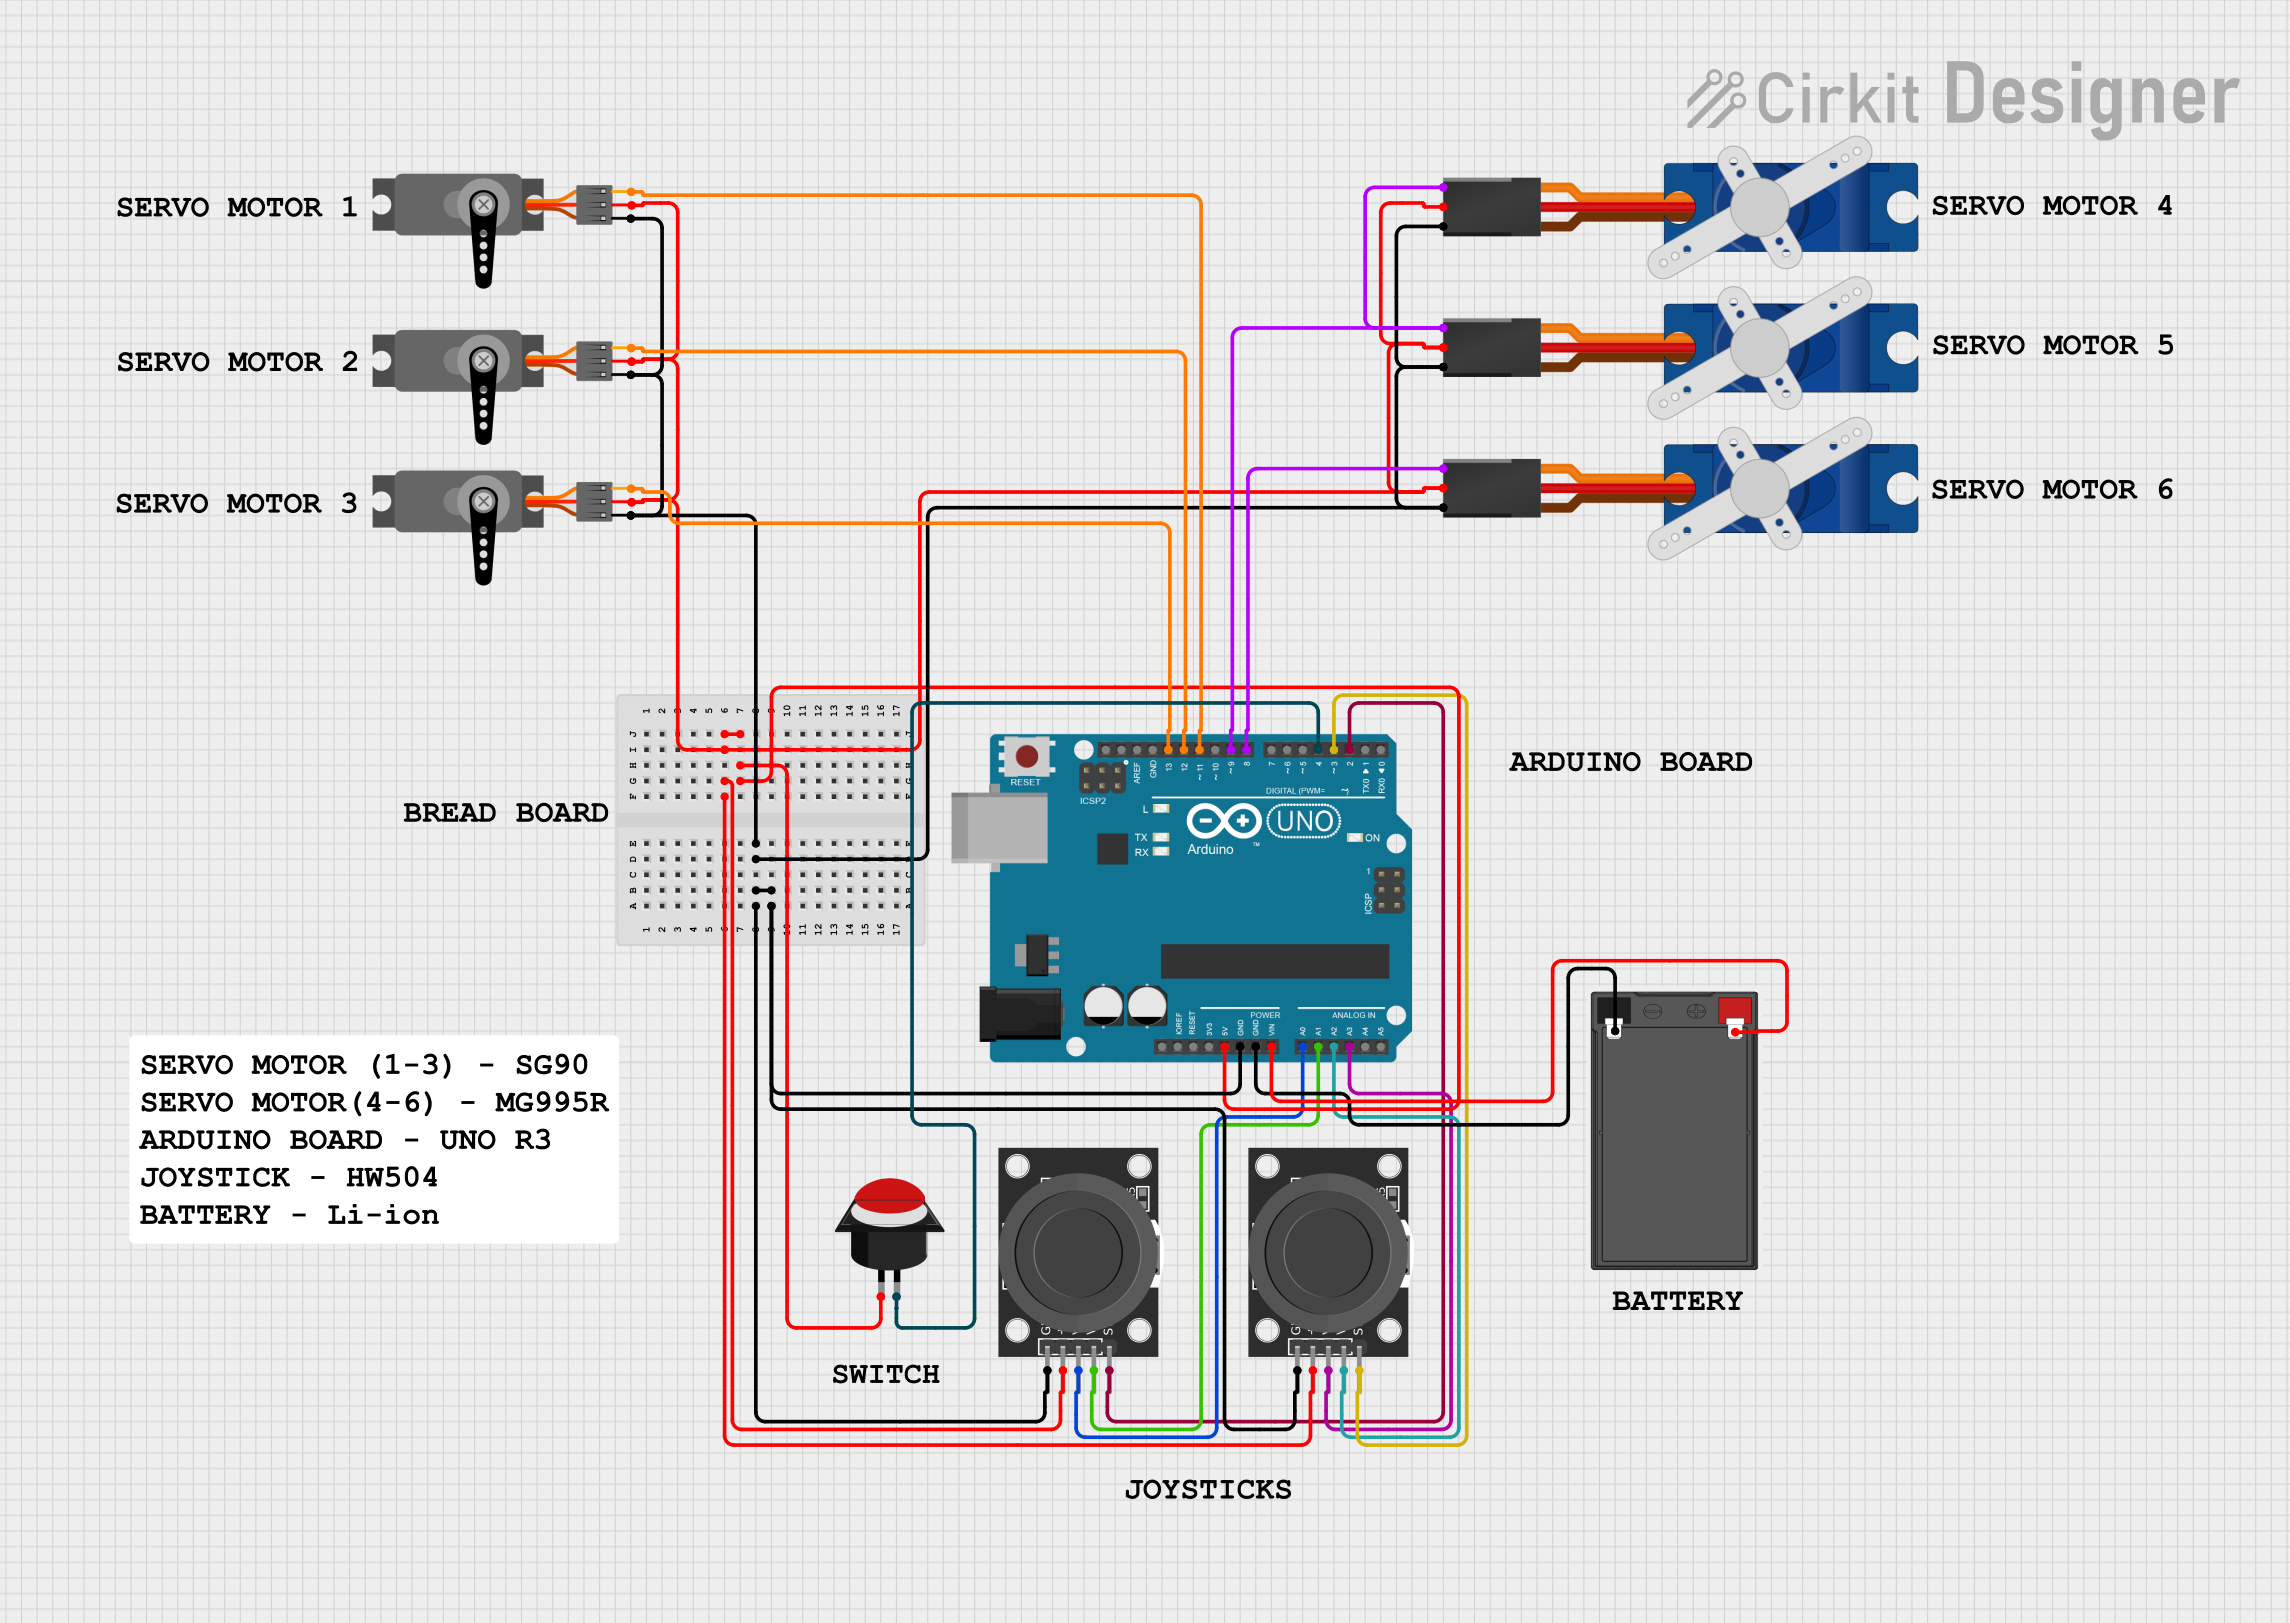
Circuit Documentation
Summary
This circuit involves an Arduino UNO microcontroller, multiple servos, a dual-axis joystick module, a push button, and a battery. The Arduino UNO is used to control the servos and read inputs from the joystick and push button. The battery powers the entire circuit.
Component List
Arduino UNO
- Description: A microcontroller board based on the ATmega328P.
- Pins: UNUSED, IOREF, Reset, 3.3V, 5V, GND, Vin, A0, A1, A2, A3, A4, A5, SCL, SDA, AREF, D13, D12, D11, D10, D9, D8, D7, D6, D5, D4, D3, D2, D1, D0
Servo
- Description: A standard servo motor.
- Pins: GND, VCC, PWM
Tower Pro SG90 Servo
- Description: A micro servo motor.
- Pins: Signal, +5V, GND
KY-023 Dual Axis Joystick Module
- Description: A joystick module with two potentiometers and a push button.
- Pins: GND, +5V, VRx, VRy, SW
Push Button Round
- Description: A simple push button.
- Pins: leg0, leg1
Battery
- Description: A power source for the circuit.
- Pins: -, +
Wiring Details
Arduino UNO
- 5V: Connected to +5V of Tower Pro SG90 servos, VCC of Servos, leg0 of Push Button, and +5V of KY-023 Dual Axis Joystick Modules.
- GND: Connected to GND of Tower Pro SG90 servos, GND of Servos, and GND of KY-023 Dual Axis Joystick Modules.
- Vin: Connected to + of Battery.
- A0: Connected to VRx of KY-023 Dual Axis Joystick Module.
- A1: Connected to VRy of KY-023 Dual Axis Joystick Module.
- A2: Connected to VRy of KY-023 Dual Axis Joystick Module.
- A3: Connected to VRx of KY-023 Dual Axis Joystick Module.
- D13: Connected to PWM of Servo.
- D12: Connected to PWM of Servo.
- D11: Connected to PWM of Servo.
- D9: Connected to Signal of Tower Pro SG90 servos.
- D8: Connected to Signal of Tower Pro SG90 servo.
- D4: Connected to leg1 of Push Button.
- D3: Connected to SW of KY-023 Dual Axis Joystick Module.
- D2: Connected to SW of KY-023 Dual Axis Joystick Module.
Servo
- GND: Connected to GND of Arduino UNO.
- VCC: Connected to 5V of Arduino UNO.
- PWM: Connected to D13, D12, and D11 of Arduino UNO.
Tower Pro SG90 Servo
- Signal: Connected to D9 and D8 of Arduino UNO.
- +5V: Connected to 5V of Arduino UNO.
- GND: Connected to GND of Arduino UNO.
KY-023 Dual Axis Joystick Module
- GND: Connected to GND of Arduino UNO.
- +5V: Connected to 5V of Arduino UNO.
- VRx: Connected to A0 and A3 of Arduino UNO.
- VRy: Connected to A1 and A2 of Arduino UNO.
- SW: Connected to D3 and D2 of Arduino UNO.
Push Button Round
- leg0: Connected to 5V of Arduino UNO.
- leg1: Connected to D4 of Arduino UNO.
Battery
- -: Connected to GND of Arduino UNO.
- +: Connected to Vin of Arduino UNO.
Documented Code
Arduino UNO Code
void setup() {
  // put your setup code here, to run once:

}

void loop() {
  // put your main code here, to run repeatedly:

}
KY-023 Dual Axis Joystick Module Code
void setup() {
  // put your setup code here, to run once:

}

void loop() {
  // put your main code here, to run repeatedly:

}
KY-023 Dual Axis Joystick Module Code
void setup() {
  // put your setup code here, to run once:

}

void loop() {
  // put your main code here, to run repeatedly:

}
This documentation provides a comprehensive overview of the circuit, including a summary, component list, wiring details, and the code used in the microcontrollers.