
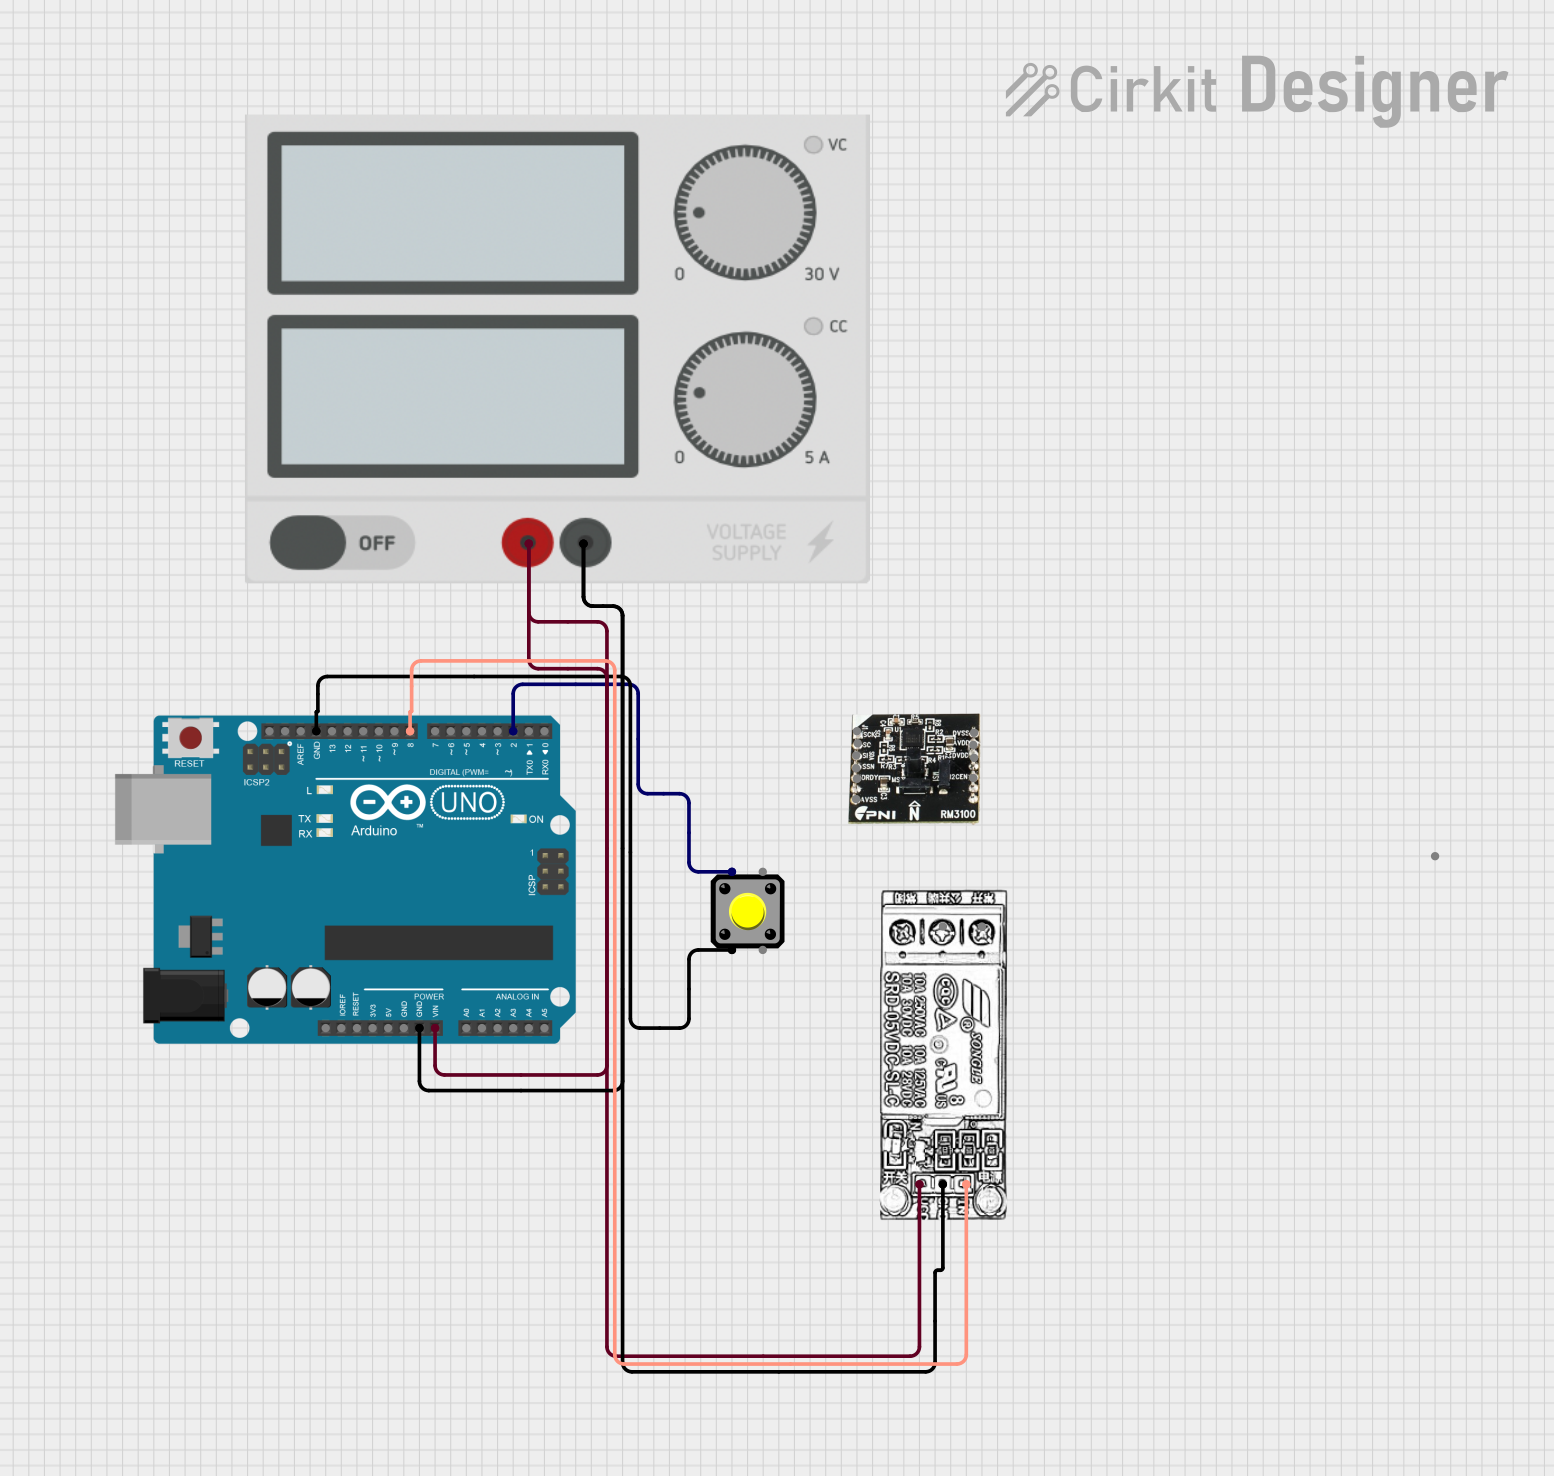
Circuit Documentation
Summary of the Circuit
This circuit is designed to control a relay module using an Arduino UNO based on the state of a pushbutton. The relay can be used to switch higher power devices on and off. The Arduino UNO reads the state of the pushbutton and toggles the relay accordingly. The power supply provides the necessary voltage to the Arduino and the relay module. The circuit includes debouncing for the pushbutton to prevent false triggering due to contact bounce.
Component List
Arduino UNO
- Description: A microcontroller board based on the ATmega328P.
- Purpose: Acts as the central controller for reading the pushbutton state and controlling the relay module.
Pushbutton
- Description: A simple switch mechanism for control of a circuit.
- Purpose: Provides a user interface to control the relay.
RELAY MODULE
- Description: An electrically operated switch that allows you to control a circuit by a low-power signal.
- Purpose: Switches a higher power circuit on and off as commanded by the Arduino UNO.
Power Supply
- Description: Provides the required electrical power to the circuit.
- Purpose: Powers the Arduino UNO and the relay module.
Wiring Details
Arduino UNO
- GND: Connected to the ground (-) of the power supply and GND of the relay module.
- Vin: Connected to the positive (+) of the power supply and VCC of the relay module.
- D8: Connected to the INPUT of the relay module.
- D2: Connected to Pin 1 of the pushbutton.
Pushbutton
- Pin 2: Connected to the ground (GND) of the Arduino UNO.
- Pin 1: Connected to digital pin D2 of the Arduino UNO.
RELAY MODULE
- GND: Connected to the ground (-) of the power supply and GND of the Arduino UNO.
- VCC: Connected to the positive (+) of the power supply and Vin of the Arduino UNO.
- INPUT: Connected to digital pin D8 of the Arduino UNO.
Power Supply
- +: Connected to Vin of the Arduino UNO and VCC of the relay module.
- -: Connected to GND of the Arduino UNO and GND of the relay module.
Documented Code
// sketch.ino
const int buttonPin = 2;    // the number of the pushbutton pin
const int relayPin = 8;     // the number of the relay pin

int buttonState = 0;        // variable for reading the pushbutton status
int relayState = LOW;       // variable for relay state

void setup() {
  pinMode(buttonPin, INPUT);
  pinMode(relayPin, OUTPUT);
  digitalWrite(relayPin, relayState);
}

void loop() {
  buttonState = digitalRead(buttonPin);

  if (buttonState == HIGH) {
    relayState = !relayState;
    digitalWrite(relayPin, relayState);
    delay(300); // Debounce delay
  }
}
File Name: sketch.ino
Description: This code sets up the Arduino UNO to read the state of a pushbutton and control a relay. The relay's state is toggled each time the pushbutton is pressed. A debounce delay is included to prevent false triggering.