
Arduino and ESP8266 Wi-Fi Controlled Environmental Sensing Station with Solar Charging
View and Edit Project In Cirkit Designer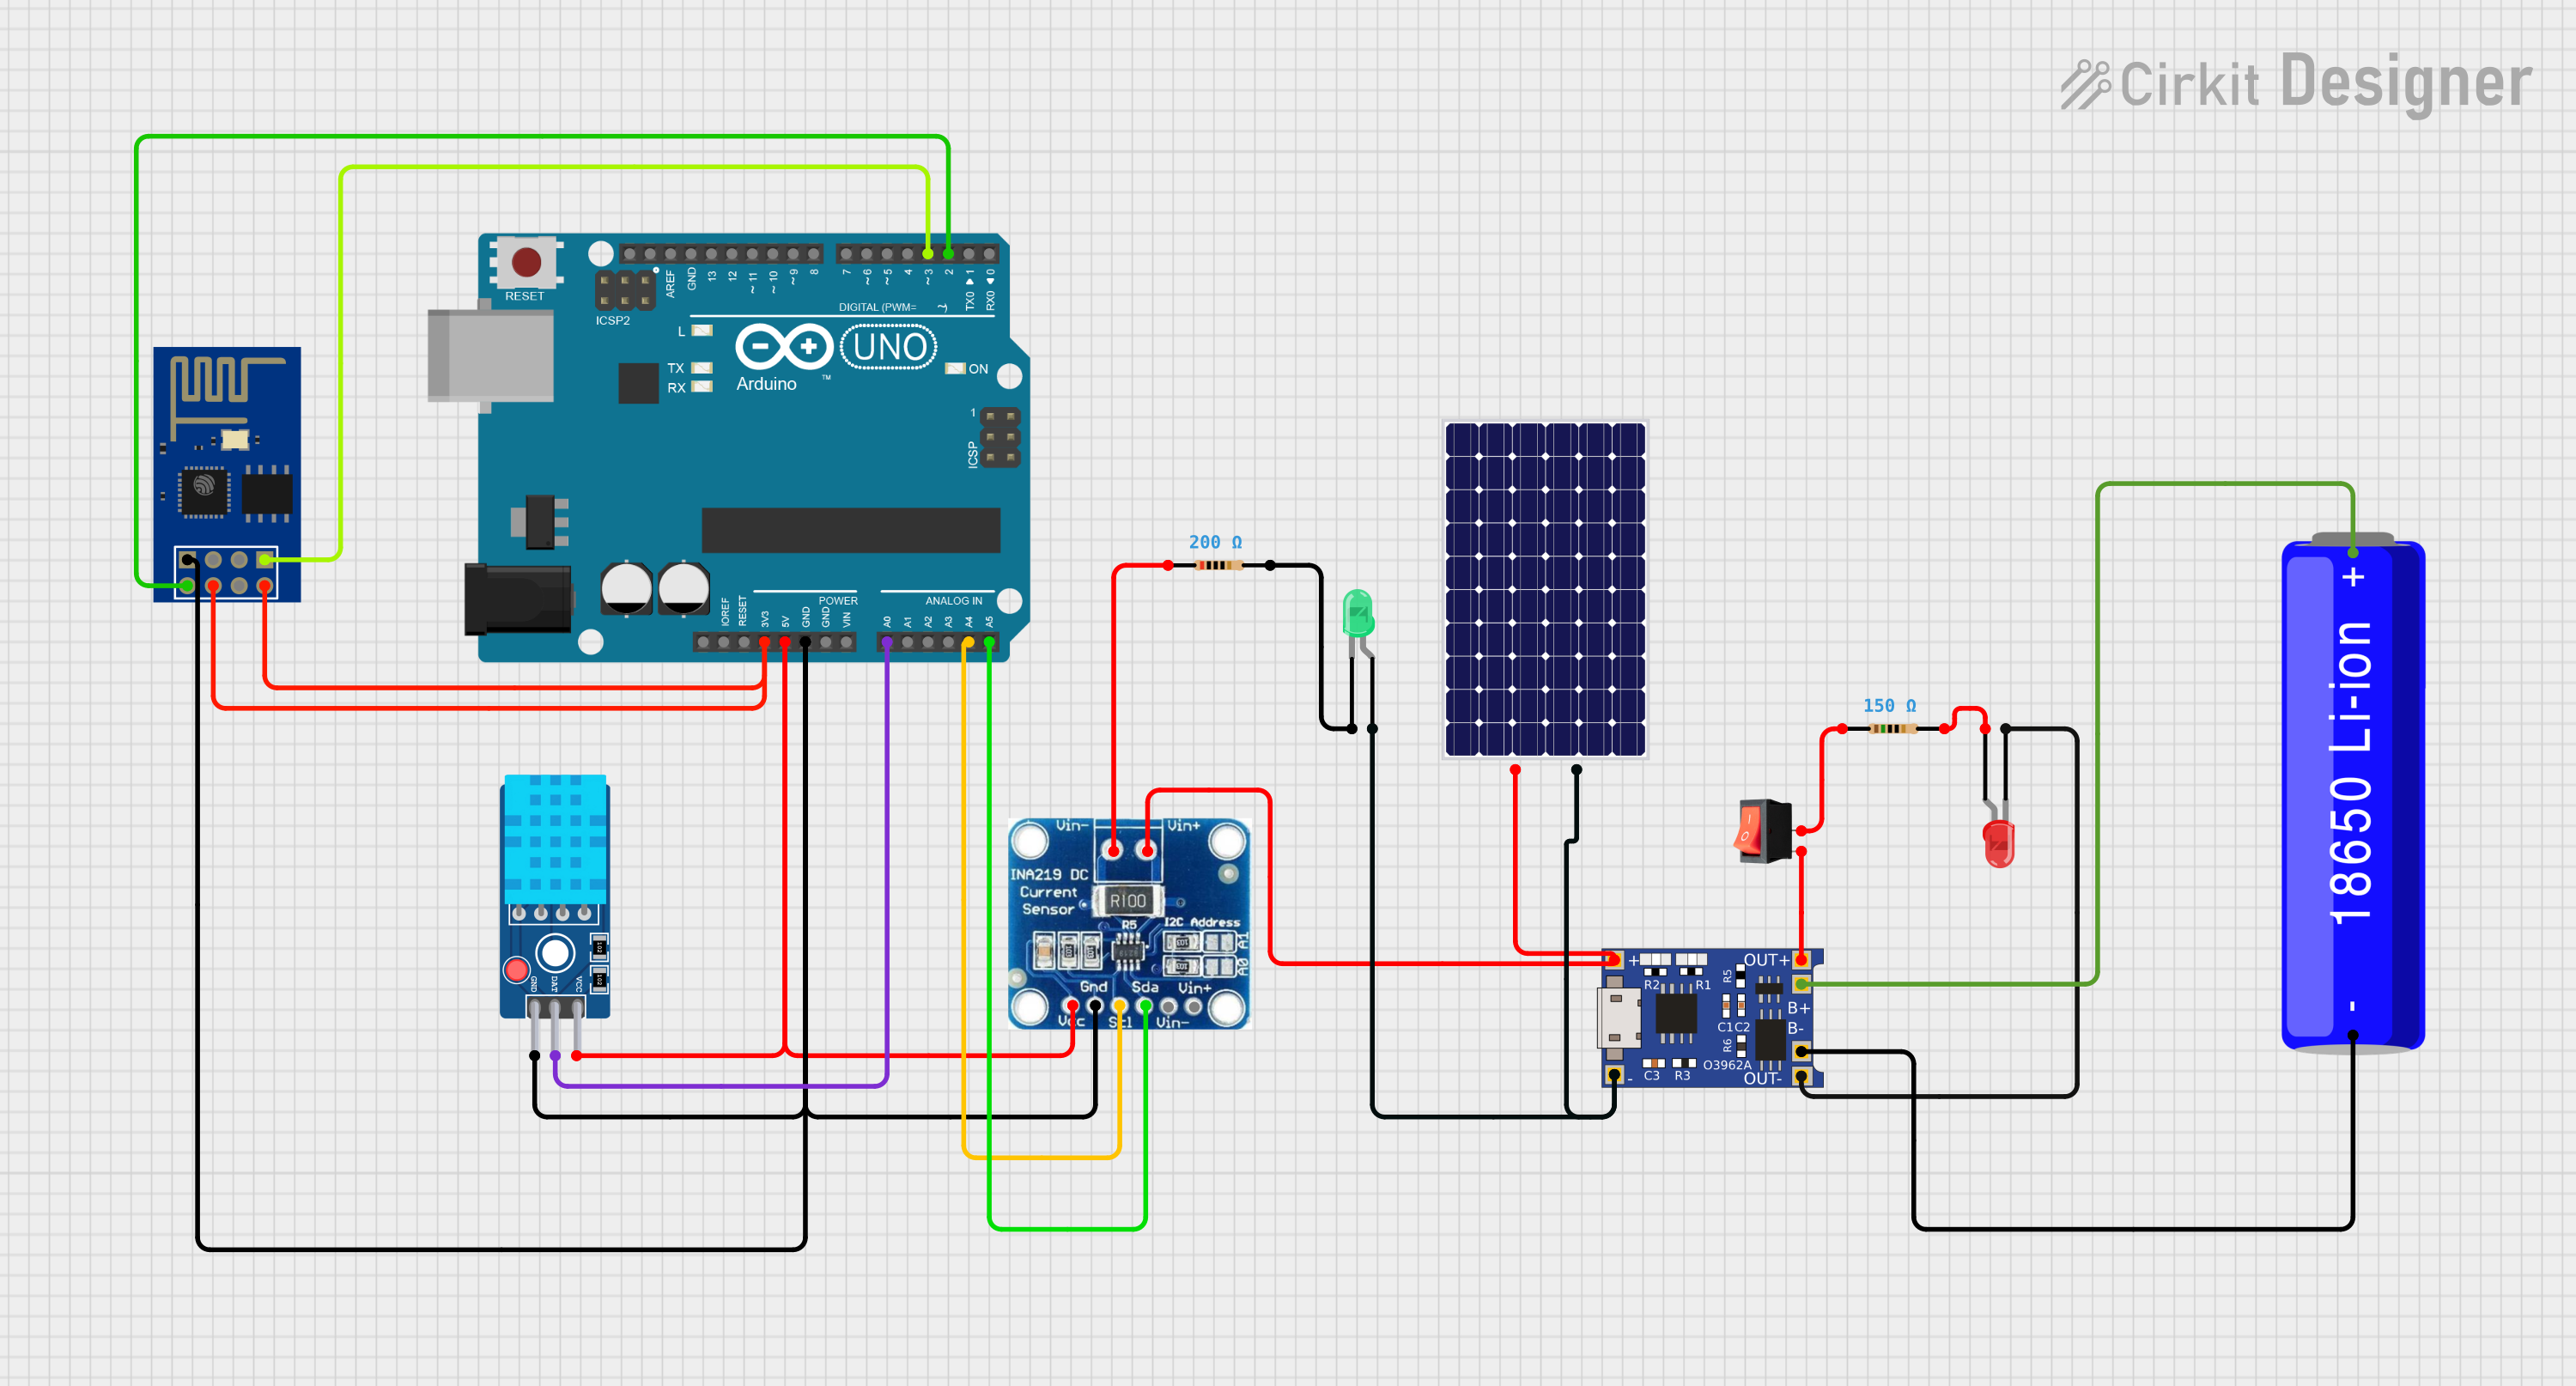
Circuit Documentation
Summary of the Circuit
This circuit integrates various components to perform a set of functions that are not explicitly defined in the provided information. However, based on the components and connections, we can infer that the circuit is designed to interface an Arduino UNO with an ESP8266 ESP-01 WiFi module, a DHT11 temperature and humidity sensor, a current sensor, and a charging module for a Li-ion battery powered by a solar panel. The circuit includes LED indicators and a rocker switch for user interaction.
Component List
Arduino UNO
- Microcontroller board based on the ATmega328P
- It has 14 digital input/output pins, 6 analog inputs, a 16 MHz quartz crystal, a USB connection, a power jack, an ICSP header, and a reset button.
TP4056
- A complete constant-current/constant-voltage linear charger for single-cell lithium-ion batteries.
LED: Two Pin (red)
- A red light-emitting diode used as an indicator.
18650 Li-ion Battery
- A standard size rechargeable battery used in laptops, flashlights, and various other devices.
Solar Panel
- A photovoltaic panel designed to absorb the sun's rays as a source of energy for generating electricity.
Resistor (150 Ohms)
- A passive two-terminal electrical component that implements electrical resistance as a circuit element.
Rocker Switch
- An on-off switch that rocks (rather than trips) when pressed.
Current Sensor
- A device that detects electric current in a wire and generates a signal proportional to it.
LED: Two Pin (green)
- A green light-emitting diode used as an indicator.
DHT11 Sensor V2
- A basic, ultra low-cost digital temperature and humidity sensor.
ESP8266 ESP-01 WiFi Module
- A self-contained SOC with integrated TCP/IP protocol stack that can give any microcontroller access to your WiFi network.
Resistor (200 Ohms)
- Another passive two-terminal electrical component used to create resistance in the flow of electric current.
Wiring Details
Arduino UNO
3.3Vconnected to ESP8266 ESP-01 WiFi ModuleCH_PDandVCC5Vconnected to DHT11 Sensor V2VCCand current sensorVccGNDconnected to DHT11 Sensor V2GND, ESP8266 ESP-01 WiFi ModuleGND, and current sensorgndA0connected to DHT11 Sensor V2DATA4connected to current sensorSClA5connected to current sensorSdaD3connected to ESP8266 ESP-01 WiFi ModuleRXDD2connected to ESP8266 ESP-01 WiFi ModuleTXD
TP4056
OUT-connected to LED (red)cathodeB-connected to 18650 Li-ion Battery-B+connected to 18650 Li-ion Battery+OUT+connected to rocker switchinputIN-connected to LED (green)anodeand solar panel-IN+connected to solar panel+and current sensorvin +
LED: Two Pin (red)
anodeconnected to Resistor (150 Ohms)pin2
LED: Two Pin (green)
cathodeconnected to Resistor (200 Ohms)pin2
Resistor (150 Ohms)
pin1connected to rocker switchoutput
Resistor (200 Ohms)
pin1connected to current sensorVin -
Documented Code
Arduino UNO Code (sketch.ino)
void setup() {
  // put your setup code here, to run once:

}

void loop() {
  // put your main code here, to run repeatedly:

}
Note: The provided code is a template and does not contain any functional code. It is expected that the user will fill in the setup and loop functions with code that initializes the connected components and defines the main behavior of the circuit.