Cirkit Designer
Your all-in-one circuit design IDE
Home /
Project Documentation
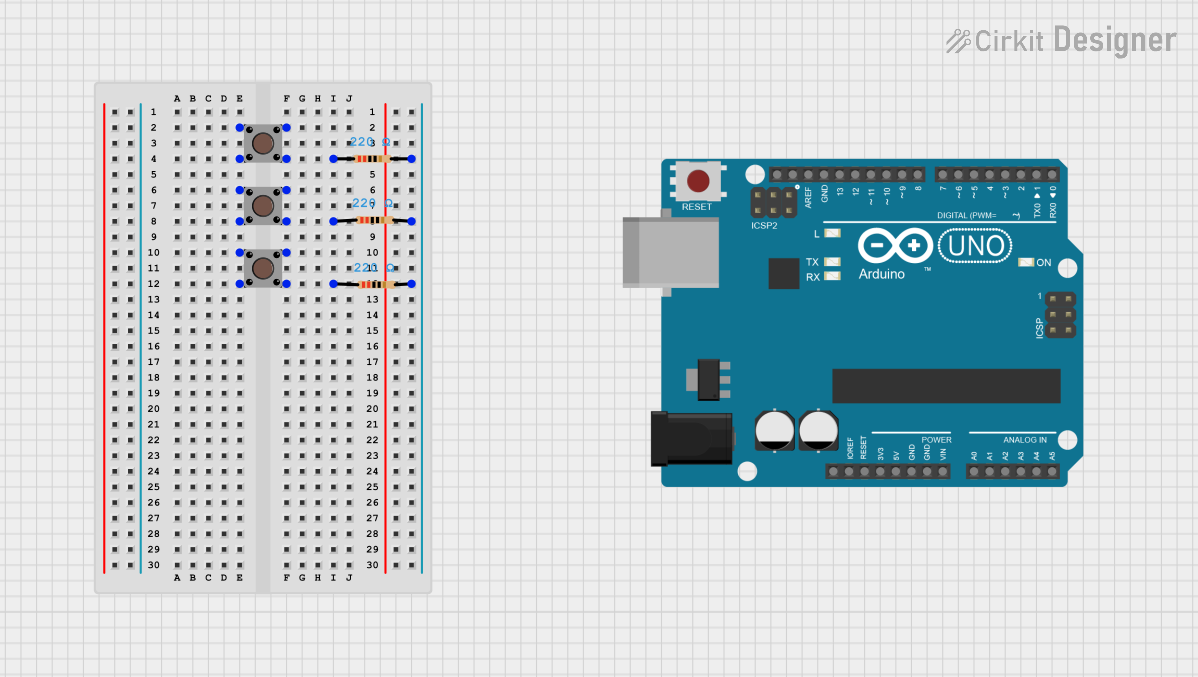
Arduino UNO Pushbutton-Controlled Circuit with Resistors
Circuit Documentation
Summary
This circuit consists of an Arduino UNO microcontroller, three pushbuttons, and three resistors. The pushbuttons are connected to the Arduino through resistors, which are used to limit the current. The Arduino is programmed to handle the input from the pushbuttons.
Component List
Arduino UNO
- Description: A microcontroller board based on the ATmega328P.
- Pins: UNUSED, IOREF, Reset, 3.3V, 5V, GND, Vin, A0, A1, A2, A3, A4, A5, SCL, SDA, AREF, D13, D12, D11, D10, D9, D8, D7, D6, D5, D4, D3, D2, D1, D0
Pushbutton 1
- Description: A simple pushbutton switch.
- Pins: Pin 3 (out), Pin 4 (out), Pin 1 (in), Pin 2 (in)
Pushbutton 2
- Description: A simple pushbutton switch.
- Pins: Pin 3 (out), Pin 4 (out), Pin 1 (in), Pin 2 (in)
Pushbutton 3
- Description: A simple pushbutton switch.
- Pins: Pin 3 (out), Pin 4 (out), Pin 1 (in), Pin 2 (in)
Resistor 1
- Description: A resistor with a resistance of 220 Ohms.
- Pins: pin1, pin2
Resistor 2
- Description: A resistor with a resistance of 220 Ohms.
- Pins: pin1, pin2
Resistor 3
- Description: A resistor with a resistance of 220 Ohms.
- Pins: pin1, pin2
Wiring Details
Arduino UNO
- Pin Connections:
- No direct connections specified in the net list.
Pushbutton 1
- Pin 3 (out): Connected to Resistor 1 pin1
- Pin 4 (out): Not connected
- Pin 1 (in): Not connected
- Pin 2 (in): Not connected
Pushbutton 2
- Pin 3 (out): Connected to Resistor 2 pin1
- Pin 4 (out): Not connected
- Pin 1 (in): Not connected
- Pin 2 (in): Not connected
Pushbutton 3
- Pin 3 (out): Connected to Resistor 3 pin1
- Pin 4 (out): Not connected
- Pin 1 (in): Not connected
- Pin 2 (in): Not connected
Resistor 1
- pin1: Connected to Pushbutton 1 Pin 3 (out)
- pin2: Connected to Resistor 2 pin2 and Resistor 3 pin2
Resistor 2
- pin1: Connected to Pushbutton 2 Pin 3 (out)
- pin2: Connected to Resistor 1 pin2 and Resistor 3 pin2
Resistor 3
- pin1: Connected to Pushbutton 3 Pin 3 (out)
- pin2: Connected to Resistor 1 pin2 and Resistor 2 pin2
Code Documentation
Arduino UNO Code
sketch.ino
void setup() {
  // put your setup code here, to run once:

}

void loop() {
  // put your main code here, to run repeatedly:

}
documentation.txt