
Raspberry Pi and Arduino-Based Smart Camera System with USB Power
View and Edit Project In Cirkit Designer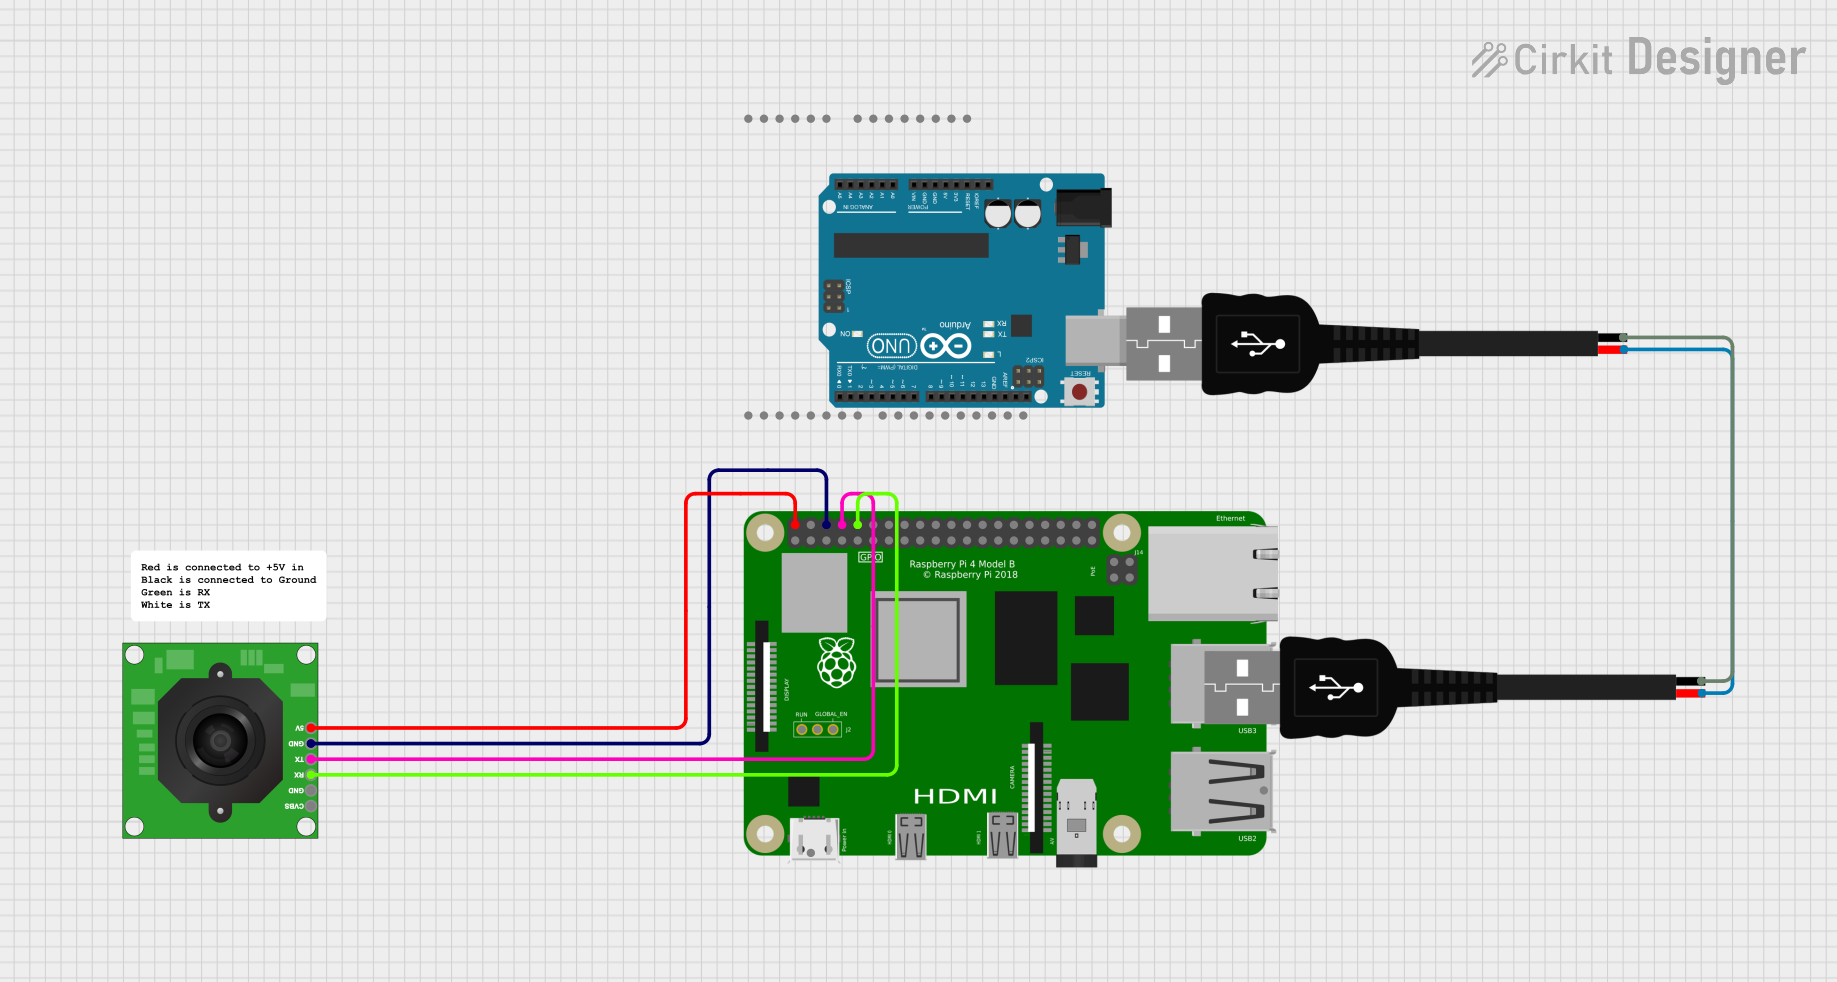
Circuit Documentation
Summary
This document provides a detailed overview of a circuit involving a Raspberry Pi 4B, a TTL Serial JPEG Camera, an Arduino UNO, and USB connections. The circuit is designed to interface a camera with a Raspberry Pi for image capture and processing, with additional power connections provided via USB.
Component List
Raspberry Pi 4B
- Description: A powerful single-board computer used for various applications including IoT, robotics, and more.
- Pins: 3V3, 5V, GPIO2, GPIO3, GND, GPIO4, GPIO14, GPIO15, GPIO17, GPIO18, GPIO27, GPIO22, GPIO23, GPIO24, GPIO10, GPIO9, GPIO25, GPIO11, GPIO8, GPIO7, ID_SD, GPIO5, GPIO6, GPIO12, GPIO13, GPIO19, GPIO16, GPIO26, GPIO20, GPIO21, ID_SC, TR01_TAP, TR00_TAP, TR03_TAP, TR02_TAP, RUN, GLOBAL_EN
TTL Serial JPEG Camera
- Description: A camera module that outputs JPEG images over a TTL serial interface.
- Pins: GND, RX, TX, CVBS, 5V
Arduino UNO
- Description: A popular microcontroller board used for prototyping and educational purposes.
- Pins: UNUSED, IOREF, Reset, 3.3V, 5V, GND, Vin, A0, A1, A2, A3, A4, A5, SCL, SDA, AREF, D13, D12, D11, D10, D9, D8, D7, D6, D5, D4, D3, D2, D1, D0
USB Male 2 Pin Connection
- Description: A standard USB male connector used for power supply.
- Pins: Negative -, Positive +
Wiring Details
Raspberry Pi 4B
- 5V connected to 5V of TTL Serial JPEG Camera
- GND connected to GND of TTL Serial JPEG Camera
- GPIO14 connected to RX of TTL Serial JPEG Camera
- GPIO15 connected to TX of TTL Serial JPEG Camera
TTL Serial JPEG Camera
- 5V connected to 5V of Raspberry Pi 4B
- GND connected to GND of Raspberry Pi 4B
- RX connected to GPIO14 of Raspberry Pi 4B
- TX connected to GPIO15 of Raspberry Pi 4B
USB Male 2 Pin Connection
- Negative - connected to Negative - of another USB Male 2 Pin Connection
- Positive + connected to Positive + of another USB Male 2 Pin Connection
Documented Code
Arduino UNO Code
void setup() {
  // put your setup code here, to run once:

}

void loop() {
  // put your main code here, to run repeatedly:

}
Additional Documentation
This document provides a comprehensive overview of the circuit, including the components used, their connections, and the code running on the Arduino UNO.