
Arduino UNO-Based Digital Weighing Scale with 7-Segment Display
View and Edit Project In Cirkit Designer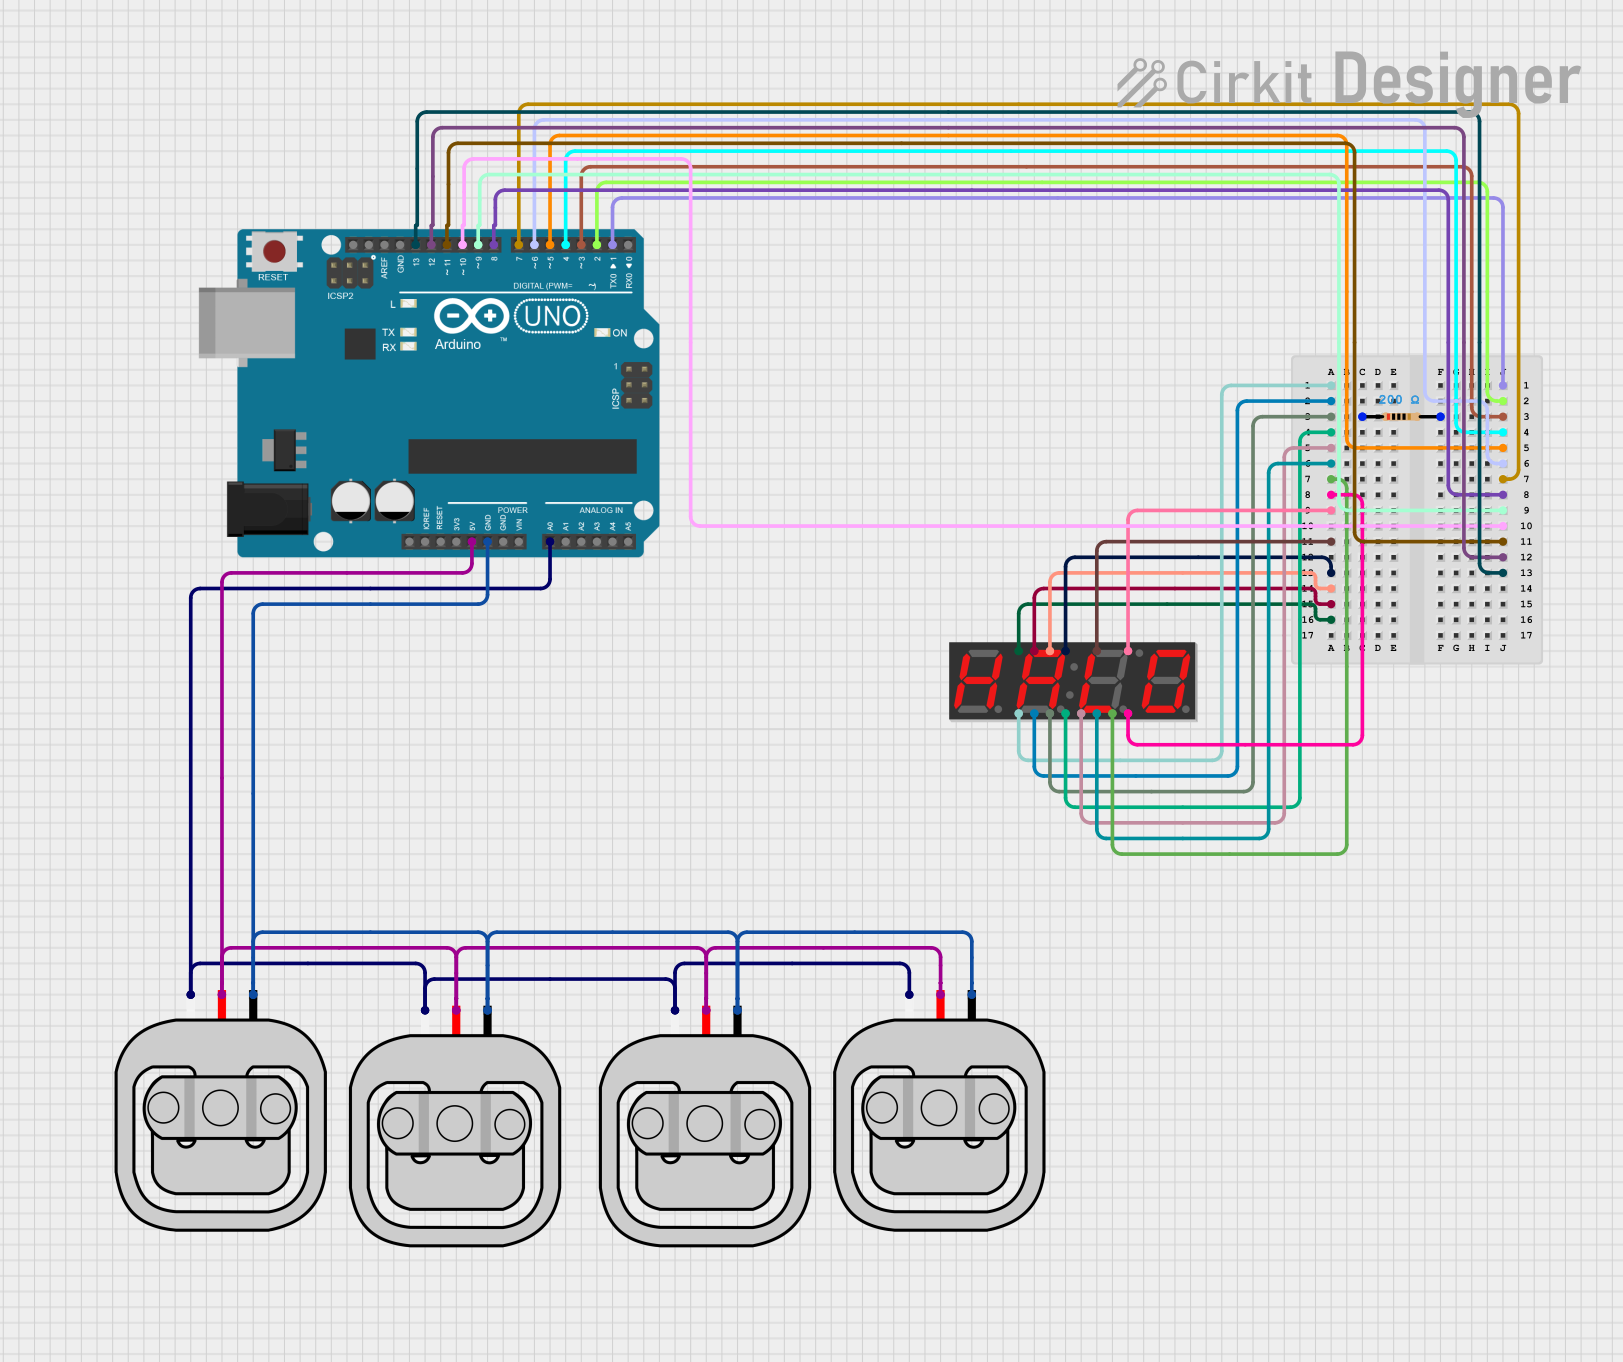
Circuit Documentation
Summary
This circuit consists of an Arduino UNO microcontroller, four load sensors, a 4-digit 7-segment display, and two resistors. The Arduino UNO is used to read data from the load sensors and display the results on the 7-segment display. The resistors are used to limit the current to the display.
Component List
Arduino UNO
- Description: A microcontroller board based on the ATmega328P.
- Pins: UNUSED, IOREF, Reset, 3.3V, 5V, GND, Vin, A0, A1, A2, A3, A4, A5, SCL, SDA, AREF, D13, D12, D11, D10, D9, D8, D7, D6, D5, D4, D3, D2, D1, D0
Load Sensor - 50kg
- Description: A sensor used to measure weight up to 50kg.
- Pins: W, R, B
7-Segment Display (4 Digit)
- Description: A display module used to show numerical data.
- Pins: 1, 2, 3, 4, 5, 6, 7, 8, 9, 11, 13, 14, 15, 16
Resistor
- Description: A passive electrical component that limits current.
- Pins: pin1, pin2
- Properties:
- Resistance: 200 Ohms
Wiring Details
Arduino UNO
- D1: Not connected
- D2: Not connected
- D3: Connected to pin2 of Resistor 1 and pin2 of Resistor 2
- D4: Not connected
- D5: Not connected
- D6: Not connected
- D7: Not connected
- D8: Not connected
- D9: Not connected
- D10: Not connected
- D11: Not connected
- D12: Not connected
- D13: Not connected
- 5V: Connected to pin R of all Load Sensors
- GND: Connected to pin B of all Load Sensors
- A0: Connected to pin W of all Load Sensors
Load Sensor - 50kg
- W: Connected to A0 of Arduino UNO
- R: Connected to 5V of Arduino UNO
- B: Connected to GND of Arduino UNO
7-Segment Display (4 Digit)
- Pin 1: Not connected
- Pin 2: Not connected
- Pin 3: Connected to pin1 of Resistor 1 and pin1 of Resistor 2
- Pin 4: Not connected
- Pin 5: Not connected
- Pin 6: Not connected
- Pin 7: Not connected
- Pin 8: Not connected
- Pin 9: Not connected
- Pin 11: Not connected
- Pin 13: Not connected
- Pin 14: Not connected
- Pin 15: Not connected
- Pin 16: Not connected
Resistor 1
- Pin 1: Connected to pin3 of 7-Segment Display
- Pin 2: Connected to D3 of Arduino UNO
Resistor 2
- Pin 1: Connected to pin3 of 7-Segment Display
- Pin 2: Connected to D3 of Arduino UNO
Code Documentation
Arduino UNO Code
void setup() {
  // put your setup code here, to run once:

}

void loop() {
  // put your main code here, to run repeatedly:

}
This code is a basic template for the Arduino UNO. The setup function is used to initialize any settings or configurations, and the loop function contains the main code that runs repeatedly. Currently, both functions are empty and need to be filled with the appropriate logic for reading the load sensors and displaying the data on the 7-segment display.