
Circuit Documentation
Summary of the Circuit
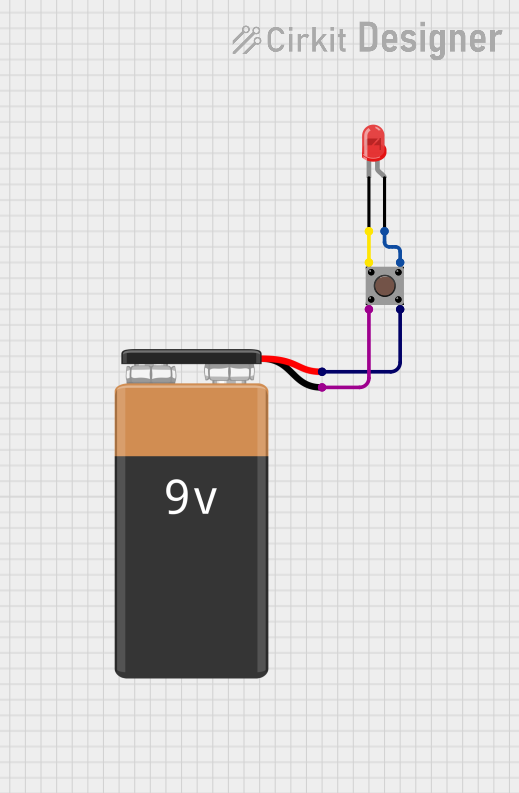
The circuit described by the provided inputs is a simple pushbutton-controlled LED circuit powered by a 9V battery. When the pushbutton is pressed, the circuit is completed, allowing current to flow from the battery through the LED, causing it to light up. The circuit is straightforward and does not include any microcontrollers or complex components, making it an ideal project for beginners in electronics.
Component List
Pushbutton
- Description: A standard pushbutton used to open or close the circuit.
- Pins:
- Pin 3 (out)
- Pin 4 (out)
- Pin 1 (in)
- Pin 2 (in)
- Purpose: Acts as a switch to control the flow of current to the LED.
LED: Two Pin (red)
- Description: A basic two-pin red LED.
- Pins:
- Cathode
- Anode
- Purpose: Emits light when current flows through it.
9V Battery
- Description: A standard 9V battery providing the power source for the circuit.
- Pins:
- Positive (+)
- Negative (-)
- Purpose: Supplies electrical power to the circuit.
Wiring Details
Pushbutton
- Pin 3 (out) is connected to the anode of the LED.
- Pin 4 (out) is connected to the positive (+) terminal of the 9V Battery.
- Pin 1 (in) is connected to the cathode of the LED.
- Pin 2 (in) is connected to the negative (-) terminal of the 9V Battery.
LED: Two Pin (red)
- Anode is connected to Pin 3 (out) of the Pushbutton.
- Cathode is connected to Pin 1 (in) of the Pushbutton.
9V Battery
- Positive (+) terminal is connected to Pin 4 (out) of the Pushbutton.
- Negative (-) terminal is connected to Pin 2 (in) of the Pushbutton.
Documented Code
There is no microcontroller or embedded code associated with this circuit. Therefore, this section is not applicable to the current documentation.