
Arduino UNO RFID Reader with LED Indicator and Battery Power
View and Edit Project In Cirkit Designer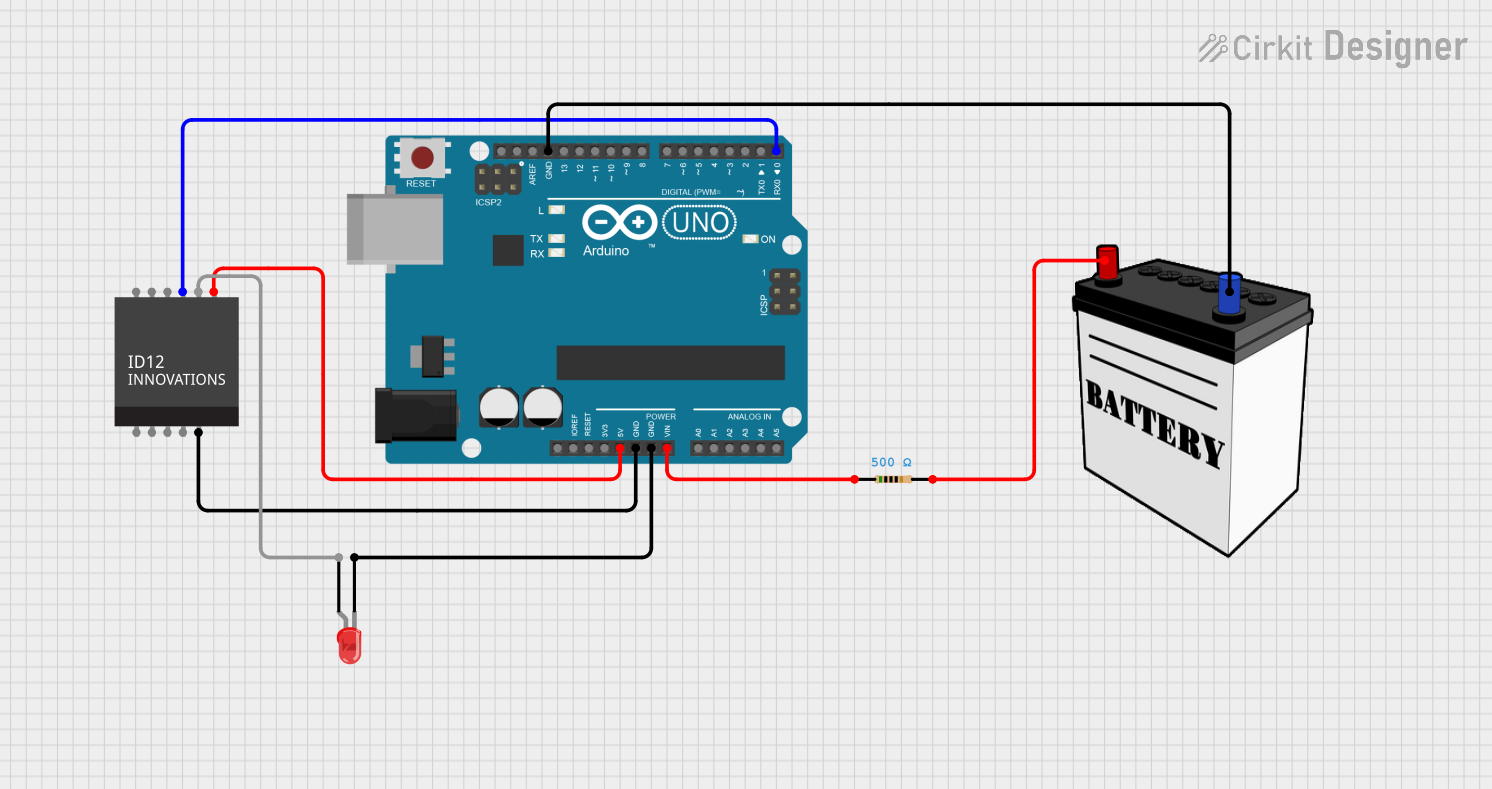
Circuit Documentation
Summary
This circuit involves an Arduino UNO microcontroller, an RFID reader, a red LED, a 12V battery, and a resistor. The Arduino UNO serves as the central controller, interfacing with the RFID reader and controlling the LED. The 12V battery powers the circuit through a resistor.
Component List
Arduino UNO
- Description: A microcontroller board based on the ATmega328P.
- Pins: UNUSED, IOREF, Reset, 3.3V, 5V, GND, Vin, A0, A1, A2, A3, A4, A5, SCL, SDA, AREF, D13, D12, D11, D10, D9, D8, D7, D6, D5, D4, D3, D2, D1, D0
RFID (ID12)
- Description: An RFID reader module.
- Pins: +5V, RES, ANT0, ANT1, CP, Future, +/-, D1, D0, LED, GND
LED: Two Pin (red)
- Description: A red LED with two pins.
- Pins: cathode, anode
12V Battery
- Description: A 12V power source.
- Pins: VCC, GND
Resistor
- Description: A resistor with a resistance of 500 Ohms.
- Pins: pin1, pin2
- Properties: Resistance = 500 Ohms
Wiring Details
Arduino UNO
- 5V is connected to +5V of the RFID (ID12).
- GND is connected to:
- GND of the RFID (ID12).
- cathode of the LED.
- GND of the 12V Battery.
- Vin is connected to pin1 of the Resistor.
- D0 is connected to D0 of the RFID (ID12).
RFID (ID12)
- +5V is connected to 5V of the Arduino UNO.
- GND is connected to GND of the Arduino UNO.
- D0 is connected to D0 of the Arduino UNO.
- LED is connected to anode of the LED.
LED: Two Pin (red)
- cathode is connected to GND of the Arduino UNO.
- anode is connected to LED of the RFID (ID12).
12V Battery
- VCC is connected to pin2 of the Resistor.
- GND is connected to GND of the Arduino UNO.
Resistor
- pin1 is connected to Vin of the Arduino UNO.
- pin2 is connected to VCC of the 12V Battery.
Code Documentation
Arduino UNO Code
void setup() {
  // put your setup code here, to run once:

}

void loop() {
  // put your main code here, to run repeatedly:

}
This code is a basic template for the Arduino UNO. The setup() function is where you initialize your settings, and the loop() function is where the main code runs repeatedly. Currently, both functions are empty and need to be filled with the appropriate logic for the circuit's operation.