Cirkit Designer Logo
Cirkit Designer
Your all-in-one circuit design IDE
Home / 
Component Documentation

How to Use CubePilot Power Brick Mini: Examples, Pinouts, and Specs

Image of CubePilot Power Brick Mini
Cirkit Designer LogoDesign with CubePilot Power Brick Mini in Cirkit Designer

Introduction

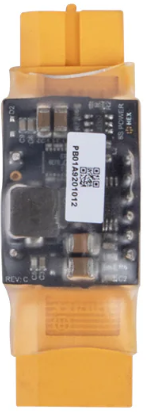
The CubePilot Power Brick Mini is a compact and efficient power management module designed specifically for use with the CubePilot flight controller. It provides regulated power to various components in drones, robotic systems, and other embedded applications. The Power Brick Mini ensures stable voltage and current delivery while also offering current and voltage sensing capabilities for monitoring power consumption.

Explore Projects Built with CubePilot Power Brick Mini

Use Cirkit Designer to design, explore, and prototype these projects online. Some projects support real-time simulation. Click "Open Project" to start designing instantly!
Arduino-Controlled Quadcopter with GPS and NRF24L01 Wireless Communication
Image of Octocopter Drone Circuit1: A project utilizing CubePilot Power Brick Mini in a practical application
This circuit is designed for a quadcopter control system. It features an Arduino Pro Mini as the central microcontroller, interfacing with a GPS module for positioning, an NRF24L01 module for wireless communication, and an MPU-6050 for motion sensing. Power regulation is managed by an MP1584EN board, and four electronic speed controllers (ESCs) are connected to brushless motors for propeller control.
Cirkit Designer LogoOpen Project in Cirkit Designer
Beelink Mini S12 N95 and Arduino UNO Based Fingerprint Authentication System with ESP32 CAM
Image of design 3: A project utilizing CubePilot Power Brick Mini in a practical application
This circuit features a Beelink MINI S12 N95 computer connected to a 7-inch display via HDMI for video output and two USB connections for power and touch screen functionality. An Arduino UNO is interfaced with a fingerprint scanner for biometric input. The Beelink MINI S12 N95 is powered by a PC power supply, which in turn is connected to a 240V power source. Additionally, an ESP32 CAM module is powered and programmed via a USB plug and an FTDI programmer, respectively, for wireless camera capabilities.
Cirkit Designer LogoOpen Project in Cirkit Designer
Raspberry Pi-Controlled Drone with Brushless Motors and Camera Module
Image of ROV: A project utilizing CubePilot Power Brick Mini in a practical application
This circuit is designed for a multi-motor application, likely a drone or a similar vehicle, featuring eight brushless motors controlled by two 4-in-1 electronic speed controllers (ESCs). The ESCs are powered by a 3s2p 18650 battery pack and interfaced with a Pixhawk flight controller for motor management. Additionally, the system includes a Raspberry Pi 4B for advanced processing and control, which is connected to a NoIR camera module and a cooling fan, and a power module to supply and monitor the power to the Pixhawk.
Cirkit Designer LogoOpen Project in Cirkit Designer
Arduino Pro Mini and HC-05 Bluetooth Controlled Coreless Motor Clock with MPU-6050 Feedback
Image of drone: A project utilizing CubePilot Power Brick Mini in a practical application
This is a motion-controlled device with wireless capabilities, powered by a LiPo battery with voltage regulation. It uses an Arduino Pro Mini to process MPU-6050 sensor data and control coreless motors via MOSFETs, interfacing with an external device through an HC-05 Bluetooth module.
Cirkit Designer LogoOpen Project in Cirkit Designer

Explore Projects Built with CubePilot Power Brick Mini

Use Cirkit Designer to design, explore, and prototype these projects online. Some projects support real-time simulation. Click "Open Project" to start designing instantly!
Image of Octocopter Drone Circuit1: A project utilizing CubePilot Power Brick Mini in a practical application
Arduino-Controlled Quadcopter with GPS and NRF24L01 Wireless Communication
This circuit is designed for a quadcopter control system. It features an Arduino Pro Mini as the central microcontroller, interfacing with a GPS module for positioning, an NRF24L01 module for wireless communication, and an MPU-6050 for motion sensing. Power regulation is managed by an MP1584EN board, and four electronic speed controllers (ESCs) are connected to brushless motors for propeller control.
Cirkit Designer LogoOpen Project in Cirkit Designer
Image of design 3: A project utilizing CubePilot Power Brick Mini in a practical application
Beelink Mini S12 N95 and Arduino UNO Based Fingerprint Authentication System with ESP32 CAM
This circuit features a Beelink MINI S12 N95 computer connected to a 7-inch display via HDMI for video output and two USB connections for power and touch screen functionality. An Arduino UNO is interfaced with a fingerprint scanner for biometric input. The Beelink MINI S12 N95 is powered by a PC power supply, which in turn is connected to a 240V power source. Additionally, an ESP32 CAM module is powered and programmed via a USB plug and an FTDI programmer, respectively, for wireless camera capabilities.
Cirkit Designer LogoOpen Project in Cirkit Designer
Image of ROV: A project utilizing CubePilot Power Brick Mini in a practical application
Raspberry Pi-Controlled Drone with Brushless Motors and Camera Module
This circuit is designed for a multi-motor application, likely a drone or a similar vehicle, featuring eight brushless motors controlled by two 4-in-1 electronic speed controllers (ESCs). The ESCs are powered by a 3s2p 18650 battery pack and interfaced with a Pixhawk flight controller for motor management. Additionally, the system includes a Raspberry Pi 4B for advanced processing and control, which is connected to a NoIR camera module and a cooling fan, and a power module to supply and monitor the power to the Pixhawk.
Cirkit Designer LogoOpen Project in Cirkit Designer
Image of drone: A project utilizing CubePilot Power Brick Mini in a practical application
Arduino Pro Mini and HC-05 Bluetooth Controlled Coreless Motor Clock with MPU-6050 Feedback
This is a motion-controlled device with wireless capabilities, powered by a LiPo battery with voltage regulation. It uses an Arduino Pro Mini to process MPU-6050 sensor data and control coreless motors via MOSFETs, interfacing with an external device through an HC-05 Bluetooth module.
Cirkit Designer LogoOpen Project in Cirkit Designer

Common Applications and Use Cases

  • Powering CubePilot flight controllers and peripherals in drones
  • Voltage and current monitoring for UAV systems
  • Robotics and embedded systems requiring regulated power
  • Battery-powered applications needing power management

Technical Specifications

Key Technical Details

Parameter Value
Input Voltage Range 4.8V to 52.2V (2S to 12S LiPo batteries)
Output Voltage 5.35V ± 0.1V
Maximum Output Current 30A (continuous)
Voltage Measurement Range 0V to 60V
Current Measurement Range 0A to 120A
Connector Type XT60 for input/output
Dimensions 39mm x 18mm x 9mm
Weight 20g

Pin Configuration and Descriptions

The Power Brick Mini has a 6-pin JST-GH connector for interfacing with the CubePilot flight controller. Below is the pinout:

Pin Number Name Description
1 VCC Regulated 5.35V output
2 GND Ground
3 Voltage Sense Voltage measurement signal
4 Current Sense Current measurement signal
5 Reserved Not used
6 Reserved Not used

Usage Instructions

How to Use the Component in a Circuit

  1. Connect the Input Power:

    • Use the XT60 connector to connect the Power Brick Mini to the battery (2S to 12S LiPo).
    • Ensure correct polarity to avoid damage.
  2. Connect to the Flight Controller:

    • Use the 6-pin JST-GH cable to connect the Power Brick Mini to the power input port of the CubePilot flight controller.
    • Ensure the connector is securely seated.
  3. Power Distribution:

    • The Power Brick Mini will regulate the input voltage and provide a stable 5.35V output to the flight controller and connected peripherals.
  4. Voltage and Current Monitoring:

    • The Voltage Sense and Current Sense pins provide real-time power consumption data to the flight controller for monitoring and logging.

Important Considerations and Best Practices

  • Battery Compatibility: Ensure the battery voltage is within the supported range (4.8V to 52.2V).
  • Current Limitations: Do not exceed the maximum continuous current rating of 30A to prevent overheating or damage.
  • Secure Connections: Use high-quality connectors and cables to minimize resistance and ensure reliable operation.
  • Environmental Conditions: Avoid exposing the Power Brick Mini to extreme temperatures, moisture, or vibration.

Example Code for Arduino UNO

While the Power Brick Mini is primarily designed for CubePilot flight controllers, you can interface it with an Arduino UNO for voltage and current monitoring. Below is an example code snippet:

// Example code to read voltage and current from the Power Brick Mini
// Connect Voltage Sense to A0 and Current Sense to A1 on Arduino UNO

const int voltagePin = A0; // Pin connected to Voltage Sense
const int currentPin = A1; // Pin connected to Current Sense

// Calibration factors (adjust based on your setup)
const float voltageDividerRatio = 18.182; // Voltage divider ratio for scaling
const float currentSensorScale = 37.89;   // Scale factor for current sensor

void setup() {
  Serial.begin(9600); // Initialize serial communication
  pinMode(voltagePin, INPUT);
  pinMode(currentPin, INPUT);
}

void loop() {
  // Read analog values
  int rawVoltage = analogRead(voltagePin);
  int rawCurrent = analogRead(currentPin);

  // Convert to actual voltage and current
  float voltage = (rawVoltage * 5.0 / 1023.0) * voltageDividerRatio;
  float current = (rawCurrent * 5.0 / 1023.0) * currentSensorScale;

  // Print values to Serial Monitor
  Serial.print("Voltage: ");
  Serial.print(voltage);
  Serial.print(" V, Current: ");
  Serial.print(current);
  Serial.println(" A");

  delay(1000); // Wait for 1 second before next reading
}

Troubleshooting and FAQs

Common Issues and Solutions

  1. No Output Voltage:

    • Cause: Incorrect battery connection or damaged Power Brick Mini.
    • Solution: Verify the battery polarity and ensure the XT60 connector is securely connected.
  2. Inaccurate Voltage or Current Readings:

    • Cause: Calibration mismatch or noise in the signal.
    • Solution: Recalibrate the voltage divider ratio and current sensor scale in your code. Use shielded cables to reduce noise.
  3. Overheating:

    • Cause: Exceeding the maximum current rating.
    • Solution: Ensure the connected load does not draw more than 30A continuously.
  4. Flight Controller Not Powering On:

    • Cause: Loose or damaged JST-GH cable.
    • Solution: Check the cable connections and replace the cable if necessary.

FAQs

Q1: Can the Power Brick Mini be used with other flight controllers?
A1: Yes, it can be used with other flight controllers that support the same voltage and current sensing interface.

Q2: What happens if I connect a battery with a voltage higher than 52.2V?
A2: Connecting a battery with a voltage higher than the specified range may damage the Power Brick Mini. Always use a compatible battery.

Q3: Is the Power Brick Mini waterproof?
A3: No, the Power Brick Mini is not waterproof. Avoid exposing it to water or moisture.

Q4: Can I use the Power Brick Mini for non-drone applications?
A4: Yes, it can be used in any application requiring regulated power and current/voltage monitoring within its specifications.