Cirkit Designer Logo
Cirkit Designer
Your all-in-one circuit design IDE
Home / 
Component Documentation

How to Use ELG-75-36A: Examples, Pinouts, and Specs

Image of ELG-75-36A
Cirkit Designer LogoDesign with ELG-75-36A in Cirkit Designer

Introduction

The ELG-75-36A, manufactured by Meanwell, is a 75W LED driver designed to provide a constant voltage output of 36V. This versatile driver is suitable for both indoor and outdoor lighting applications, offering high efficiency, reliability, and robust protection features. It is commonly used in LED lighting systems, signage, architectural lighting, and other applications requiring a stable 36V power source.

Explore Projects Built with ELG-75-36A

Use Cirkit Designer to design, explore, and prototype these projects online. Some projects support real-time simulation. Click "Open Project" to start designing instantly!
Satellite-Based Timing and Navigation System with SDR and Atomic Clock Synchronization
Image of GPS 시스템 측정 구성도_Confirm: A project utilizing ELG-75-36A in a practical application
This circuit appears to be a complex system involving power supply management, GPS and timing synchronization, and data communication. It includes a SI-TEX G1 Satellite Compass for GPS data, an XHTF1021 Atomic Rubidium Clock for precise timing, and Ettus USRP B200 units for software-defined radio communication. Power is supplied through various SMPS units and distributed via terminal blocks and DC jacks. Data communication is facilitated by Beelink MINI S12 N95 computers, RS232 splitters, and a 1000BASE-T Media Converter for network connectivity. RF Directional Couplers are used to interface antennas with the USRP units, and the entire system is likely contained within cases for protection and organization.
Cirkit Designer LogoOpen Project in Cirkit Designer
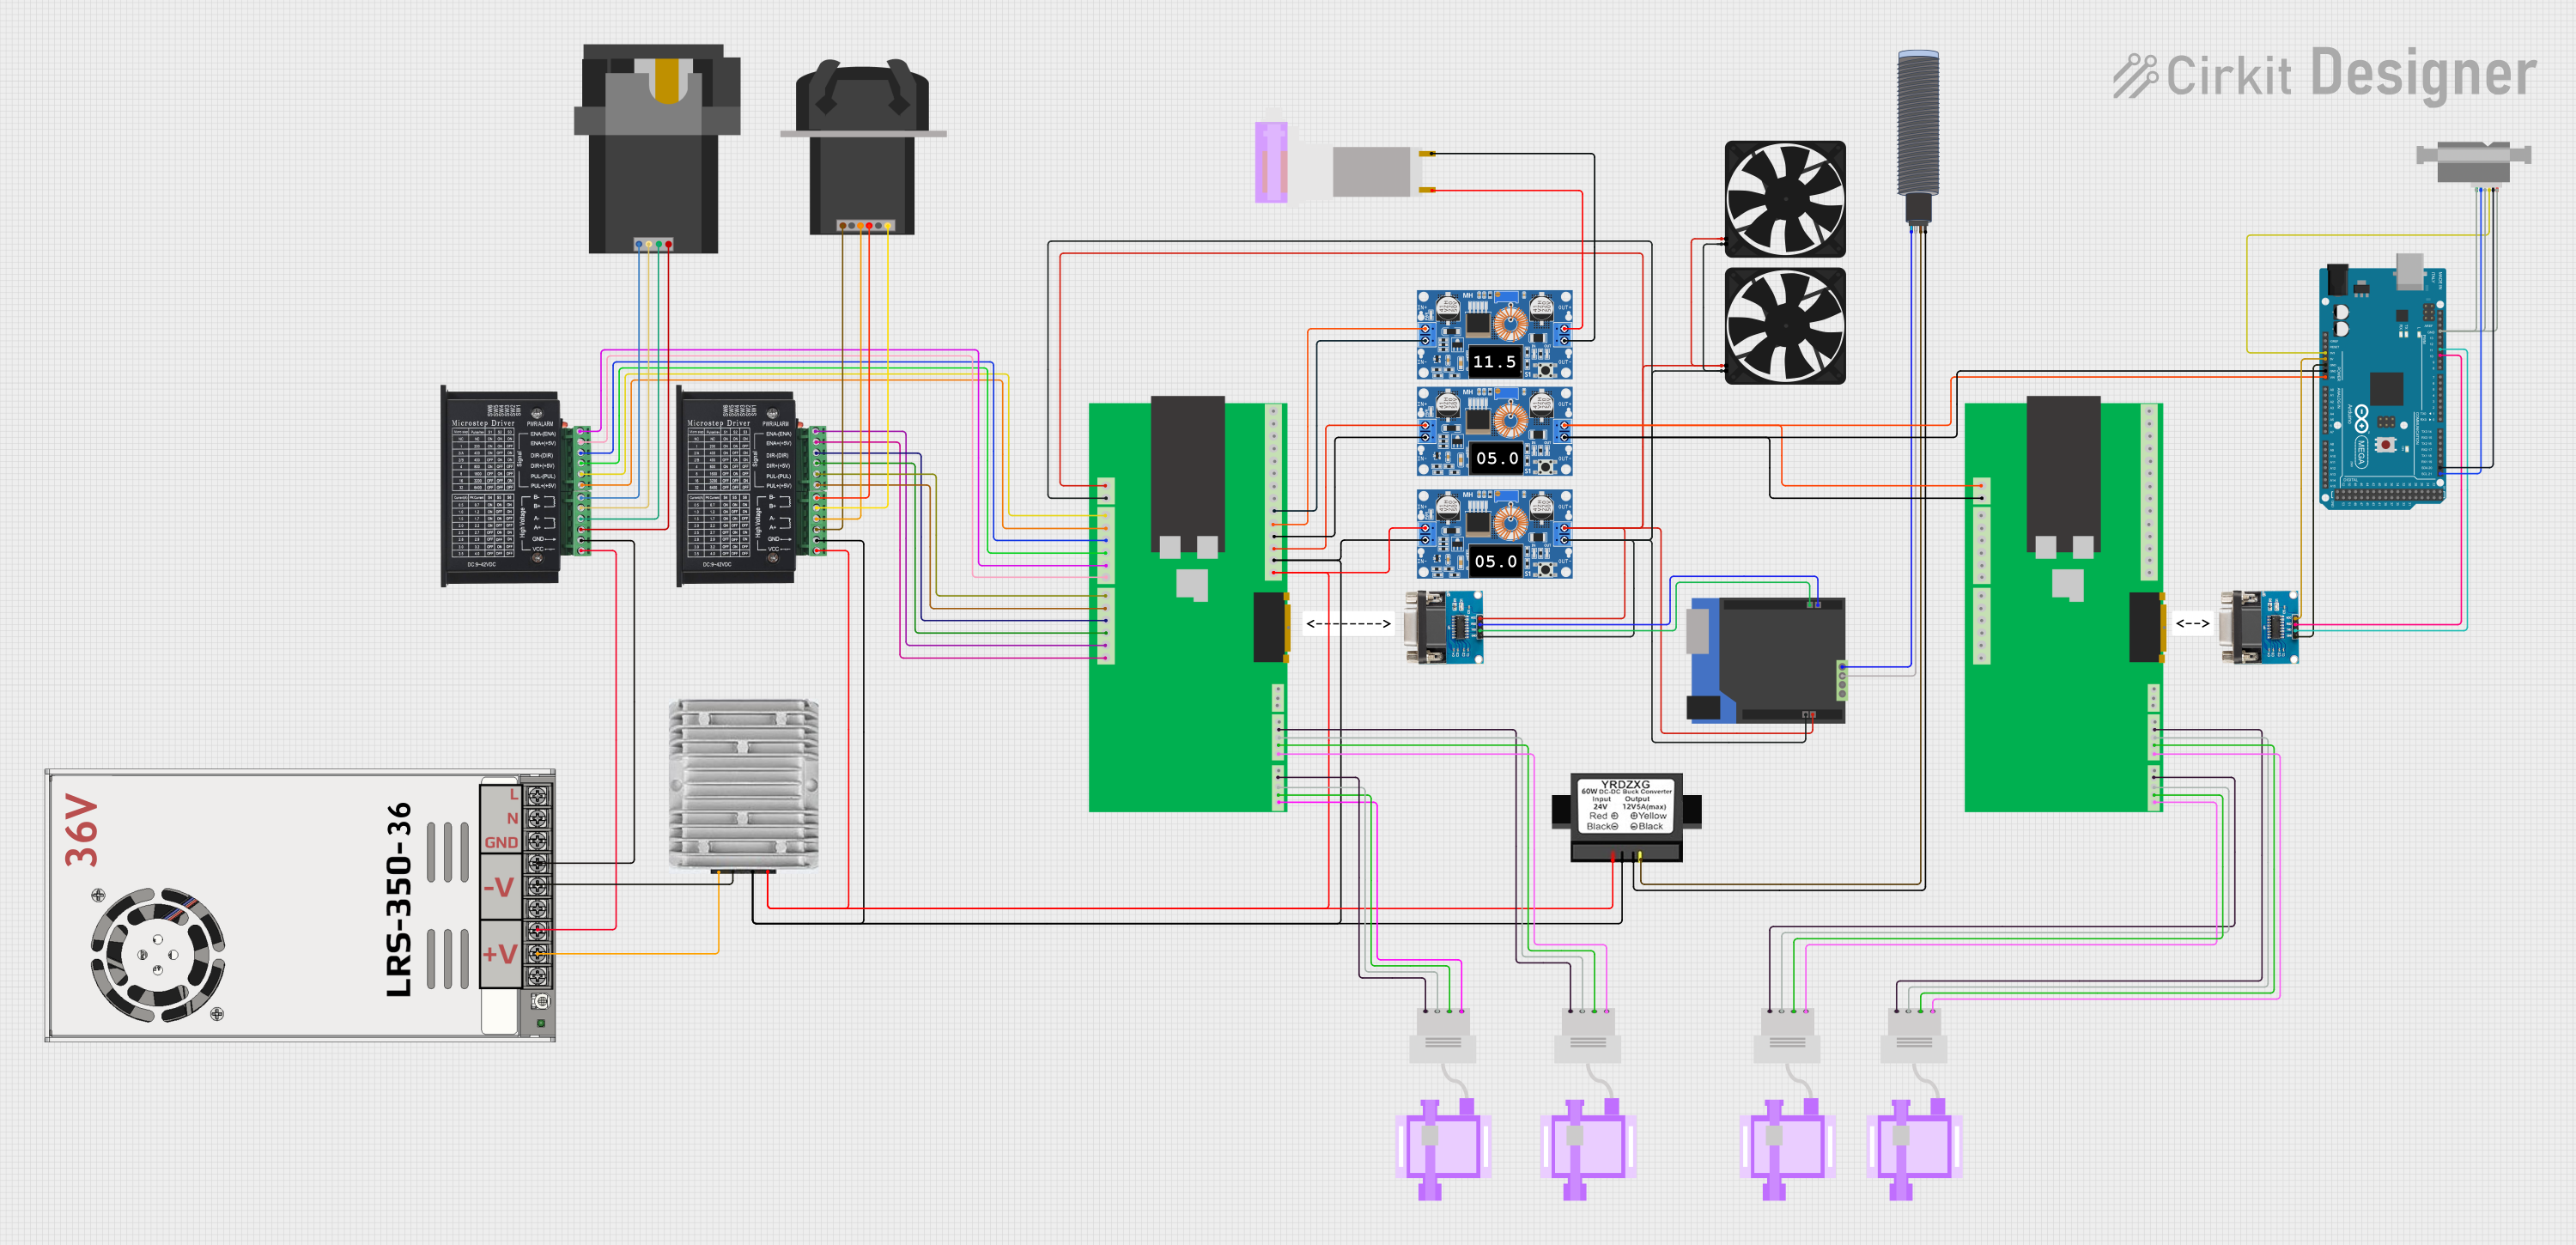
Automated Peristaltic Pump Control System with Arduino and ESP32
Image of Long-Term Bench: A project utilizing ELG-75-36A in a practical application
This circuit appears to be a control system for peristaltic pumps and a motor driver, with power regulation and communication capabilities. It includes a main power supply stepping down from 48V to various lower voltages for different components, two tb6600 micro stepping motor drivers controlling peristaltic pumps, and an ESP32-based custom PCB for managing signals and communication. The system also integrates an Arduino Mega for additional control and interfacing with a Sensirion flow meter, RS232 to TTL converters for serial communication, and an ultrasonic sensor for distance measurement.
Cirkit Designer LogoOpen Project in Cirkit Designer
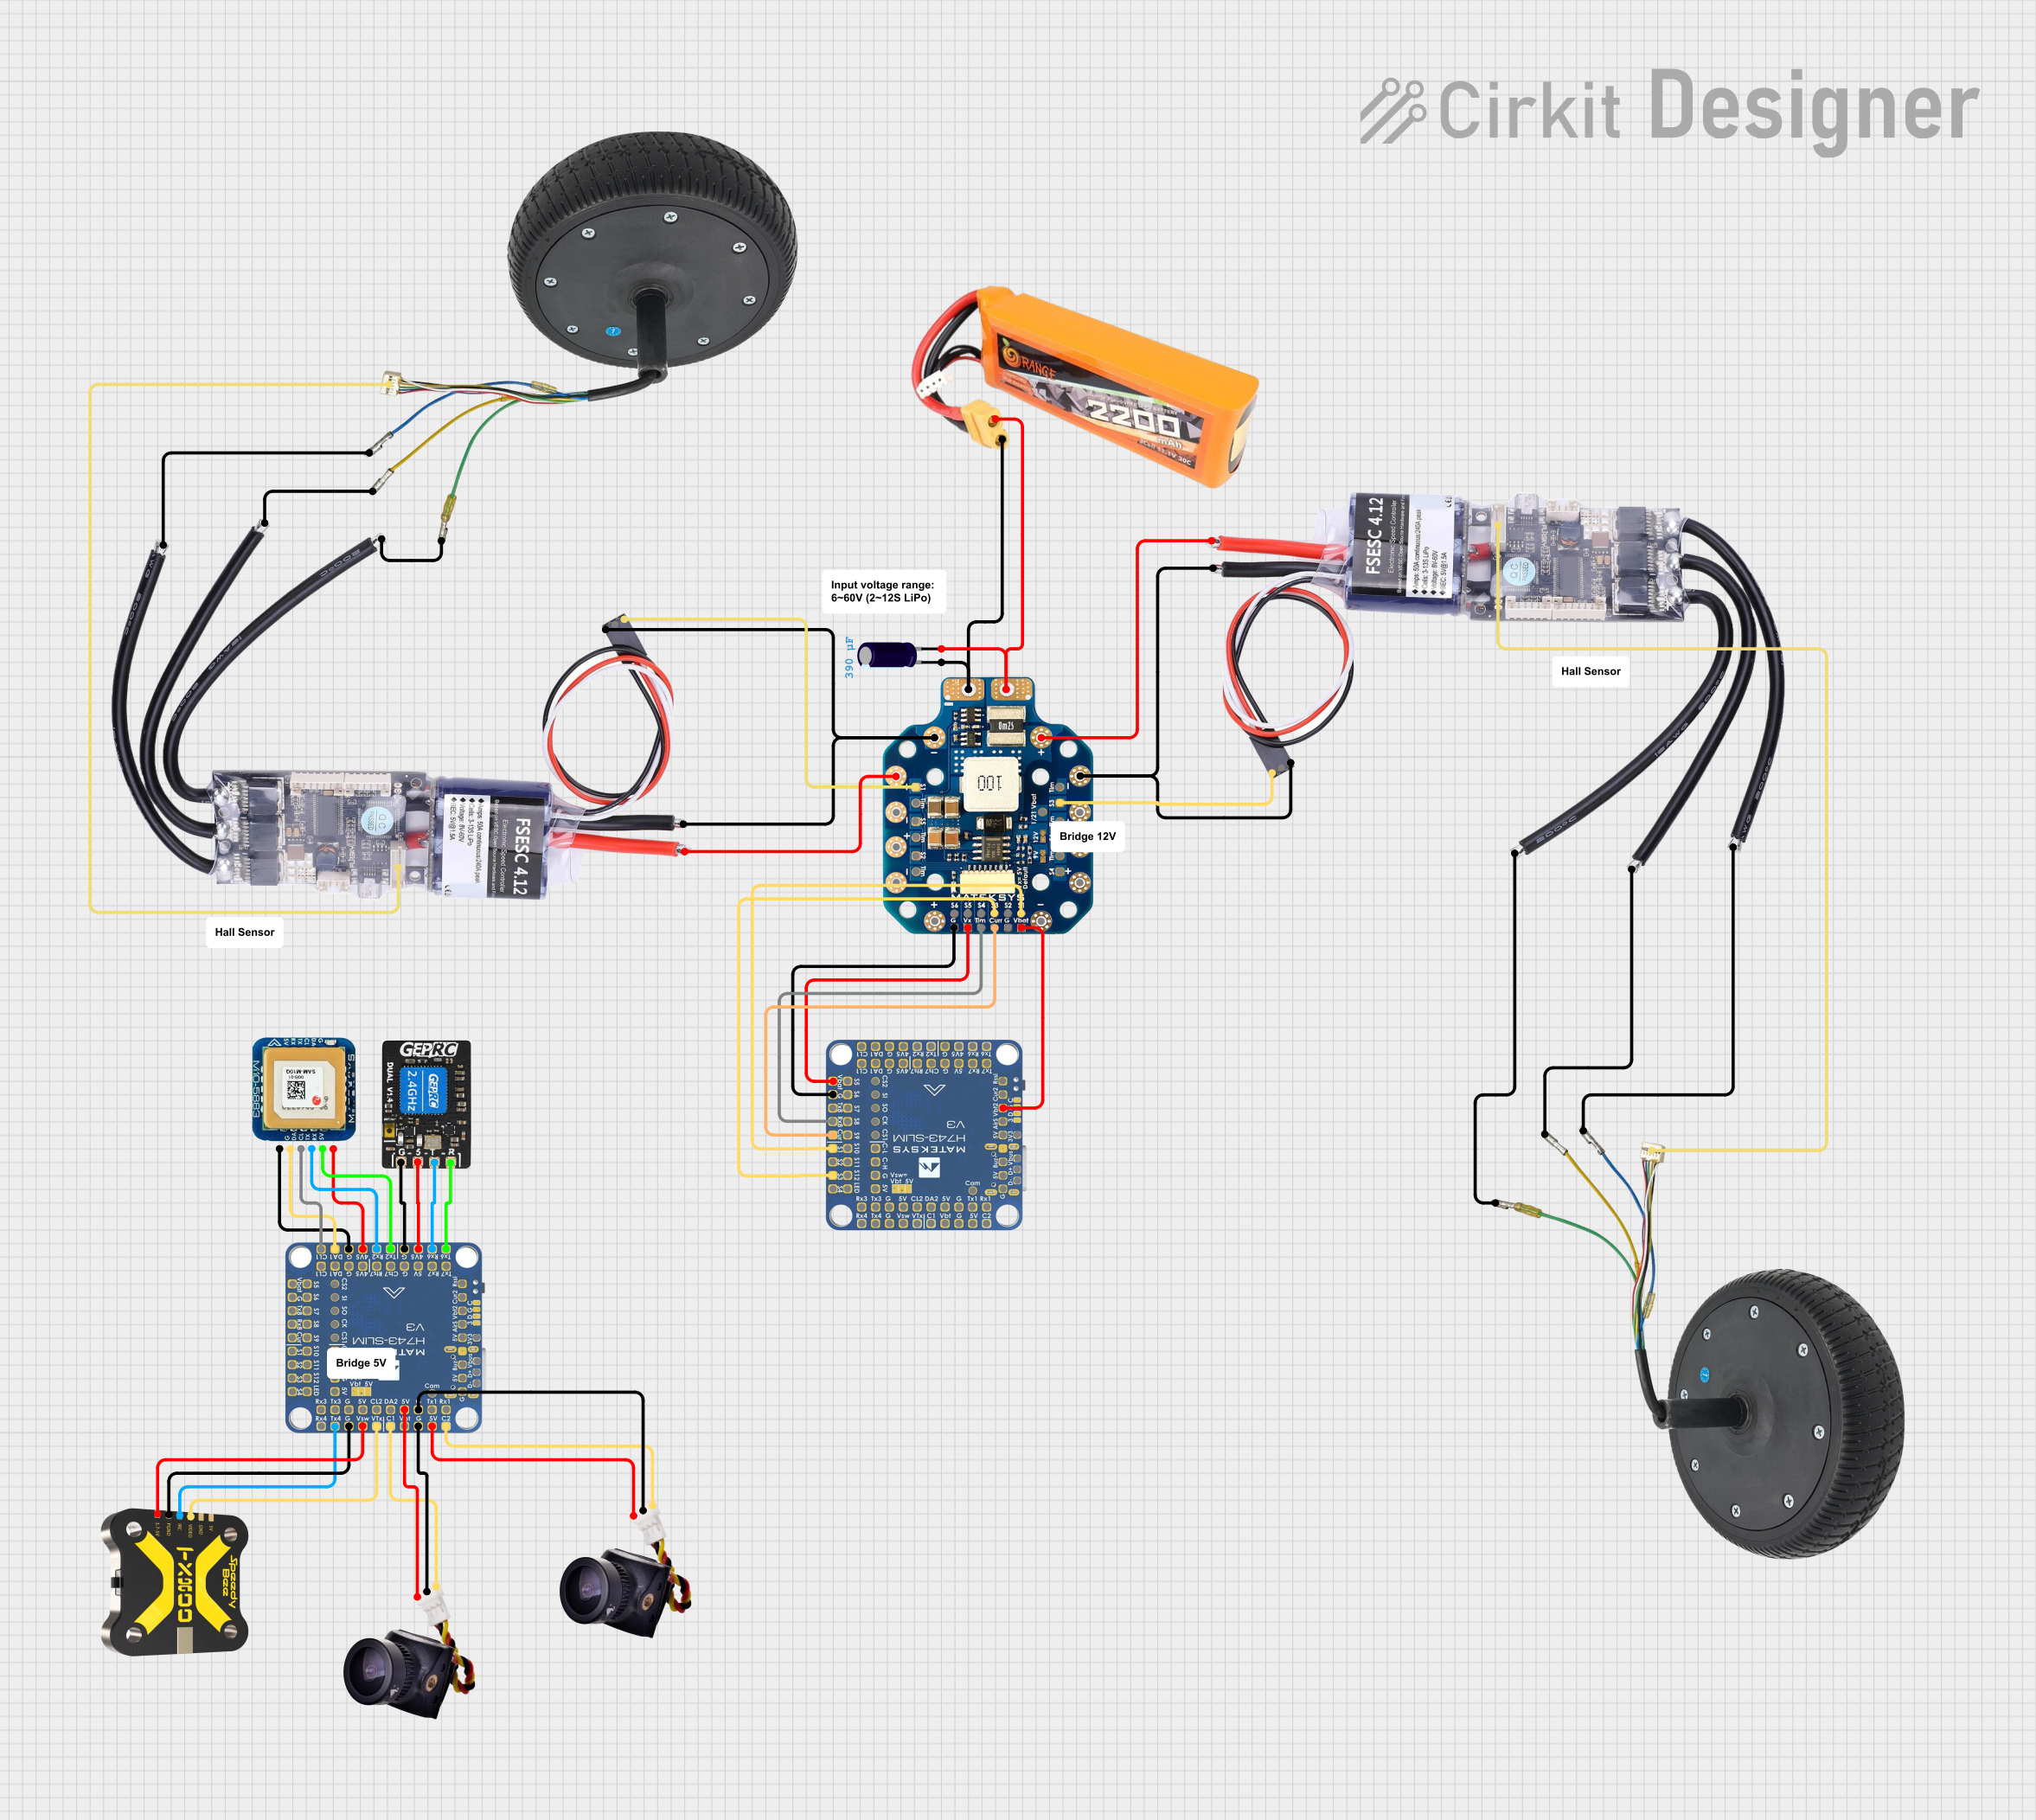
Battery-Powered FPV Drone with Telemetry and Dual Motor Control
Image of Krul': A project utilizing ELG-75-36A in a practical application
This circuit appears to be a power distribution and control system for a vehicle with two motorized wheels, possibly a drone or a robot. It includes a lipo battery connected to a Power Distribution Board (PDB) that distributes power to two Electronic Speed Controllers (ESCs) which in turn control the speed and direction of the motors. The system also integrates a flight controller (H743-SLIM V3) for managing various peripherals including GPS, FPV camera system, and a telemetry link (ExpressLRS).
Cirkit Designer LogoOpen Project in Cirkit Designer
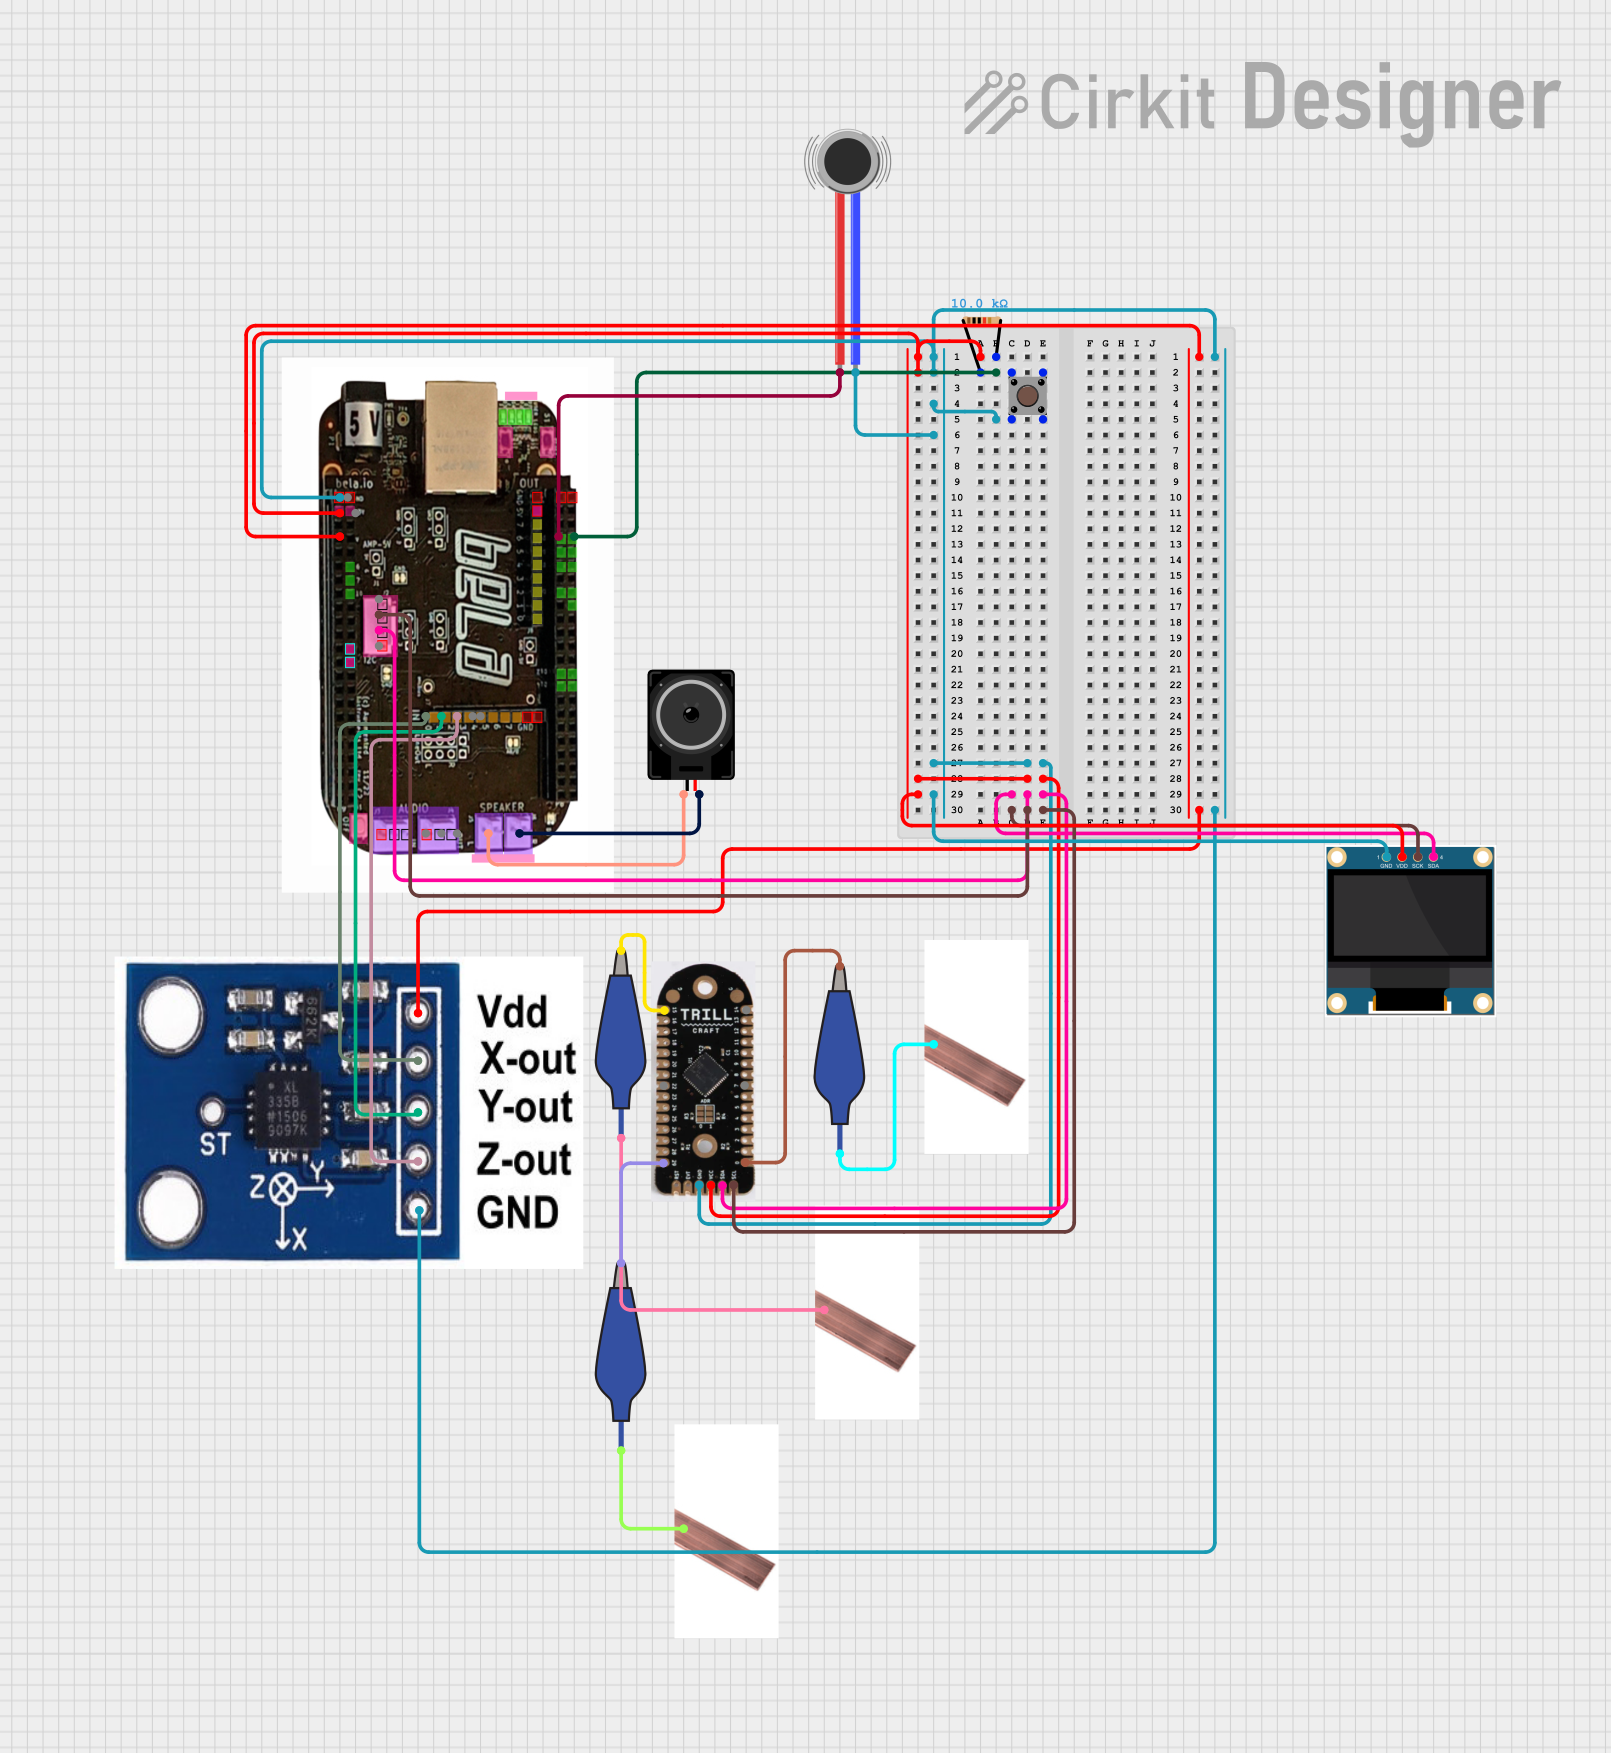
Interactive Touch and Motion Sensor System with Bela Board and OLED Display
Image of GIZMO Teaset: A project utilizing ELG-75-36A in a practical application
This circuit integrates a Bela Board with various sensors and actuators, including a TRILL CRAFT touch sensor, an ADXXL335 accelerometer, a vibration motor, and a loudspeaker. The Bela Board processes input from the touch sensor and accelerometer, and controls the vibration motor and loudspeaker, while an OLED display provides visual feedback.
Cirkit Designer LogoOpen Project in Cirkit Designer

Explore Projects Built with ELG-75-36A

Use Cirkit Designer to design, explore, and prototype these projects online. Some projects support real-time simulation. Click "Open Project" to start designing instantly!
Image of GPS 시스템 측정 구성도_Confirm: A project utilizing ELG-75-36A in a practical application
Satellite-Based Timing and Navigation System with SDR and Atomic Clock Synchronization
This circuit appears to be a complex system involving power supply management, GPS and timing synchronization, and data communication. It includes a SI-TEX G1 Satellite Compass for GPS data, an XHTF1021 Atomic Rubidium Clock for precise timing, and Ettus USRP B200 units for software-defined radio communication. Power is supplied through various SMPS units and distributed via terminal blocks and DC jacks. Data communication is facilitated by Beelink MINI S12 N95 computers, RS232 splitters, and a 1000BASE-T Media Converter for network connectivity. RF Directional Couplers are used to interface antennas with the USRP units, and the entire system is likely contained within cases for protection and organization.
Cirkit Designer LogoOpen Project in Cirkit Designer
Image of Long-Term Bench: A project utilizing ELG-75-36A in a practical application
Automated Peristaltic Pump Control System with Arduino and ESP32
This circuit appears to be a control system for peristaltic pumps and a motor driver, with power regulation and communication capabilities. It includes a main power supply stepping down from 48V to various lower voltages for different components, two tb6600 micro stepping motor drivers controlling peristaltic pumps, and an ESP32-based custom PCB for managing signals and communication. The system also integrates an Arduino Mega for additional control and interfacing with a Sensirion flow meter, RS232 to TTL converters for serial communication, and an ultrasonic sensor for distance measurement.
Cirkit Designer LogoOpen Project in Cirkit Designer
Image of Krul': A project utilizing ELG-75-36A in a practical application
Battery-Powered FPV Drone with Telemetry and Dual Motor Control
This circuit appears to be a power distribution and control system for a vehicle with two motorized wheels, possibly a drone or a robot. It includes a lipo battery connected to a Power Distribution Board (PDB) that distributes power to two Electronic Speed Controllers (ESCs) which in turn control the speed and direction of the motors. The system also integrates a flight controller (H743-SLIM V3) for managing various peripherals including GPS, FPV camera system, and a telemetry link (ExpressLRS).
Cirkit Designer LogoOpen Project in Cirkit Designer
Image of GIZMO Teaset: A project utilizing ELG-75-36A in a practical application
Interactive Touch and Motion Sensor System with Bela Board and OLED Display
This circuit integrates a Bela Board with various sensors and actuators, including a TRILL CRAFT touch sensor, an ADXXL335 accelerometer, a vibration motor, and a loudspeaker. The Bela Board processes input from the touch sensor and accelerometer, and controls the vibration motor and loudspeaker, while an OLED display provides visual feedback.
Cirkit Designer LogoOpen Project in Cirkit Designer

Common Applications

  • LED strip lighting
  • Outdoor architectural lighting
  • Indoor commercial lighting
  • Signage and display systems
  • Industrial lighting systems

Technical Specifications

The ELG-75-36A is engineered to meet the demands of modern lighting systems. Below are its key technical specifications:

General Specifications

Parameter Value
Output Voltage 36V DC
Output Power 75W
Input Voltage Range 100-305V AC
Efficiency Up to 91%
Operating Temperature -40°C to +85°C (case temp.)
IP Rating IP67 (waterproof and dustproof)
Dimming Function Adjustable via potentiometer

Electrical Protections

Protection Type Description
Over-Voltage Protection Activates at 41-46V
Over-Current Protection Constant current limiting
Short Circuit Protection Auto-recovery after fault

Pin Configuration and Descriptions

The ELG-75-36A features a simple wiring interface for input and output connections. Below is the pin configuration:

Pin Name Wire Color Description
AC-L Brown Live AC input
AC-N Blue Neutral AC input
Ground Green/Yellow Earth ground connection
V+ Red Positive DC output (36V)
V- Black Negative DC output (GND)

Usage Instructions

How to Use the ELG-75-36A in a Circuit

  1. Input Connection: Connect the AC-L (brown) and AC-N (blue) wires to the live and neutral terminals of your AC power source. Ensure the input voltage is within the range of 100-305V AC.
  2. Output Connection: Connect the V+ (red) and V- (black) wires to the positive and negative terminals of your LED load. Ensure the load operates at 36V DC and does not exceed 75W.
  3. Grounding: Connect the green/yellow wire to the earth ground for safety.
  4. Dimming Adjustment: Use the built-in potentiometer to adjust the output current for dimming purposes, if required.

Important Considerations

  • Ensure proper ventilation around the driver to prevent overheating.
  • Do not exceed the maximum output power of 75W to avoid damage.
  • Use waterproof connectors if the driver is installed outdoors.
  • Verify the polarity of the output connections to prevent damage to the LED load.

Example: Connecting to an Arduino UNO

While the ELG-75-36A is not directly connected to an Arduino UNO, it can power LED strips controlled by the Arduino. Below is an example of how to use the ELG-75-36A with an Arduino to control LED brightness via PWM:

Circuit Setup

  1. Connect the ELG-75-36A output (V+ and V-) to the LED strip.
  2. Use an N-channel MOSFET (e.g., IRF540N) to control the LED strip via the Arduino's PWM pin.
  3. Connect the MOSFET's source to the ELG-75-36A V- and the drain to the LED strip's negative terminal.
  4. Connect the MOSFET's gate to an Arduino PWM pin (e.g., pin 9) through a 220-ohm resistor.

Arduino Code

// Example code to control LED brightness using PWM
// Ensure the ELG-75-36A is properly connected to the LED strip

const int pwmPin = 9; // PWM pin connected to the MOSFET gate

void setup() {
  pinMode(pwmPin, OUTPUT); // Set the PWM pin as an output
}

void loop() {
  // Gradually increase brightness
  for (int brightness = 0; brightness <= 255; brightness++) {
    analogWrite(pwmPin, brightness); // Set PWM duty cycle
    delay(10); // Small delay for smooth transition
  }

  // Gradually decrease brightness
  for (int brightness = 255; brightness >= 0; brightness--) {
    analogWrite(pwmPin, brightness); // Set PWM duty cycle
    delay(10); // Small delay for smooth transition
  }
}

Troubleshooting and FAQs

Common Issues and Solutions

Issue Possible Cause Solution
No output voltage Incorrect input wiring Verify AC-L and AC-N connections
Flickering LEDs Overloaded driver or loose wiring Check load power and wiring
Driver overheating Poor ventilation or overload Ensure proper airflow and reduce load
LEDs not dimming Incorrect dimming setup Adjust potentiometer or verify PWM circuit

FAQs

  1. Can the ELG-75-36A be used outdoors?

    • Yes, it has an IP67 rating, making it suitable for outdoor use.
  2. What happens if the load exceeds 75W?

    • The driver will activate over-current protection to prevent damage.
  3. Can I use the ELG-75-36A with a 12V LED strip?

    • No, the driver outputs a constant 36V, which is incompatible with 12V LED strips.
  4. Is the driver dimmable via PWM?

    • The ELG-75-36A supports dimming via its built-in potentiometer. For external PWM dimming, additional circuitry is required.

By following this documentation, users can effectively integrate the ELG-75-36A into their lighting systems while ensuring safe and reliable operation.