How to Use vl53l0xv2: Examples, Pinouts, and Specs
Introduction
The VL53L0XV2 is a state-of-the-art Time-of-Flight (ToF) ranging sensor that provides accurate distance measurements by utilizing a laser light source. This sensor is capable of measuring distances up to 2 meters with high precision and speed, making it an ideal choice for a wide range of applications including robotics, drones, user detection, and gesture recognition systems.
Explore Projects Built with vl53l0xv2
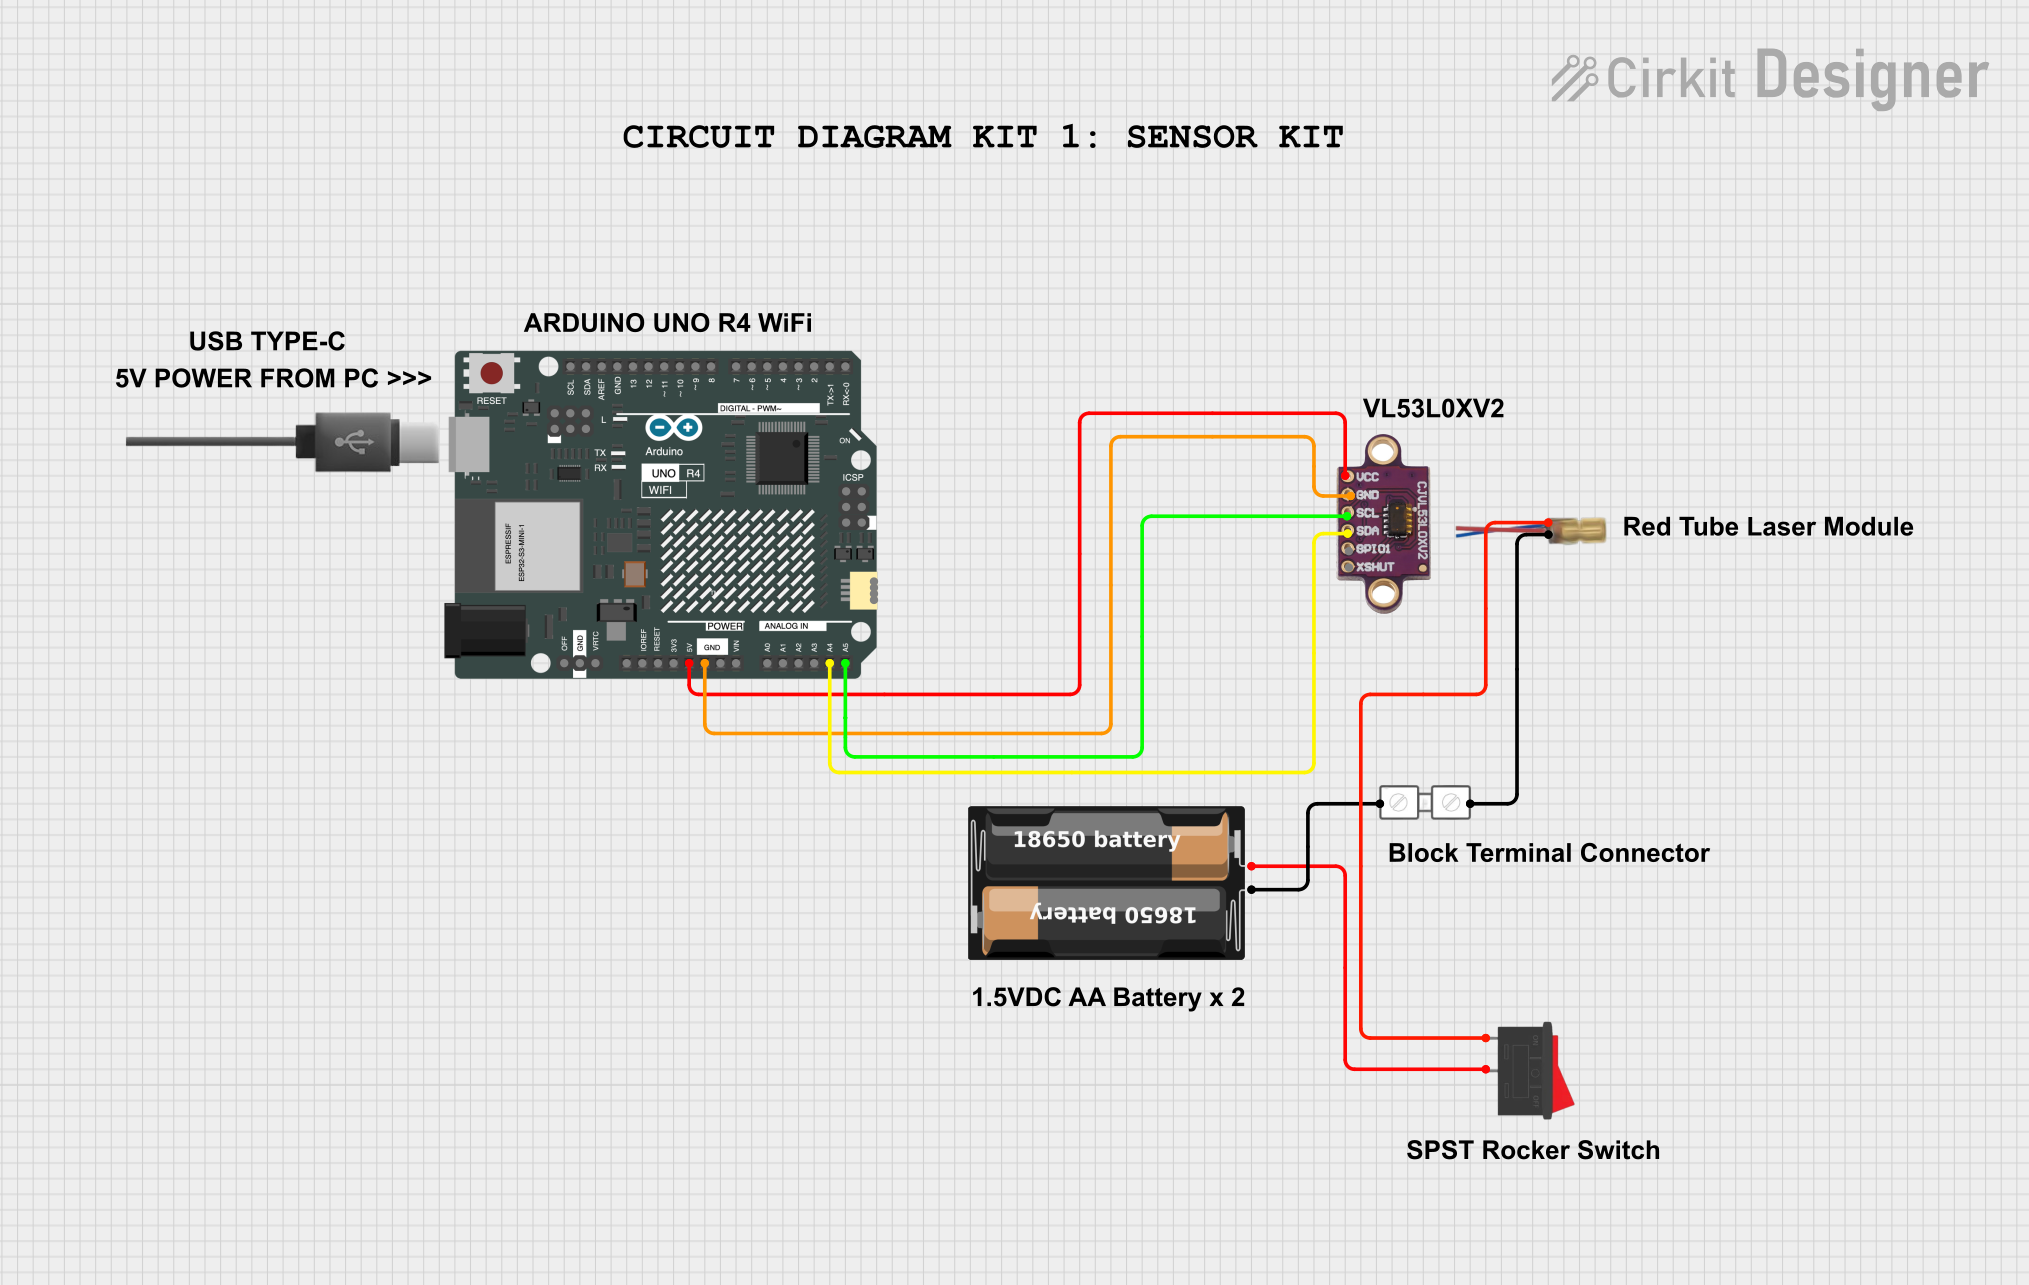

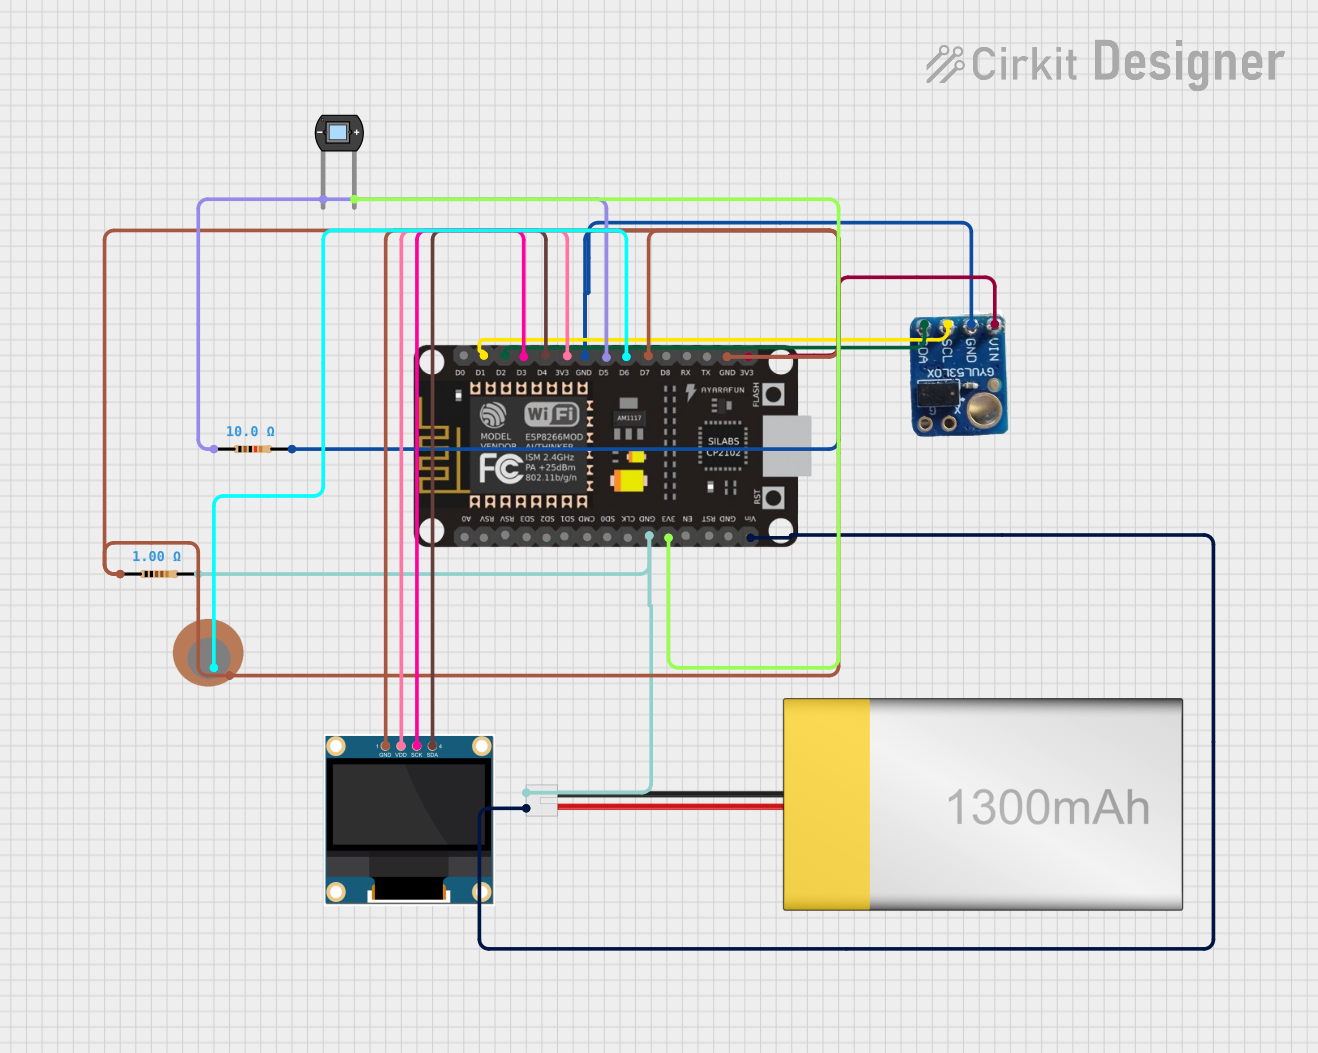
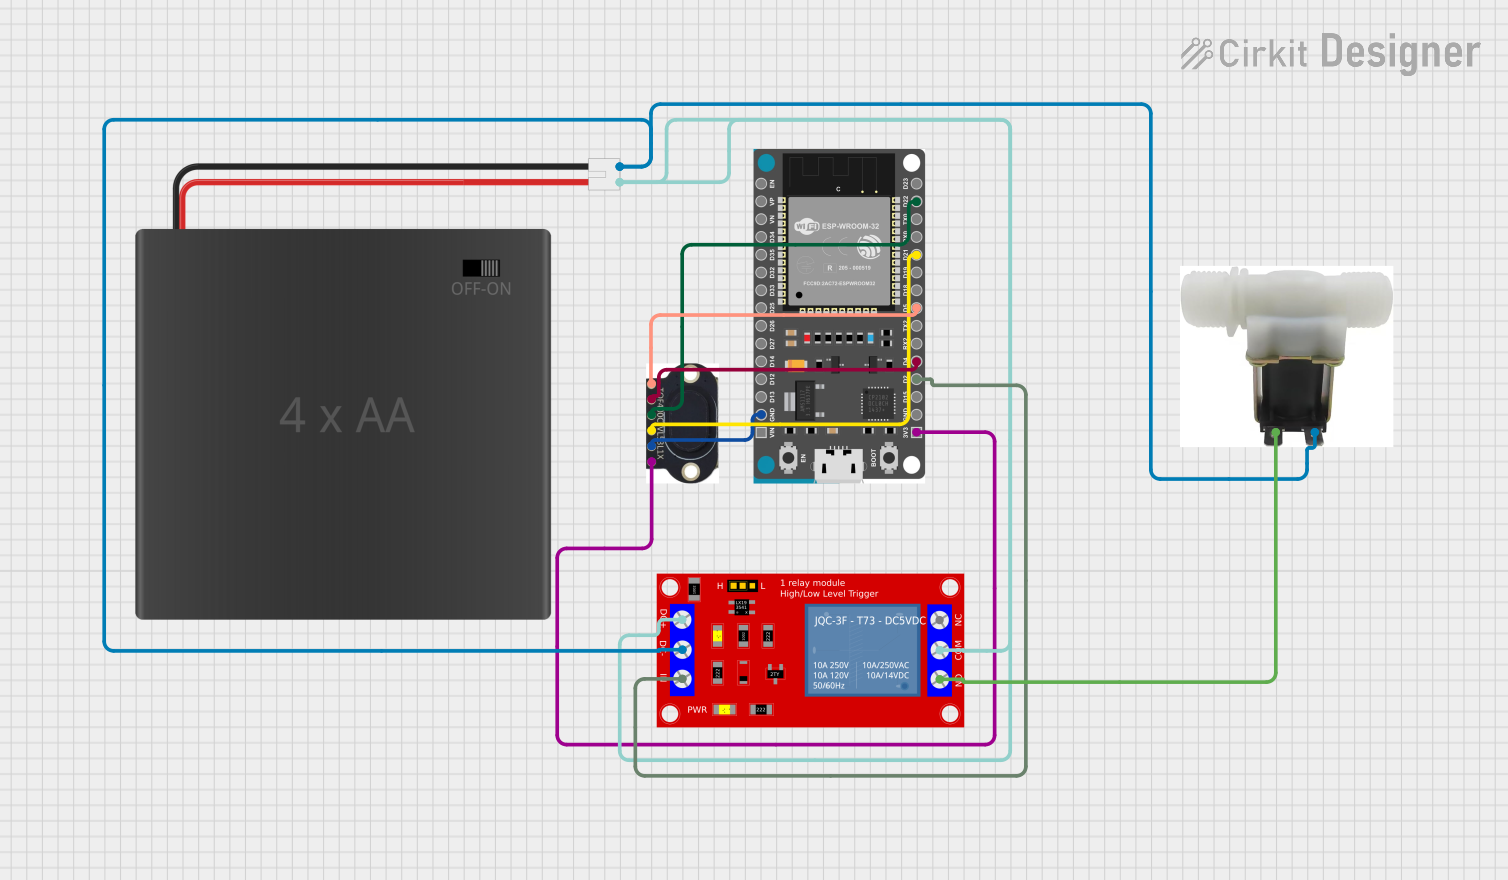
Explore Projects Built with vl53l0xv2
Technical Specifications
Key Technical Details
- Type: Time-of-Flight (ToF) ranging sensor
- Light Source: Class 1 laser (940 nm)
- Operating Voltage: 2.6V to 3.5V
- Peak Current: 20 mA during active ranging
- Maximum Range: Up to 2 meters
- Resolution: 1 mm
- Interface: I2C (up to 400 kHz)
- Field of View: 25°
- Emitter: VCSEL (Vertical Cavity Surface Emitting Laser)
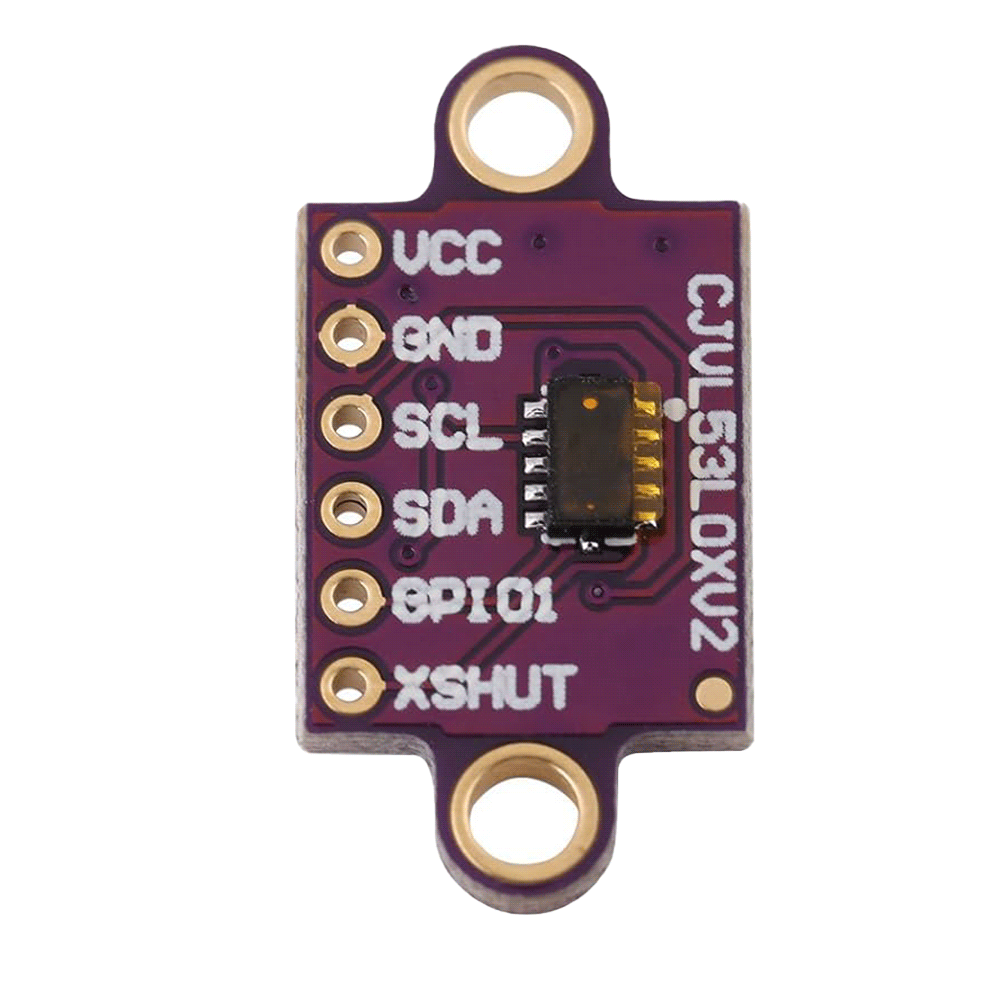
Pin Configuration and Descriptions
| Pin Number | Name | Description |
|---|---|---|
| 1 | VDD | Power supply (2.6V to 3.5V) |
| 2 | GND | Ground connection |
| 3 | SDA | I2C Data Line |
| 4 | SCL | I2C Clock Line |
| 5 | XSHUT | Shutdown pin (active low) |
| 6 | GPIO1 | Programmable interrupt output |
Usage Instructions
Integration into a Circuit
- Power Supply: Connect the VDD pin to a 2.6V to 3.5V power source and the GND pin to the ground.
- I2C Communication: Connect the SDA and SCL pins to the corresponding I2C data and clock lines on your microcontroller.
- Shutdown Control (Optional): The XSHUT pin can be used to power down the sensor when not in use for power saving. Connect this to a GPIO on your microcontroller if this functionality is desired.
- Interrupt (Optional): The GPIO1 pin can be configured to provide an interrupt signal. Connect this to an interrupt-capable GPIO on your microcontroller if you wish to use this feature.
Best Practices
- Ensure that the power supply is stable and within the specified voltage range.
- Use pull-up resistors on the I2C data and clock lines if they are not already provided by the microcontroller.
- Avoid exposing the sensor to direct sunlight or strong infrared sources to prevent measurement errors.
- Keep the sensor lens clean and unobstructed.
Example Code for Arduino UNO
#include <Wire.h>
#include <VL53L0X.h>

VL53L0X sensor;

void setup() {
  Serial.begin(9600);
  Wire.begin();

  sensor.init();
  sensor.setTimeout(500);

  // Start continuous back-to-back mode (take readings as
  // fast as possible). To use continuous timed mode
  // instead, provide a desired inter-measurement period in
  // ms (e.g. sensor.startContinuous(100)).
  sensor.startContinuous();
}

void loop() {
  Serial.print("Distance: ");
  Serial.print(sensor.readRangeContinuousMillimeters());
  if (sensor.timeoutOccurred()) { Serial.print(" TIMEOUT"); }

  Serial.println();
}
Troubleshooting and FAQs
Common Issues
- No Data on I2C: Check connections and ensure pull-up resistors are in place. Also, verify that the correct I2C address is being used in your code.
- Inaccurate Readings: Ensure there are no obstructions or reflective surfaces near the sensor that could cause incorrect readings.
- Intermittent Operation: Check for loose connections and ensure that the power supply is stable and within the specified range.
FAQs
Q: Can the VL53L0XV2 be used outdoors? A: The VL53L0XV2 can be used outdoors, but direct sunlight may interfere with its operation. It's best used in controlled lighting conditions.
Q: What is the maximum I2C speed the VL53L0XV2 supports? A: The VL53L0XV2 supports I2C speeds up to 400 kHz.
Q: How can I extend the range of the sensor? A: The range is fixed and cannot be extended beyond the maximum specified distance of 2 meters.
Q: Is the VL53L0XV2 sensor waterproof? A: No, the VL53L0XV2 is not waterproof and should be protected from moisture.
For further assistance, consult the manufacturer's datasheet and application notes, or contact technical support.