How to Use Infrared Proximity Contactless Button: Examples, Pinouts, and Specs

Introduction
The Infrared Proximity Contactless Button (Manufacturer Part ID: PRT-18582) by Sparkfun Electronics is a sensor designed to detect the presence of an object or person without requiring physical contact. It utilizes infrared (IR) light to sense proximity and triggers a response when an object enters its detection range. This makes it ideal for applications where hygiene, durability, or non-contact interaction is critical.
Explore Projects Built with Infrared Proximity Contactless Button

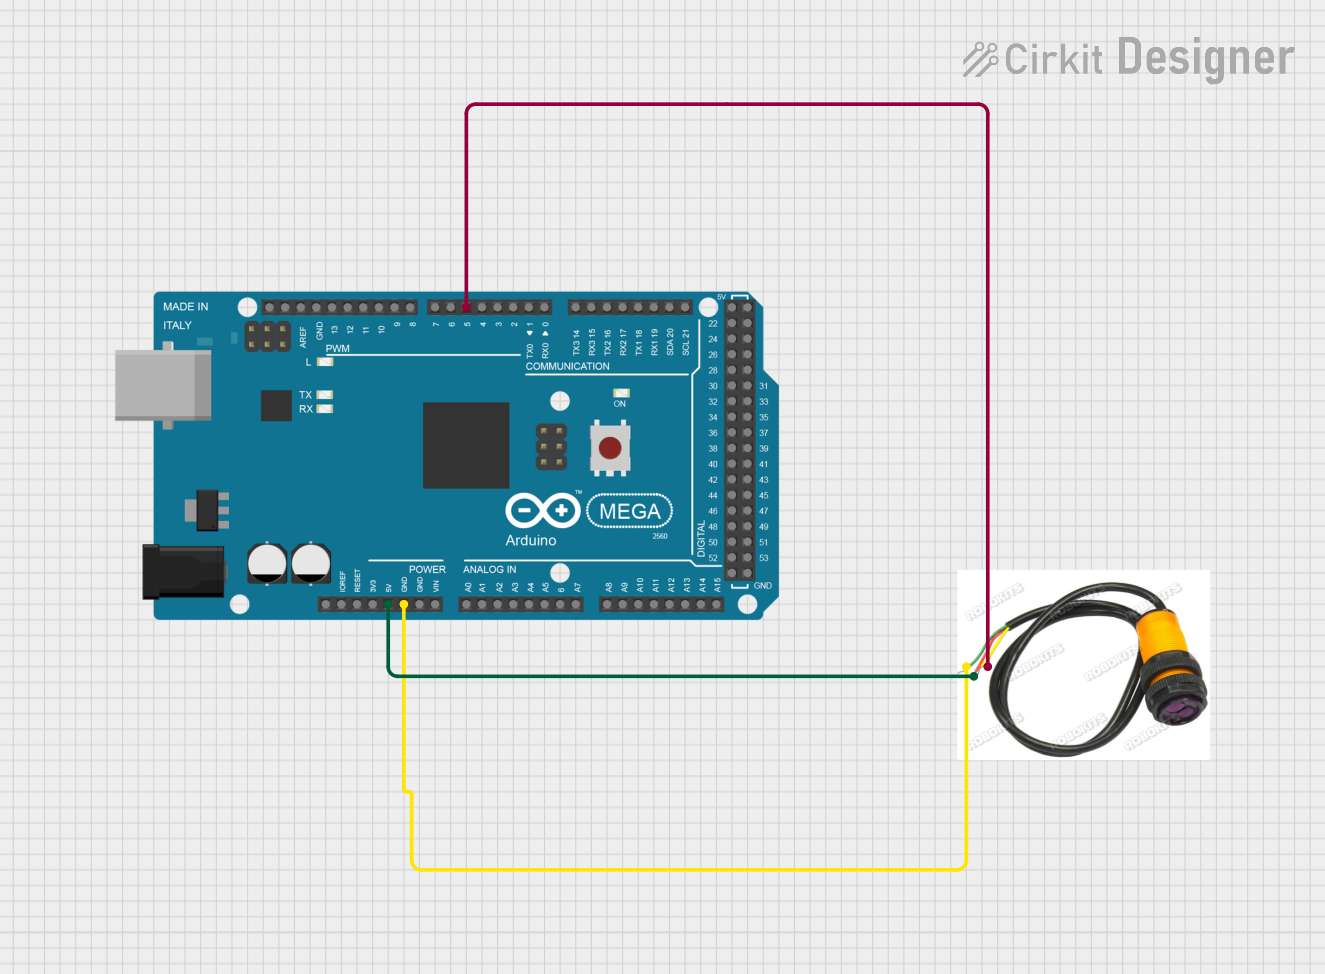
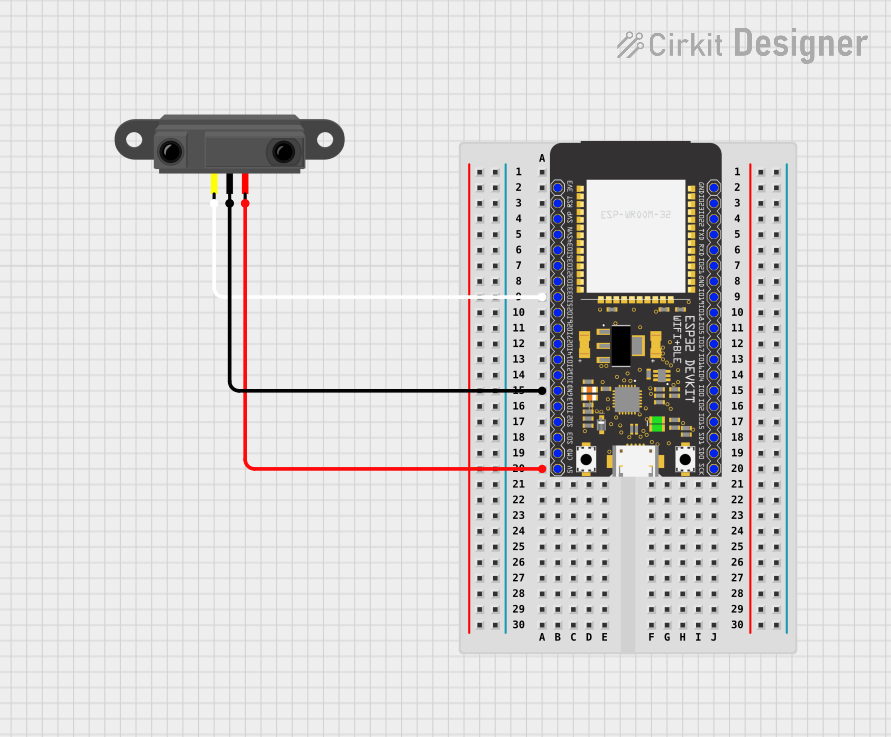
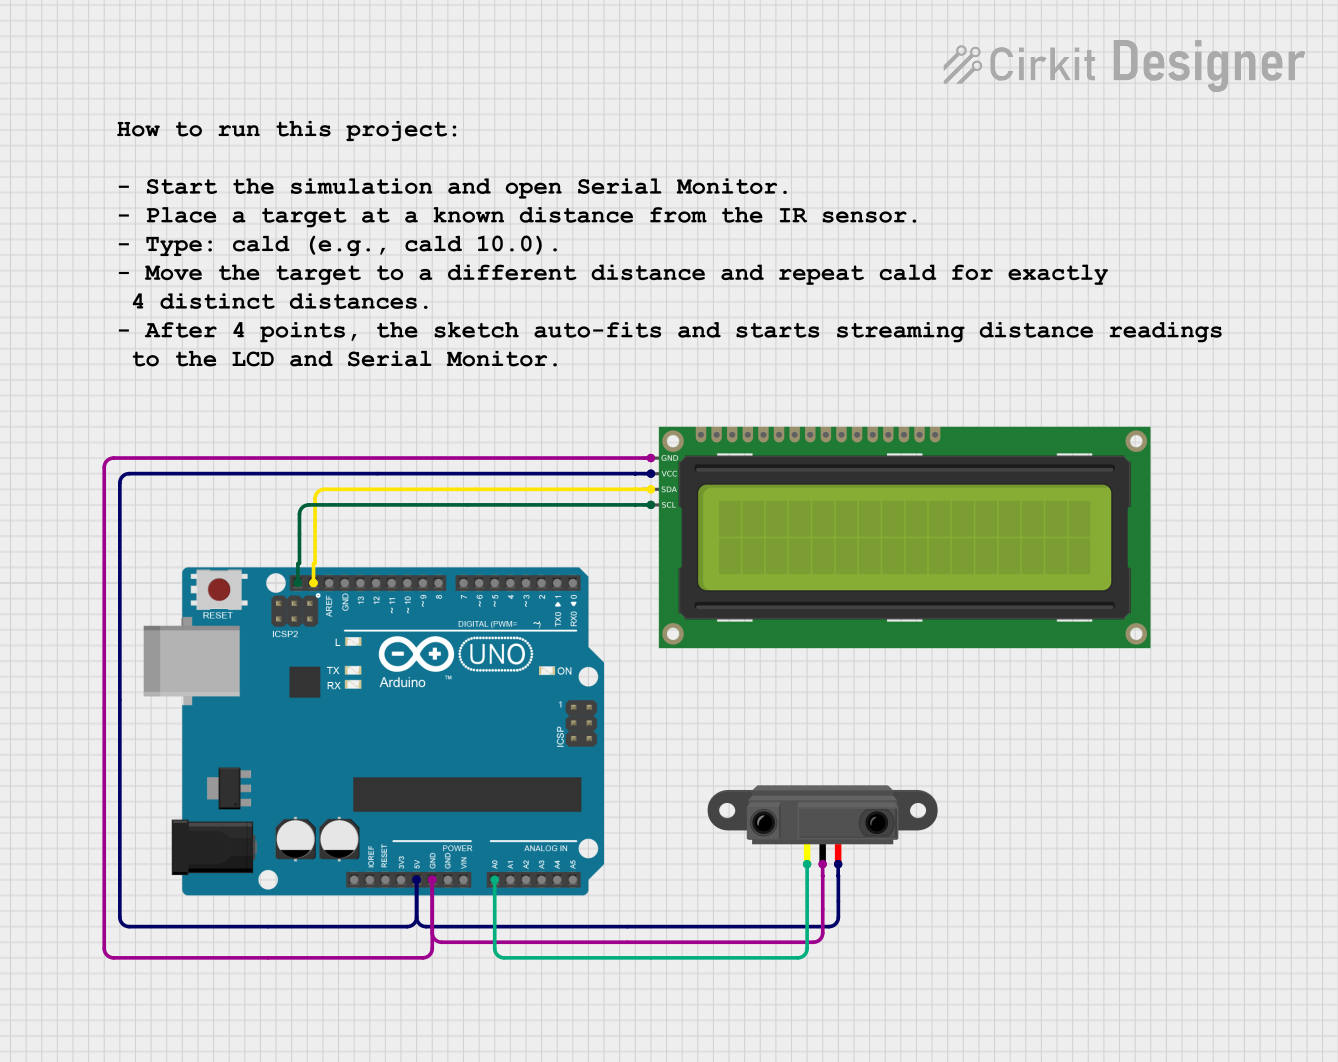
Explore Projects Built with Infrared Proximity Contactless Button
Common Applications and Use Cases
- Touchless buttons for elevators, doors, and kiosks
- Automatic hand sanitizer dispensers
- Non-contact switches in medical or industrial environments
- Gesture-based control systems
- Smart home automation
Technical Specifications
The following table outlines the key technical details of the Infrared Proximity Contactless Button:
| Parameter | Value |
|---|---|
| Operating Voltage | 3.3V to 5V |
| Operating Current | ~20mA |
| Detection Range | 0 to 10 cm (adjustable) |
| Output Type | Digital (High/Low) |
| Output Voltage (High) | ~3.3V to 5V (depends on Vcc) |
| Output Voltage (Low) | ~0V |
| Response Time | < 100 ms |
| Operating Temperature | -20°C to 70°C |
| Dimensions | 25mm x 25mm x 10mm |
Pin Configuration and Descriptions
The Infrared Proximity Contactless Button has a simple 3-pin interface. The pinout is as follows:
| Pin | Name | Description |
|---|---|---|
| 1 | VCC | Power supply input (3.3V to 5V) |
| 2 | GND | Ground connection |
| 3 | OUT | Digital output pin (High when object is detected) |
Usage Instructions
How to Use the Component in a Circuit
- Power the Sensor: Connect the
VCCpin to a 3.3V or 5V power source and theGNDpin to the ground of your circuit. - Connect the Output: Attach the
OUTpin to a microcontroller's digital input pin or directly to an external circuit (e.g., an LED or relay). - Adjust Detection Range: If the sensor includes a potentiometer, use it to fine-tune the detection range (0 to 10 cm).
- Test the Sensor: Place an object within the detection range and observe the output pin. The
OUTpin will go HIGH when an object is detected.
Important Considerations and Best Practices
- Avoid Direct Sunlight: Infrared sensors can be affected by strong ambient IR light, such as sunlight. Use the sensor in controlled lighting conditions for optimal performance.
- Stable Power Supply: Ensure a stable power source to avoid false triggers or inconsistent behavior.
- Mounting: Position the sensor so that it has a clear line of sight to the detection area. Avoid obstructions that could block the IR beam.
- Debouncing: If using the sensor with a microcontroller, implement software debouncing to filter out noise or rapid fluctuations in the output signal.
Example Code for Arduino UNO
Below is an example of how to use the Infrared Proximity Contactless Button with an Arduino UNO:
// Infrared Proximity Contactless Button Example
// Manufacturer: Sparkfun Electronics
// Part ID: PRT-18582

const int sensorPin = 2;  // Digital pin connected to the sensor's OUT pin
const int ledPin = 13;    // Onboard LED pin for visual feedback

void setup() {
  pinMode(sensorPin, INPUT);  // Set sensor pin as input
  pinMode(ledPin, OUTPUT);    // Set LED pin as output
  Serial.begin(9600);         // Initialize serial communication
}

void loop() {
  int sensorState = digitalRead(sensorPin);  // Read the sensor's output

  if (sensorState == HIGH) {
    // Object detected
    digitalWrite(ledPin, HIGH);  // Turn on the LED
    Serial.println("Object detected!");
  } else {
    // No object detected
    digitalWrite(ledPin, LOW);   // Turn off the LED
    Serial.println("No object detected.");
  }

  delay(100);  // Small delay to stabilize readings
}
Troubleshooting and FAQs
Common Issues and Solutions
Sensor Not Detecting Objects
- Cause: Incorrect wiring or insufficient power supply.
- Solution: Double-check the connections and ensure the power supply is within the specified range (3.3V to 5V).
False Triggers
- Cause: Ambient IR interference or unstable power supply.
- Solution: Use the sensor in a controlled environment and ensure a stable power source. Shield the sensor from direct sunlight or strong IR sources.
Output Signal Fluctuates
- Cause: Electrical noise or rapid changes in the detection area.
- Solution: Add a capacitor (e.g., 0.1 µF) across the power pins to filter noise. Implement software debouncing in your microcontroller code.
Short Detection Range
- Cause: Misadjusted potentiometer or obstructions in the detection path.
- Solution: Adjust the potentiometer to increase the range and ensure the sensor has a clear line of sight.
FAQs
Q: Can this sensor detect transparent objects?
A: The sensor may struggle to detect transparent or highly reflective objects due to the way infrared light interacts with such surfaces.
Q: Is the sensor waterproof?
A: No, the sensor is not waterproof. Use it in dry environments or enclose it in a waterproof housing for outdoor applications.
Q: Can I use this sensor with a 3.3V microcontroller?
A: Yes, the sensor is compatible with both 3.3V and 5V systems. Ensure the VCC pin matches the microcontroller's voltage level.
Q: What is the maximum detection range?
A: The maximum detection range is approximately 10 cm, but this can vary depending on environmental conditions and object reflectivity.