How to Use Sound Detector: Examples, Pinouts, and Specs
Introduction
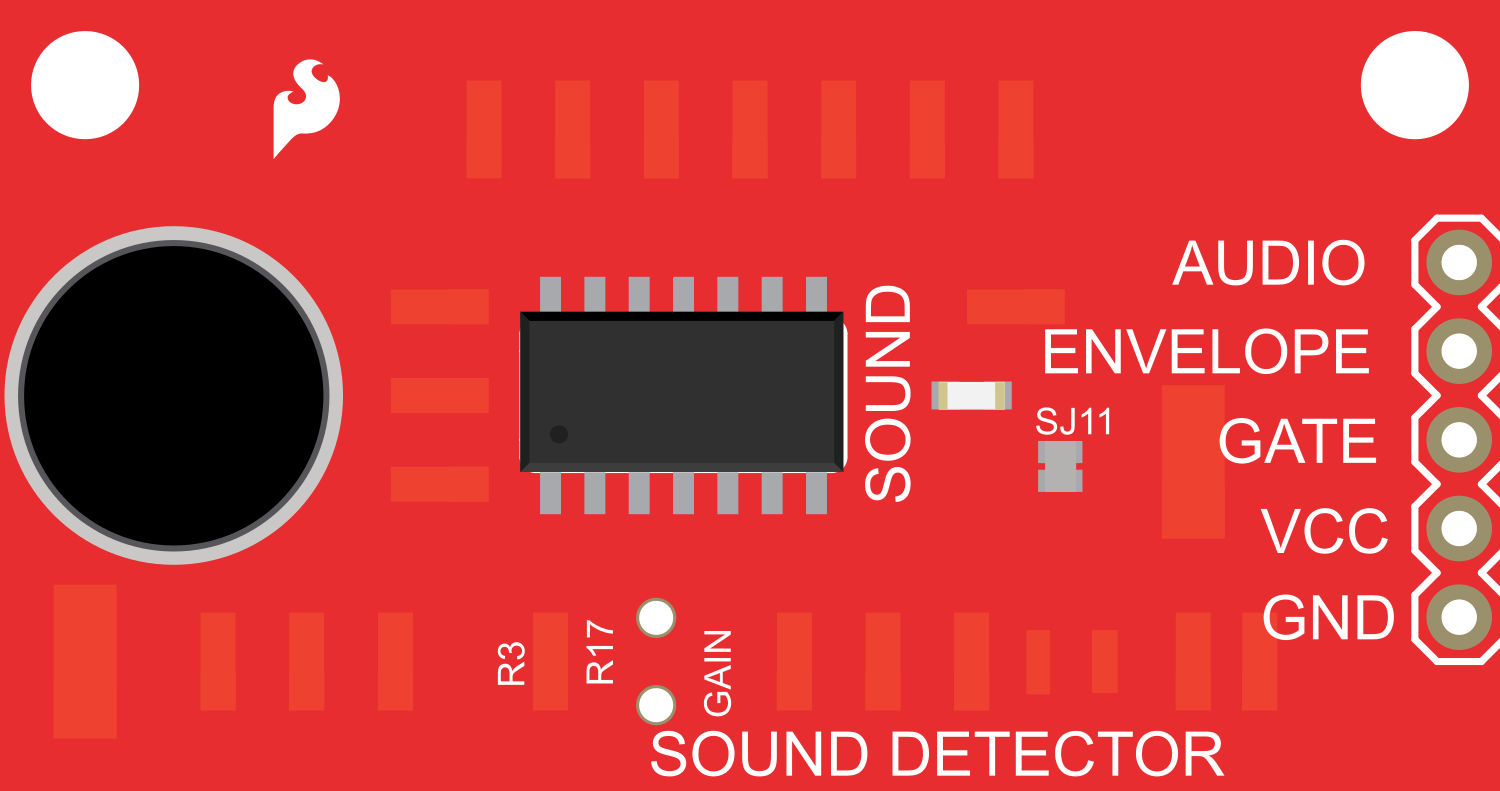
The Sound Detector is an electronic module designed to sense the intensity of ambient sound and convert it into a digital signal that can be processed by microcontrollers such as the Arduino UNO. This component is commonly used in noise level monitoring, audio-responsive projects, security systems, and interactive art installations.
Explore Projects Built with Sound Detector
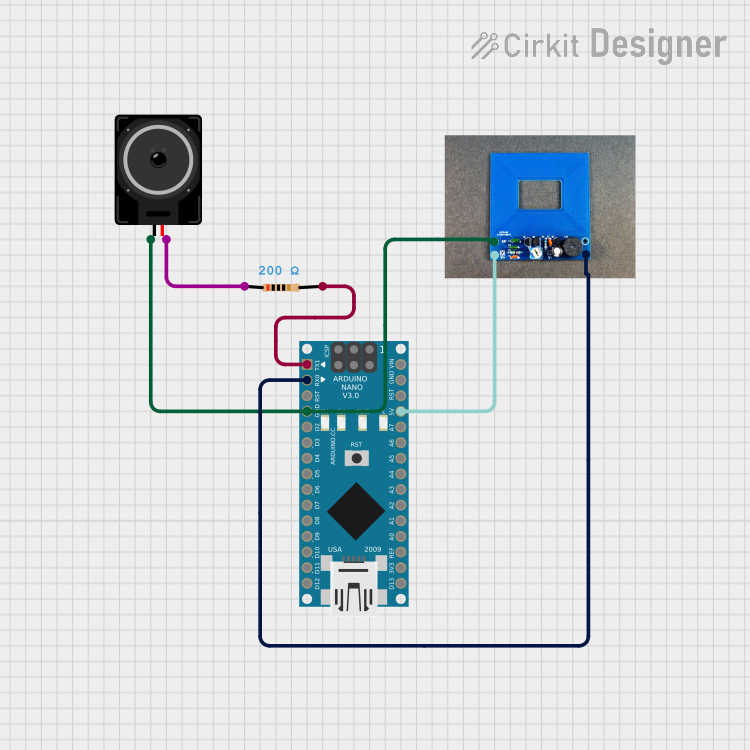
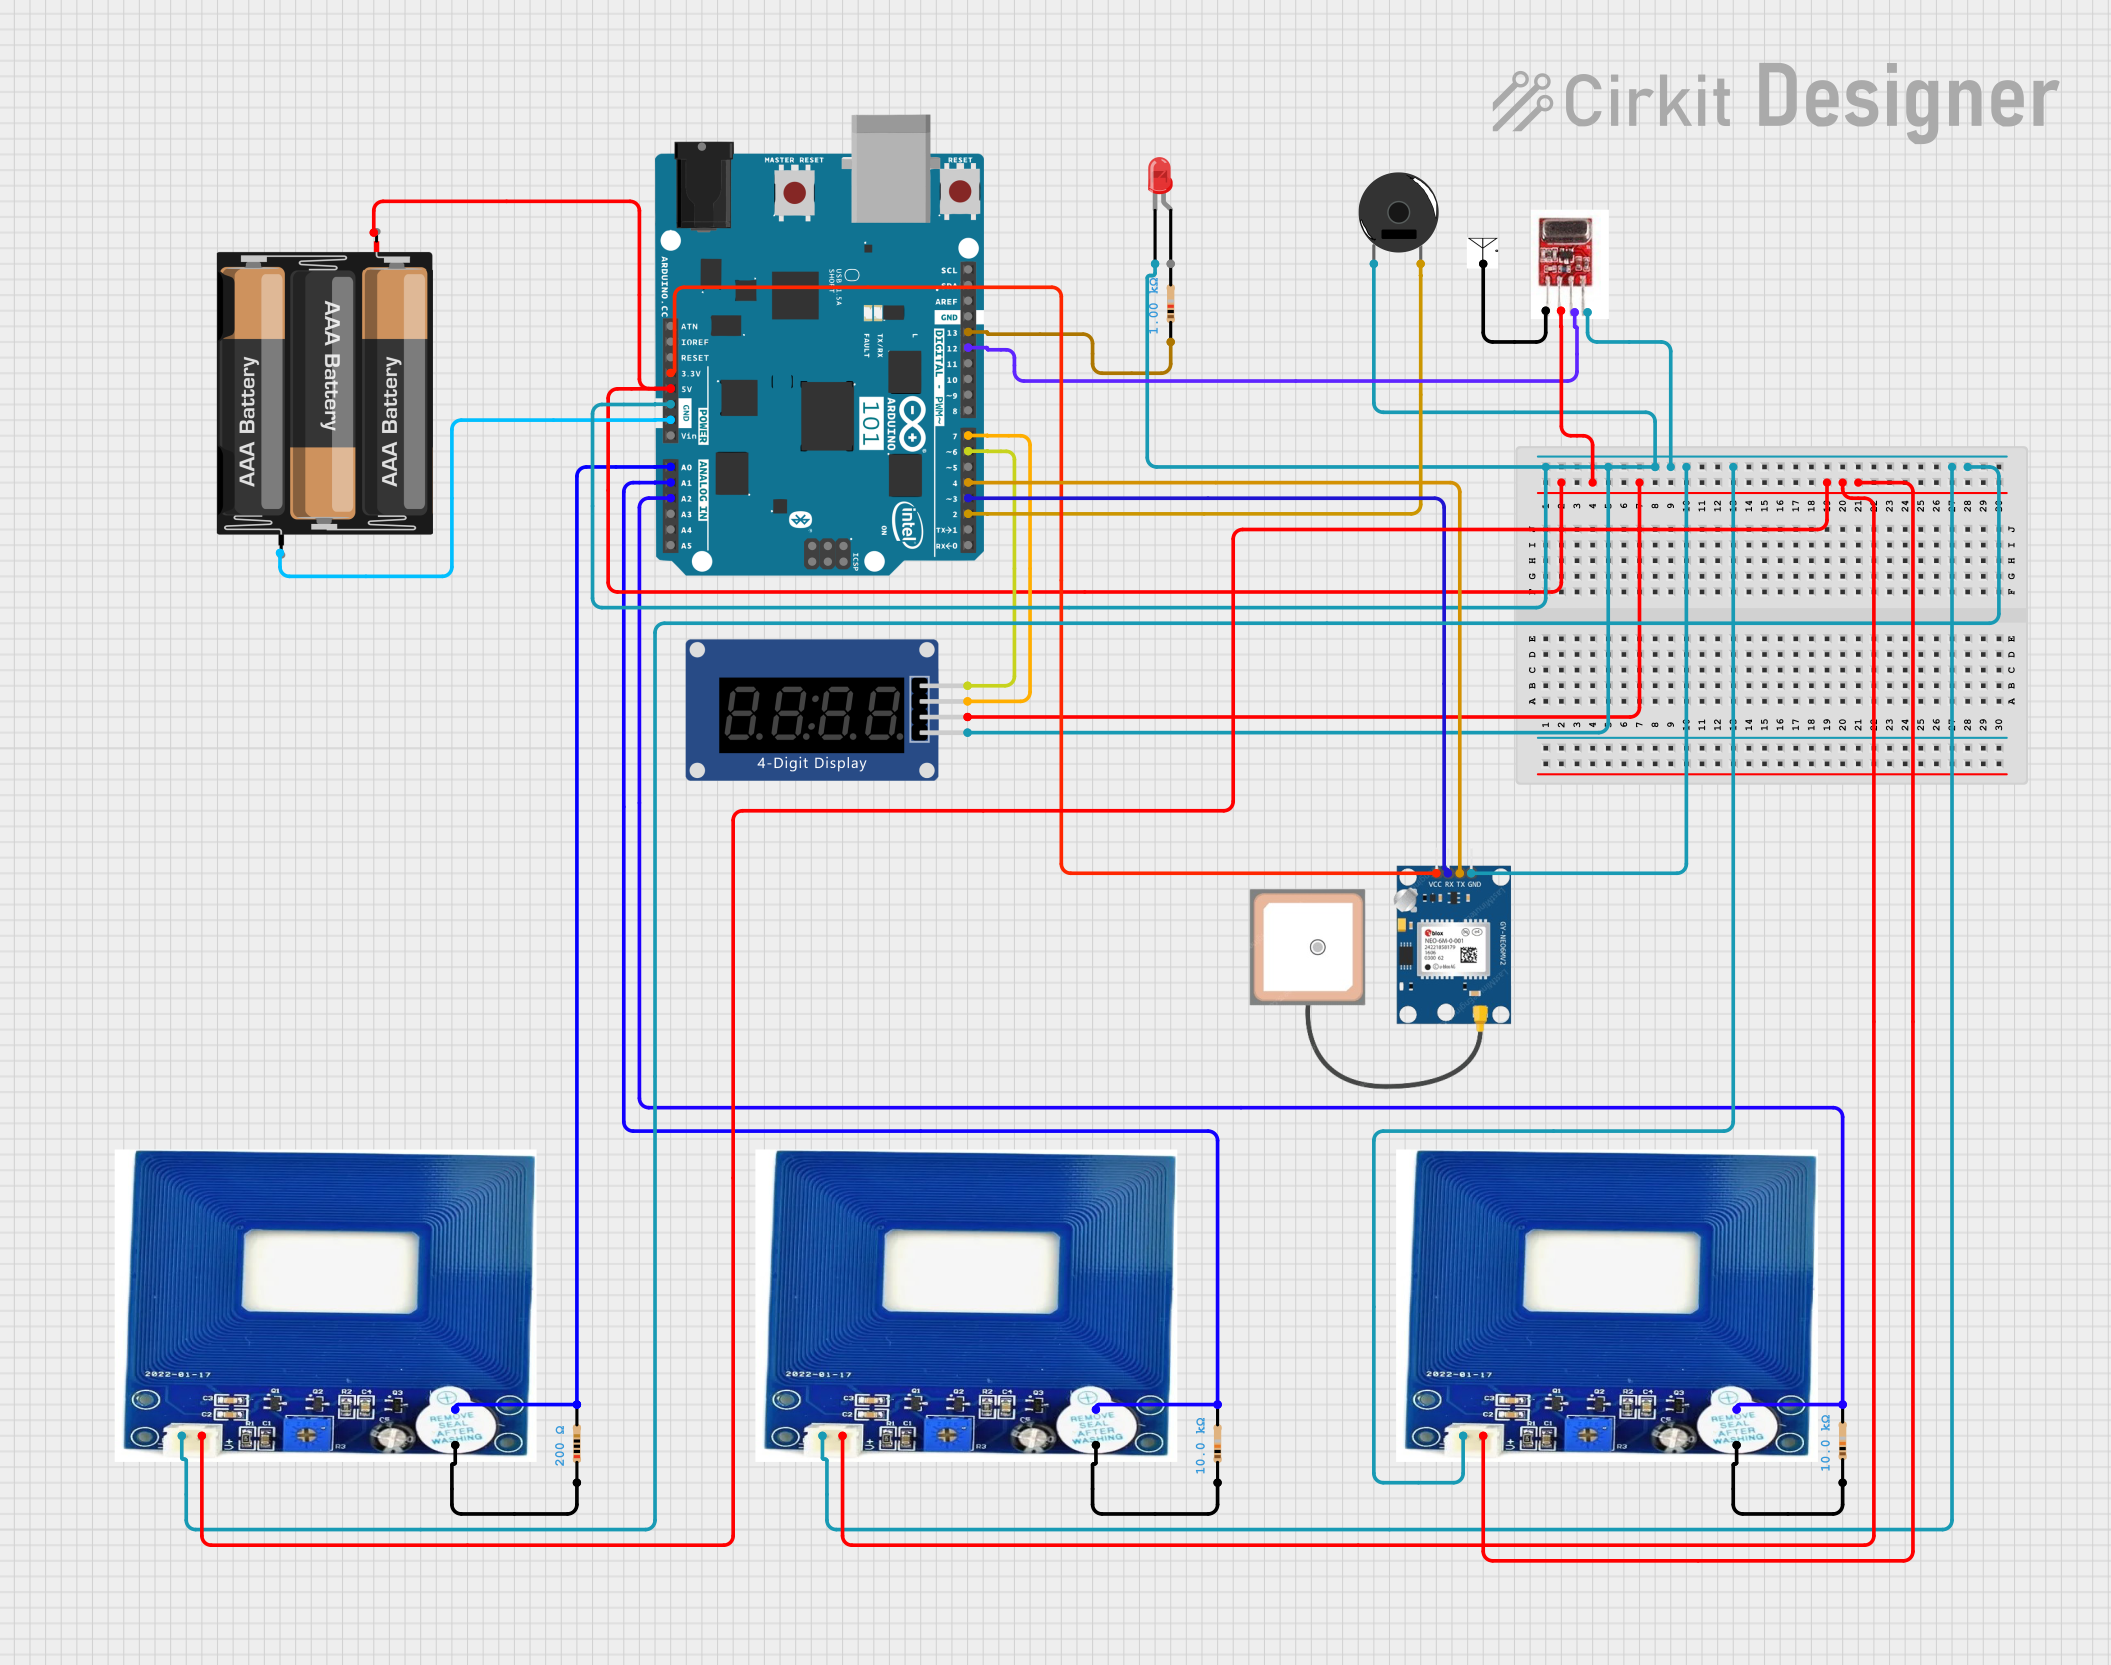
Explore Projects Built with Sound Detector
Technical Specifications
Key Technical Details
- Operating Voltage: 3.3V to 5V DC
- Output Type: Digital (High/Low signal)
- Sound Detection Range: Typically up to 3 meters (depends on ambient noise levels)
- Frequency Range: 50 Hz to 20 kHz (suitable for human audible range)
- Dimensions: Varies by manufacturer, typically around 40mm x 15mm
Pin Configuration and Descriptions
| Pin Name | Description |
|---|---|
| VCC | Power supply (3.3V to 5V DC) |
| GND | Ground |
| DO | Digital output (High/Low signal) |
| AO | Analog output (Voltage level proportional to sound intensity) |
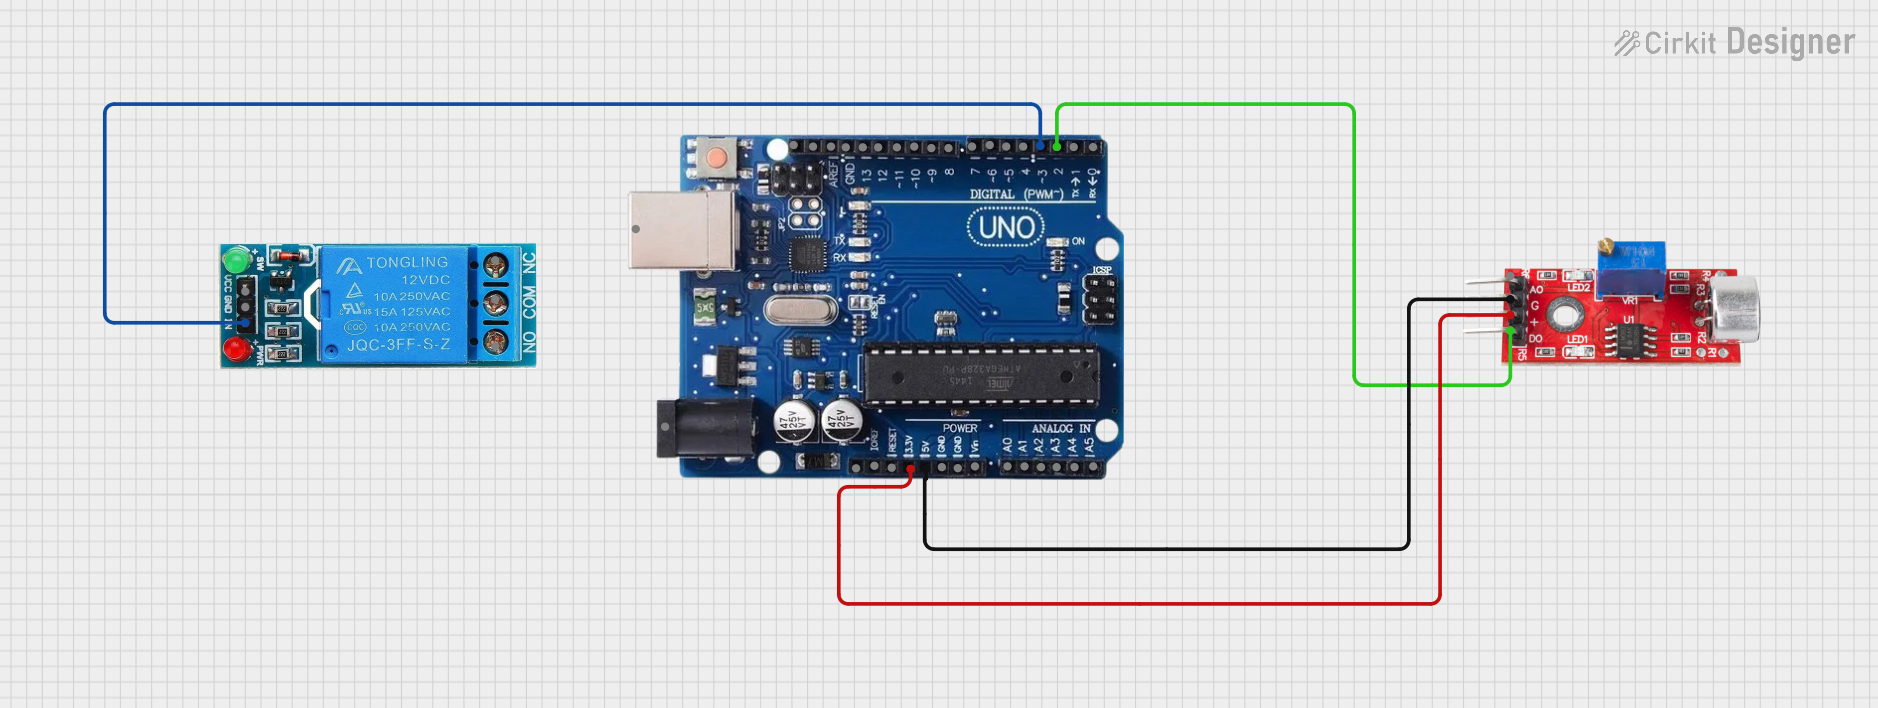
Usage Instructions
Connecting to a Circuit
- Connect the VCC pin to the 5V output on the Arduino UNO.
- Connect the GND pin to one of the GND pins on the Arduino UNO.
- Connect the DO pin to a digital input pin on the Arduino UNO (e.g., D2).
Sample Arduino Code
// Define the digital input pin where the Sound Detector's DO pin is connected
const int soundDetectorPin = 2;

void setup() {
  // Initialize the digital pin as an input
  pinMode(soundDetectorPin, INPUT);
  // Begin serial communication at a baud rate of 9600
  Serial.begin(9600);
}

void loop() {
  // Read the digital signal from the Sound Detector
  int soundDetected = digitalRead(soundDetectorPin);

  // If a sound is detected, the DO pin will be HIGH
  if (soundDetected == HIGH) {
    Serial.println("Sound detected!");
  } else {
    Serial.println("No sound detected.");
  }

  // Wait for a short period before reading again
  delay(100);
}
Important Considerations and Best Practices
- Ensure that the operating voltage of the Sound Detector matches the output voltage of the power supply.
- Avoid placing the Sound Detector near loudspeakers or other sources of intense sound to prevent damage.
- Use appropriate debounce techniques in software to avoid false triggering due to noise.
- The sensitivity of the Sound Detector may vary; some modules come with a potentiometer to adjust sensitivity.
Troubleshooting and FAQs
Common Issues
- No response from the module: Check the power supply and wiring connections.
- False triggering: Adjust the sensitivity, check for electrical noise, or implement software debounce.
- Inconsistent readings: Ensure there are no obstructions or interference from other sound sources.
Solutions and Tips
- Adjusting Sensitivity: If your module has a potentiometer, turn it slowly while monitoring the output until the desired sensitivity is achieved.
- Debounce in Software: Implement a short delay after detecting sound to prevent immediate re-triggering.
- Shielding from Noise: Use shielded cables for connections and keep the module away from high-frequency devices.
FAQs
Q: Can the Sound Detector differentiate between different sounds? A: No, the Sound Detector can only detect the presence and intensity of sound, not the type or frequency.
Q: Is it possible to use the analog output? A: Yes, the AO pin provides an analog voltage proportional to the sound intensity, which can be read using an analog input on the Arduino.
Q: How can I extend the range of sound detection? A: The range is limited by the microphone's sensitivity and the ambient noise level. Using a more sensitive microphone or amplifying the signal may extend the range.
Q: Can this module be used outdoors? A: The Sound Detector is not typically weatherproof. For outdoor use, it should be placed in a protective enclosure.
Remember to always consult the datasheet provided by the manufacturer for the most accurate and detailed information about the Sound Detector module you are using.