How to Use Adafruit VCNL4040: Examples, Pinouts, and Specs
Introduction
The Adafruit VCNL4040 is a versatile sensor module that combines proximity sensing and ambient light measurement capabilities. It leverages infrared technology to detect the presence of objects and accurately measures ambient light levels. This sensor is ideal for a wide range of applications, including gesture recognition, proximity detection, and automatic light adjustment in consumer electronics.
Explore Projects Built with Adafruit VCNL4040

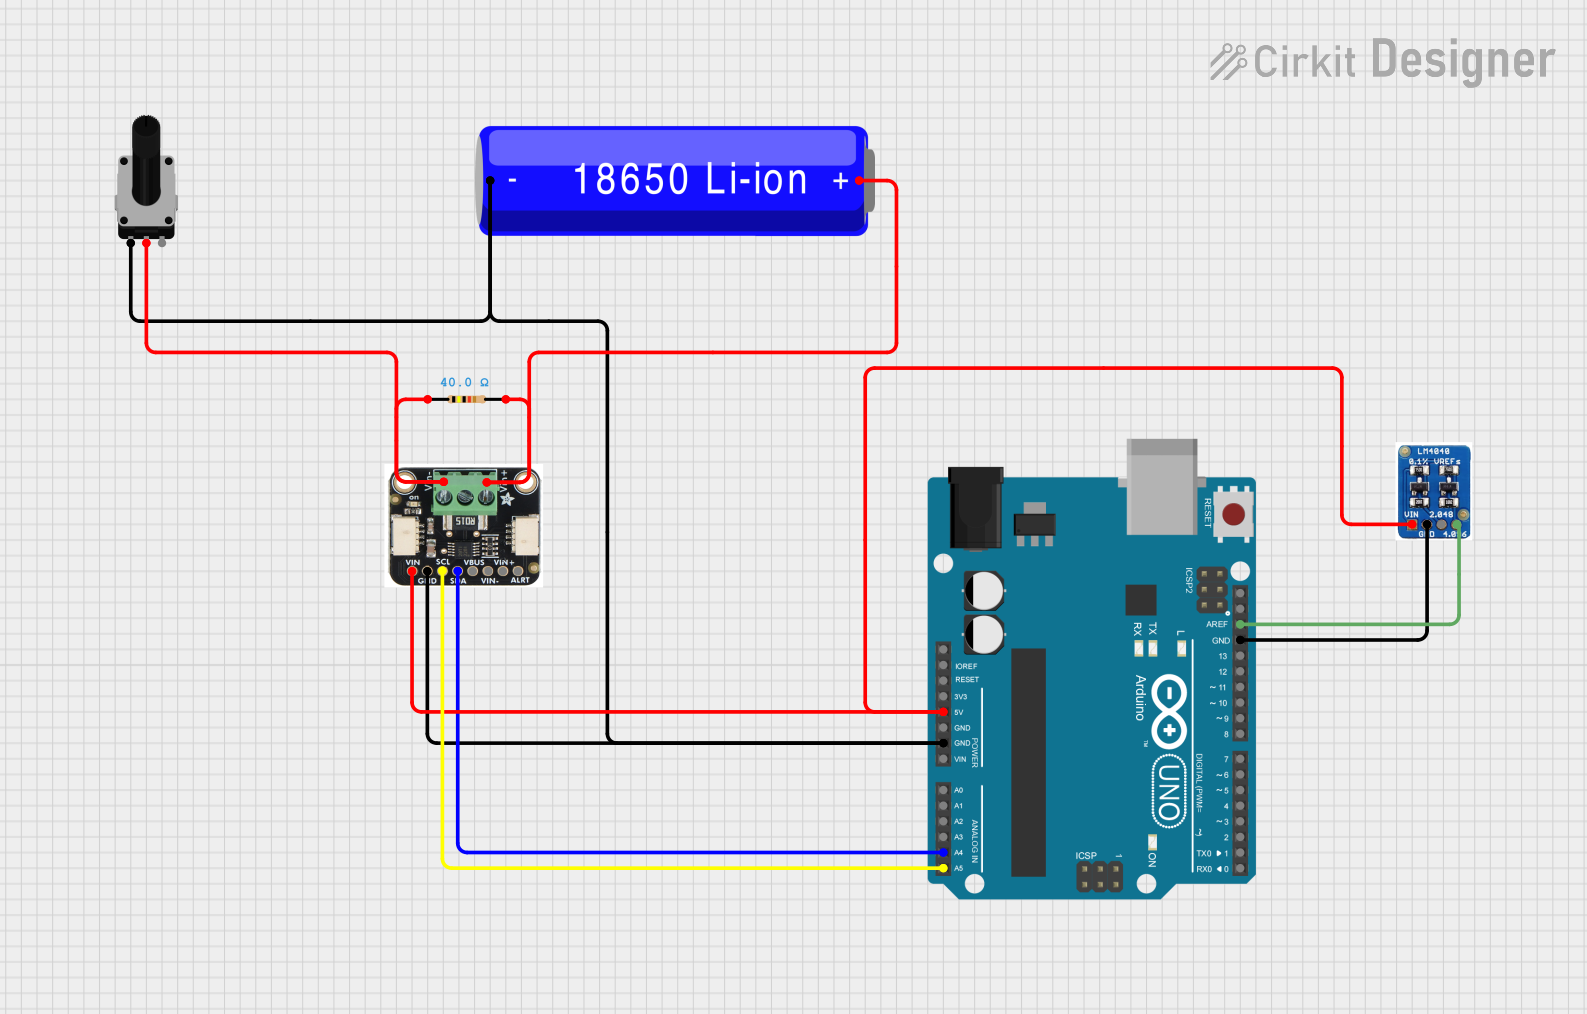
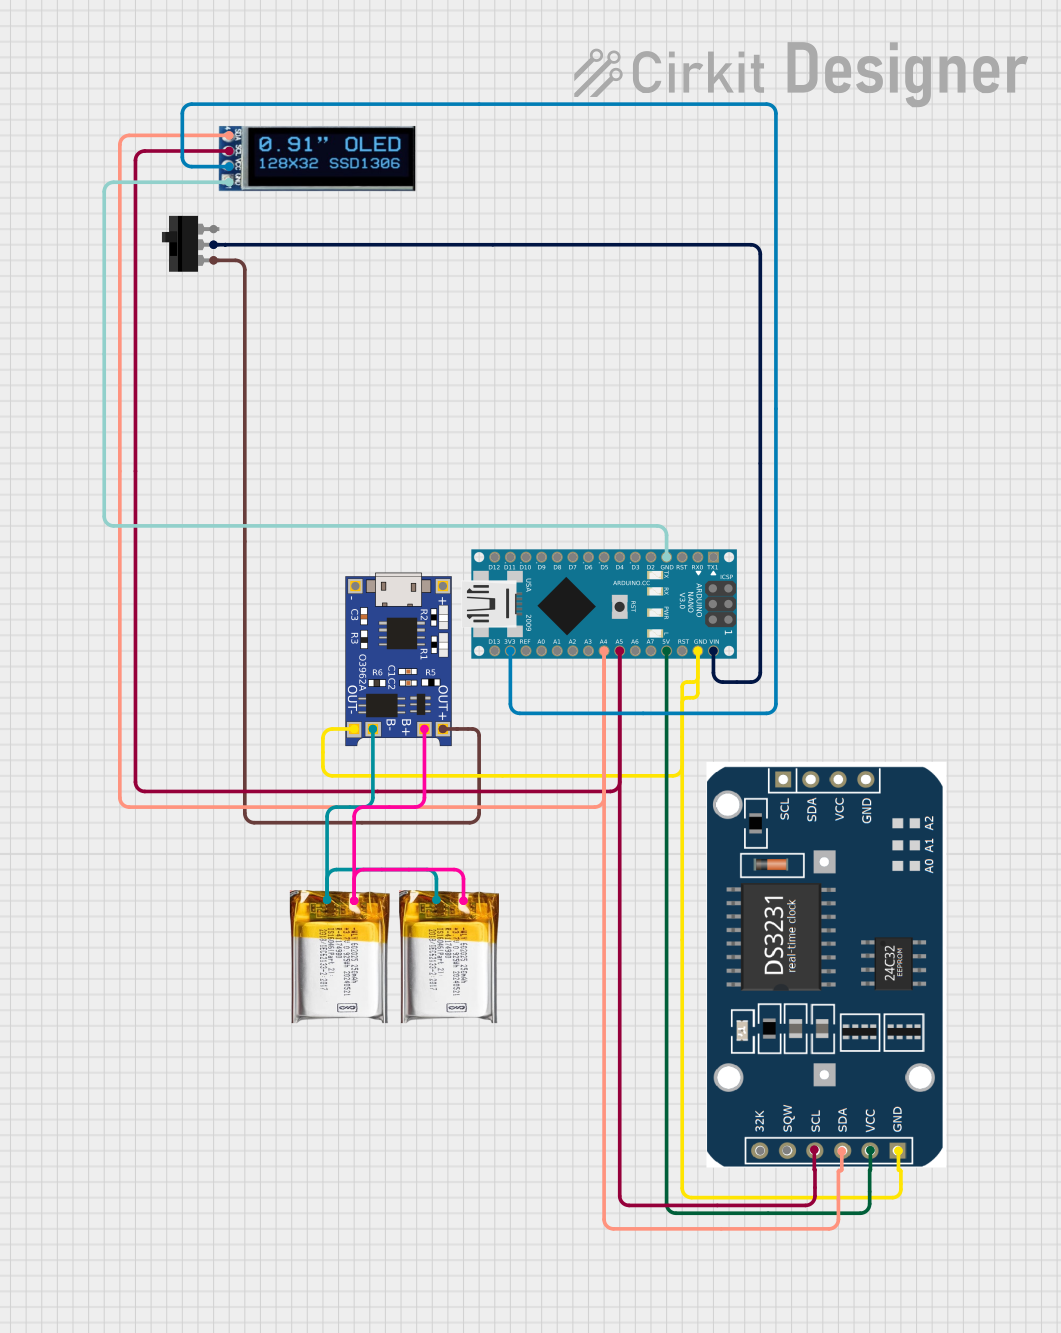
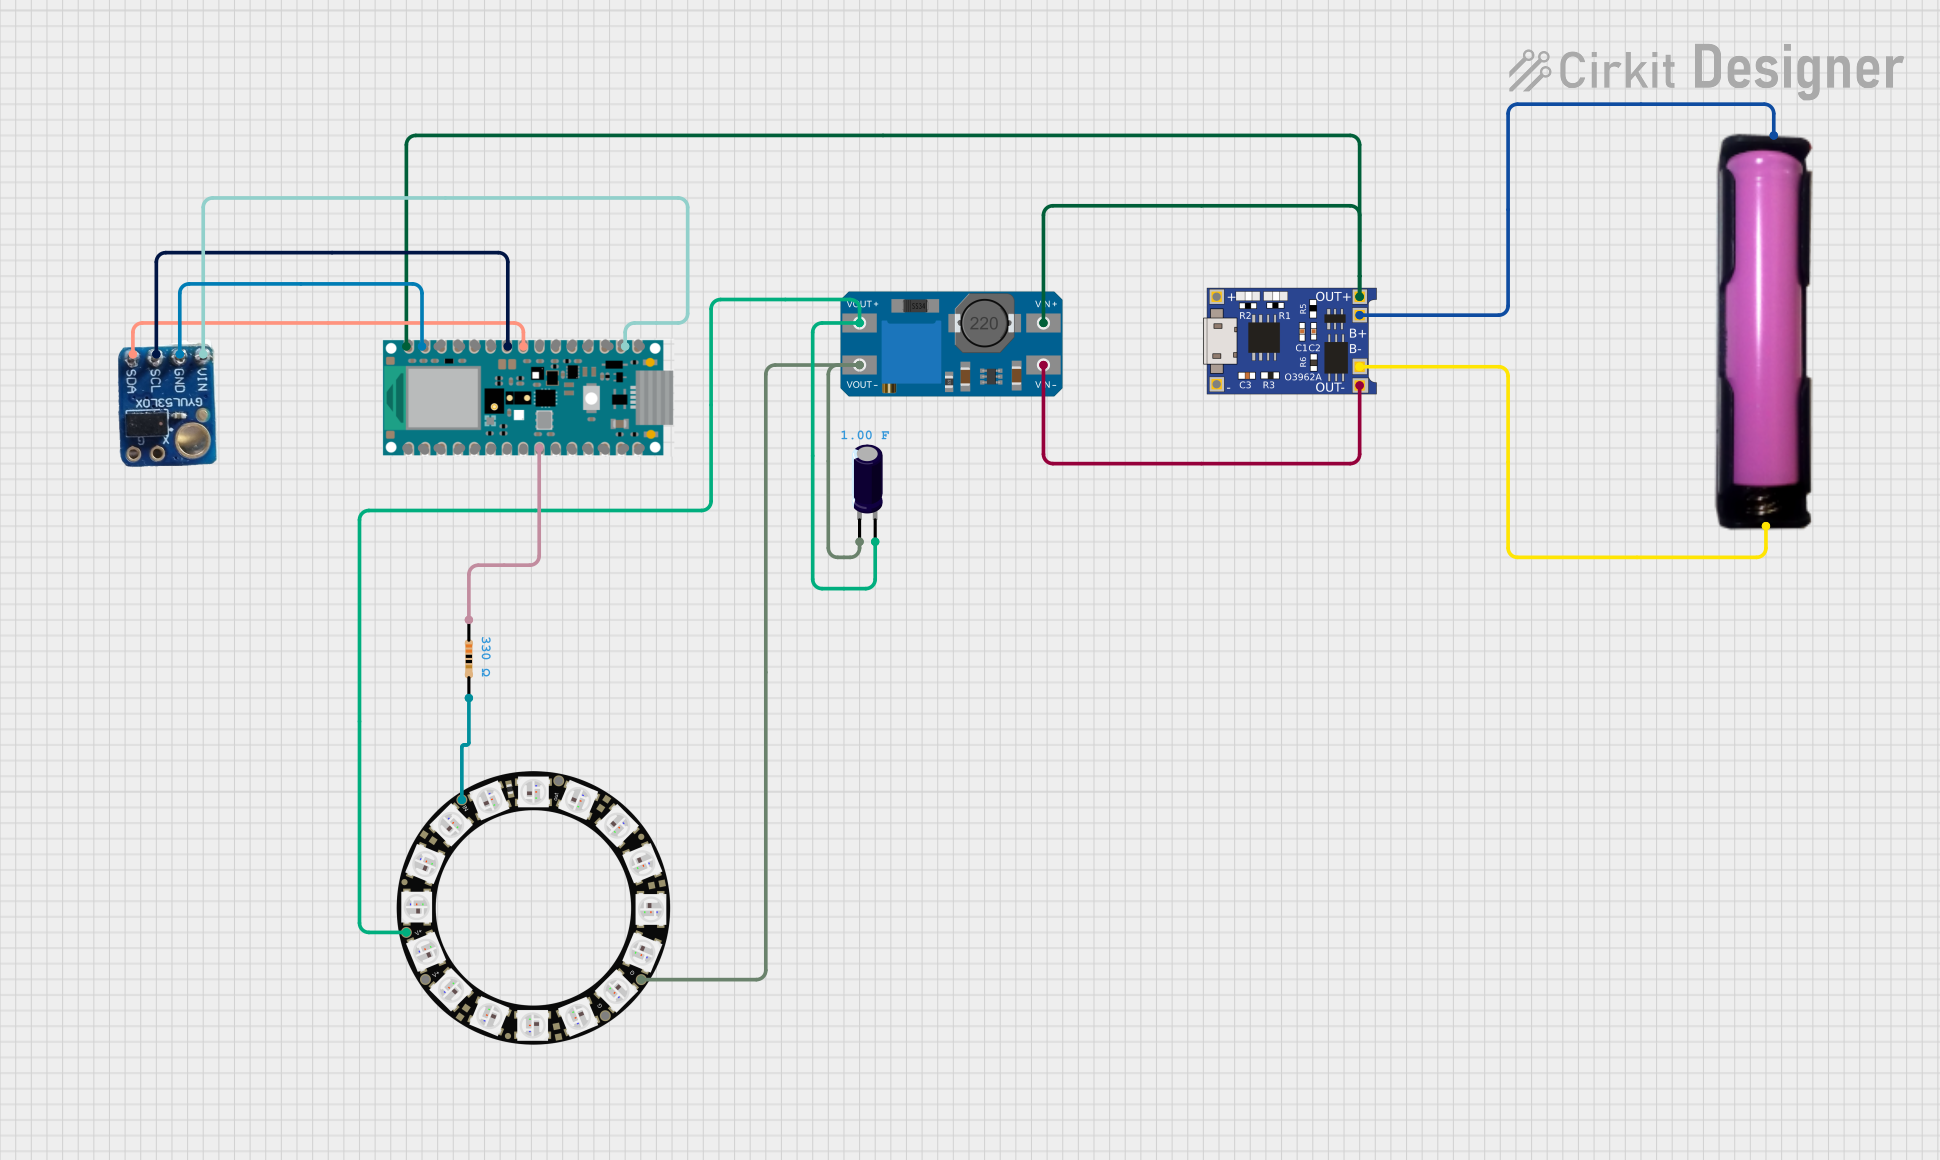
Explore Projects Built with Adafruit VCNL4040
Common Applications and Use Cases
- Gesture recognition in consumer devices
- Proximity detection for activating screens or functions
- Ambient light sensing for display brightness control
- User presence detection in smart home devices
- Obstacle detection for robotics
Technical Specifications
Key Technical Details
- Operating Voltage: 2.5V to 3.6V
- Supply Current: 200 µA (typical)
- Proximity Sensor Range: Up to 200mm
- Ambient Light Sensor Range: 0.0125 to 6,400 lux
- I2C Interface: Standard (100 kHz) and Fast (400 kHz) modes
- Interrupt Function: Programmable upper and lower thresholds
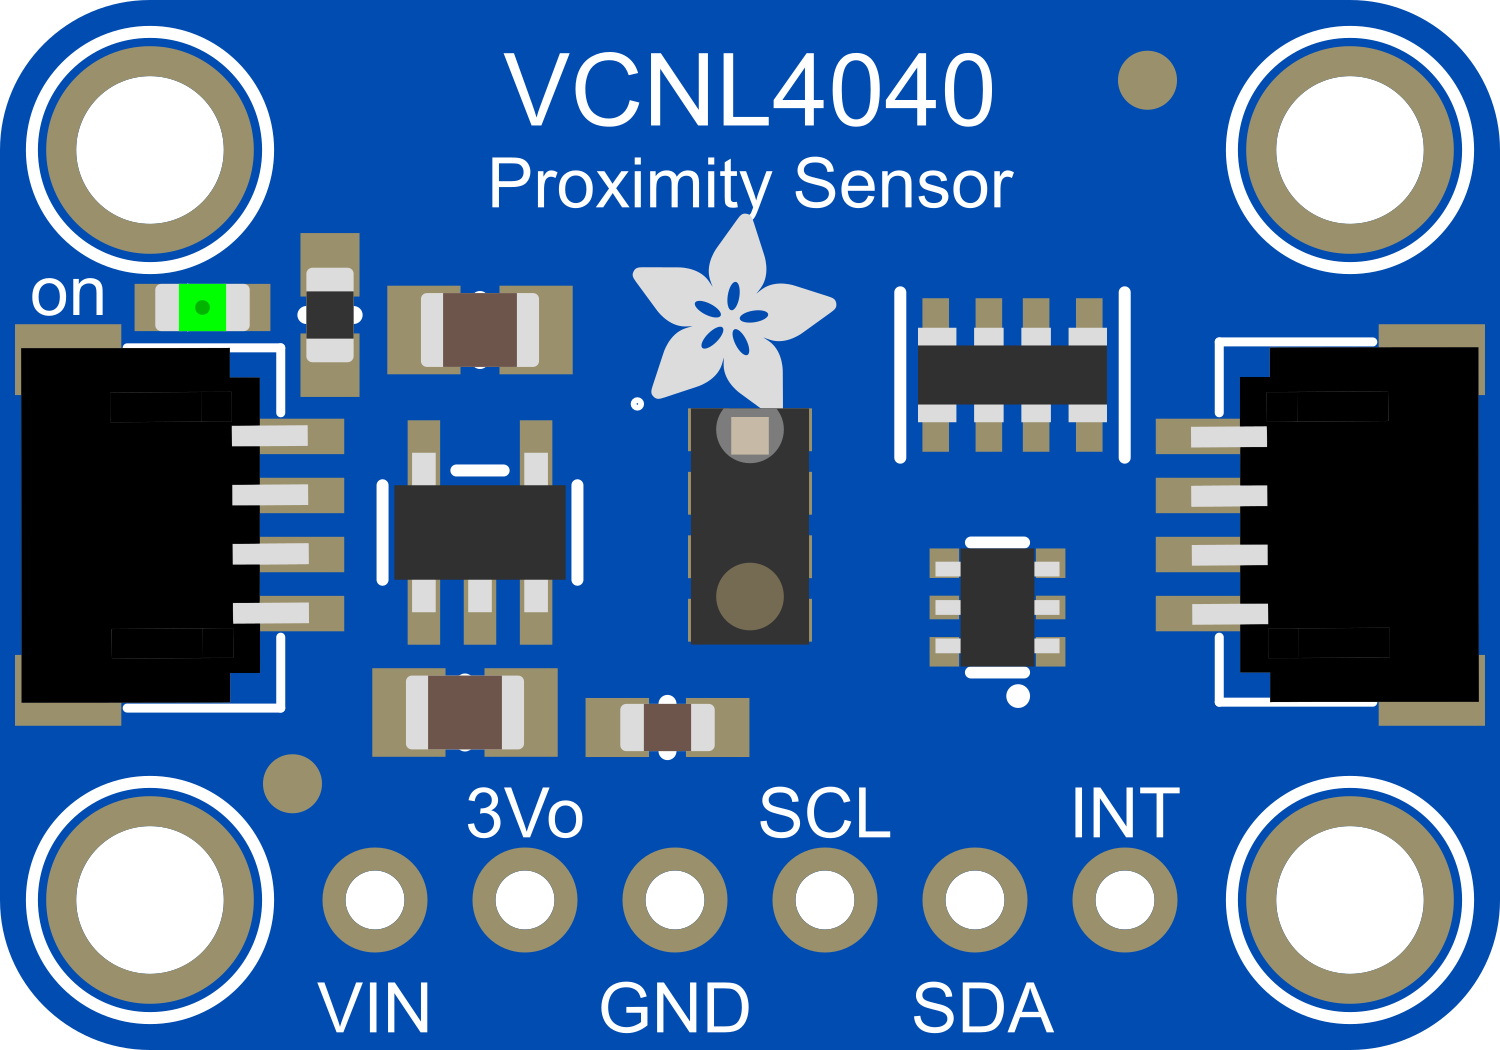
Pin Configuration and Descriptions
| Pin Number | Pin Name | Description |
|---|---|---|
| 1 | VIN | Power supply (2.5V to 3.6V) |
| 2 | GND | Ground |
| 3 | SCL | I2C clock line |
| 4 | SDA | I2C data line |
| 5 | INT | Interrupt output (active low) |
Usage Instructions
How to Use the Component in a Circuit
- Power Connections: Connect the VIN pin to a 2.5V to 3.6V power supply and the GND pin to the ground.
- I2C Connections: Connect the SCL and SDA pins to the I2C clock and data lines on your microcontroller.
- Interrupt (Optional): The INT pin can be connected to an interrupt-capable GPIO pin on your microcontroller to utilize the interrupt feature.
Important Considerations and Best Practices
- Ensure that the power supply voltage is within the specified range to prevent damage.
- Use pull-up resistors on the I2C lines if they are not provided on the microcontroller board.
- Avoid placing objects that emit infrared light near the sensor to prevent false readings.
- Calibrate the sensor for the specific application and environment for accurate results.
Example Code for Arduino UNO
#include <Wire.h>
#include "VCNL4040.h"

VCNL4040 proximitySensor;

void setup() {
  Serial.begin(9600);
  Wire.begin();

  if (!proximitySensor.begin()) {
    Serial.println("Failed to find VCNL4040 chip");
    while (1) { delay(10); }
  }
  Serial.println("VCNL4040 Found!");
}

void loop() {
  uint16_t proximity = proximitySensor.getProximity();
  uint16_t ambientLight = proximitySensor.getAmbientLight();

  Serial.print("Proximity: ");
  Serial.print(proximity);
  Serial.print(" | Ambient Light: ");
  Serial.println(ambientLight);

  delay(500);
}
Troubleshooting and FAQs
Common Issues Users Might Face
- Sensor Not Detected: Ensure that the I2C connections are correct and that the microcontroller is supplying the correct voltage.
- Inaccurate Readings: Check for sources of infrared light interference and recalibrate the sensor if necessary.
- No Response from Sensor: Verify that the sensor is not in a power-saving mode and that the I2C address is correctly configured.
Solutions and Tips for Troubleshooting
- Double-check wiring and solder joints for any loose connections or shorts.
- Use I2C scanner code to confirm the sensor's address and connectivity.
- Ensure that the ambient light conditions are within the sensor's operating range for accurate measurements.
FAQs
Q: Can the VCNL4040 detect the exact distance to an object? A: The VCNL4040 is not a distance-measuring sensor. It can detect the presence of an object within its range but does not provide precise distance measurements.
Q: Is the VCNL4040 suitable for outdoor use? A: The VCNL4040 can be used outdoors, but direct sunlight may interfere with the ambient light sensor. It is recommended to calibrate the sensor for the specific outdoor conditions.
Q: How can I adjust the sensor's sensitivity? A: Sensitivity can be adjusted through the sensor's registers using I2C communication. Refer to the sensor's datasheet for detailed register descriptions and settings.
This documentation provides an overview of the Adafruit VCNL4040 sensor module, its technical specifications, usage instructions, example code for Arduino UNO, and troubleshooting tips. For more detailed information, consult the sensor's datasheet and Adafruit's resources.