How to Use DS18B20 Module: Examples, Pinouts, and Specs
Introduction
The DS18B20 Module is a compact digital temperature sensor module that utilizes the DS18B20 temperature sensor chip. It is designed to provide precise temperature readings over a one-wire digital interface, which means it requires only one data line (and ground) for communication with a microcontroller such as an Arduino. This sensor is widely used in a variety of applications, including HVAC environmental controls, temperature monitoring systems inside buildings, equipment or machinery, and process monitoring and control systems.
Explore Projects Built with DS18B20 Module
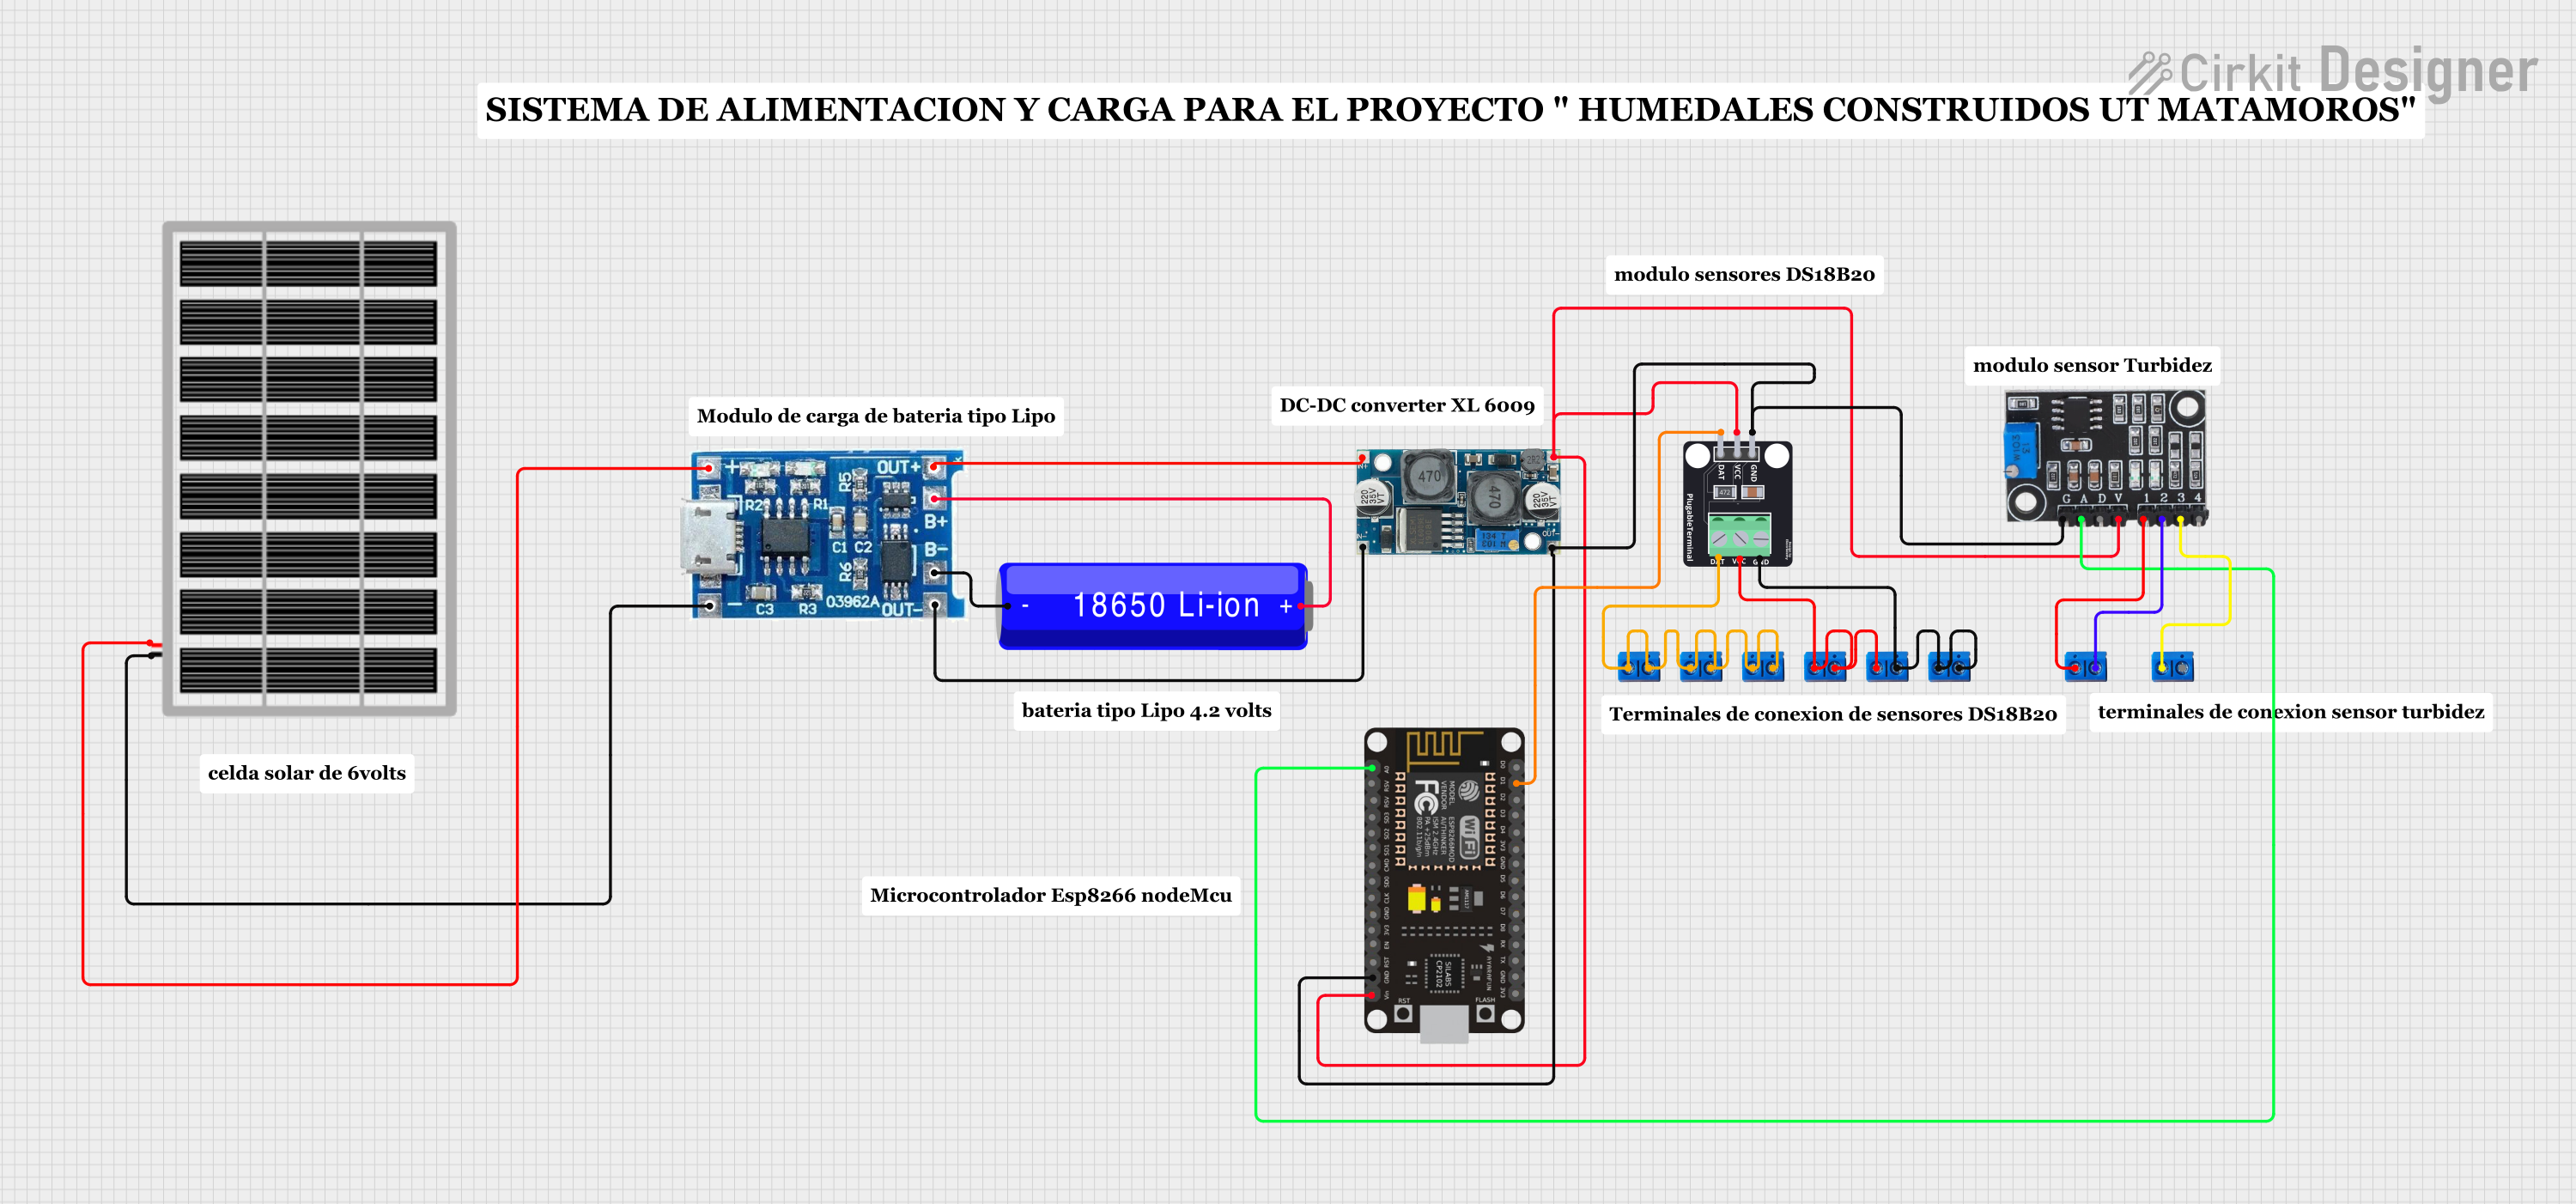
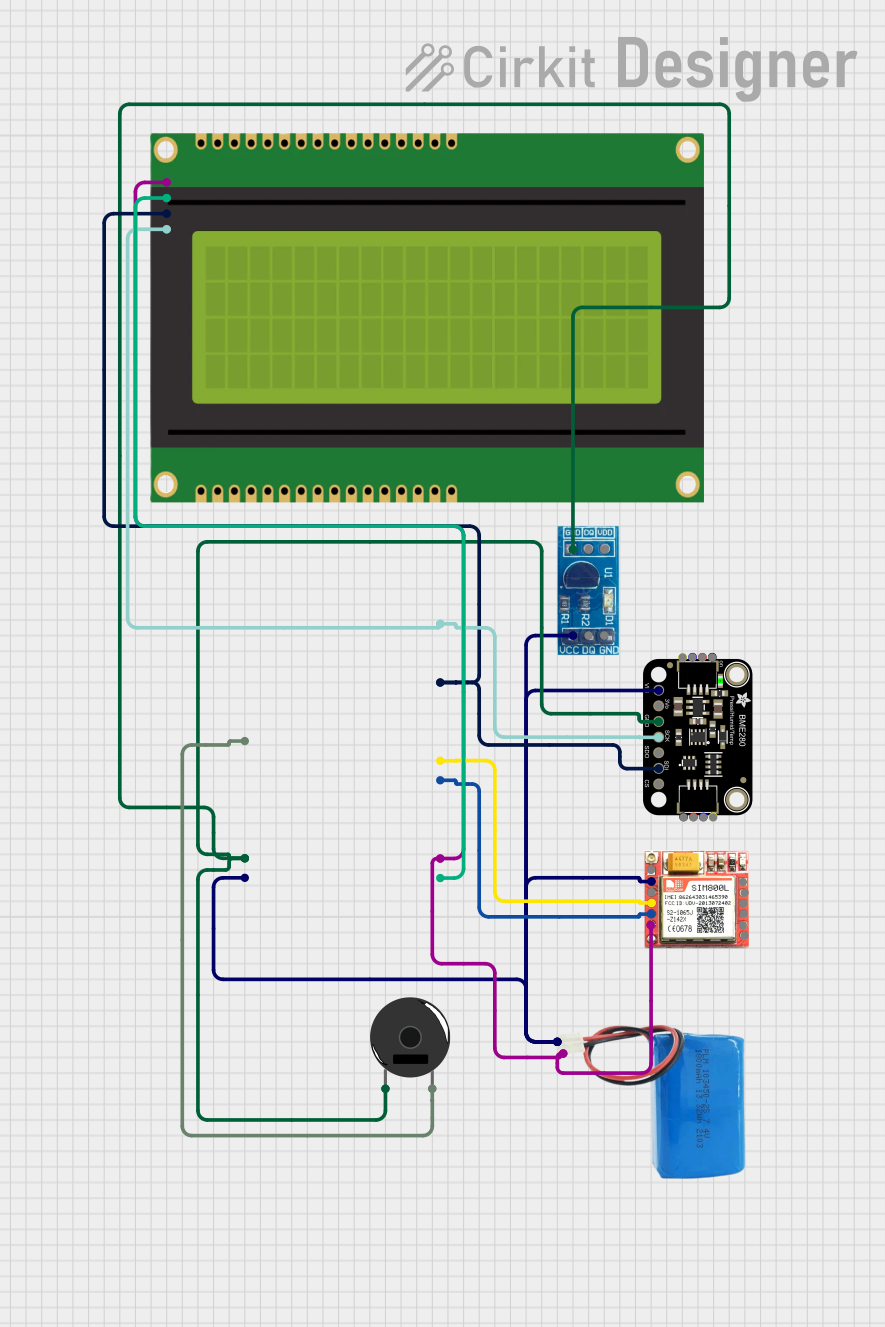
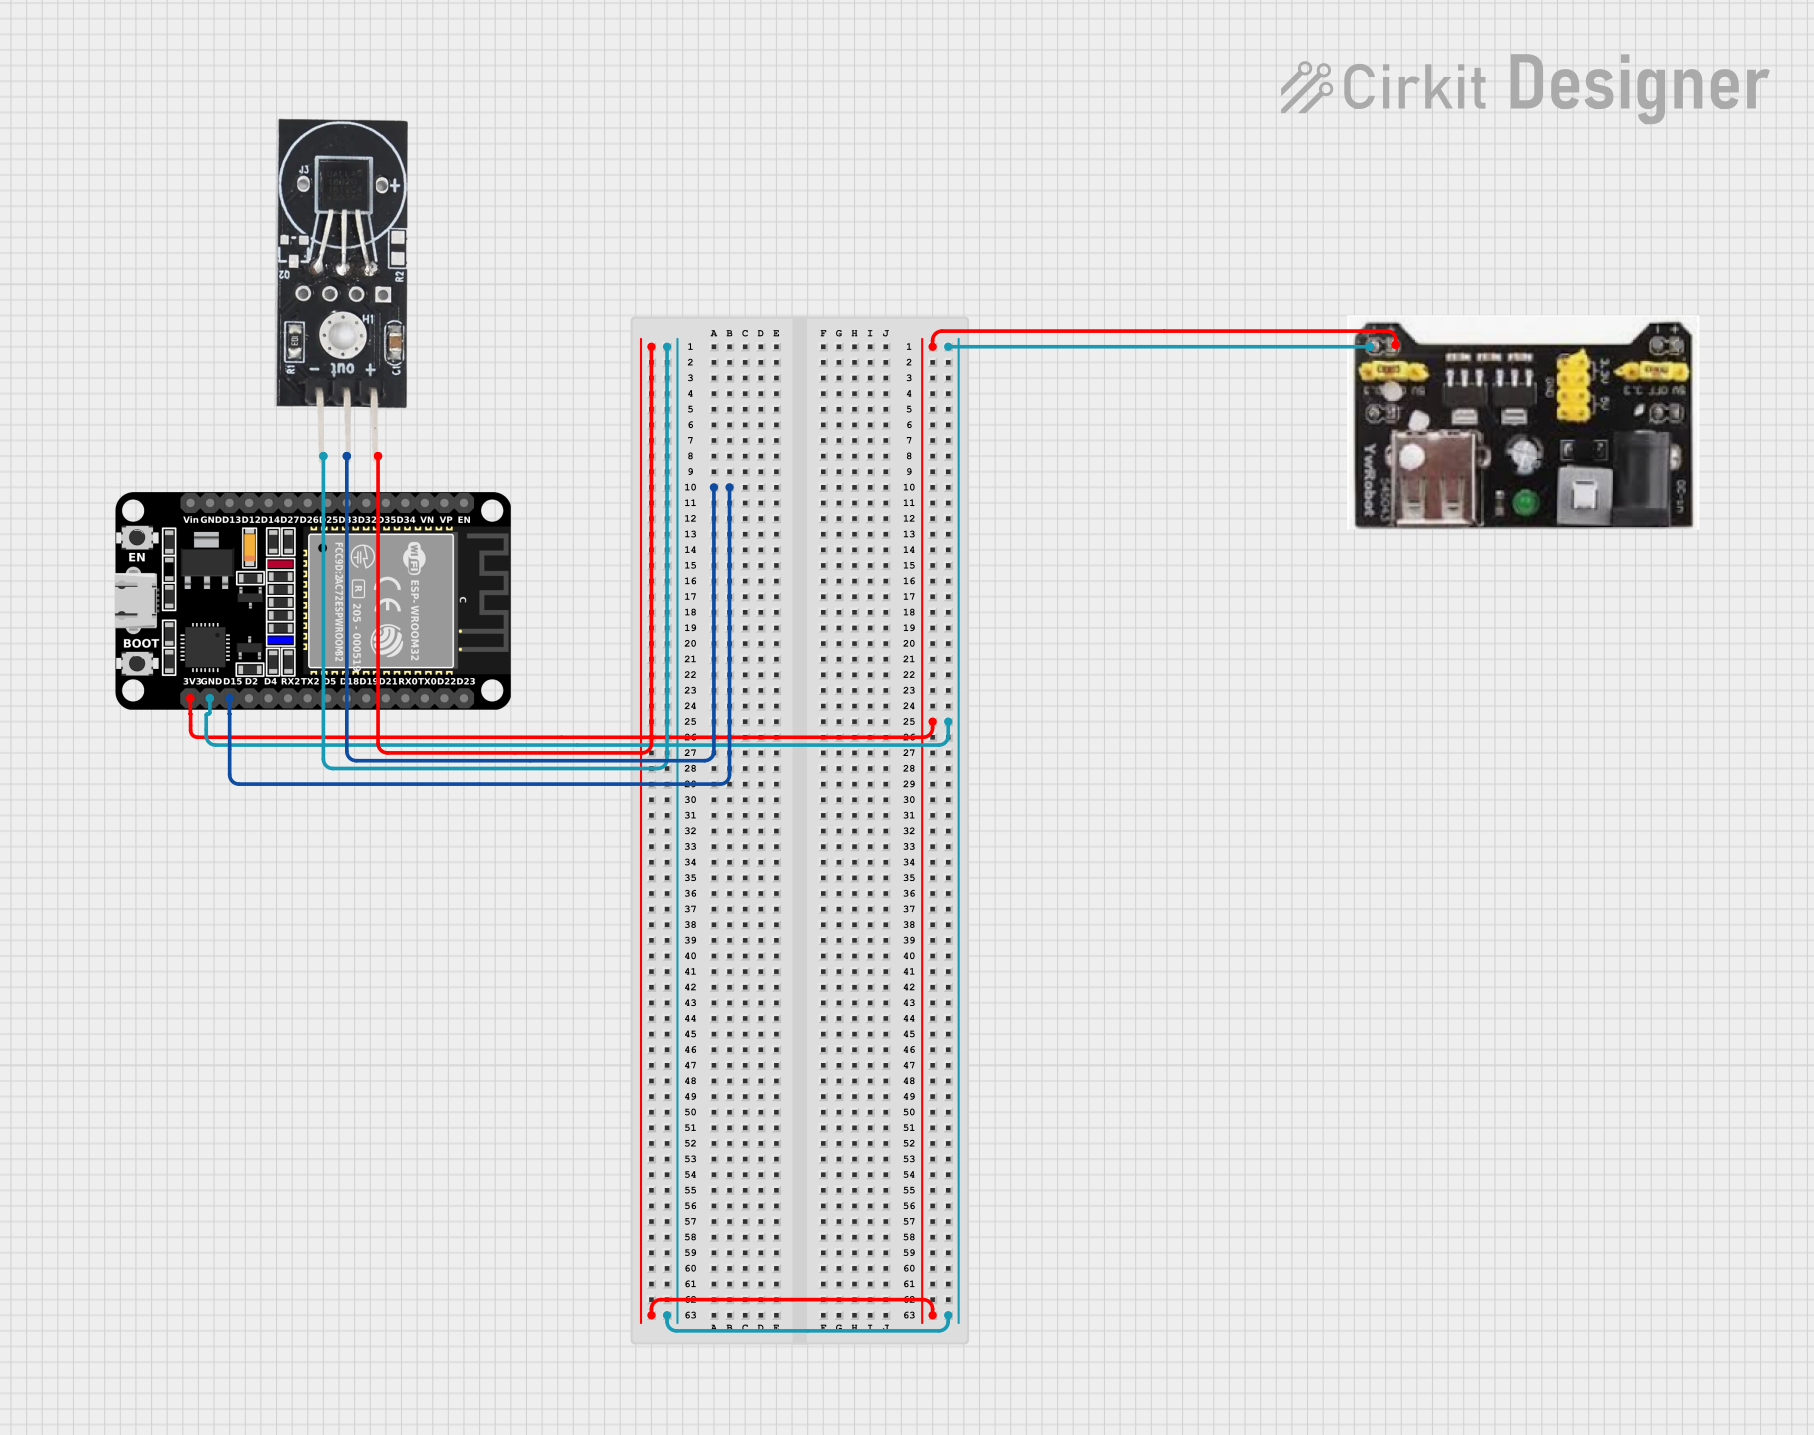
Explore Projects Built with DS18B20 Module
Technical Specifications
Key Technical Details
- Temperature Range: -55°C to +125°C (-67°F to +257°F)
- Accuracy: ±0.5°C (from -10°C to +85°C)
- Supply Voltage: 3.0V to 5.5V
- Current: 1mA (active), 750μA (standby)
- Output: Digital signal via 1-Wire protocol
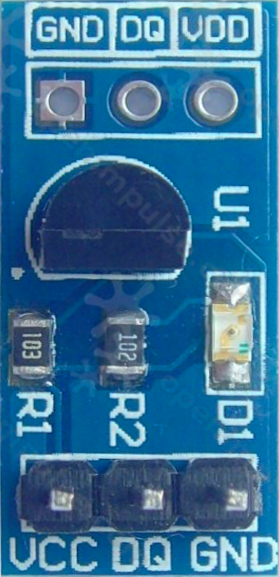
Pin Configuration and Descriptions
| Pin Number | Name | Description |
|---|---|---|
| 1 | VDD | Power supply (3.0V to 5.5V) |
| 2 | DQ | Data line for 1-Wire communication |
| 3 | GND | Ground |
Usage Instructions
Connecting the DS18B20 to an Arduino UNO
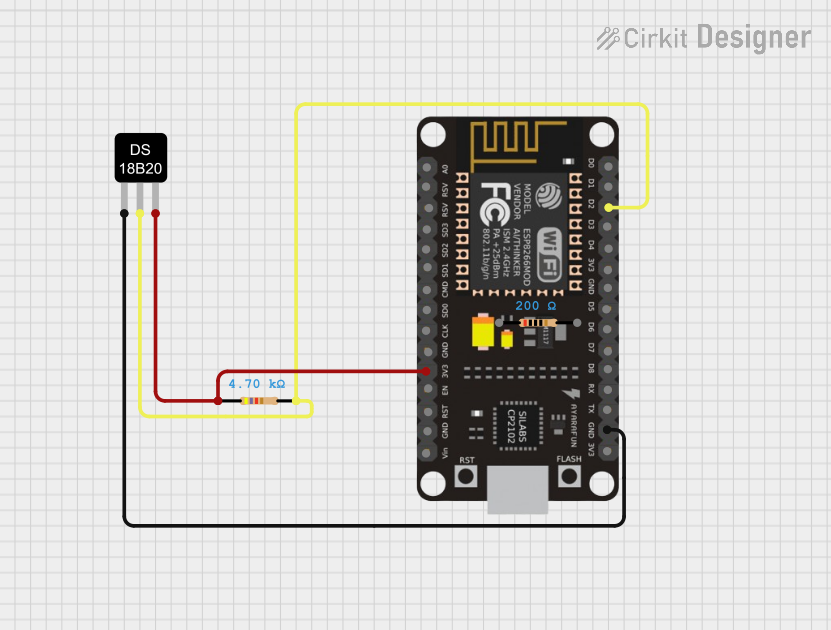
- Connect the VDD pin of the DS18B20 to the 5V output on the Arduino.
- Connect the GND pin to one of the GND pins on the Arduino.
- Connect the DQ pin to a digital I/O pin on the Arduino (e.g., pin 2).
- Place a 4.7kΩ pull-up resistor between the VDD and DQ pins to ensure proper communication on the data line.
Programming the Arduino to Read Temperature
To read temperature data from the DS18B20, you will need to use the OneWire and DallasTemperature libraries, which can be installed through the Arduino IDE's Library Manager.
Here is a sample code snippet to get you started:
#include <OneWire.h>
#include <DallasTemperature.h>

// Data wire is connected to Arduino pin 2
#define ONE_WIRE_BUS 2

// Setup a oneWire instance to communicate with any OneWire device
OneWire oneWire(ONE_WIRE_BUS);

// Pass oneWire reference to DallasTemperature library
DallasTemperature sensors(&oneWire);

void setup() {
  Serial.begin(9600);
  sensors.begin(); // Start up the library
}

void loop() {
  sensors.requestTemperatures(); // Send command to get temperatures
  float temperatureC = sensors.getTempCByIndex(0); // Read temperature in Celsius
  Serial.print("Temperature: ");
  Serial.print(temperatureC);
  Serial.println("°C");
  delay(1000); // Wait 1 second before next reading
}
Important Considerations and Best Practices
- Ensure that the connections are secure to prevent intermittent readings.
- Use the correct pull-up resistor value (4.7kΩ is recommended).
- Avoid running the data line next to high-voltage or high-current lines to minimize interference.
- For long cable runs, shielded cable may be necessary to prevent signal degradation.
Troubleshooting and FAQs
Common Issues
- Inaccurate Temperature Readings: Ensure that the pull-up resistor is properly connected and that the DS18B20 is not exposed to rapid temperature changes.
- No Temperature Readings: Check the wiring and connections, and ensure that the correct pin is defined in the code for the data line.
- Fluctuating Readings: This could be due to electrical noise. Try using a shorter cable or a shielded cable.
Solutions and Tips for Troubleshooting
- Double-check the wiring against the pin configuration table.
- Verify that the Arduino IDE has the OneWire and DallasTemperature libraries installed.
- Use the
sensors.getDeviceCount()function to ensure that the Arduino is communicating with the sensor. - If multiple sensors are on the same data line, ensure each has a unique address.
FAQs
Q: Can I connect multiple DS18B20 sensors to the same Arduino pin? A: Yes, the DS18B20 supports multiple devices on the same 1-Wire bus. Each device has a unique 64-bit serial code, which allows for multiple sensors to be connected to the same data line.
Q: How long can the data line be? A: The maximum length depends on various factors, including the quality of the cable and the presence of electrical noise. For longer distances, it is recommended to use a shielded cable and to keep the cable length as short as practical.
Q: Is the DS18B20 waterproof? A: The DS18B20 chip itself is not waterproof, but waterproof versions of the sensor are available, which encase the chip in a stainless steel tube. Always check the specifications of the sensor you are using.
Q: How do I read the temperature in Fahrenheit?
A: The DallasTemperature library provides a function getTempFByIndex() which can be used to get the temperature in Fahrenheit directly. Replace getTempCByIndex() with getTempFByIndex() in the code.
This documentation provides a comprehensive guide to using the DS18B20 Temperature Sensor Module with an Arduino. For further assistance, consult the datasheet of the DS18B20 chip or reach out to the community forums for support.