Cirkit Designer Logo
Cirkit Designer
Your all-in-one circuit design IDE
Home / 
Component Documentation

How to Use neopixel: Examples, Pinouts, and Specs

Image of neopixel
Cirkit Designer LogoDesign with neopixel in Cirkit Designer

Introduction

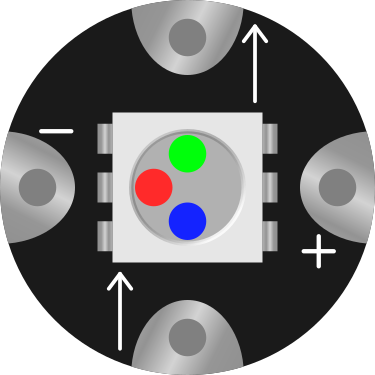
Neopixels are individually addressable RGB LED strips that allow for full-color control of each LED, enabling complex lighting effects and animations. Each LED contains a built-in driver chip, making it possible to control the color and brightness of every LED independently using a single data line. Neopixels are widely used in decorative lighting, wearables, displays, and interactive projects.

Explore Projects Built with neopixel

Use Cirkit Designer to design, explore, and prototype these projects online. Some projects support real-time simulation. Click "Open Project" to start designing instantly!
Battery-Powered Adafruit Flora RGB NeoPixel Light Show
Image of FloraTest: A project utilizing neopixel in a practical application
This circuit consists of an Adafruit Flora v3 microcontroller connected to a Breadboard-friendly RGB Smart NeoPixel and powered by a 3xAAA battery pack. The microcontroller runs code to control the NeoPixel, displaying various colors and patterns.
Cirkit Designer LogoOpen Project in Cirkit Designer
Arduino Nano Controlled Sound and Light Effects System with NeoPixel LEDs
Image of Proton Pack: A project utilizing neopixel in a practical application
This circuit features an Arduino Nano microcontroller connected to a series of WS2812B LEDs, Adafruit NeoPixel Jewels, and Sticks, forming an addressable LED array. The Arduino controls the LED patterns and sequences, and interfaces with an Adafruit Audio FX Mini Sound Board for audio playback, which is amplified by an Adafruit PAM8302 amplifier connected to piezo speakers. The circuit includes toggle and push switches for user interaction, and uses a lipo battery with MP1584EN power regulators for power management. The embedded code on the Arduino facilitates complex lighting effects and sound playback, responding to switch states and button presses to create an interactive experience.
Cirkit Designer LogoOpen Project in Cirkit Designer
Arduino-Powered NeoPixel Light Show with Multiple Rings
Image of Chained Neopixel Rings: A project utilizing neopixel in a practical application
This circuit features an Arduino UNO microcontroller controlling three Adafruit NeoPixel Rings, which are connected in a chain. The code programmed into the Arduino sequentially lights up each pixel in green, creating a visual effect across the rings. The circuit is designed to demonstrate basic control of addressable RGB LEDs using the Arduino platform.
Cirkit Designer LogoOpen Project in Cirkit Designer
Arduino UNO Controlled NeoPixel Ring Light Show
Image of 6 Ring Series: A project utilizing neopixel in a practical application
This circuit consists of an Arduino UNO microcontroller connected to six Adafruit 12 NeoPixel Rings, each with 12 LEDs, for a total of 72 LEDs. The Arduino controls the LEDs to display a yellow color with varying brightness, creating a pulsating effect.
Cirkit Designer LogoOpen Project in Cirkit Designer

Explore Projects Built with neopixel

Use Cirkit Designer to design, explore, and prototype these projects online. Some projects support real-time simulation. Click "Open Project" to start designing instantly!
Image of FloraTest: A project utilizing neopixel in a practical application
Battery-Powered Adafruit Flora RGB NeoPixel Light Show
This circuit consists of an Adafruit Flora v3 microcontroller connected to a Breadboard-friendly RGB Smart NeoPixel and powered by a 3xAAA battery pack. The microcontroller runs code to control the NeoPixel, displaying various colors and patterns.
Cirkit Designer LogoOpen Project in Cirkit Designer
Image of Proton Pack: A project utilizing neopixel in a practical application
Arduino Nano Controlled Sound and Light Effects System with NeoPixel LEDs
This circuit features an Arduino Nano microcontroller connected to a series of WS2812B LEDs, Adafruit NeoPixel Jewels, and Sticks, forming an addressable LED array. The Arduino controls the LED patterns and sequences, and interfaces with an Adafruit Audio FX Mini Sound Board for audio playback, which is amplified by an Adafruit PAM8302 amplifier connected to piezo speakers. The circuit includes toggle and push switches for user interaction, and uses a lipo battery with MP1584EN power regulators for power management. The embedded code on the Arduino facilitates complex lighting effects and sound playback, responding to switch states and button presses to create an interactive experience.
Cirkit Designer LogoOpen Project in Cirkit Designer
Image of Chained Neopixel Rings: A project utilizing neopixel in a practical application
Arduino-Powered NeoPixel Light Show with Multiple Rings
This circuit features an Arduino UNO microcontroller controlling three Adafruit NeoPixel Rings, which are connected in a chain. The code programmed into the Arduino sequentially lights up each pixel in green, creating a visual effect across the rings. The circuit is designed to demonstrate basic control of addressable RGB LEDs using the Arduino platform.
Cirkit Designer LogoOpen Project in Cirkit Designer
Image of 6 Ring Series: A project utilizing neopixel in a practical application
Arduino UNO Controlled NeoPixel Ring Light Show
This circuit consists of an Arduino UNO microcontroller connected to six Adafruit 12 NeoPixel Rings, each with 12 LEDs, for a total of 72 LEDs. The Arduino controls the LEDs to display a yellow color with varying brightness, creating a pulsating effect.
Cirkit Designer LogoOpen Project in Cirkit Designer

Common Applications and Use Cases

  • Decorative lighting for homes, events, and holidays
  • Wearable electronics and cosplay
  • Interactive art installations
  • LED displays and signage
  • Robotics and IoT projects
  • Gaming setups and PC case lighting

Technical Specifications

  • Operating Voltage: 5V DC (some variants support 3.3V logic input)
  • Current Consumption: ~60mA per LED at full brightness (all colors on)
  • Communication Protocol: One-wire (timing-based)
  • LED Type: RGB (Red, Green, Blue) with 24-bit color depth
  • Data Transfer Rate: ~800 kHz
  • Operating Temperature: -40°C to 80°C
  • LED Spacing: Varies by strip (e.g., 30, 60, or 144 LEDs per meter)

Pin Configuration and Descriptions

Pin Name Description
VCC Power supply input (typically 5V DC).
GND Ground connection.
DIN Data input for controlling the LEDs. Connect to the microcontroller's pin.
DOUT Data output for chaining multiple Neopixel strips.

Usage Instructions

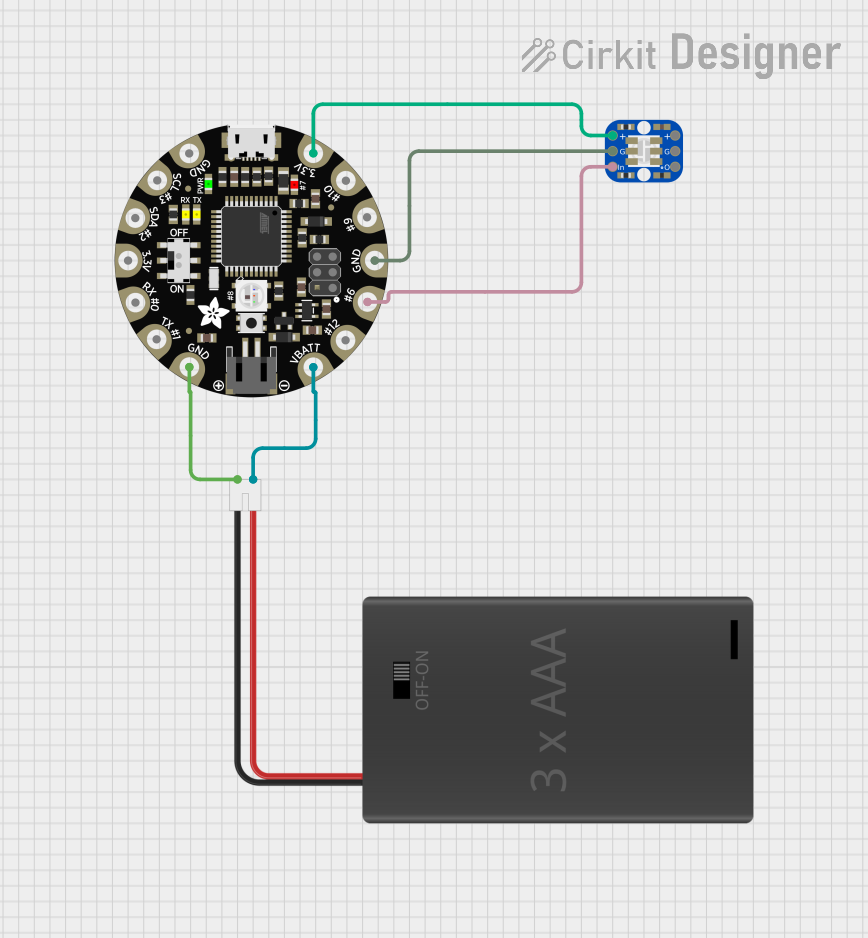
How to Use the Component in a Circuit

  1. Power Supply: Connect the VCC pin to a 5V power source and the GND pin to ground. Ensure the power supply can handle the total current draw of the strip (e.g., 60mA per LED at full brightness).
  2. Data Line: Connect the DIN pin to a digital output pin on your microcontroller. Use a resistor (330-500 ohms) in series with the data line to protect the first LED.
  3. Capacitor: Place a 1000 µF capacitor across VCC and GND near the strip to stabilize the power supply.
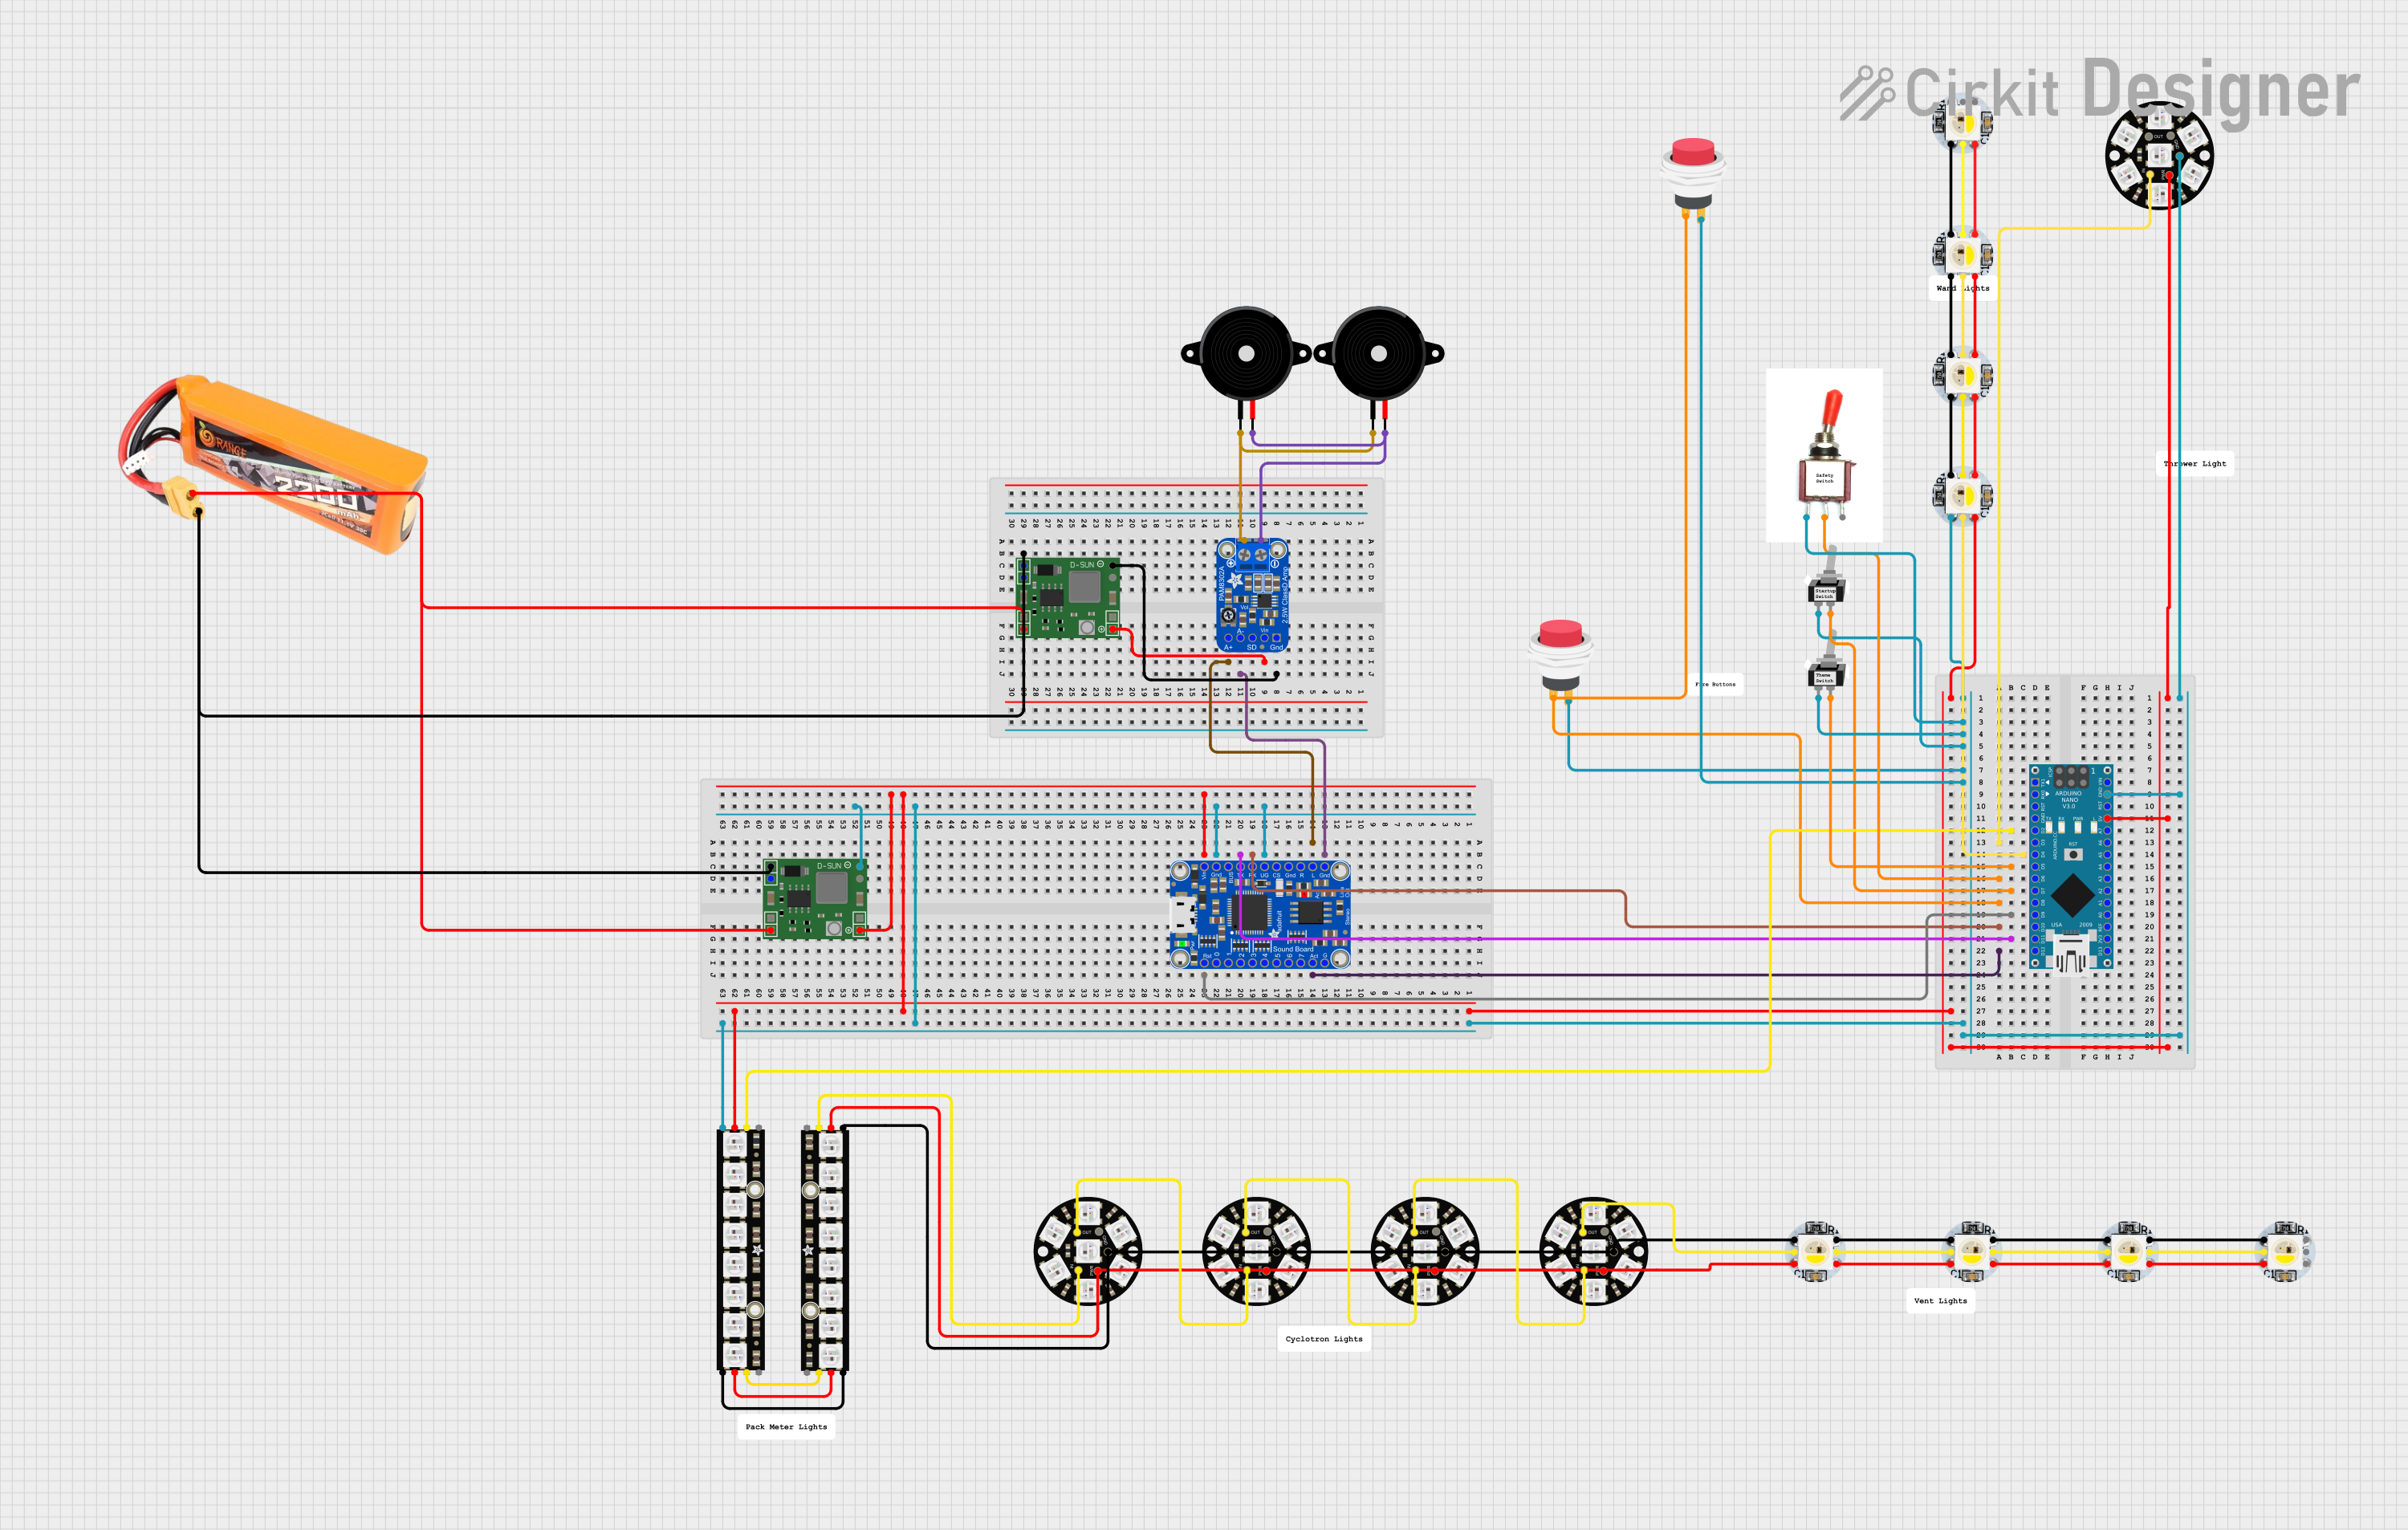
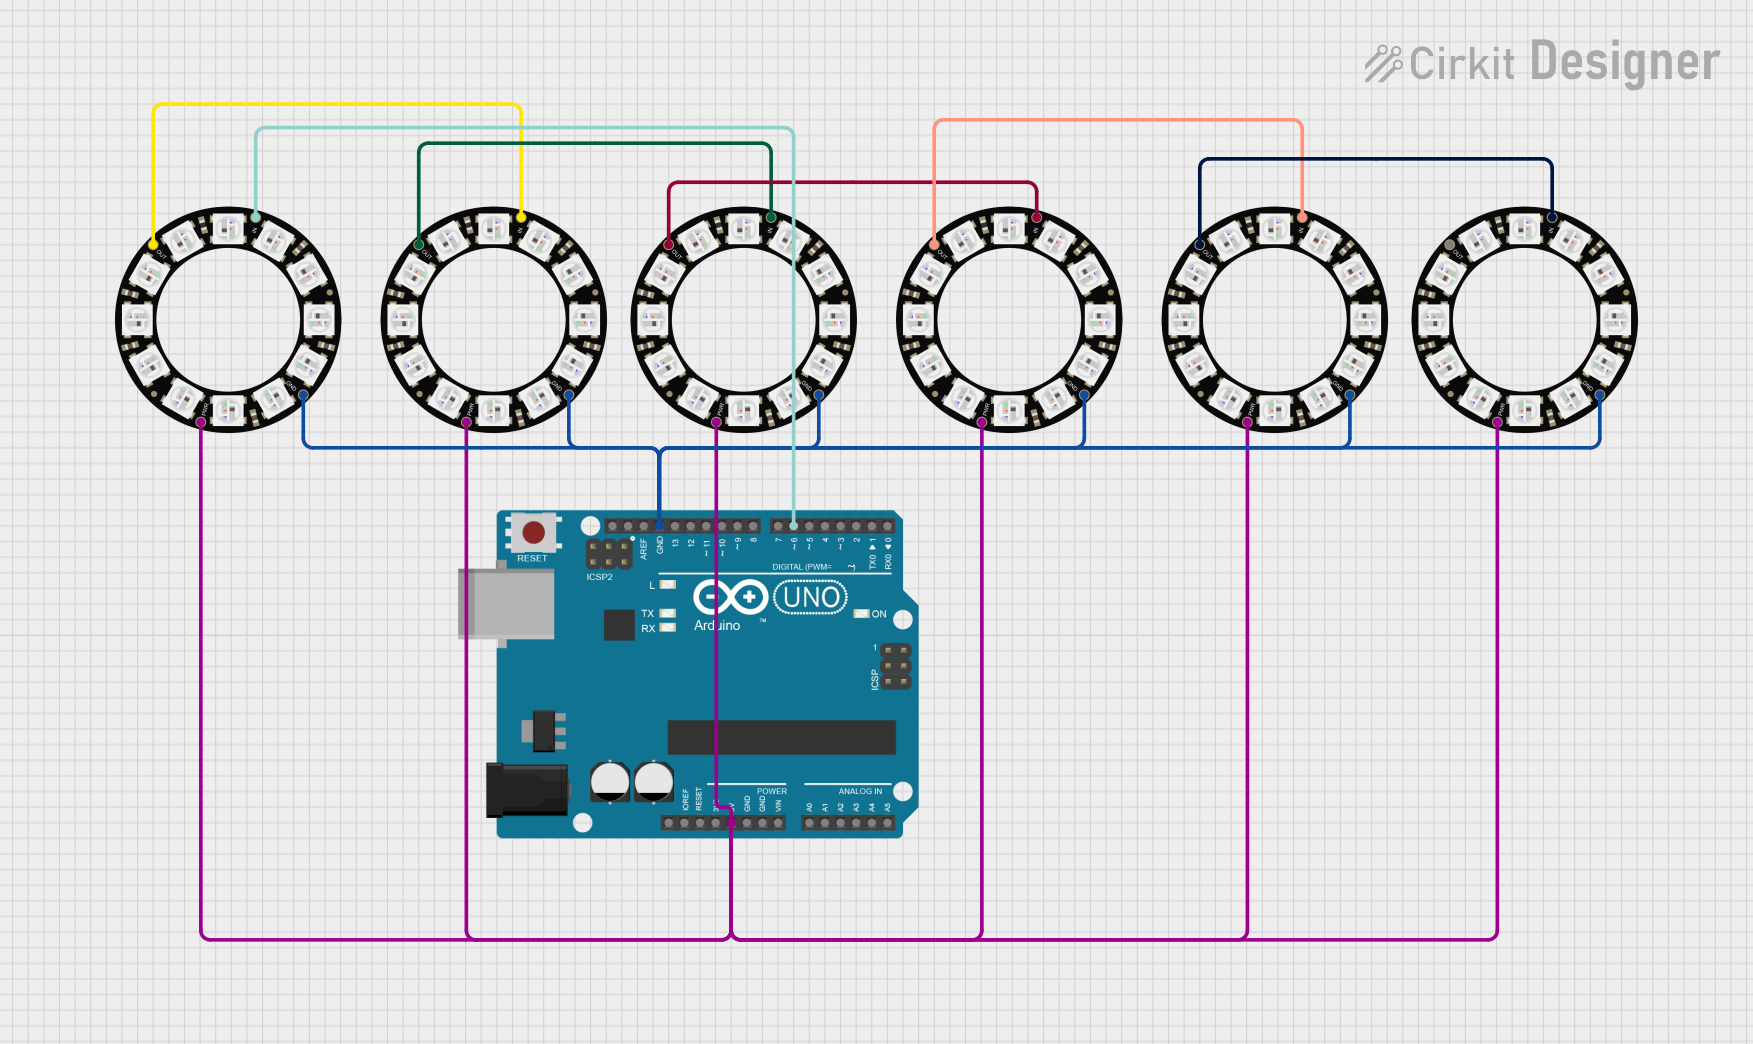
  4. Chaining Strips: To chain multiple strips, connect the DOUT pin of one strip to the DIN pin of the next.

Important Considerations and Best Practices

  • Voltage Level: Ensure the microcontroller's logic level matches the Neopixel's requirements. For 5V Neopixels, use a level shifter if your microcontroller operates at 3.3V.
  • Power Supply: Use a dedicated power supply for long strips to avoid voltage drops.
  • Data Timing: Neopixels require precise timing for data signals. Use libraries like Adafruit NeoPixel to simplify control.
  • Heat Management: Avoid running LEDs at full brightness for extended periods to prevent overheating.

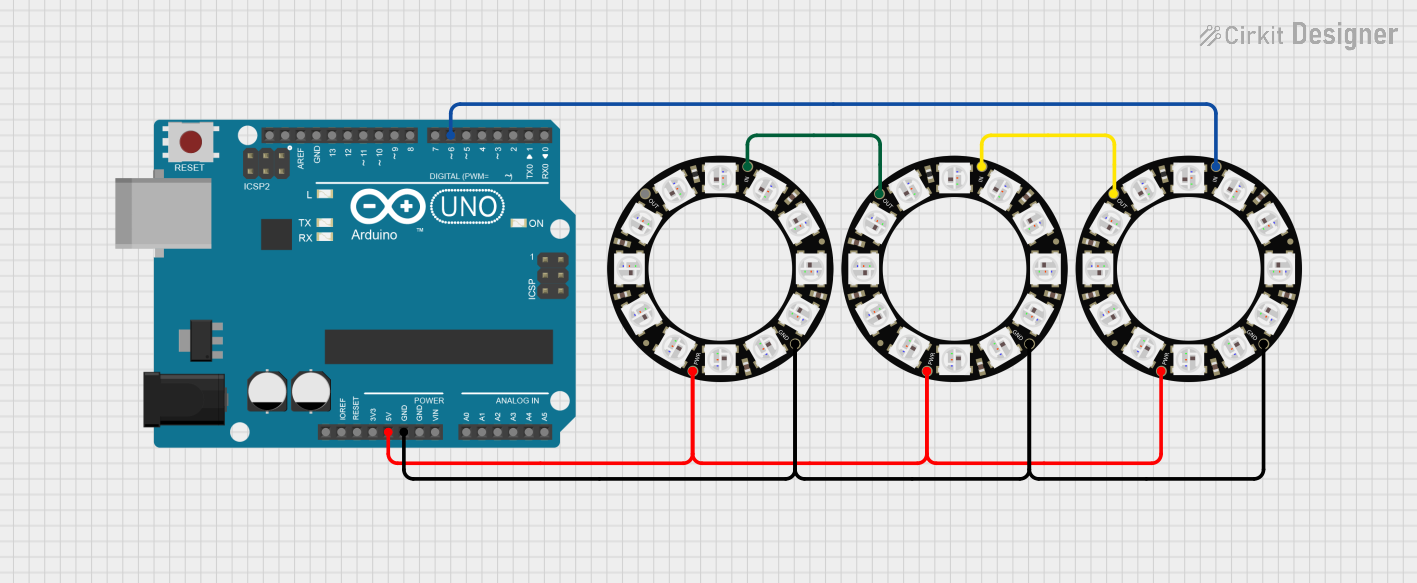
Example Code for Arduino UNO

Below is an example of how to control a Neopixel strip using the Adafruit NeoPixel library:

#include <Adafruit_NeoPixel.h>

// Define the pin connected to the Neopixel data line
#define PIN 6

// Define the number of LEDs in the strip
#define NUM_LEDS 30

// Create a NeoPixel object
Adafruit_NeoPixel strip = Adafruit_NeoPixel(NUM_LEDS, PIN, NEO_GRB + NEO_KHZ800);

void setup() {
  strip.begin();  // Initialize the Neopixel strip
  strip.show();   // Turn off all LEDs initially
}

void loop() {
  // Example: Set all LEDs to red
  for (int i = 0; i < NUM_LEDS; i++) {
    strip.setPixelColor(i, strip.Color(255, 0, 0)); // Red color
  }
  strip.show();  // Update the strip to display the colors
  delay(1000);   // Wait for 1 second

  // Example: Turn off all LEDs
  for (int i = 0; i < NUM_LEDS; i++) {
    strip.setPixelColor(i, strip.Color(0, 0, 0)); // Turn off
  }
  strip.show();  // Update the strip to turn off LEDs
  delay(1000);   // Wait for 1 second
}

Troubleshooting and FAQs

Common Issues and Solutions

  1. LEDs Not Lighting Up:

    • Check the power supply voltage and current rating.
    • Verify the data line connection and ensure the correct pin is used.
    • Add a resistor (330-500 ohms) in series with the data line if not already present.
  2. Flickering or Incorrect Colors:

    • Ensure the ground of the Neopixel strip is connected to the microcontroller's ground.
    • Use a capacitor (1000 µF) across VCC and GND to stabilize the power supply.
    • Verify the timing of the data signal. Use a library like Adafruit NeoPixel to handle timing.
  3. Voltage Drop on Long Strips:

    • Inject power at multiple points along the strip to prevent dimming.
    • Use thicker wires for power and ground connections.
  4. Microcontroller Resetting:

    • Ensure the power supply can handle the total current draw of the LEDs.
    • Add a capacitor near the microcontroller to prevent voltage dips.

FAQs

  • Can I cut the Neopixel strip? Yes, Neopixel strips can be cut at designated points (usually marked with a scissor icon).

  • How many Neopixels can I control? The number depends on the microcontroller's memory and processing power. For example, an Arduino UNO can control up to ~500 LEDs.

  • Can I power Neopixels with a battery? Yes, but ensure the battery can provide sufficient voltage (5V) and current for the strip.

  • Do I need a resistor on the data line? While not mandatory, a 330-500 ohm resistor is recommended to protect the first LED from voltage spikes.