Cirkit Designer
Your all-in-one circuit design IDE
Home /
Component Documentation
How to Use ps2 controller adapter board: Examples, Pinouts, and Specs
Introduction
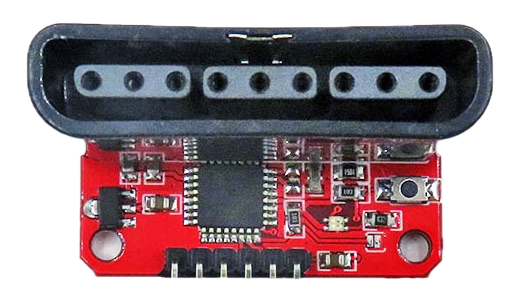
The PS2 Controller Adapter Board is a versatile circuit board designed to interface a PlayStation 2 (PS2) controller with various devices, such as computers or custom electronics projects. This adapter board simplifies the process of integrating the PS2 controller into your projects, providing a reliable and efficient way to utilize the controller's inputs.
Explore Projects Built with ps2 controller adapter board
Raspberry Pi Pico-based PS2 Controller Emulator with ADS1115 Analog Input

This circuit appears to be a game controller interface that uses a Raspberry Pi Pico microcontroller to emulate a PS2 controller, interfacing with a PS2 joystick and a PS2 console cable. The ADS1115 analog-to-digital converter is used to read the joystick's analog signals, and the microcontroller's SPI and I2C interfaces are utilized for communication with the PS2 console and the ADS1115, respectively. Additionally, an NPN transistor and a resistor are configured to handle the PS2 controller's acknowledge signal.
ESP32-Based Wi-Fi Controlled Laser Shooting Game with OLED Display

This circuit is a laser shooting game controlled by a PS3 controller, featuring an ESP32 microcontroller, two photosensitive sensors for light detection, and a motor driver to control two DC motors. The game includes an OLED display for score visualization, and a MOSFET to control an LED bulb, with power supplied by a 12V battery and regulated by a DC-DC step-down converter.
ESP32-Based Industrial Control System with RS485 Communication and I2C Interface

This circuit integrates a microcontroller with a display, digital potentiometer, IO expander, and opto-isolator board for signal interfacing and isolation. It includes a UART to RS485 converter for serial communication and a power converter to step down voltage for the system. The circuit is designed for control and communication in an isolated and protected environment.
Battery-Powered Game Controller with SparkFun Pro Micro and Raspberry Pi 4B

This circuit is a custom game controller featuring a SparkFun Pro Micro microcontroller, multiple tactile pushbuttons, and two analog joysticks. The Pro Micro reads inputs from the buttons and joysticks, processes them, and sends the corresponding gamepad signals. Additionally, a Raspberry Pi 4B is powered by a Pisugar S Pro battery module.
Explore Projects Built with ps2 controller adapter board
Raspberry Pi Pico-based PS2 Controller Emulator with ADS1115 Analog Input
This circuit appears to be a game controller interface that uses a Raspberry Pi Pico microcontroller to emulate a PS2 controller, interfacing with a PS2 joystick and a PS2 console cable. The ADS1115 analog-to-digital converter is used to read the joystick's analog signals, and the microcontroller's SPI and I2C interfaces are utilized for communication with the PS2 console and the ADS1115, respectively. Additionally, an NPN transistor and a resistor are configured to handle the PS2 controller's acknowledge signal.
ESP32-Based Wi-Fi Controlled Laser Shooting Game with OLED Display
This circuit is a laser shooting game controlled by a PS3 controller, featuring an ESP32 microcontroller, two photosensitive sensors for light detection, and a motor driver to control two DC motors. The game includes an OLED display for score visualization, and a MOSFET to control an LED bulb, with power supplied by a 12V battery and regulated by a DC-DC step-down converter.
ESP32-Based Industrial Control System with RS485 Communication and I2C Interface
This circuit integrates a microcontroller with a display, digital potentiometer, IO expander, and opto-isolator board for signal interfacing and isolation. It includes a UART to RS485 converter for serial communication and a power converter to step down voltage for the system. The circuit is designed for control and communication in an isolated and protected environment.
Battery-Powered Game Controller with SparkFun Pro Micro and Raspberry Pi 4B
This circuit is a custom game controller featuring a SparkFun Pro Micro microcontroller, multiple tactile pushbuttons, and two analog joysticks. The Pro Micro reads inputs from the buttons and joysticks, processes them, and sends the corresponding gamepad signals. Additionally, a Raspberry Pi 4B is powered by a Pisugar S Pro battery module.
Common Applications and Use Cases
- Gaming Projects: Use the PS2 controller for custom-built gaming consoles or retro gaming setups.
- Robotics: Control robots or other automated systems using the PS2 controller.
- Computer Interface: Connect the PS2 controller to a computer for use in custom software applications.
- DIY Electronics Projects: Integrate the PS2 controller into various DIY electronics projects for enhanced control and functionality.
Technical Specifications
Key Technical Details
| Specification | Value |
|---|---|
| Operating Voltage | 5V |
| Communication | Serial (SPI) |
| Connector Type | PS2 Controller Port |
| Dimensions | 50mm x 30mm x 10mm |
| Power Consumption | < 100mA |
Pin Configuration and Descriptions
| Pin Number | Pin Name | Description |
|---|---|---|
| 1 | VCC | Power supply (5V) |
| 2 | GND | Ground |
| 3 | DATA | Serial data line (MISO) |
| 4 | CMD | Command line (MOSI) |
| 5 | ATT | Attention line (Chip Select) |
| 6 | CLK | Clock line (SCK) |
| 7 | ACK | Acknowledge line (Interrupt) |
Usage Instructions
How to Use the Component in a Circuit
- Power Supply: Connect the VCC pin to a 5V power source and the GND pin to the ground.
- Communication Lines: Connect the DATA, CMD, ATT, CLK, and ACK pins to the corresponding pins on your microcontroller or interface device.
- PS2 Controller Connection: Plug the PS2 controller into the adapter board's PS2 port.
Important Considerations and Best Practices
- Voltage Levels: Ensure that the operating voltage is maintained at 5V to avoid damaging the adapter board or the PS2 controller.
- Signal Integrity: Use short and properly shielded cables for the communication lines to minimize noise and signal degradation.
- Initialization: Properly initialize the PS2 controller in your code to ensure correct communication and functionality.
Example Code for Arduino UNO
#include <PS2X_lib.h>  // Include PS2X library

PS2X ps2x;  // Create PS2 Controller Class

#define PS2_DAT  12  // MISO
#define PS2_CMD  11  // MOSI
#define PS2_SEL  10  // CS
#define PS2_CLK  13  // SCK

void setup() {
  Serial.begin(9600);

  // Initialize controller
  int error = ps2x.config_gamepad(PS2_CLK, PS2_CMD, PS2_SEL, PS2_DAT, true, true);

  if(error == 0) {
    Serial.println("PS2 Controller successfully connected!");
  } else {
    Serial.println("Error connecting PS2 Controller.");
  }
}

void loop() {
  ps2x.read_gamepad(false, 0);  // Read controller data

  if(ps2x.Button(PSB_START)) {
    Serial.println("Start button pressed");
  }

  delay(50);  // Small delay to prevent overwhelming the serial output
}
Troubleshooting and FAQs
Common Issues Users Might Face
No Response from Controller:
- Solution: Ensure all connections are secure and the power supply is stable. Verify that the PS2 controller is properly plugged into the adapter board.
Erratic Behavior:
- Solution: Check for noise or interference in the communication lines. Use shorter cables and proper shielding if necessary.
Initialization Errors:
- Solution: Double-check the pin connections and ensure the correct pins are defined in the code. Verify that the PS2 controller is compatible and functioning correctly.
Solutions and Tips for Troubleshooting
- Check Connections: Ensure all connections are secure and correctly aligned with the pin configuration.
- Power Supply: Verify that the power supply is providing a stable 5V.
- Code Verification: Ensure that the code is correctly written and the library used is compatible with your microcontroller.
- Component Testing: Test the PS2 controller and adapter board separately to isolate the issue.
By following this documentation, users can effectively integrate the PS2 Controller Adapter Board into their projects, ensuring reliable performance and functionality.