How to Use Esp32 amplifier: Examples, Pinouts, and Specs
Introduction
The ESP32 Amplifier is a versatile electronic component that combines the powerful ESP32 microcontroller with an integrated audio amplifier. This component is designed to boost audio signals, making it ideal for applications such as music playback, voice recognition, and smart audio systems. With its built-in Wi-Fi and Bluetooth capabilities, the ESP32 Amplifier is perfect for IoT-based audio projects, wireless speakers, and voice-controlled devices.
Explore Projects Built with Esp32 amplifier

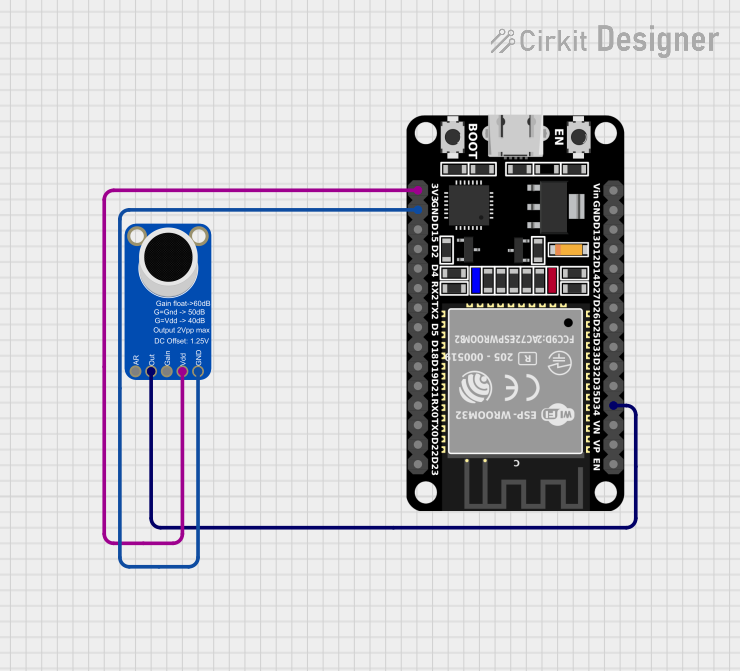
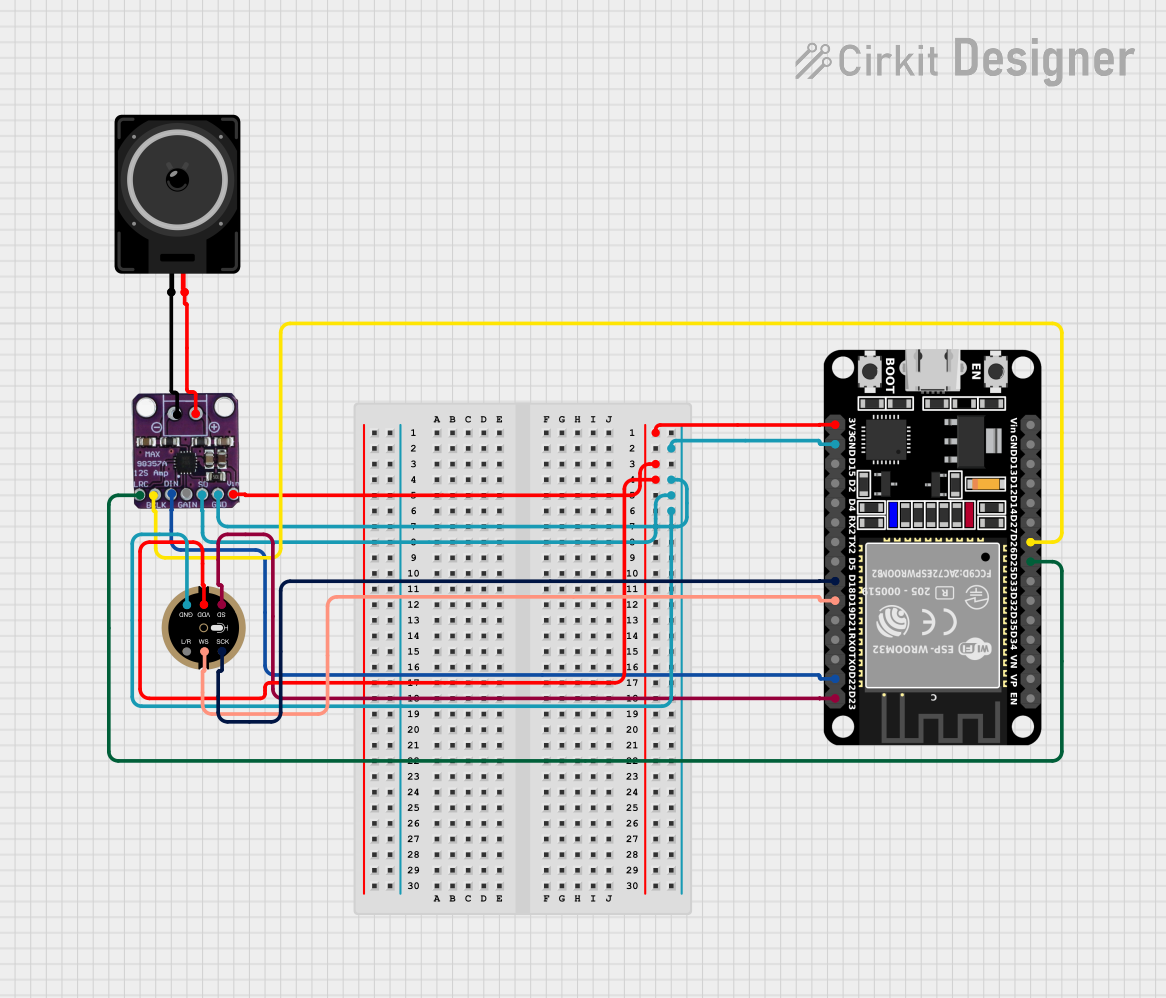
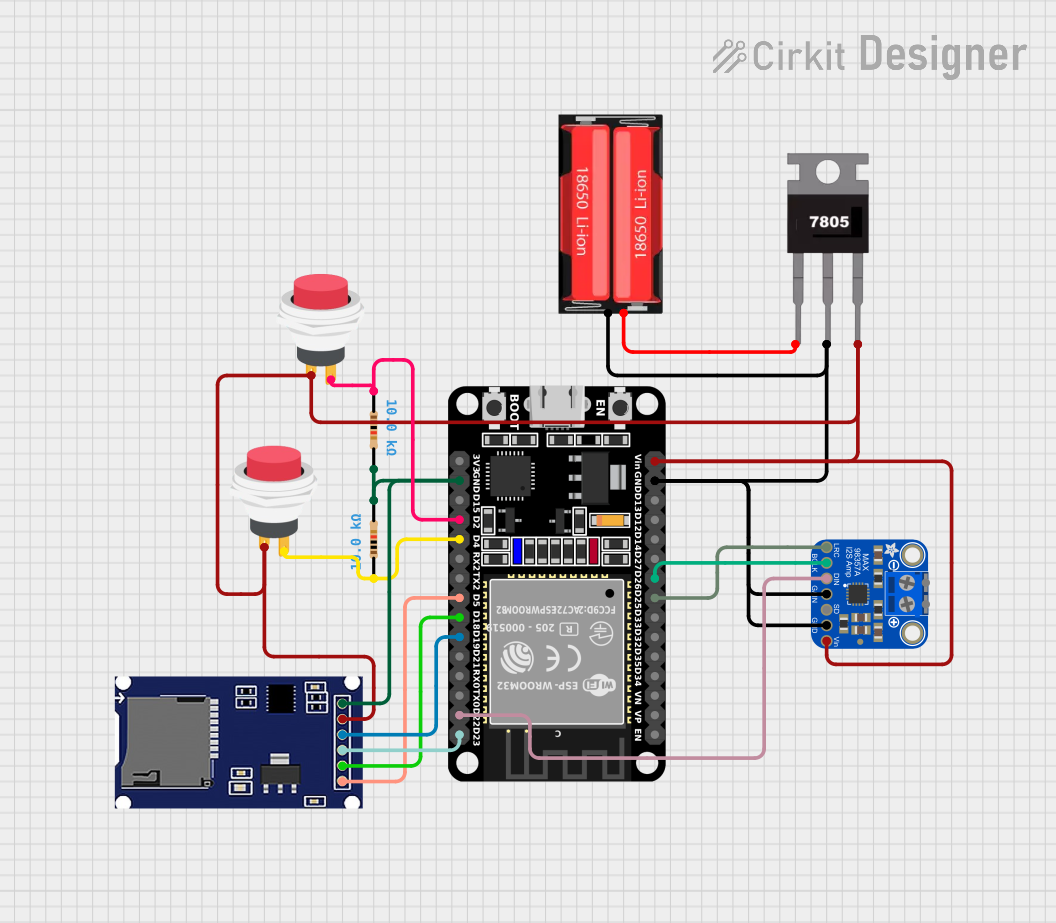
Explore Projects Built with Esp32 amplifier
Common Applications and Use Cases
- Wireless audio streaming and playback
- Smart home voice assistants
- IoT-enabled audio systems
- Portable Bluetooth speakers
- Audio signal processing and amplification
Technical Specifications
Key Technical Details
| Parameter | Value |
|---|---|
| Microcontroller | ESP32 Dual-Core Xtensa LX6 |
| Amplifier Type | Class D Audio Amplifier |
| Operating Voltage | 3.3V (ESP32) / 5V (Amplifier) |
| Output Power | Up to 3W per channel (stereo) |
| Audio Input | I2S (Inter-IC Sound) |
| Connectivity | Wi-Fi 802.11 b/g/n, Bluetooth 4.2 |
| Frequency Response | 20 Hz – 20 kHz |
| Signal-to-Noise Ratio | ≥ 90 dB |
| Dimensions | Varies by module design |
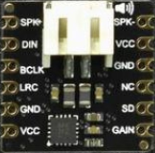
Pin Configuration and Descriptions
| Pin Name | Pin Number | Description |
|---|---|---|
| VIN | 1 | Power input for the amplifier (5V recommended). |
| GND | 2 | Ground connection. |
| L_OUT | 3 | Left channel audio output. |
| R_OUT | 4 | Right channel audio output. |
| I2S_WS | 5 | I2S word select (WS) signal input. |
| I2S_BCK | 6 | I2S bit clock (BCK) signal input. |
| I2S_DIN | 7 | I2S data input for audio signals. |
| EN | 8 | Amplifier enable pin (active high). |
Usage Instructions
How to Use the ESP32 Amplifier in a Circuit
- Power Supply: Connect the VIN pin to a 5V power source and the GND pin to ground.
- Audio Input: Use the I2S interface (I2S_WS, I2S_BCK, and I2S_DIN) to send audio signals from the ESP32 to the amplifier.
- Audio Output: Connect speakers to the L_OUT and R_OUT pins for stereo audio output.
- Enable Amplifier: Set the EN pin to HIGH to activate the amplifier.
Important Considerations and Best Practices
- Ensure proper heat dissipation for the amplifier, especially at higher output power levels.
- Use decoupling capacitors near the power supply pins to reduce noise.
- Match the speaker impedance with the amplifier's specifications to avoid damage.
- Keep the I2S signal lines short to minimize interference and signal degradation.
Example: Connecting the ESP32 Amplifier to an Arduino UNO
Although the ESP32 Amplifier is designed for use with the ESP32, it can also be interfaced with an Arduino UNO for basic audio applications. Below is an example code snippet for generating an I2S audio signal using the ESP32 Amplifier.
#include <I2S.h> // Include the I2S library for audio signal generation

void setup() {
  // Initialize I2S with the appropriate pins
  I2S.begin(I2S_PHILIPS_MODE, 44100, 16); // Philips mode, 44.1 kHz, 16-bit audio

  // Set up the I2S pins
  I2S.setPins(5, 18, 19); // BCK, WS, and DIN pins for I2S

  // Enable the amplifier
  pinMode(8, OUTPUT); // Set the EN pin as output
  digitalWrite(8, HIGH); // Enable the amplifier
}

void loop() {
  // Generate a simple sine wave for testing
  for (int i = 0; i < 360; i++) {
    float sample = sin(i * PI / 180); // Generate sine wave sample
    int16_t audioSample = (int16_t)(sample * 32767); // Scale to 16-bit range
    I2S.write(audioSample); // Send the sample to the amplifier
  }
}
Note: Replace the pin numbers in the
I2S.setPins()function with the actual I2S pins of your ESP32 Amplifier module.
Troubleshooting and FAQs
Common Issues and Solutions
No Audio Output:
- Ensure the EN pin is set to HIGH to enable the amplifier.
- Verify that the I2S signals are correctly connected and configured.
Distorted Audio:
- Check the power supply voltage and ensure it meets the amplifier's requirements.
- Verify that the audio input signal is within the acceptable range.
Overheating:
- Use a heatsink or active cooling if the amplifier operates at high power levels.
- Ensure proper ventilation around the module.
Low Volume:
- Confirm that the input audio signal is not too weak.
- Check the speaker impedance and ensure it matches the amplifier's specifications.
FAQs
Q: Can I use the ESP32 Amplifier with a mono speaker?
A: Yes, you can connect a mono speaker to either the L_OUT or R_OUT pin. However, for optimal performance, use a stereo speaker setup.
Q: What is the maximum speaker impedance supported?
A: The ESP32 Amplifier typically supports speakers with an impedance of 4–8 ohms. Check the specific module's datasheet for exact details.
Q: Can I use the ESP32 Amplifier for wireless audio streaming?
A: Yes, the ESP32's built-in Wi-Fi and Bluetooth capabilities make it ideal for wireless audio streaming applications.
Q: How do I adjust the volume?
A: Volume control can be implemented in software by scaling the audio signal before sending it to the I2S interface.
By following this documentation, you can effectively integrate the ESP32 Amplifier into your audio projects and troubleshoot common issues with ease.