How to Use STM32 NUCLEO-F042K6: Examples, Pinouts, and Specs
Introduction
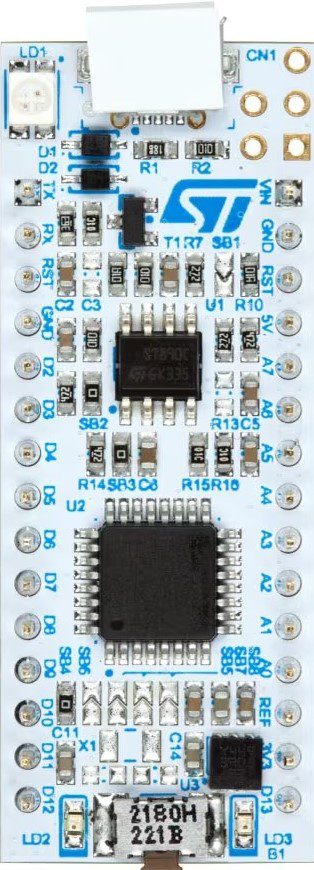
The STM32 NUCLEO-F042K6 is a compact and versatile development board manufactured by STMicroelectronics. It is built around the STM32F042K6 microcontroller, which is part of the STM32 family of ARM Cortex-M0-based microcontrollers. This board is designed for rapid prototyping and development of embedded applications, offering a cost-effective and user-friendly platform for engineers, hobbyists, and students.
The NUCLEO-F042K6 features an integrated ST-LINK/V2-1 debugger/programmer, eliminating the need for external debugging tools. It also supports Arduino Uno R3 connectors, enabling compatibility with a wide range of Arduino shields for easy expansion of functionality.
Explore Projects Built with STM32 NUCLEO-F042K6
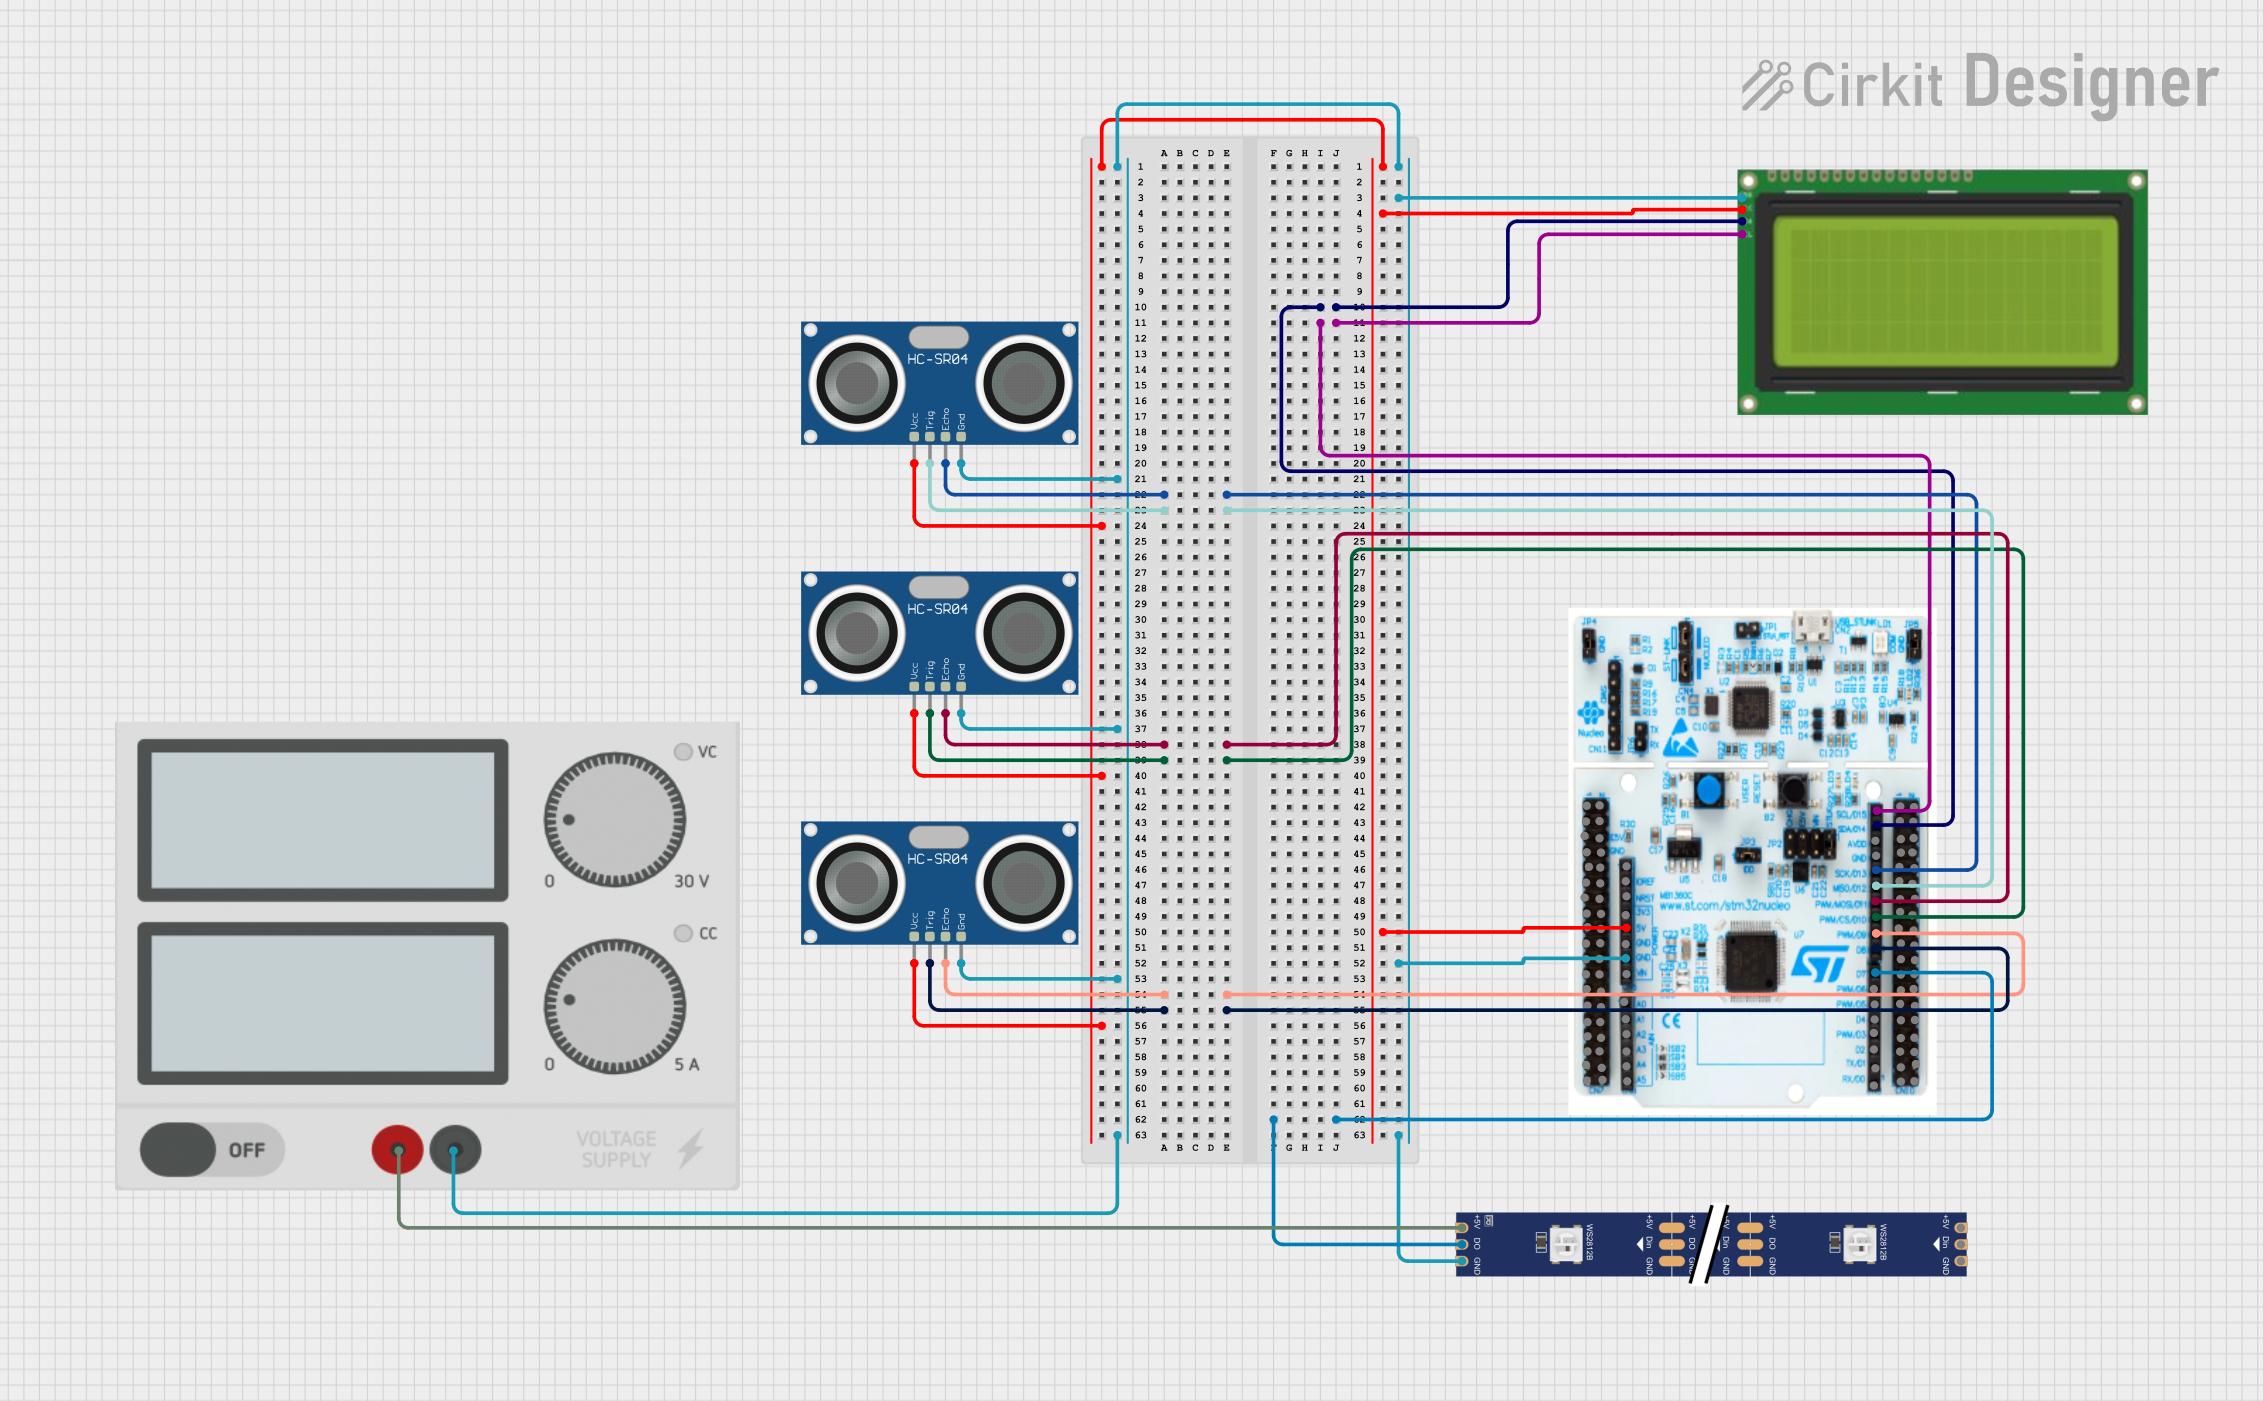
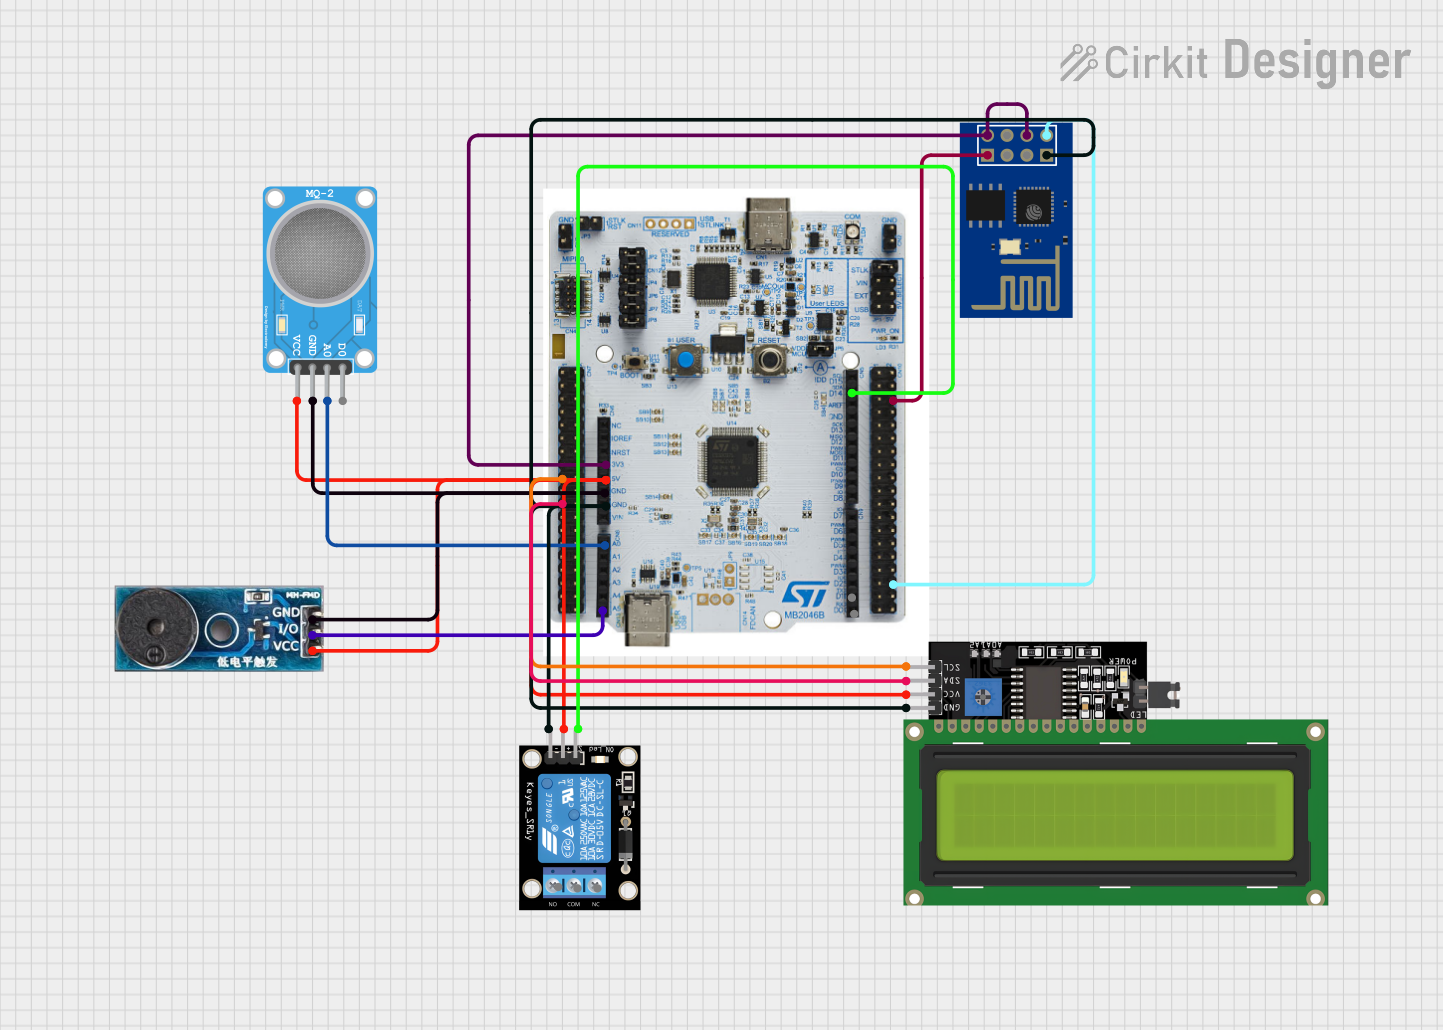
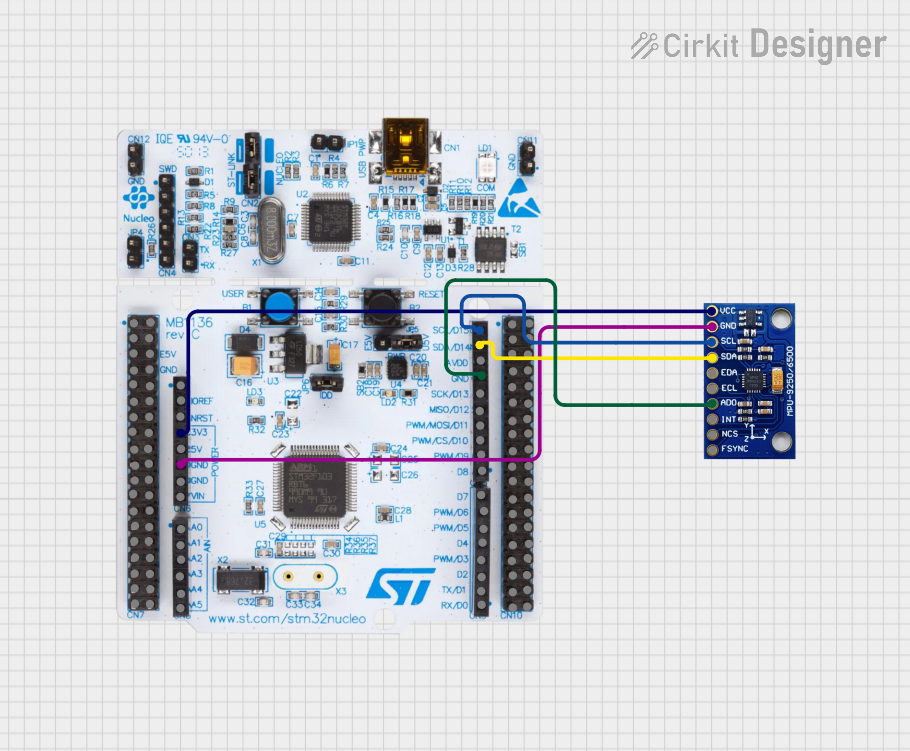

Explore Projects Built with STM32 NUCLEO-F042K6
Common Applications and Use Cases
- Prototyping IoT devices
- Motor control and industrial automation
- Sensor interfacing and data acquisition
- Educational projects and embedded systems learning
- Low-power applications and battery-operated devices
Technical Specifications
Key Technical Details
| Parameter | Specification |
|---|---|
| Microcontroller | STM32F042K6 (ARM Cortex-M0, 32-bit) |
| Operating Voltage | 3.3V |
| Input Voltage (via USB) | 5V |
| Clock Speed | 48 MHz |
| Flash Memory | 32 KB |
| SRAM | 6 KB |
| GPIO Pins | 19 (including analog inputs) |
| Communication Interfaces | USART, I2C, SPI, USB 2.0 Full-Speed |
| Debugging Interface | Integrated ST-LINK/V2-1 |
| Arduino Compatibility | Supports Arduino Uno R3 shields |
| Dimensions | 43 mm x 17.5 mm |
Pin Configuration and Descriptions
The STM32 NUCLEO-F042K6 features a dual-row pin header layout. Below is a summary of the pin configuration:
Power Pins
| Pin Name | Description |
|---|---|
| VIN | Input voltage (5V from USB or external source) |
| 3.3V | Regulated 3.3V output |
| GND | Ground |
GPIO and Communication Pins
| Pin Name | Description |
|---|---|
| PA0-PA15 | General-purpose I/O pins |
| PB0-PB1 | General-purpose I/O pins |
| USART1_TX | UART transmit pin |
| USART1_RX | UART receive pin |
| I2C1_SCL | I2C clock line |
| I2C1_SDA | I2C data line |
| SPI1_SCK | SPI clock line |
| SPI1_MISO | SPI master-in/slave-out |
| SPI1_MOSI | SPI master-out/slave-in |
Analog Pins
| Pin Name | Description |
|---|---|
| PA0-PA3 | Analog input pins (ADC) |
| PA4 | Analog input or DAC output |
Usage Instructions
How to Use the STM32 NUCLEO-F042K6 in a Circuit
Powering the Board:
- Connect the board to your computer via a micro-USB cable. This provides both power and a communication interface for programming and debugging.
- Alternatively, supply 5V to the VIN pin or 3.3V to the 3.3V pin for external power.
Programming the Board:
- Use the integrated ST-LINK/V2-1 debugger/programmer to upload code. The board is compatible with popular IDEs such as STM32CubeIDE, Keil, and IAR Embedded Workbench.
- For Arduino users, install the STM32 core in the Arduino IDE to program the board using Arduino libraries.
Connecting Peripherals:
- Use the GPIO pins to interface with sensors, actuators, and other peripherals.
- For Arduino shields, align the shield with the Arduino Uno R3 connectors on the board.
Debugging:
- The ST-LINK/V2-1 interface allows for real-time debugging and monitoring of the microcontroller.
Important Considerations and Best Practices
- Voltage Levels: Ensure that all connected peripherals operate at 3.3V logic levels to avoid damaging the microcontroller.
- Pin Multiplexing: Many pins have multiple functions (e.g., GPIO, ADC, UART). Configure the pins appropriately in your code.
- Clock Configuration: Use the STM32CubeMX tool to configure the clock tree and peripherals for optimal performance.
- Static Protection: Handle the board with care to avoid damage from electrostatic discharge (ESD).
Example Code for Arduino IDE
Below is an example of how to blink an LED connected to pin PA5 using the Arduino IDE:
// Define the pin number for the LED
#define LED_PIN PA5

void setup() {
  // Set the LED pin as an output
  pinMode(LED_PIN, OUTPUT);
}

void loop() {
  // Turn the LED on
  digitalWrite(LED_PIN, HIGH);
  delay(1000); // Wait for 1 second

  // Turn the LED off
  digitalWrite(LED_PIN, LOW);
  delay(1000); // Wait for 1 second
}
Troubleshooting and FAQs
Common Issues and Solutions
The board is not detected by the computer:
- Ensure the micro-USB cable is functional and supports data transfer.
- Check that the ST-LINK driver is installed on your computer.
Code upload fails:
- Verify that the correct board and port are selected in your IDE.
- Ensure no other application is using the ST-LINK interface.
Peripherals are not working as expected:
- Double-check the pin configuration in your code.
- Ensure that the connected peripherals are powered and operating at 3.3V logic levels.
Arduino shield is not functioning:
- Confirm that the shield is compatible with 3.3V logic.
- Check for pin conflicts between the shield and the board.
FAQs
Q: Can I power the board using a battery?
A: Yes, you can power the board using a 3.3V or 5V battery connected to the 3.3V or VIN pin, respectively.
Q: Is the board compatible with STM32CubeMX?
A: Yes, the board is fully supported by STM32CubeMX for peripheral configuration and code generation.
Q: Can I use the board for low-power applications?
A: Yes, the STM32F042K6 microcontroller supports low-power modes, making it suitable for battery-operated devices.
Q: How do I reset the board?
A: Press the reset button located on the board to restart the microcontroller.
This documentation provides a comprehensive guide to using the STM32 NUCLEO-F042K6 development board. For further details, refer to the official datasheet and user manual provided by STMicroelectronics.