Cirkit Designer Logo
Cirkit Designer
Your all-in-one circuit design IDE
Home / 
Component Documentation

How to Use infuse heater: Examples, Pinouts, and Specs

Image of infuse heater
Cirkit Designer LogoDesign with infuse heater in Cirkit Designer

Introduction

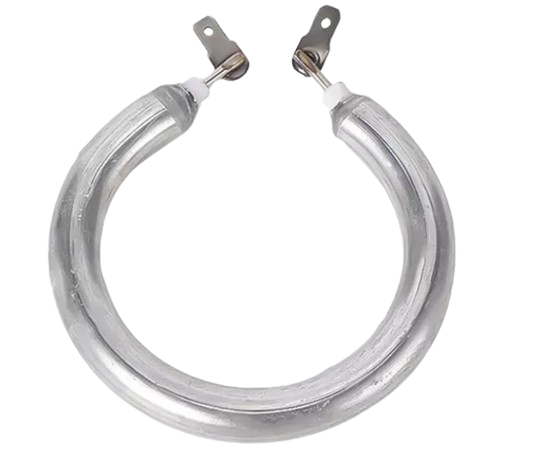
The Infuse Heater (Manufacturer Part ID: heat) by Sparkfruit Electronics is a specialized device designed to heat liquids or materials to precise temperatures. It is commonly used in applications such as infusion, extraction, and temperature-controlled processes in culinary, laboratory, and industrial settings. Its compact design and efficient heating capabilities make it an ideal choice for both professional and hobbyist use.

Explore Projects Built with infuse heater

Use Cirkit Designer to design, explore, and prototype these projects online. Some projects support real-time simulation. Click "Open Project" to start designing instantly!
ESP32-Controlled Smart Relay for Heater and Bulb Automation
Image of wiring heater: A project utilizing infuse heater in a practical application
This circuit is designed to control a heater and a bulb using an ESP32 microcontroller, which interfaces with a 4-channel relay module. The ESP32 can independently switch the heater and bulb on or off by sending signals to the relay module's input channels. The power supply provides the necessary 12V to the relay module, and the plug connects the power supply to the AC mains.
Cirkit Designer LogoOpen Project in Cirkit Designer
Heater Control Circuit with Power Socket Integration
Image of Simple Water Heater: A project utilizing infuse heater in a practical application
The circuit connects a heater to a power source via a socket. The heater is likely to be powered directly from the socket, with the positive and negative terminals of the socket providing the necessary voltage and ground connections to the heater. There are no control elements or sensors present in the circuit, indicating that the heater operates at a constant power level when connected.
Cirkit Designer LogoOpen Project in Cirkit Designer
Smart Kettle with LED Indicator and Thermal Switch
Image of Electric Kettle: A project utilizing infuse heater in a practical application
This circuit is a basic electric kettle control system. It includes a heater element powered by a 220V supply, controlled by a rocker switch and a thermal switch for safety. An LED indicator with a current-limiting resistor shows the operational status of the heater.
Cirkit Designer LogoOpen Project in Cirkit Designer
ESP32-Controlled Water Heating and Management System with Quality Monitoring
Image of IoT: A project utilizing infuse heater in a practical application
This circuit is designed to control a water heating system with various sensors and actuators. It uses an ESP32 microcontroller to manage inputs from a DO sensor, PH meter, PT100 temperature sensor, water pressure sensor, and an inductive sensor, and to control outputs including a water heater, electric motor, water pump, and solenoid valve through a 4-channel relay. The power supply converts 220V AC to 12V DC, which is further regulated by a DC-DC converter for the ESP32 and sensors, while the actuators are directly powered by the 12V output.
Cirkit Designer LogoOpen Project in Cirkit Designer

Explore Projects Built with infuse heater

Use Cirkit Designer to design, explore, and prototype these projects online. Some projects support real-time simulation. Click "Open Project" to start designing instantly!
Image of wiring heater: A project utilizing infuse heater in a practical application
ESP32-Controlled Smart Relay for Heater and Bulb Automation
This circuit is designed to control a heater and a bulb using an ESP32 microcontroller, which interfaces with a 4-channel relay module. The ESP32 can independently switch the heater and bulb on or off by sending signals to the relay module's input channels. The power supply provides the necessary 12V to the relay module, and the plug connects the power supply to the AC mains.
Cirkit Designer LogoOpen Project in Cirkit Designer
Image of Simple Water Heater: A project utilizing infuse heater in a practical application
Heater Control Circuit with Power Socket Integration
The circuit connects a heater to a power source via a socket. The heater is likely to be powered directly from the socket, with the positive and negative terminals of the socket providing the necessary voltage and ground connections to the heater. There are no control elements or sensors present in the circuit, indicating that the heater operates at a constant power level when connected.
Cirkit Designer LogoOpen Project in Cirkit Designer
Image of Electric Kettle: A project utilizing infuse heater in a practical application
Smart Kettle with LED Indicator and Thermal Switch
This circuit is a basic electric kettle control system. It includes a heater element powered by a 220V supply, controlled by a rocker switch and a thermal switch for safety. An LED indicator with a current-limiting resistor shows the operational status of the heater.
Cirkit Designer LogoOpen Project in Cirkit Designer
Image of IoT: A project utilizing infuse heater in a practical application
ESP32-Controlled Water Heating and Management System with Quality Monitoring
This circuit is designed to control a water heating system with various sensors and actuators. It uses an ESP32 microcontroller to manage inputs from a DO sensor, PH meter, PT100 temperature sensor, water pressure sensor, and an inductive sensor, and to control outputs including a water heater, electric motor, water pump, and solenoid valve through a 4-channel relay. The power supply converts 220V AC to 12V DC, which is further regulated by a DC-DC converter for the ESP32 and sensors, while the actuators are directly powered by the 12V output.
Cirkit Designer LogoOpen Project in Cirkit Designer

Common Applications

  • Culinary: Infusing oils, teas, or other liquids with flavors.
  • Laboratory: Heating solutions for chemical reactions or extractions.
  • Industrial: Controlled heating for small-scale manufacturing processes.
  • DIY Projects: Custom temperature-controlled systems for hobbyists.

Technical Specifications

Key Technical Details

Parameter Value
Operating Voltage 12V DC
Power Rating 50W
Temperature Range 25°C to 150°C
Heating Element Type Nichrome wire
Dimensions 50mm x 50mm x 10mm
Weight 30g
Thermal Protection Built-in thermal cutoff switch
Connector Type 2-pin JST

Pin Configuration and Descriptions

Pin Number Pin Name Description
1 VCC Positive power supply (12V DC)
2 GND Ground connection

Usage Instructions

How to Use the Infuse Heater in a Circuit

  1. Power Supply: Connect the VCC pin to a 12V DC power source and the GND pin to the ground of the power supply.
  2. Temperature Control: Use a compatible temperature controller or a microcontroller with a temperature sensor to regulate the heater's output.
  3. Mounting: Secure the heater to the desired surface using thermal adhesive or screws, ensuring good thermal contact for efficient heat transfer.
  4. Safety: Ensure proper ventilation and avoid direct contact with the heating surface during operation.

Important Considerations and Best Practices

  • Thermal Management: Use a heat sink or thermal paste if necessary to improve heat dissipation.
  • Power Supply: Ensure the power supply can deliver at least 50W to avoid underpowering the heater.
  • Temperature Monitoring: Always use a temperature sensor to prevent overheating and ensure precise control.
  • Safety Precautions: Avoid operating the heater near flammable materials and always disconnect power before handling.

Example: Using the Infuse Heater with an Arduino UNO

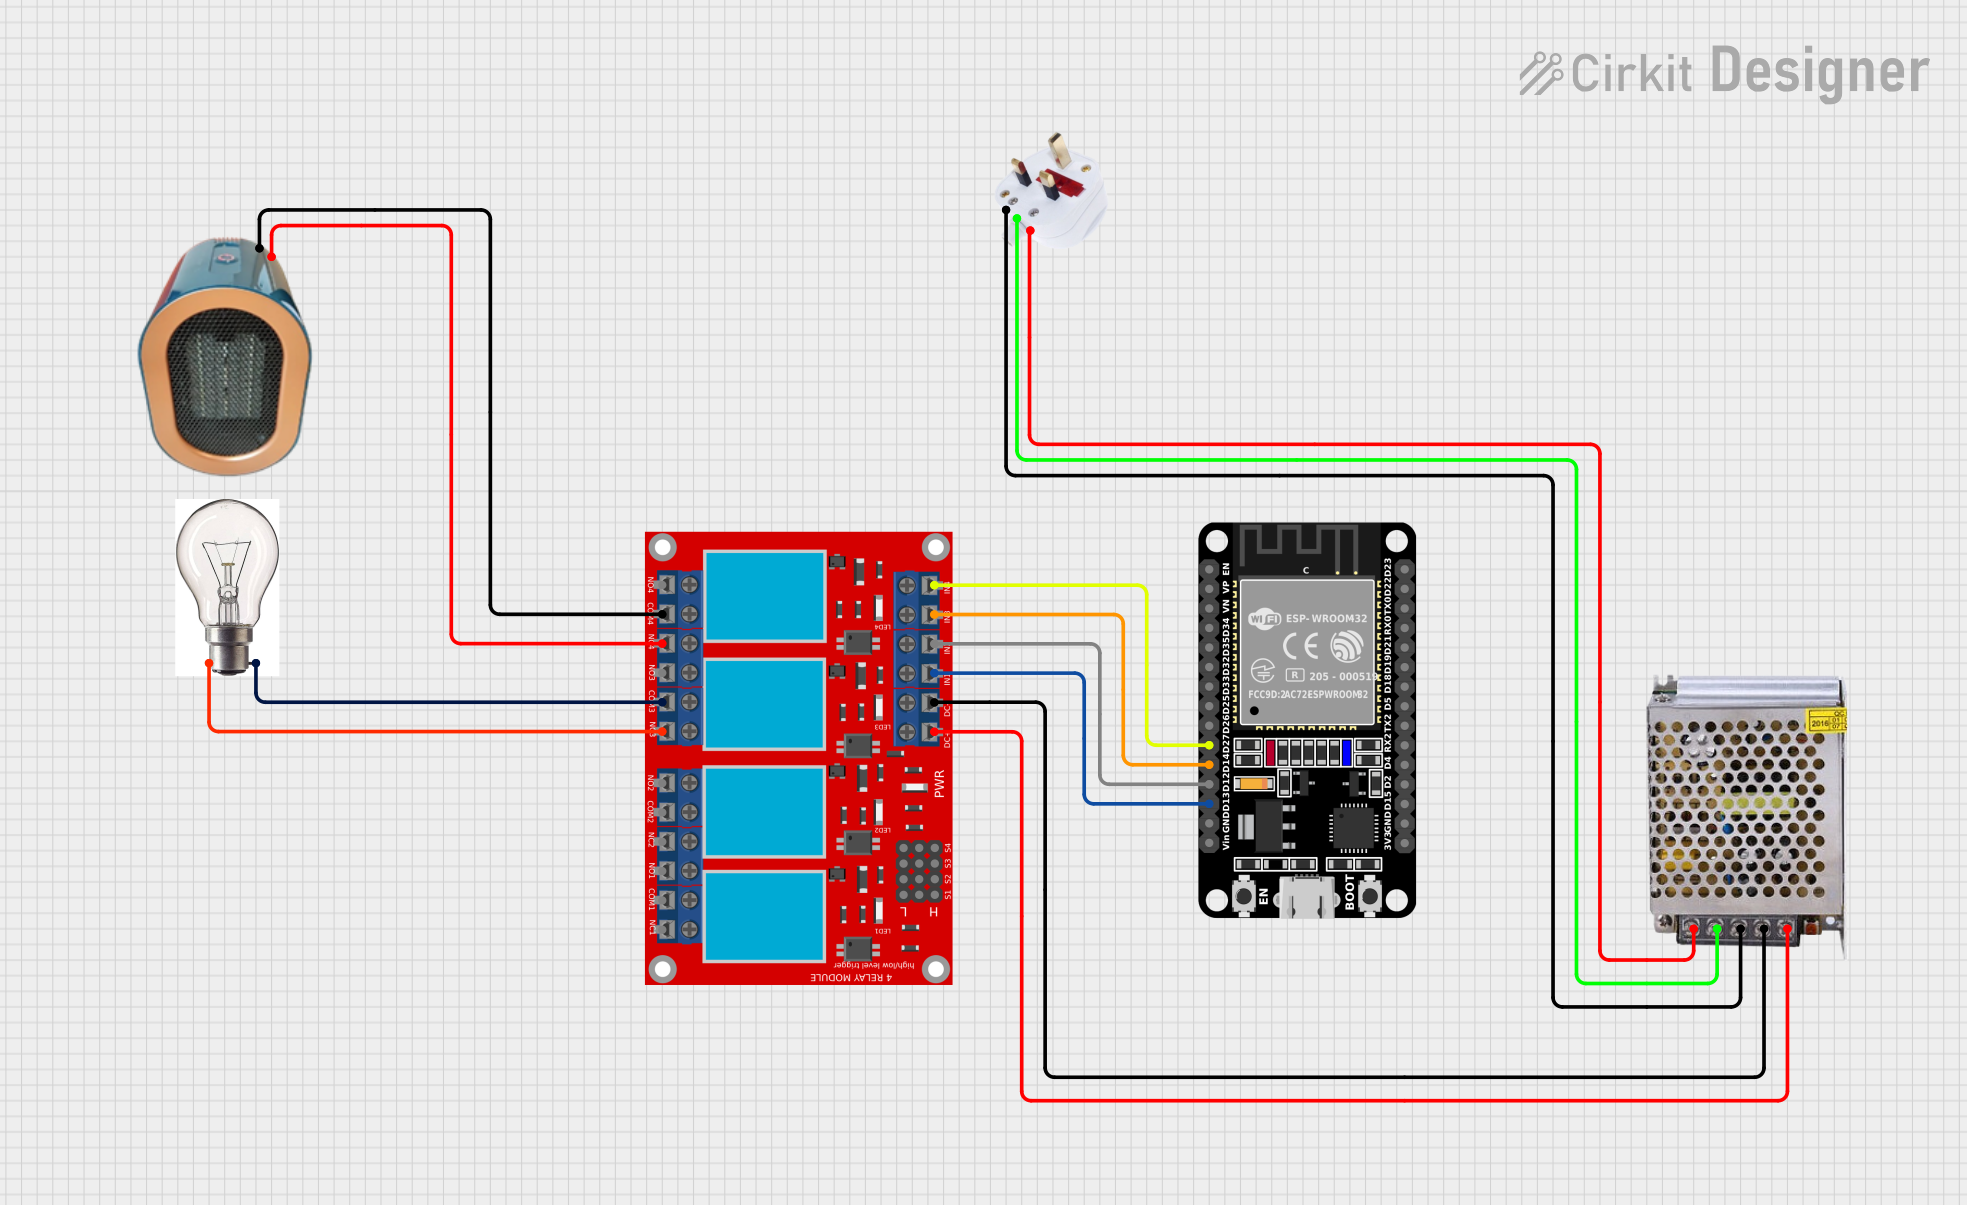
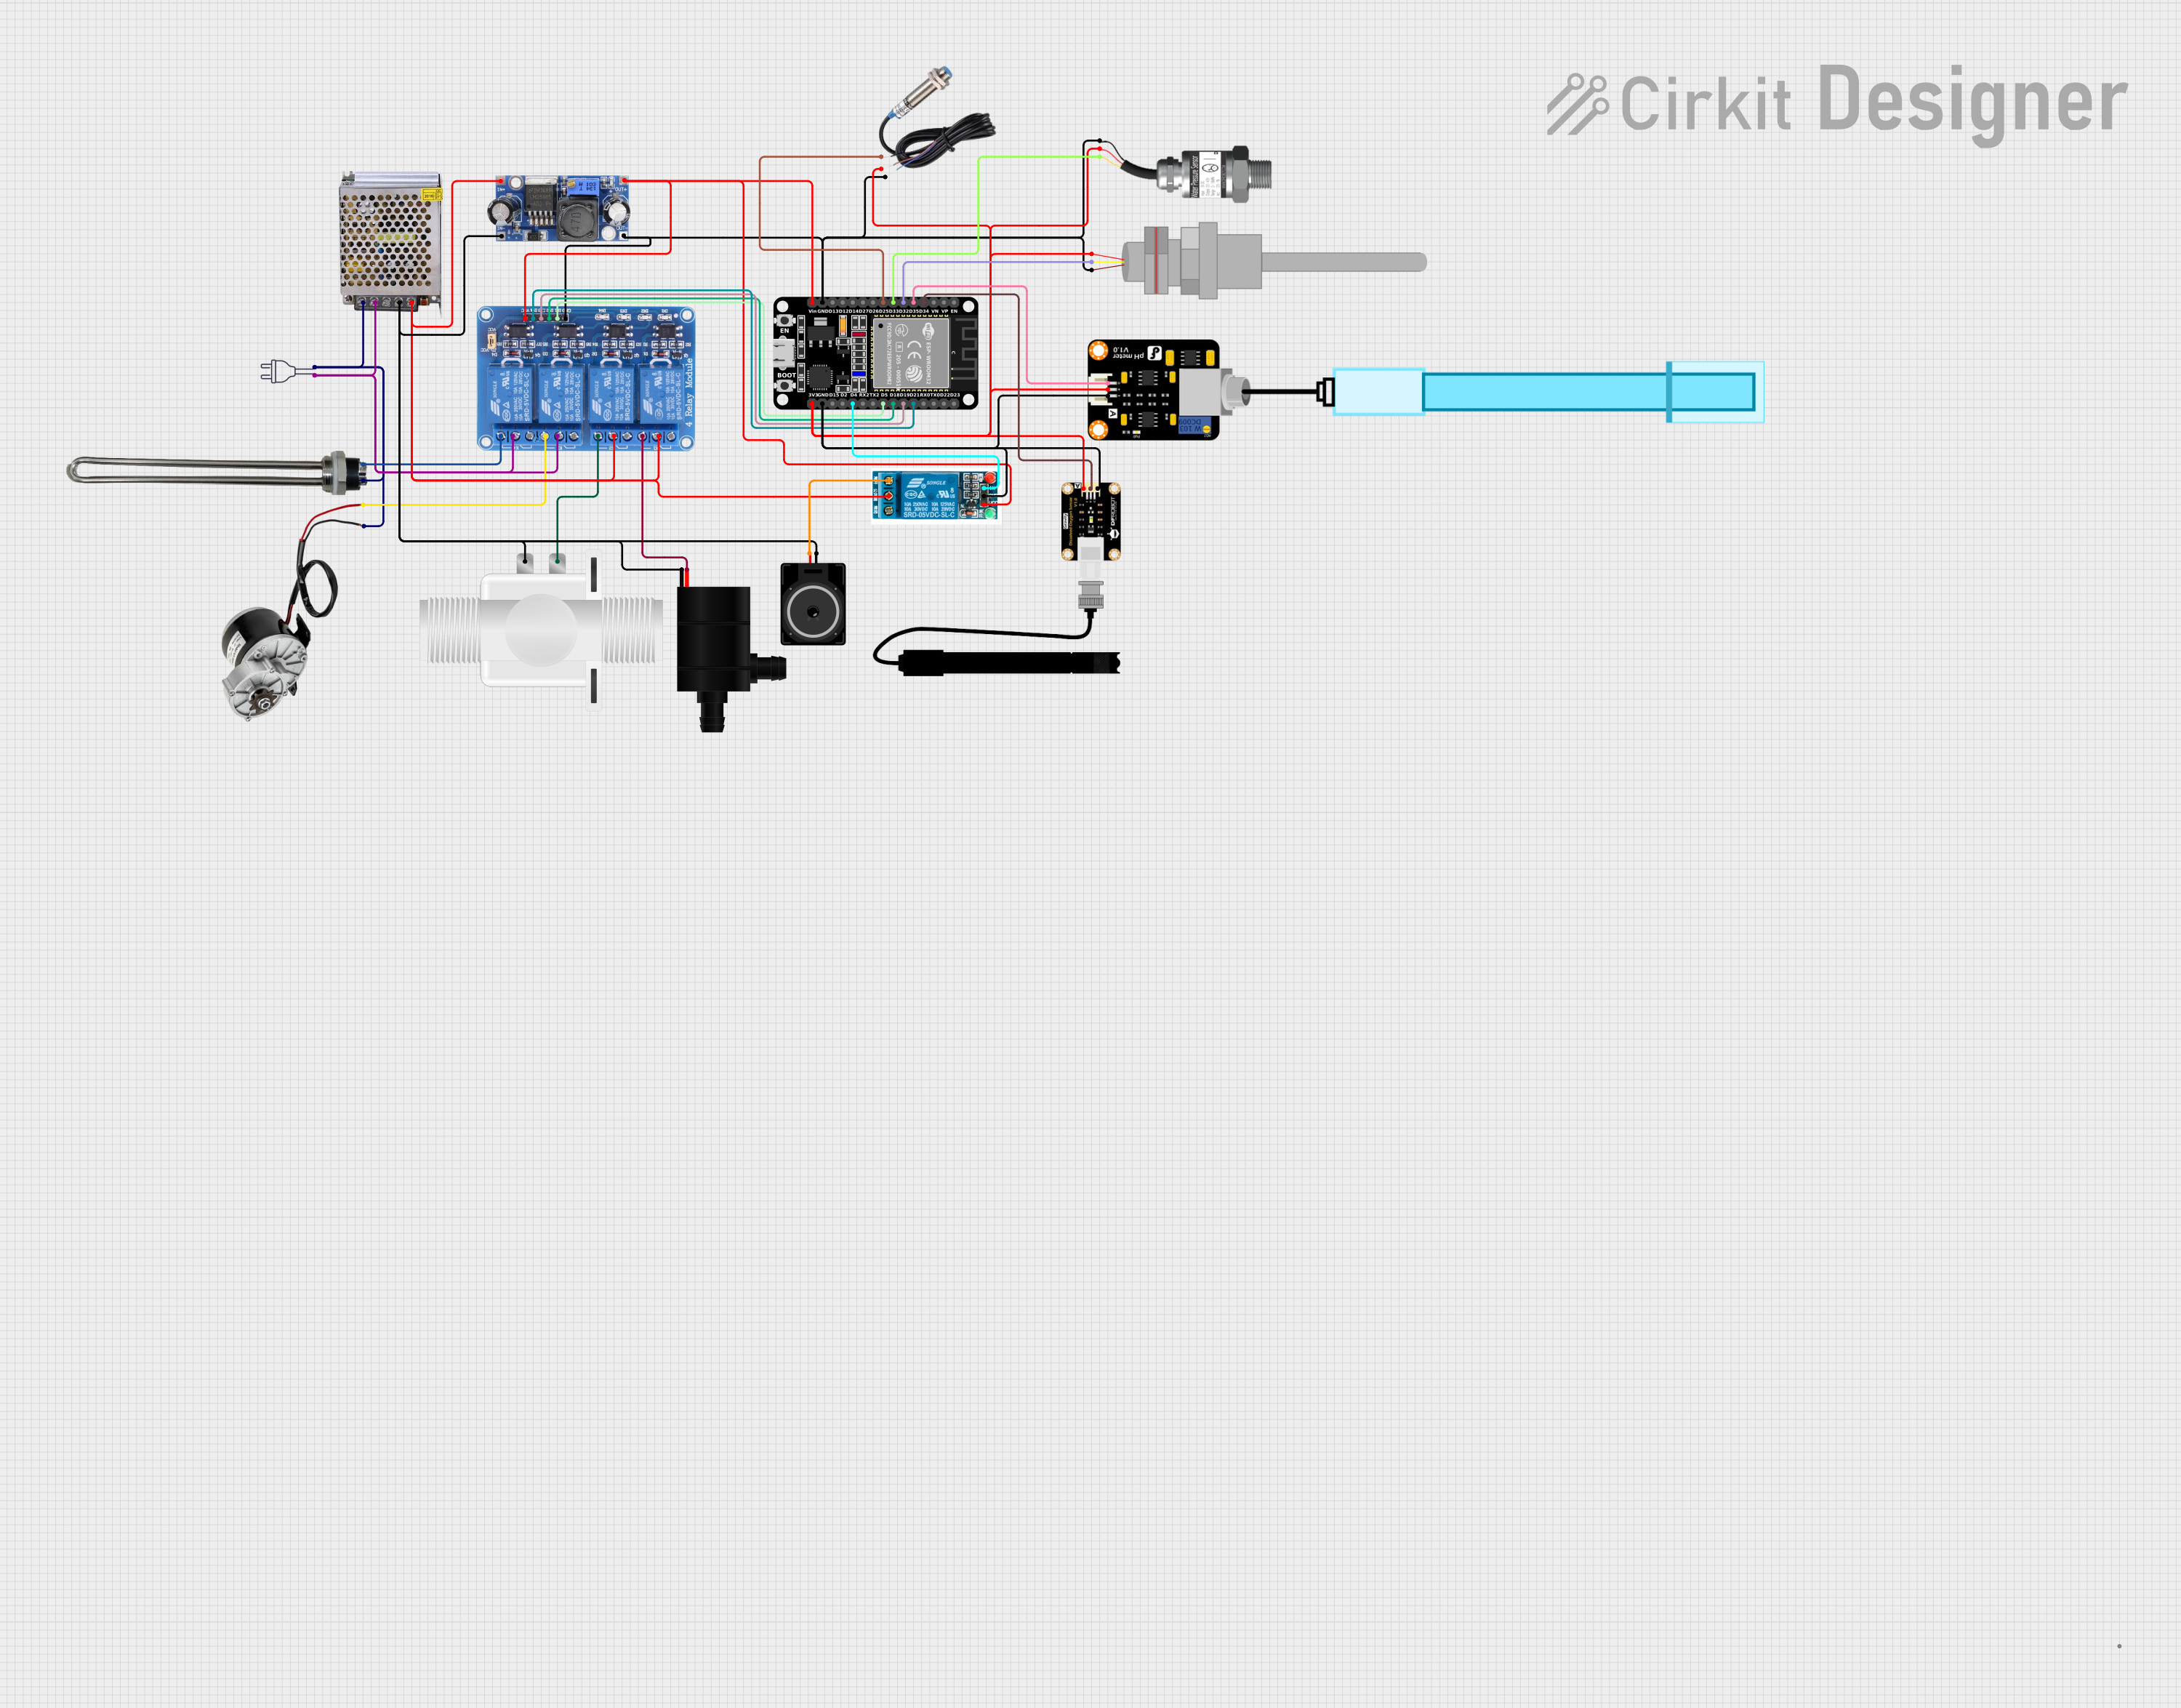
Below is an example of how to control the Infuse Heater using an Arduino UNO and a relay module for switching.
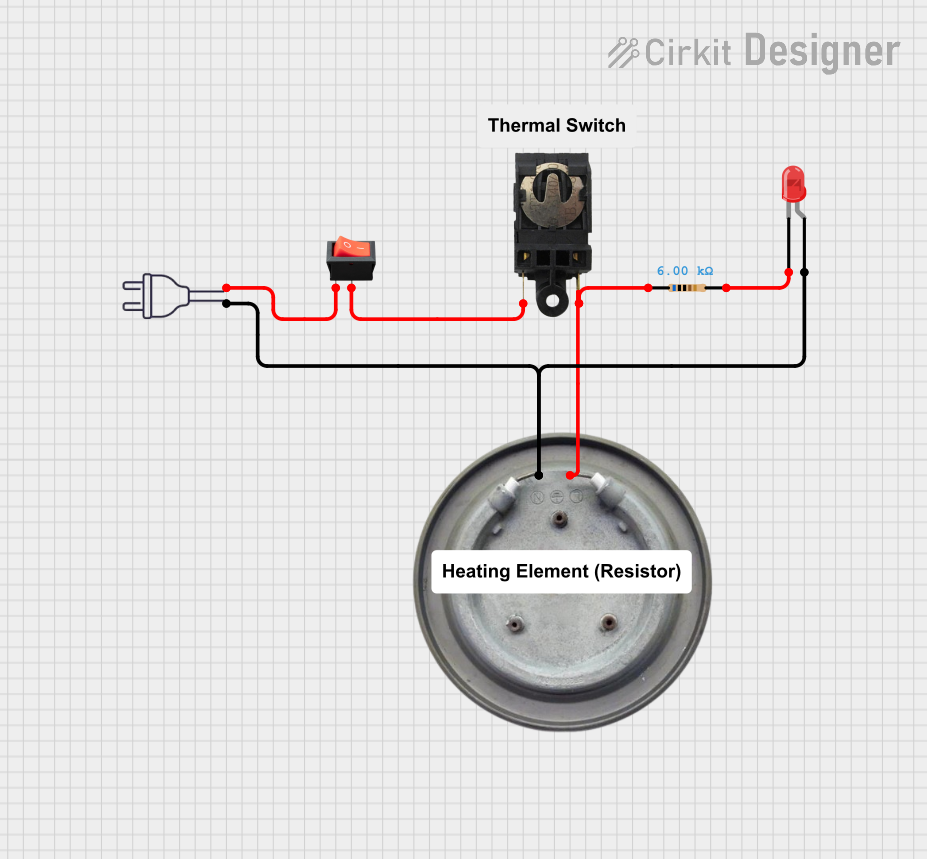
Circuit Diagram

  • Connect the VCC and GND pins of the heater to the relay module's output terminals.
  • Connect the relay module's control pin to Arduino pin 7.
  • Use a thermistor or temperature sensor (e.g., DS18B20) to monitor the temperature.

Arduino Code

// Include the necessary libraries for temperature sensor
#include <OneWire.h>
#include <DallasTemperature.h>

// Define pin connections
#define RELAY_PIN 7 // Relay module control pin
#define TEMP_SENSOR_PIN 2 // DS18B20 data pin

// Initialize OneWire and DallasTemperature objects
OneWire oneWire(TEMP_SENSOR_PIN);
DallasTemperature sensors(&oneWire);

// Define target temperature in Celsius
const float targetTemperature = 80.0;

void setup() {
  pinMode(RELAY_PIN, OUTPUT); // Set relay pin as output
  digitalWrite(RELAY_PIN, LOW); // Ensure relay is off initially
  sensors.begin(); // Initialize temperature sensor
  Serial.begin(9600); // Start serial communication
}

void loop() {
  sensors.requestTemperatures(); // Request temperature readings
  float currentTemperature = sensors.getTempCByIndex(0); // Get temperature in Celsius

  Serial.print("Current Temperature: ");
  Serial.println(currentTemperature);

  // Control the heater based on the target temperature
  if (currentTemperature < targetTemperature) {
    digitalWrite(RELAY_PIN, HIGH); // Turn on the heater
  } else {
    digitalWrite(RELAY_PIN, LOW); // Turn off the heater
  }

  delay(1000); // Wait for 1 second before the next reading
}

Troubleshooting and FAQs

Common Issues and Solutions

  1. Heater Not Heating:

    • Cause: Insufficient power supply.
    • Solution: Verify that the power supply provides 12V DC and at least 50W.
  2. Overheating:

    • Cause: Lack of temperature control.
    • Solution: Use a temperature sensor and controller to regulate the heater.
  3. Uneven Heating:

    • Cause: Poor thermal contact with the surface.
    • Solution: Ensure the heater is securely mounted with thermal adhesive or screws.
  4. Relay Not Switching:

    • Cause: Incorrect wiring or insufficient current to the relay.
    • Solution: Double-check the relay connections and ensure the Arduino pin can drive the relay.

FAQs

  • Q: Can I use a higher voltage power supply?
    A: No, the heater is designed for 12V DC. Using a higher voltage may damage the component.

  • Q: Is the heater waterproof?
    A: No, the heater is not waterproof. Avoid exposing it to liquids.

  • Q: Can I use the heater without a temperature controller?
    A: It is not recommended, as this may lead to overheating and damage.

  • Q: What is the lifespan of the heater?
    A: The heater is rated for approximately 10,000 hours of operation under normal conditions.