How to Use Arduino Xbee Libellium Shield: Examples, Pinouts, and Specs

Introduction
The Arduino XBee Libellium Shield is an accessory that enables wireless communication for Arduino boards using XBee radio modules. This shield simplifies the process of integrating XBee modules into Arduino projects, allowing for a wide range of applications such as remote sensor networks, home automation, and robotics.
Explore Projects Built with Arduino Xbee Libellium Shield
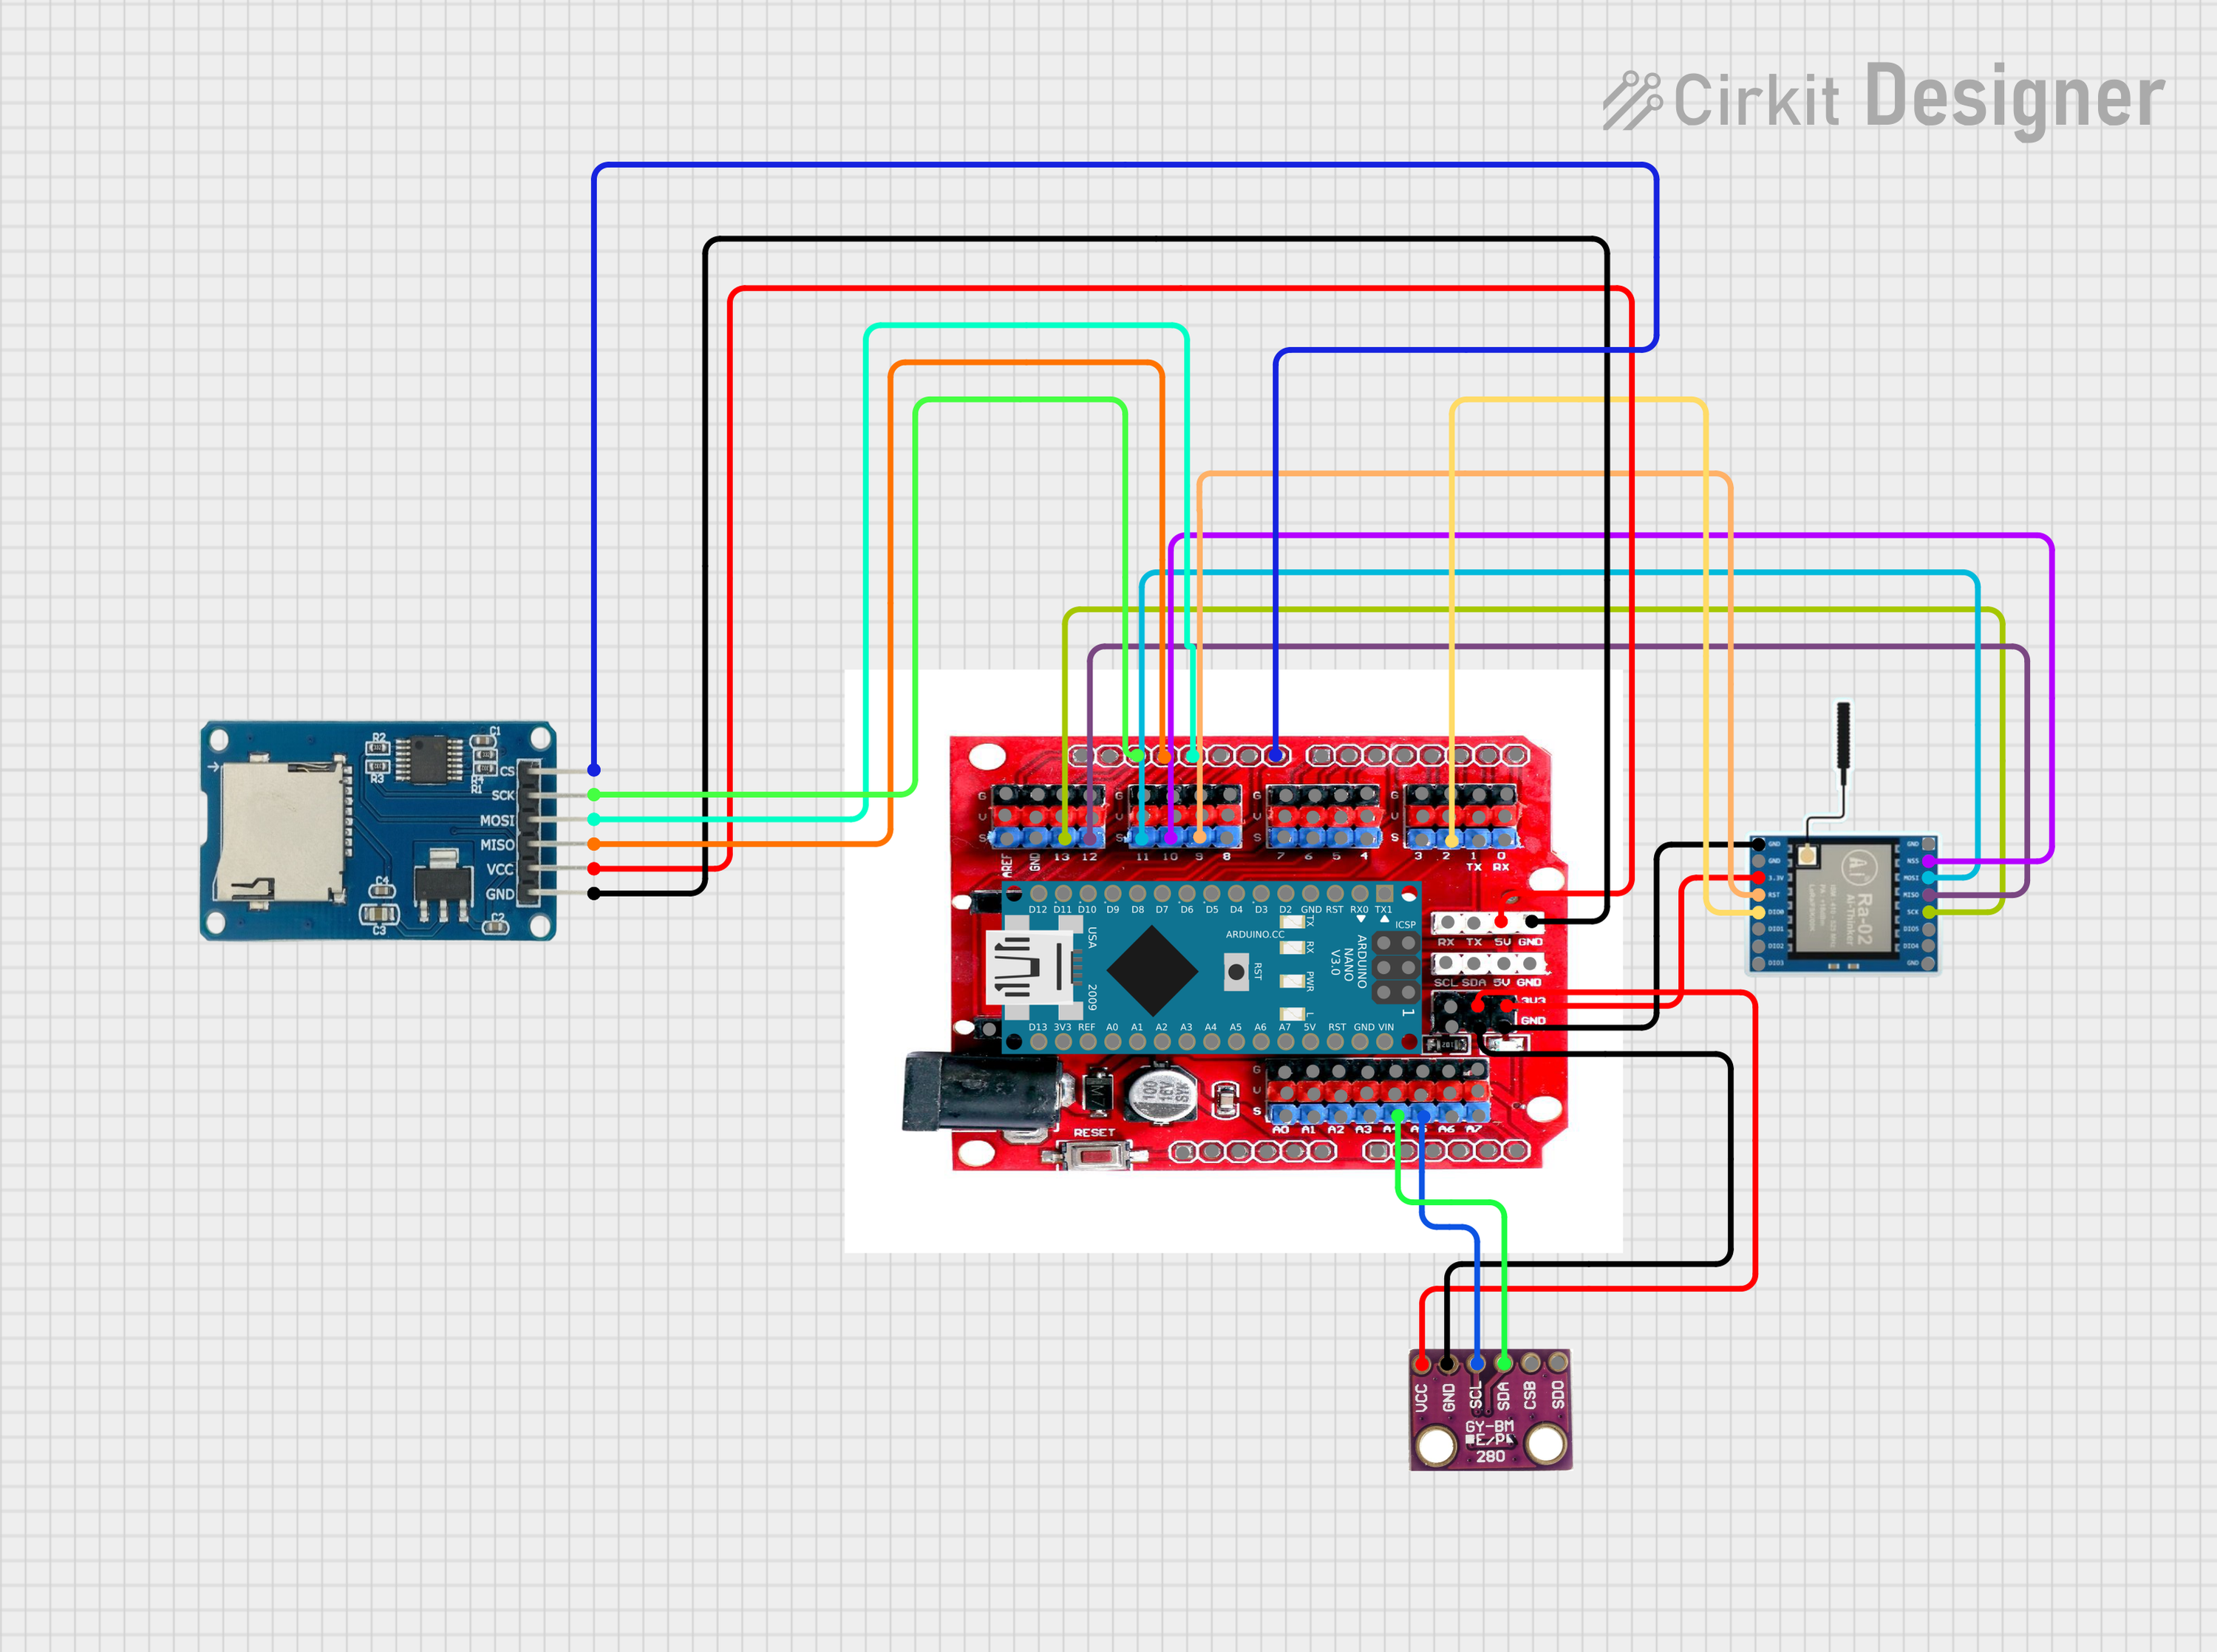
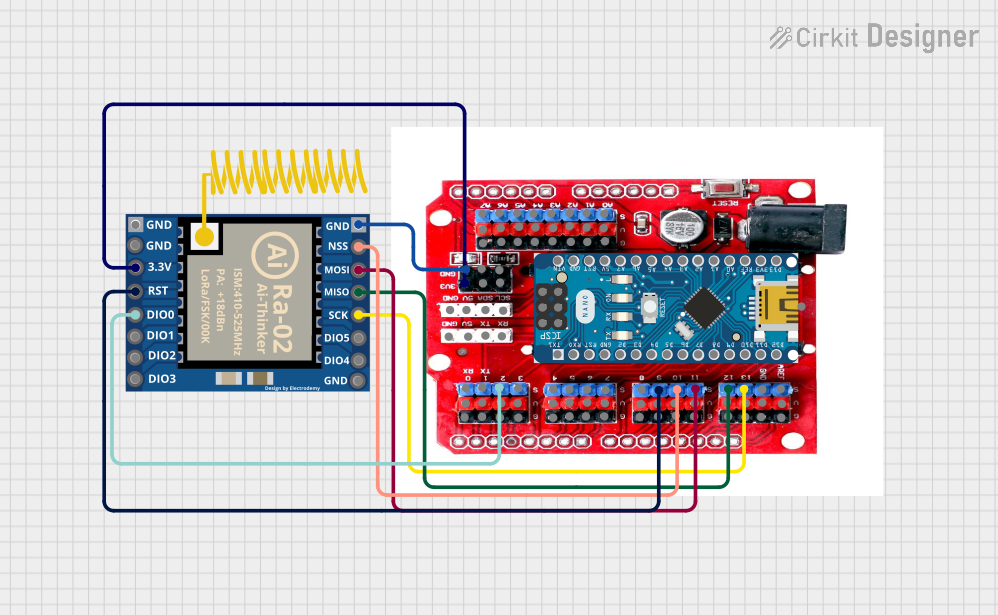


Explore Projects Built with Arduino Xbee Libellium Shield
Common Applications and Use Cases
- Wireless sensor networks
- Home automation systems
- Remote control for robots and drones
- IoT (Internet of Things) projects
- Data logging and telemetry
Technical Specifications
Key Technical Details
- Compatibility: Designed for Arduino Uno and similar boards
- Operating Voltage: 3.3V (from Arduino board)
- Communication: Utilizes UART serial communication
- Indicators: LEDs for TX, RX, and Associate indication
Pin Configuration and Descriptions
| Pin Number | Description |
|---|---|
| D0 (RX) | XBee RX, Arduino TX |
| D1 (TX) | XBee TX, Arduino RX |
| D2 to D7 | Configurable digital I/O pins |
| D8 to D13 | Configurable digital I/O pins |
| A0 to A5 | Configurable analog input pins |
| 3V3 | 3.3V supply from Arduino to XBee |
| 5V | 5V supply from Arduino |
| GND | Ground |
| RESET | Reset pin |
Usage Instructions
How to Use the Component in a Circuit
- Mounting the Shield: Carefully align the shield pins with the corresponding headers on the Arduino board and press down gently to connect.
- Installing the XBee Module: Insert the XBee module into the shield's XBee socket, ensuring the orientation is correct (the XBee's antenna should be pointing away from the Arduino).
- Powering the Arduino: Connect the Arduino to a power source. The shield will draw power directly from the Arduino board.
- Serial Communication: The shield communicates with the Arduino via the UART serial interface. Make sure to configure the serial port correctly in your code.
Important Considerations and Best Practices
- Voltage Levels: XBee modules operate at 3.3V. The shield includes level shifters to safely interface with the Arduino's 5V logic.
- Antenna Clearance: Ensure that the XBee's antenna has enough clearance from metal objects and the Arduino itself to avoid signal interference.
- Shield Stacking: If stacking other shields on top of the XBee Shield, ensure they do not interfere with the XBee's operation or antenna.
- Firmware Configuration: XBee modules may require firmware configuration using XCTU software or AT commands before use.
Example Code for Arduino UNO
#include <SoftwareSerial.h>

// Create a software serial port on pins 2 (RX) and 3 (TX)
SoftwareSerial xbeeSerial(2, 3);

void setup() {
  // Start the hardware serial port
  Serial.begin(9600);
  // Start the software serial port
  xbeeSerial.begin(9600);
}

void loop() {
  // Check if data has been received from the hardware serial port
  if (Serial.available()) {
    // Send any characters from the hardware serial port to the XBee
    xbeeSerial.write(Serial.read());
  }
  // Check if data has been received from the XBee
  if (xbeeSerial.available()) {
    // Send any characters from the XBee to the hardware serial port
    Serial.write(xbeeSerial.read());
  }
}
Troubleshooting and FAQs
Common Issues Users Might Face
- No Communication: Ensure that both the Arduino and XBee modules are powered and configured correctly.
- LEDs Not Lighting Up: Check the power supply and ensure the shield is properly seated on the Arduino.
- Intermittent Connection: Verify the antenna is properly attached and has sufficient clearance.
Solutions and Tips for Troubleshooting
- Power Cycle: If the XBee is unresponsive, try power cycling the Arduino and shield.
- Configuration: Double-check the XBee configuration using XCTU or AT commands.
- Serial Monitor: Use the Arduino's serial monitor to debug serial communication issues.
FAQs
Q: Can I use the XBee Shield with Arduino Mega or Leonardo? A: Yes, but you may need to adjust the pin assignments and software serial configuration.
Q: How do I update the XBee firmware? A: Use the XCTU software provided by Digi International to update the XBee firmware.
Q: Can I use the XBee Shield with other wireless modules? A: The shield is designed specifically for XBee modules. Using other modules may require additional hardware or software adjustments.
Q: What is the range of the XBee module with this shield? A: The range depends on the specific XBee module used, the environment, and antenna type. Refer to the XBee module's datasheet for detailed range information.