How to Use NI-MH Battery Charger: Examples, Pinouts, and Specs
Introduction
A Nickel-Metal Hydride (Ni-MH) Battery Charger is an electronic device designed to replenish the charge in Ni-MH rechargeable batteries. These chargers are preferred for their ability to charge batteries efficiently and safely, making them suitable for a wide range of applications including consumer electronics, remote controls, flashlights, and portable power tools.
Explore Projects Built with NI-MH Battery Charger
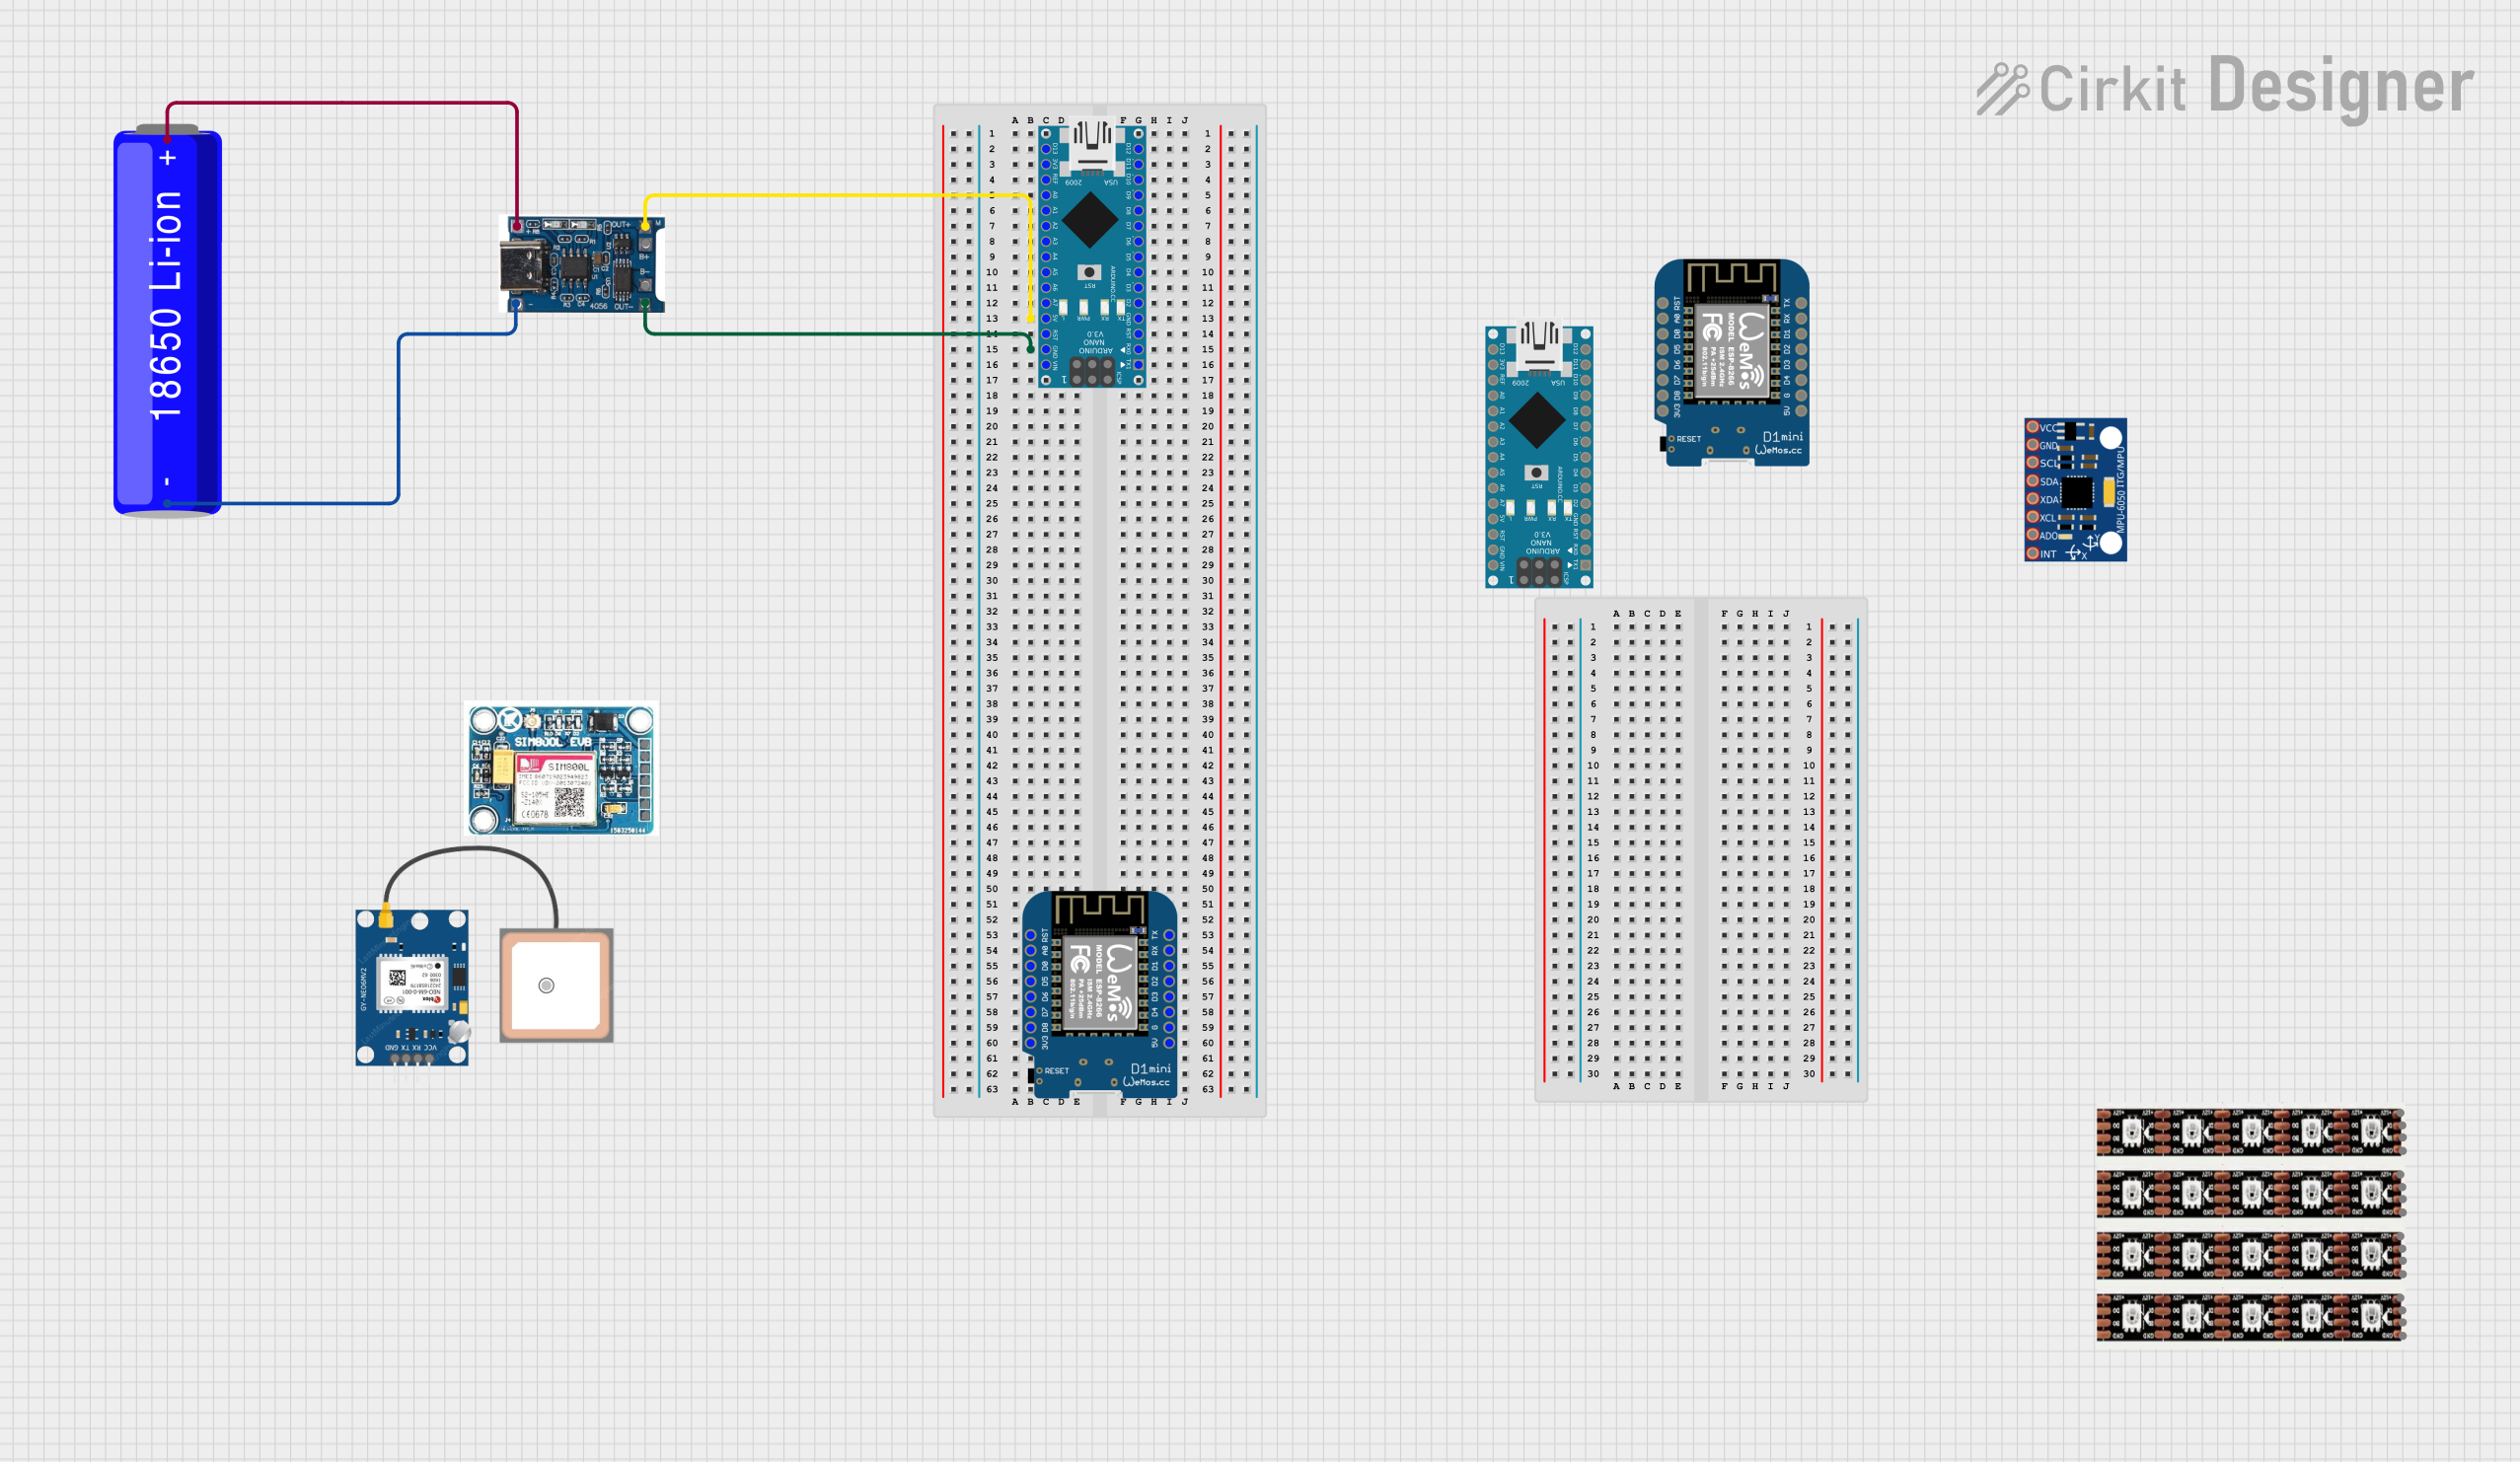
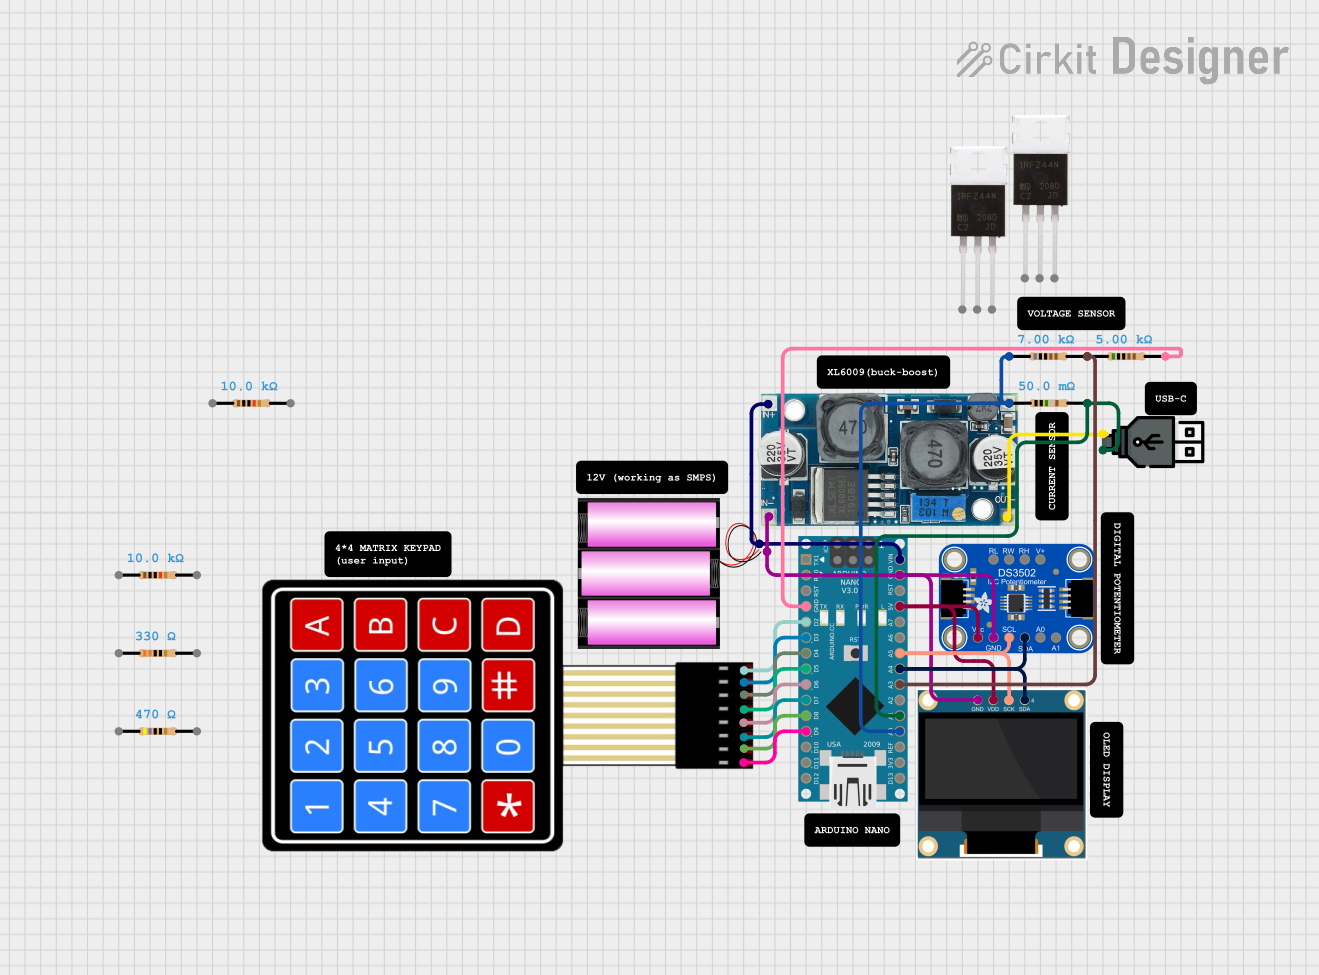


Explore Projects Built with NI-MH Battery Charger
Technical Specifications
Key Technical Details
- Input Voltage: Typically ranges from 100V to 240V AC for standard wall chargers.
- Output Voltage: Usually matches the rated voltage of the batteries being charged (e.g., 1.2V per cell).
- Charging Current: Varies depending on the charger model and battery capacity (e.g., 500mA to 2A).
- Battery Compatibility: Designed to charge Ni-MH batteries of various sizes (e.g., AA, AAA, C, D, 9V).
- Charge Indication: LED indicators or LCD displays to show charging status.
- Safety Features: Overcharge protection, temperature monitoring, and short-circuit prevention.
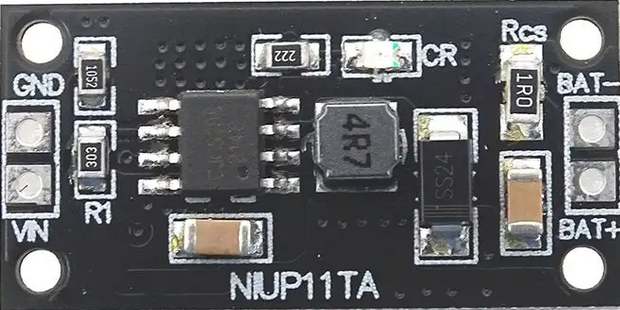
Pin Configuration and Descriptions
| Pin Number | Description | Notes |
|---|---|---|
| 1 | Positive Output | Connects to the positive terminal of the battery |
| 2 | Negative Output | Connects to the negative terminal of the battery |
| 3 | Ground (if applicable) | For chargers with a grounding pin |
| 4 | Control/Feedback (optional) | For smart chargers with communication features |
Note: The actual pin configuration may vary depending on the charger design.
Usage Instructions
How to Use the Component in a Circuit
- Connect the Charger: Plug the charger into an AC outlet.
- Insert Batteries: Place the Ni-MH batteries into the charging slots, ensuring correct polarity.
- Start Charging: The charger will typically begin charging automatically.
- Monitor Charging: Observe the charge indication to know when the batteries are fully charged.
- End Charging: Once charged, remove the batteries from the charger.
Important Considerations and Best Practices
- Battery Orientation: Always insert batteries with the correct polarity to prevent damage.
- Charger Compatibility: Use a charger that is compatible with the size and type of Ni-MH batteries you are charging.
- Charging Time: Do not exceed the recommended charging time to avoid overcharging.
- Heat Dissipation: Ensure the charger is in a well-ventilated area to prevent overheating.
- Maintenance: Periodically clean the charger's contacts and battery terminals.
Troubleshooting and FAQs
Common Issues
- Batteries Not Charging: Ensure the charger is plugged in and the batteries are correctly inserted.
- Charger Overheating: Remove the charger from the power source and allow it to cool before retrying.
- Incomplete Charging: Check if the batteries have reached the end of their lifespan or require reconditioning.
Solutions and Tips for Troubleshooting
- LED Indicator Not Lighting Up: Confirm the power source and check for any damage to the charger.
- Charging Taking Too Long: Ensure you are using the correct charger for your battery capacity.
- Batteries Getting Hot: This can be normal to some extent, but if excessively hot, stop charging and check the batteries and charger.
FAQs
Q: Can I charge other types of batteries with this charger? A: No, Ni-MH battery chargers are specifically designed for Ni-MH batteries and should not be used with other types.
Q: How do I know when the batteries are fully charged? A: Most chargers have an indicator light or display that will change color or turn off when charging is complete.
Q: Is it safe to leave the batteries in the charger overnight? A: While many chargers have overcharge protection, it is generally not recommended to leave batteries charging unattended for extended periods.
Q: Can I charge a single battery or do I need to charge pairs? A: This depends on the charger. Some chargers can charge individual batteries, while others require pairs. Refer to the charger's manual for specific instructions.
Example Code for Arduino UNO Connection
Note: This section is hypothetical as standard Ni-MH battery chargers do not typically interface with an Arduino. However, for the purpose of this exercise, we will assume there is a smart charger with an Arduino-compatible interface.
#include <Wire.h>

// Define the I2C address for the smart charger
#define CHARGER_ADDR 0x40

void setup() {
  Wire.begin(); // Start the I2C bus
  Serial.begin(9600); // Start serial communication for debugging
}

void loop() {
  Wire.beginTransmission(CHARGER_ADDR); // Begin transmission to the charger
  Wire.write(0x01); // Send a command to start charging
  Wire.endTransmission(); // End transmission

  delay(1000); // Wait for 1 second

  // Request charging status from the charger
  Wire.requestFrom(CHARGER_ADDR, 1);
  if(Wire.available()) {
    byte status = Wire.read(); // Read the status byte
    // Print the charging status to the serial monitor
    Serial.print("Charging Status: ");
    if(status == 0x00) {
      Serial.println("Not Charging");
    } else if(status == 0x01) {
      Serial.println("Charging");
    } else if(status == 0x02) {
      Serial.println("Charge Complete");
    } else {
      Serial.println("Error");
    }
  }

  delay(5000); // Wait for 5 seconds before checking again
}
Note: The above code is for illustrative purposes only and may not correspond to a real-world Ni-MH battery charger.