Cirkit Designer Logo
Cirkit Designer
Your all-in-one circuit design IDE
Home / 
Component Documentation

How to Use stepper motor one: Examples, Pinouts, and Specs

Image of stepper motor one
Cirkit Designer LogoDesign with stepper motor one in Cirkit Designer

Introduction

A stepper motor is an electromechanical device that converts electrical pulses into discrete mechanical movements. It rotates in fixed angular steps or increments, making it suitable for applications that require precise position control. Common applications include robotics, CNC machines, and 3D printers.

Explore Projects Built with stepper motor one

Use Cirkit Designer to design, explore, and prototype these projects online. Some projects support real-time simulation. Click "Open Project" to start designing instantly!
Arduino-Controlled Stepper and DC Motor with Relay Switching
Image of Conveyor Belt & Capping Motor: A project utilizing stepper motor one in a practical application
This circuit controls a Nema 17 stepper motor using a DRV8825 driver module, with an Arduino UNO microcontroller dictating the step and direction. Additionally, the circuit can switch a DC motor on and off using a relay module controlled by the Arduino. The power supply provides the necessary voltage for the relay and the motor driver, which in turn powers the stepper motor, while the Arduino's firmware defines the motor's stepping behavior and the relay's switching to control the DC motor.
Cirkit Designer LogoOpen Project in Cirkit Designer
Arduino UNO Controlled Stepper Motor with Servo Integration
Image of Stepper: A project utilizing stepper motor one in a practical application
This circuit uses an Arduino UNO to control a stepper motor. The Arduino provides power and control signals to the stepper motor through its digital pins, enabling precise rotational movement as defined in the embedded code.
Cirkit Designer LogoOpen Project in Cirkit Designer
Arduino UNO-Based Stepper Motor Controller with Rotary Encoder and Key Switch
Image of Attenuator with 2 Buttons: A project utilizing stepper motor one in a practical application
This circuit controls a bipolar stepper motor using an Arduino UNO and a DRV8825 stepper motor driver. The Arduino reads inputs from a rotary encoder and a key switch module to manage the motor's direction and steps, powered by a 12V power supply.
Cirkit Designer LogoOpen Project in Cirkit Designer
Arduino UNO Controlled Stepper Motor and Servo System
Image of Stepper + Servo: A project utilizing stepper motor one in a practical application
This circuit uses an Arduino UNO to control a stepper motor and a micro servo. The Arduino is programmed to rotate the stepper motor in both directions and to move the servo to specific angles, enabling precise control of mechanical movements.
Cirkit Designer LogoOpen Project in Cirkit Designer

Explore Projects Built with stepper motor one

Use Cirkit Designer to design, explore, and prototype these projects online. Some projects support real-time simulation. Click "Open Project" to start designing instantly!
Image of Conveyor Belt & Capping Motor: A project utilizing stepper motor one in a practical application
Arduino-Controlled Stepper and DC Motor with Relay Switching
This circuit controls a Nema 17 stepper motor using a DRV8825 driver module, with an Arduino UNO microcontroller dictating the step and direction. Additionally, the circuit can switch a DC motor on and off using a relay module controlled by the Arduino. The power supply provides the necessary voltage for the relay and the motor driver, which in turn powers the stepper motor, while the Arduino's firmware defines the motor's stepping behavior and the relay's switching to control the DC motor.
Cirkit Designer LogoOpen Project in Cirkit Designer
Image of Stepper: A project utilizing stepper motor one in a practical application
Arduino UNO Controlled Stepper Motor with Servo Integration
This circuit uses an Arduino UNO to control a stepper motor. The Arduino provides power and control signals to the stepper motor through its digital pins, enabling precise rotational movement as defined in the embedded code.
Cirkit Designer LogoOpen Project in Cirkit Designer
Image of Attenuator with 2 Buttons: A project utilizing stepper motor one in a practical application
Arduino UNO-Based Stepper Motor Controller with Rotary Encoder and Key Switch
This circuit controls a bipolar stepper motor using an Arduino UNO and a DRV8825 stepper motor driver. The Arduino reads inputs from a rotary encoder and a key switch module to manage the motor's direction and steps, powered by a 12V power supply.
Cirkit Designer LogoOpen Project in Cirkit Designer
Image of Stepper + Servo: A project utilizing stepper motor one in a practical application
Arduino UNO Controlled Stepper Motor and Servo System
This circuit uses an Arduino UNO to control a stepper motor and a micro servo. The Arduino is programmed to rotate the stepper motor in both directions and to move the servo to specific angles, enabling precise control of mechanical movements.
Cirkit Designer LogoOpen Project in Cirkit Designer

Technical Specifications

General Characteristics

  • Step Angle: Typically 1.8 degrees per step (200 steps per revolution)
  • Voltage Rating: Varies by model (commonly 12V)
  • Current Rating: Varies by model (commonly 1-2A per phase)
  • Phase: Bipolar or Unipolar (depending on model)

Pin Configuration and Descriptions

Pin Number Description Notes
1 Coil 1A Connect to a driver output
2 Coil 1B Connect to a driver output
3 Coil 2A Connect to a driver output
4 Coil 2B Connect to a driver output
5 (Optional) Center tap For unipolar configurations

Usage Instructions

Connecting to an Arduino UNO

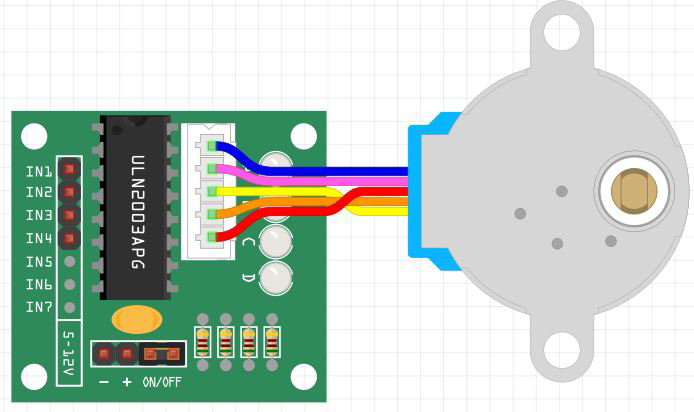
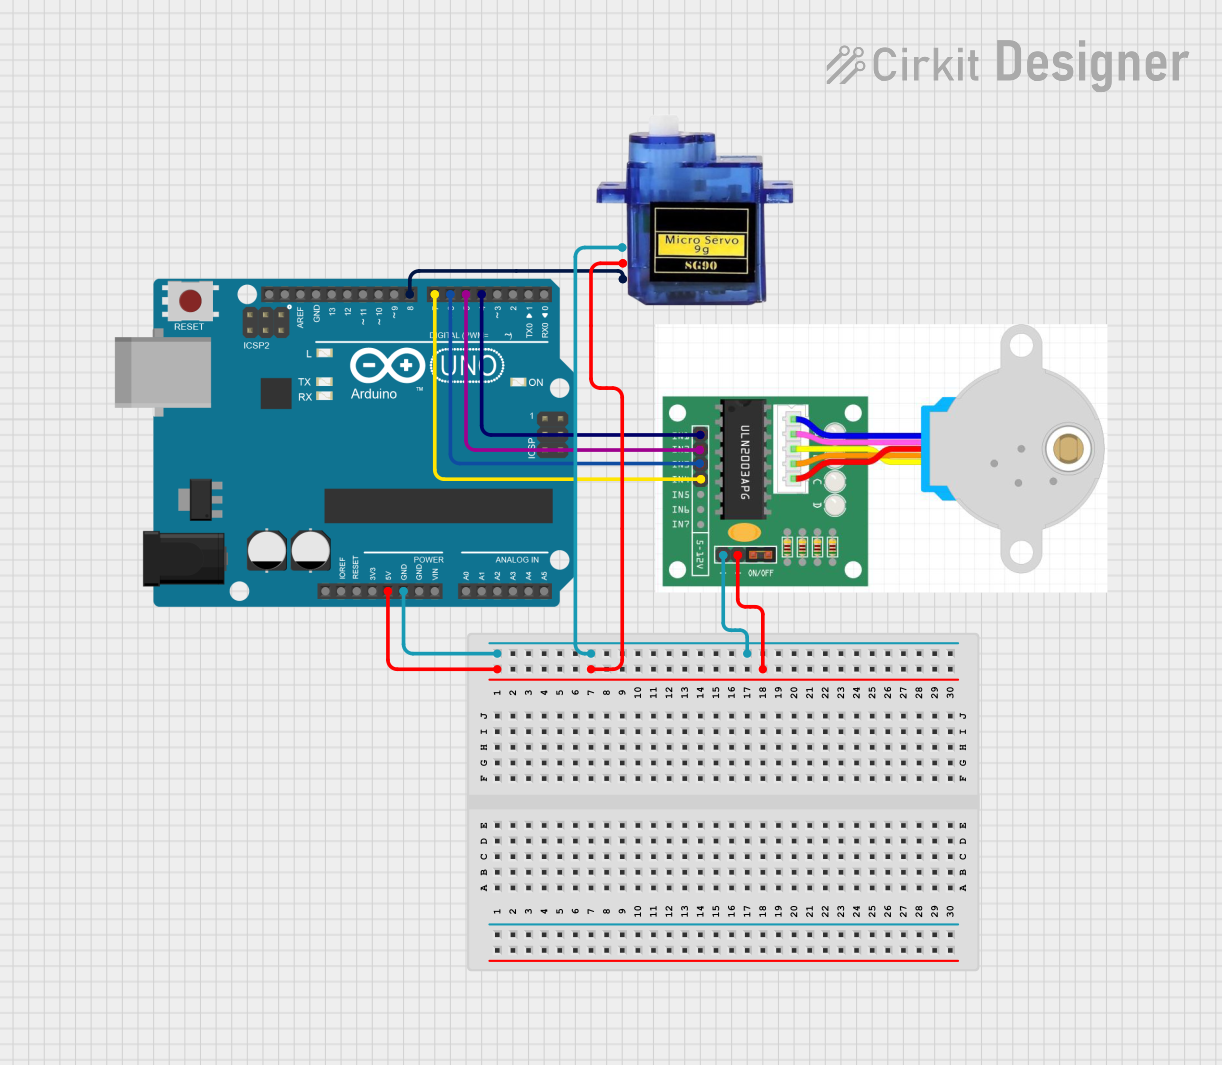
To use the stepper motor with an Arduino UNO, you will need a stepper motor driver, such as the A4988 or the ULN2003, depending on the motor's voltage and current specifications.
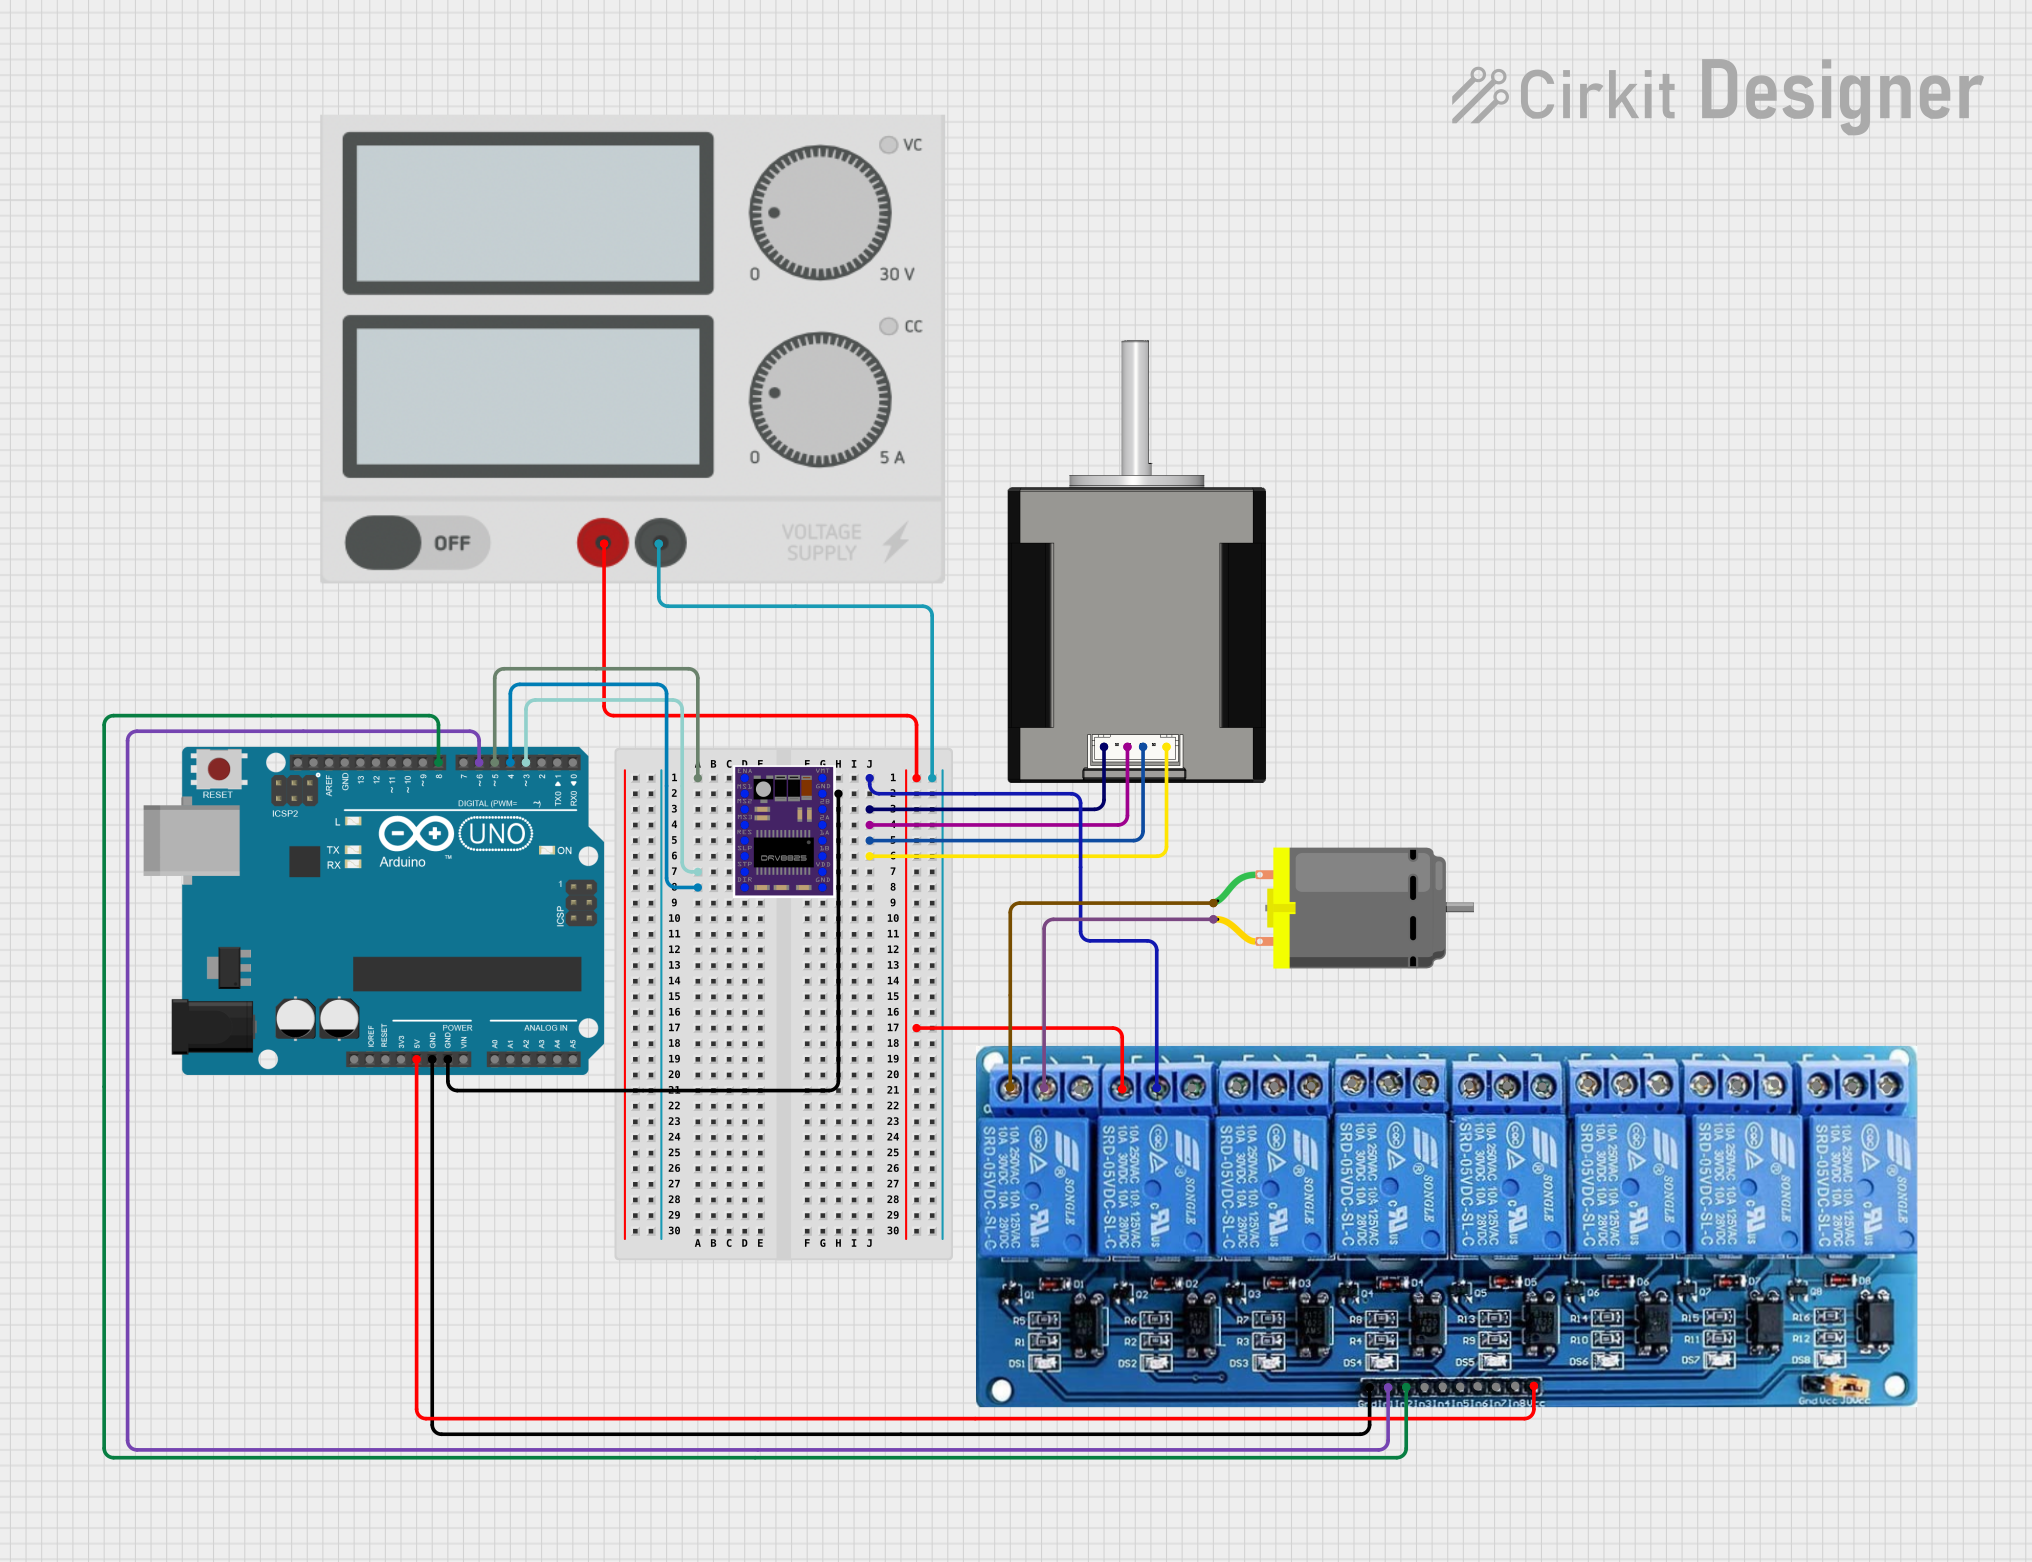
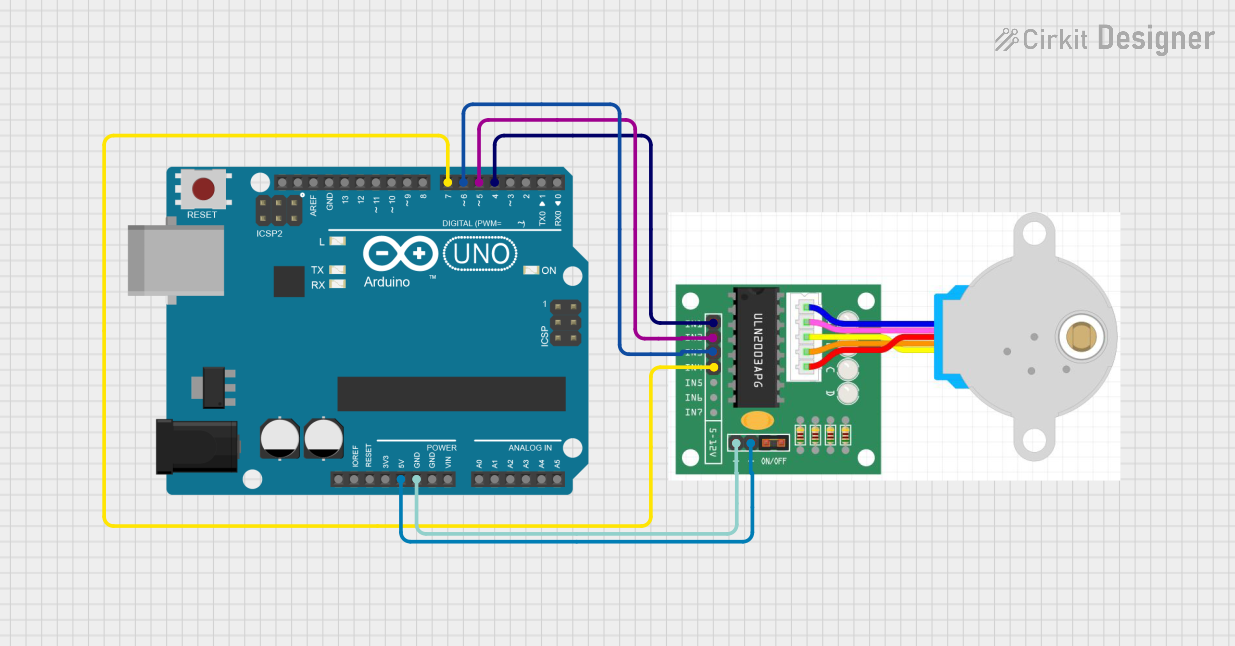
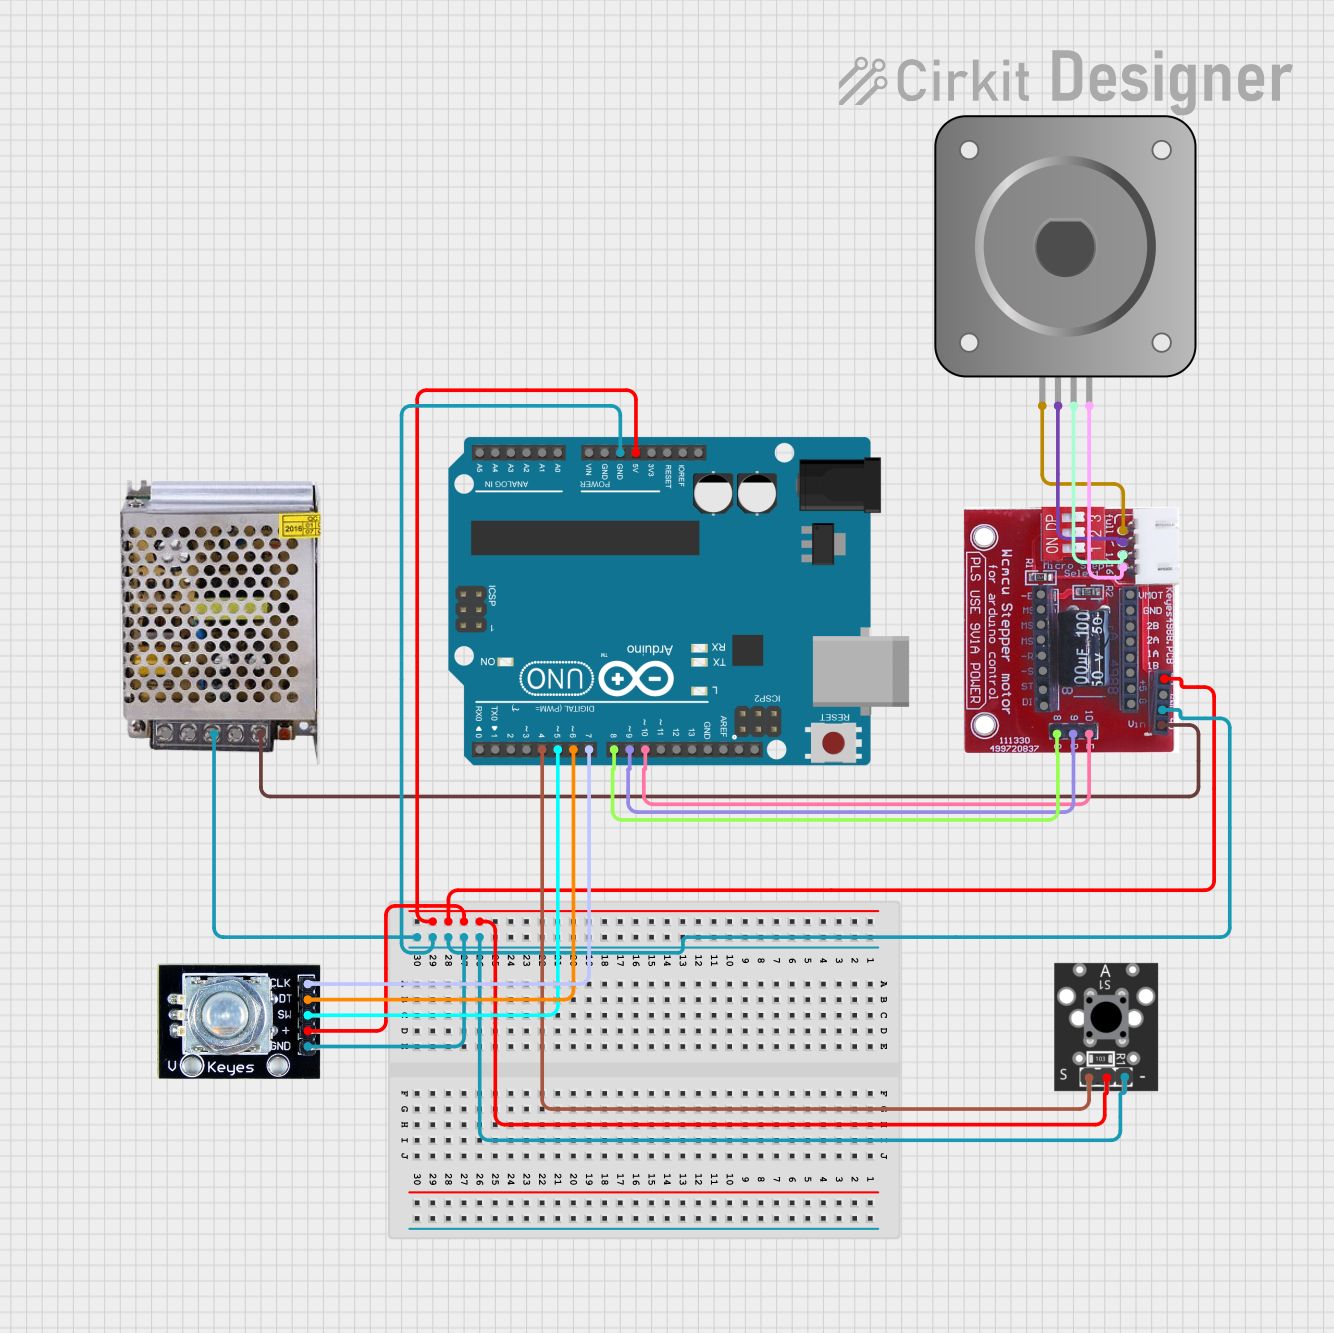
Wiring Diagram

  1. Connect the motor's coils to the driver's output pins.
  2. Connect the driver's input pins to the Arduino's digital output pins.
  3. Connect the driver's power supply pins to an appropriate power source.
  4. Ground the driver and the Arduino to a common ground.

Example Code

#include <Stepper.h>

// Change these values based on your motor's specifications
const int stepsPerRevolution = 200;  // typically 200 steps for a 1.8 degree stepper

// Wiring: Arduino pins are connected to stepper driver inputs
Stepper myStepper(stepsPerRevolution, 8, 9, 10, 11);

void setup() {
  myStepper.setSpeed(60); // Set the speed to 60 RPM
}

void loop() {
  // Step one revolution in one direction:
  myStepper.step(stepsPerRevolution);
  delay(500);

  // Step one revolution in the other direction:
  myStepper.step(-stepsPerRevolution);
  delay(500);
}

Important Considerations and Best Practices

  • Always use a stepper motor driver; do not connect a stepper motor directly to the Arduino.
  • Ensure the power supply matches the motor's requirements.
  • Avoid running the stepper motor at its maximum ratings for extended periods to prevent overheating.
  • Use a decoupling capacitor across the power supply to minimize voltage spikes.

Troubleshooting and FAQs

Common Issues

  • Motor does not turn: Check wiring, ensure the power supply is adequate, and verify that the driver is functioning.
  • Motor skips steps or stalls: This may be due to excessive speed, high load, or insufficient current. Adjust the driver settings accordingly.
  • Motor overheats: Reduce the current, improve cooling, or reduce the duty cycle.

FAQs

Q: Can I run a stepper motor without a driver? A: No, a driver is necessary to control the current and to protect the Arduino from damage.

Q: How do I know if my stepper motor is bipolar or unipolar? A: Bipolar motors have two coils with no center taps, while unipolar motors have center taps that can be used to change the winding configuration.

Q: What is the maximum speed of a stepper motor? A: The maximum speed depends on the motor and driver capabilities, as well as the load and voltage applied. It is important to refer to the motor's datasheet for specific details.

For further assistance, consult the manufacturer's datasheet or contact technical support.