How to Use Gravity EC Meter: Examples, Pinouts, and Specs
Introduction
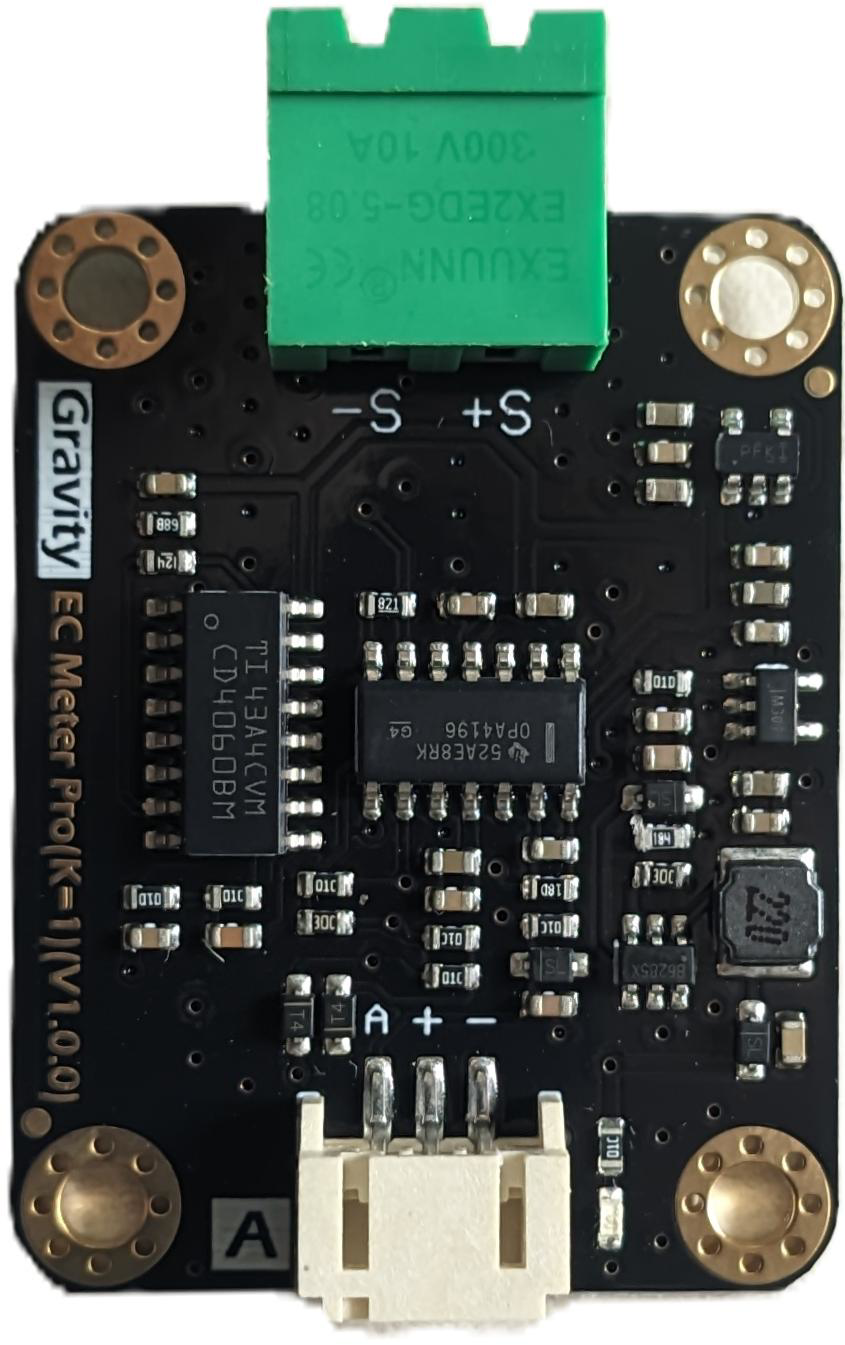
The Gravity EC Meter (Manufacturer Part ID: DFR0300) by DFRobot is a high-precision device designed to measure the electrical conductivity (EC) of a solution. EC is a critical parameter in determining the concentration of dissolved salts and nutrients, making this sensor an essential tool for hydroponics, agriculture, aquaculture, and environmental monitoring. The Gravity EC Meter is easy to use, compatible with microcontrollers like Arduino, and provides reliable and accurate readings.
Explore Projects Built with Gravity EC Meter
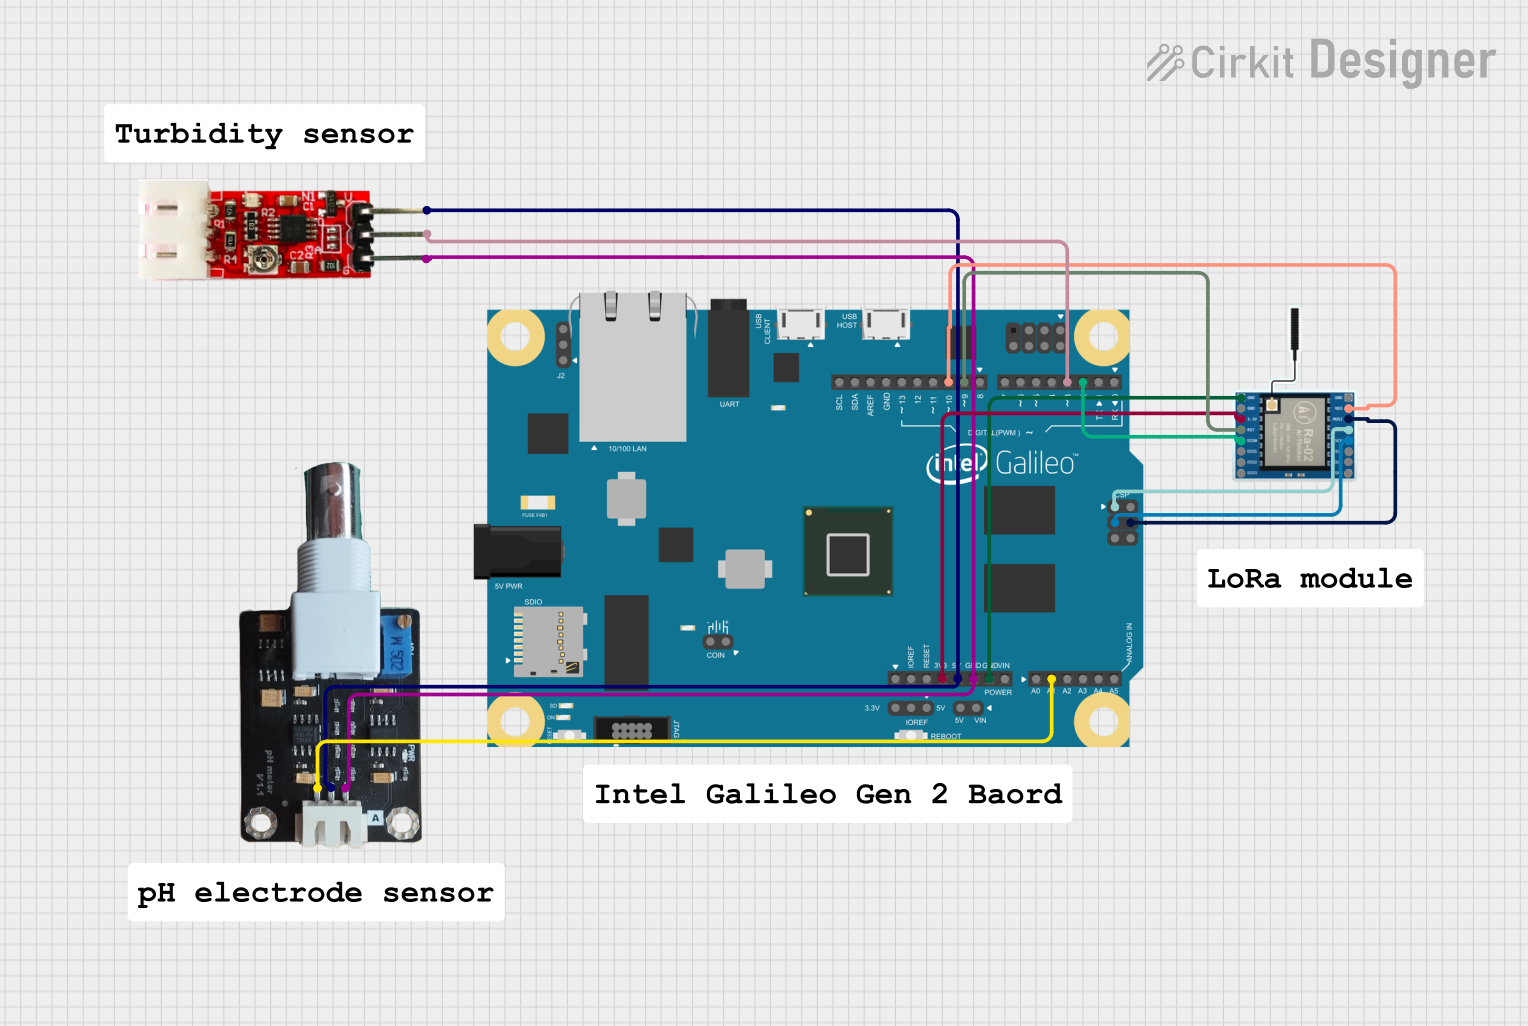

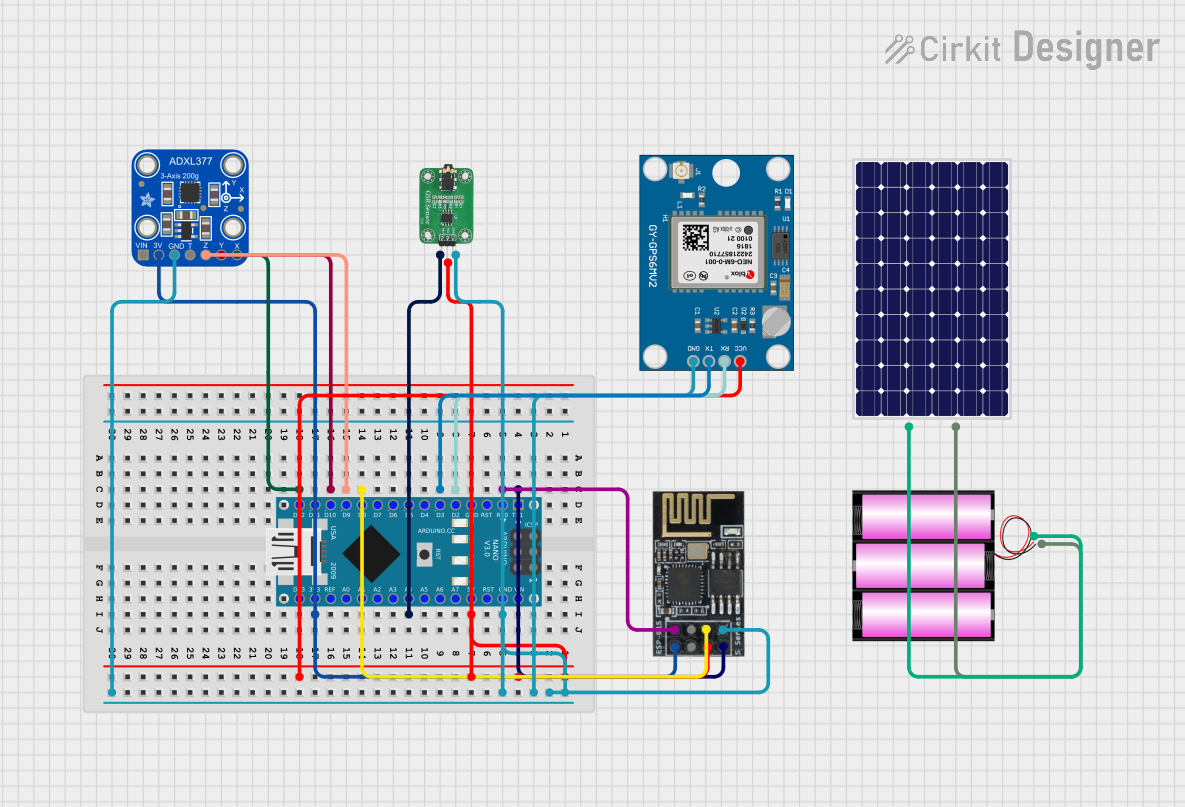
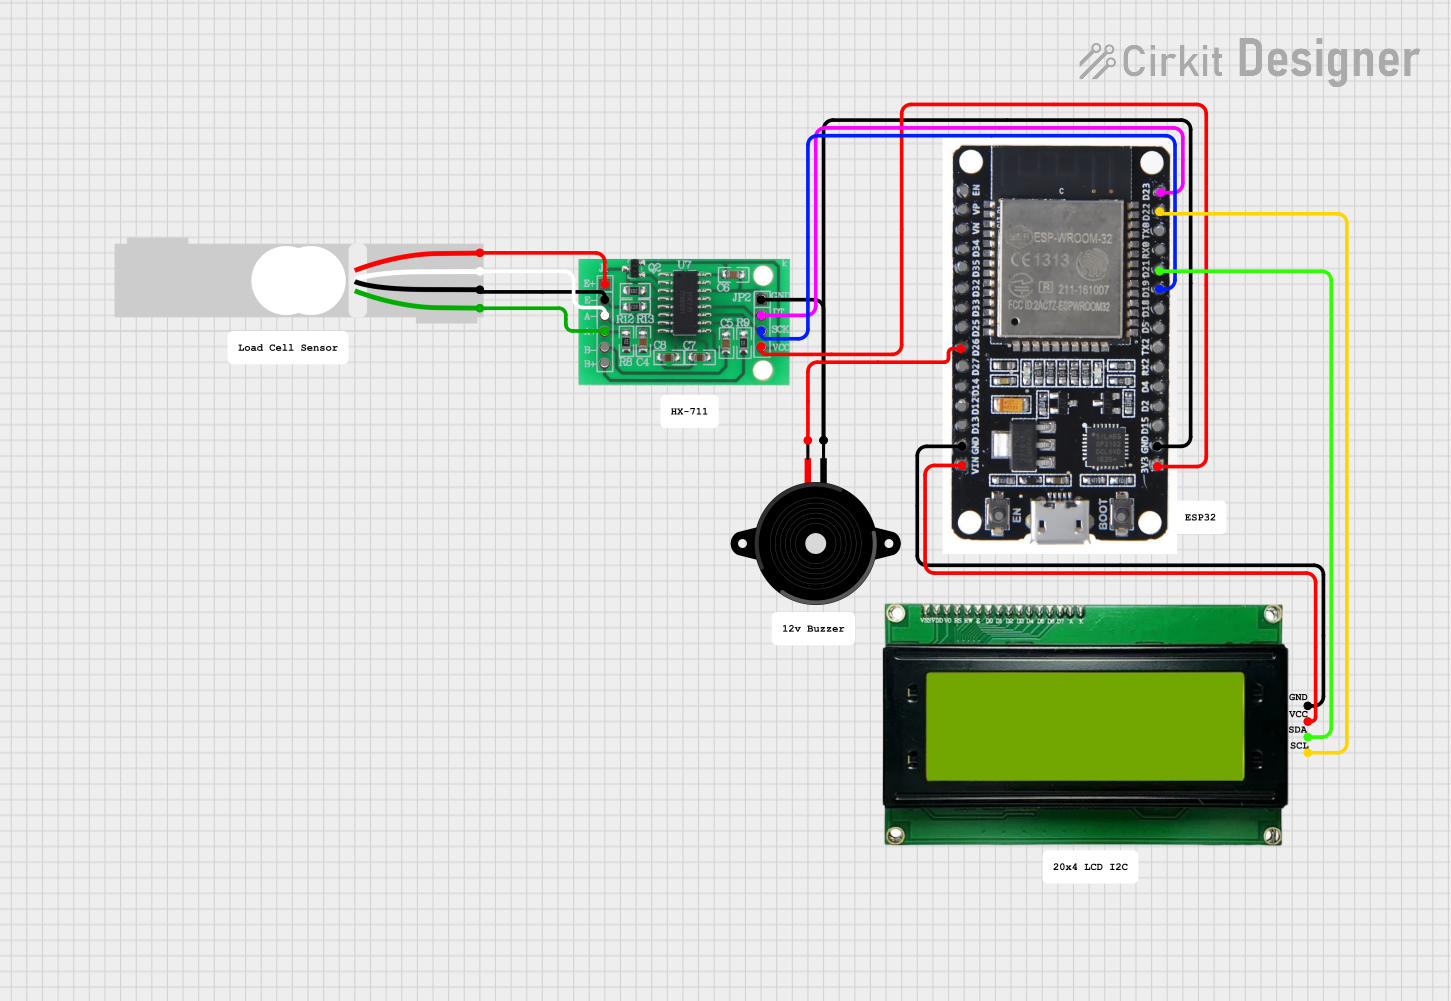
Explore Projects Built with Gravity EC Meter
Common Applications
- Hydroponic systems for monitoring nutrient levels
- Agricultural soil and water quality analysis
- Aquaculture for maintaining optimal water conditions
- Environmental monitoring of water bodies
- Laboratory experiments involving solution conductivity
Technical Specifications
Below are the key technical details and pin configuration of the Gravity EC Meter:
Key Technical Details
| Parameter | Specification |
|---|---|
| Operating Voltage | 3.3V - 5.5V |
| Operating Current | < 10mA |
| Measurement Range | 0 - 20 mS/cm |
| Accuracy | ± 5% F.S. |
| Output Signal | Analog voltage (0 - 3.0V) |
| Temperature Compensation | Supported (via external temperature sensor) |
| Probe Type | Platinum black electrode |
| Cable Length | 1 meter |
| Dimensions (PCB) | 42mm x 32mm |
Pin Configuration
The Gravity EC Meter has a 3-pin interface for easy connection to microcontrollers. The pinout is as follows:
| Pin Name | Description |
|---|---|
| VCC | Power supply (3.3V - 5.5V) |
| GND | Ground |
| AOUT | Analog output signal (0 - 3.0V) |
Usage Instructions
Connecting the Gravity EC Meter
Hardware Setup:
- Connect the VCC pin of the EC Meter to the 5V pin of your microcontroller (e.g., Arduino UNO).
- Connect the GND pin to the ground (GND) of the microcontroller.
- Connect the AOUT pin to an analog input pin (e.g., A0) on the microcontroller.
Calibration:
- The EC Meter requires calibration before use. Use a standard EC calibration solution (e.g., 1.413 mS/cm).
- Submerge the probe in the calibration solution and adjust the potentiometer on the module until the output matches the expected value.
Temperature Compensation:
- For accurate readings, use the external temperature sensor (if available) to compensate for temperature variations.
Sample Arduino Code
Below is an example of how to use the Gravity EC Meter with an Arduino UNO:
// Include necessary libraries
// No specific library is required for basic EC Meter usage

// Define the analog pin connected to the EC Meter
const int ecPin = A0;

// Variable to store the raw analog value
int rawValue = 0;

// Function to convert raw analog value to EC (mS/cm)
float calculateEC(int analogValue) {
  // Convert the analog value (0-1023) to voltage (0-5V)
  float voltage = analogValue * (5.0 / 1023.0);

  // Convert voltage to EC value (example conversion factor)
  // Note: Adjust the factor based on calibration
  float ecValue = voltage * 10.0; // Example: 1V = 10 mS/cm

  return ecValue;
}

void setup() {
  // Initialize serial communication for debugging
  Serial.begin(9600);
}

void loop() {
  // Read the raw analog value from the EC Meter
  rawValue = analogRead(ecPin);

  // Calculate the EC value
  float ec = calculateEC(rawValue);

  // Print the EC value to the Serial Monitor
  Serial.print("EC Value: ");
  Serial.print(ec);
  Serial.println(" mS/cm");

  // Delay for stability
  delay(1000);
}
Best Practices
- Always rinse the probe with distilled water after each use to prevent contamination.
- Avoid exposing the probe to strong acids, bases, or organic solvents, as this may damage the platinum black coating.
- Store the probe in a clean, dry place when not in use.
- Perform regular calibration to ensure accurate readings.
Troubleshooting and FAQs
Common Issues and Solutions
| Issue | Possible Cause | Solution |
|---|---|---|
| No output or unstable readings | Loose or incorrect wiring | Check and secure all connections. |
| Inaccurate EC readings | Calibration not performed or incorrect | Recalibrate using a standard solution. |
| Probe not responding | Probe damaged or dirty | Clean the probe or replace if necessary. |
| Temperature compensation not working | External sensor not connected properly | Verify the connection of the temperature sensor. |
FAQs
Can I use the Gravity EC Meter with a 3.3V microcontroller?
- Yes, the module supports an operating voltage range of 3.3V to 5.5V.
How often should I calibrate the EC Meter?
- Calibration is recommended before each use or at least once a week for consistent accuracy.
What is the lifespan of the EC probe?
- With proper care and maintenance, the probe can last up to 1-2 years.
Can the EC Meter measure salinity?
- While the EC Meter measures electrical conductivity, salinity can be estimated using conversion formulas specific to the solution.
By following this documentation, users can effectively integrate and utilize the Gravity EC Meter in their projects for accurate and reliable EC measurements.