How to Use Pilot Lamp Yellon: Examples, Pinouts, and Specs

Introduction
The Pilot Lamp Yellon is a small indicator light designed to visually signal the operational status of a device or system. This variant emits a yellow light, which is commonly used to indicate caution, warnings, or standby conditions. Its compact design and reliable performance make it a popular choice in industrial control panels, machinery, and consumer electronics.
Explore Projects Built with Pilot Lamp Yellon


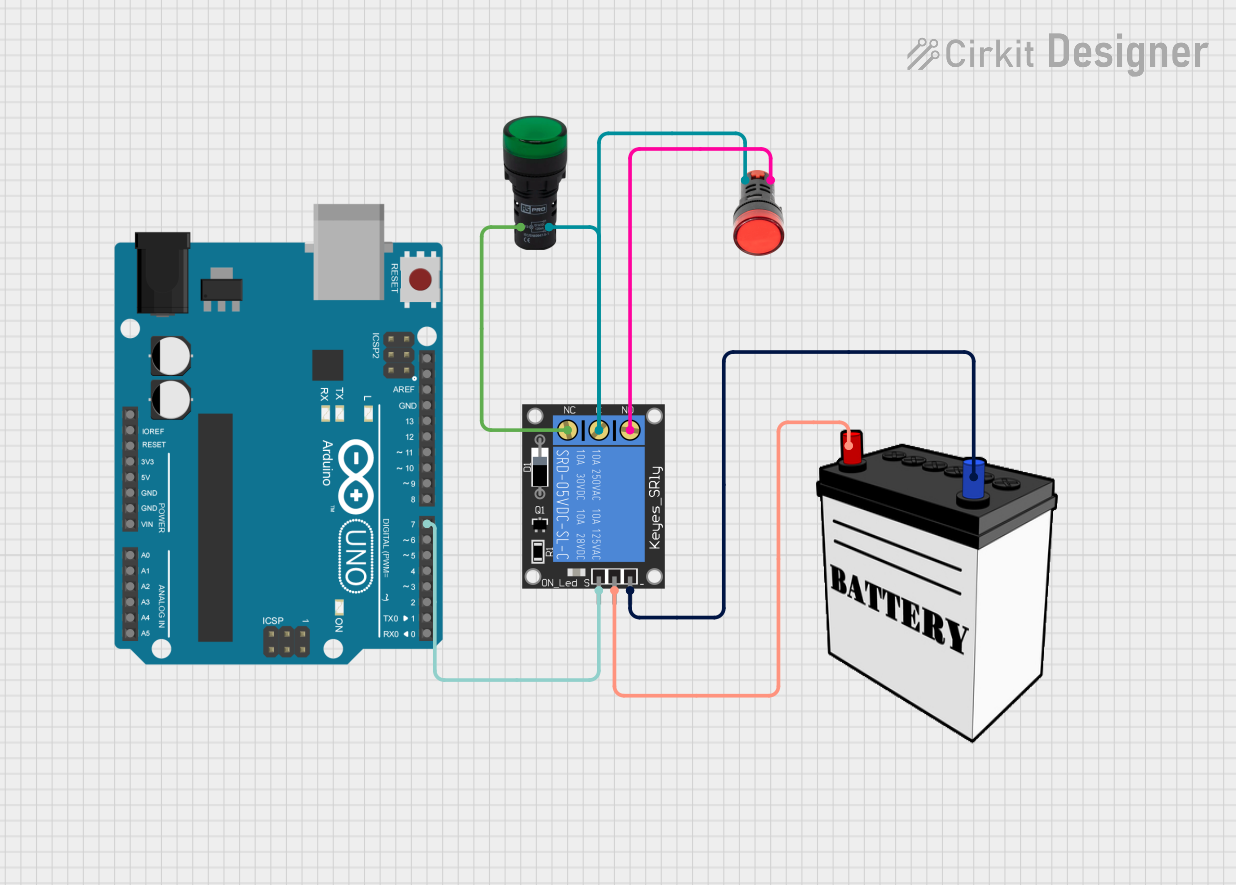
Explore Projects Built with Pilot Lamp Yellon
Common Applications and Use Cases
- Industrial Control Panels: Indicates machine status or fault conditions.
- Consumer Electronics: Serves as a power or standby indicator.
- Automotive Systems: Used in dashboards to signal warnings or alerts.
- Home Appliances: Provides visual feedback for operational states.
- Test Equipment: Highlights active or inactive states during diagnostics.
Technical Specifications
Key Technical Details
| Parameter | Value |
|---|---|
| Operating Voltage | 12V DC (typical) |
| Current Consumption | 20mA (nominal) |
| Light Color | Yellow |
| Mounting Hole Diameter | 8mm |
| Housing Material | Polycarbonate (flame-retardant) |
| LED Lifespan | 50,000 hours (approx.) |
| Operating Temperature | -20°C to +70°C |
| Connection Type | Solder terminals or screw terminals |
Pin Configuration and Descriptions
| Pin Number | Label | Description |
|---|---|---|
| 1 | Positive (+) | Connect to the positive terminal of the power supply. |
| 2 | Negative (-) | Connect to the negative terminal (ground). |
Usage Instructions
How to Use the Component in a Circuit
- Determine the Operating Voltage: Ensure the power supply matches the lamp's operating voltage (12V DC).
- Prepare the Mounting Hole: Drill an 8mm hole in the panel or enclosure where the lamp will be installed.
- Connect the Terminals:
- Attach the positive terminal of the power supply to the
Positive (+)pin. - Attach the ground (negative terminal) to the
Negative (-)pin.
- Attach the positive terminal of the power supply to the
- Secure the Lamp: Insert the lamp into the mounting hole and tighten the securing nut.
- Test the Circuit: Power on the system to verify the lamp illuminates correctly.
Important Considerations and Best Practices
- Polarity: Ensure correct polarity when connecting the lamp to avoid damage.
- Voltage Regulation: Use a regulated 12V DC power supply to prevent overvoltage.
- Heat Dissipation: Avoid placing the lamp near heat-sensitive components, as prolonged operation may generate slight heat.
- Environmental Conditions: Ensure the lamp is not exposed to moisture or extreme temperatures beyond its operating range.
Example: Connecting to an Arduino UNO
The Pilot Lamp Yellon can be used with an Arduino UNO to indicate the status of a digital output pin. Below is an example circuit and code:
Circuit Setup
- Connect the
Positive (+)pin of the lamp to a 220-ohm resistor, and then to Arduino pin 13. - Connect the
Negative (-)pin of the lamp to the Arduino GND.
Arduino Code
// Pilot Lamp Yellon Example with Arduino UNO
// This code toggles the lamp on and off every second.

const int lampPin = 13; // Pin connected to the lamp's positive terminal

void setup() {
  pinMode(lampPin, OUTPUT); // Set the lamp pin as an output
}

void loop() {
  digitalWrite(lampPin, HIGH); // Turn the lamp ON
  delay(1000);                // Wait for 1 second
  digitalWrite(lampPin, LOW);  // Turn the lamp OFF
  delay(1000);                // Wait for 1 second
}
Troubleshooting and FAQs
Common Issues and Solutions
| Issue | Possible Cause | Solution |
|---|---|---|
| Lamp does not light up | Incorrect polarity | Verify and correct the wiring. |
| Lamp flickers during operation | Unstable power supply | Use a regulated 12V DC power source. |
| Lamp overheats | Excessive voltage or prolonged use | Check the voltage and ensure proper ventilation. |
| Lamp fails prematurely | Exceeded operating temperature or voltage | Operate within specified limits. |
FAQs
Can the Pilot Lamp Yellon operate on AC power?
No, this lamp is designed for 12V DC operation only. Using AC power may damage the component.What resistor value should I use if connecting to a higher voltage?
Use Ohm's Law to calculate the resistor value:
( R = \frac{V_{supply} - V_{lamp}}{I_{lamp}} )
For example, with a 24V supply:
( R = \frac{24V - 12V}{0.02A} = 600 , \Omega ).Can the lamp be used outdoors?
The lamp is not waterproof. Use it in a dry, indoor environment or within a sealed enclosure for outdoor applications.