How to Use warm air blower: Examples, Pinouts, and Specs
Introduction
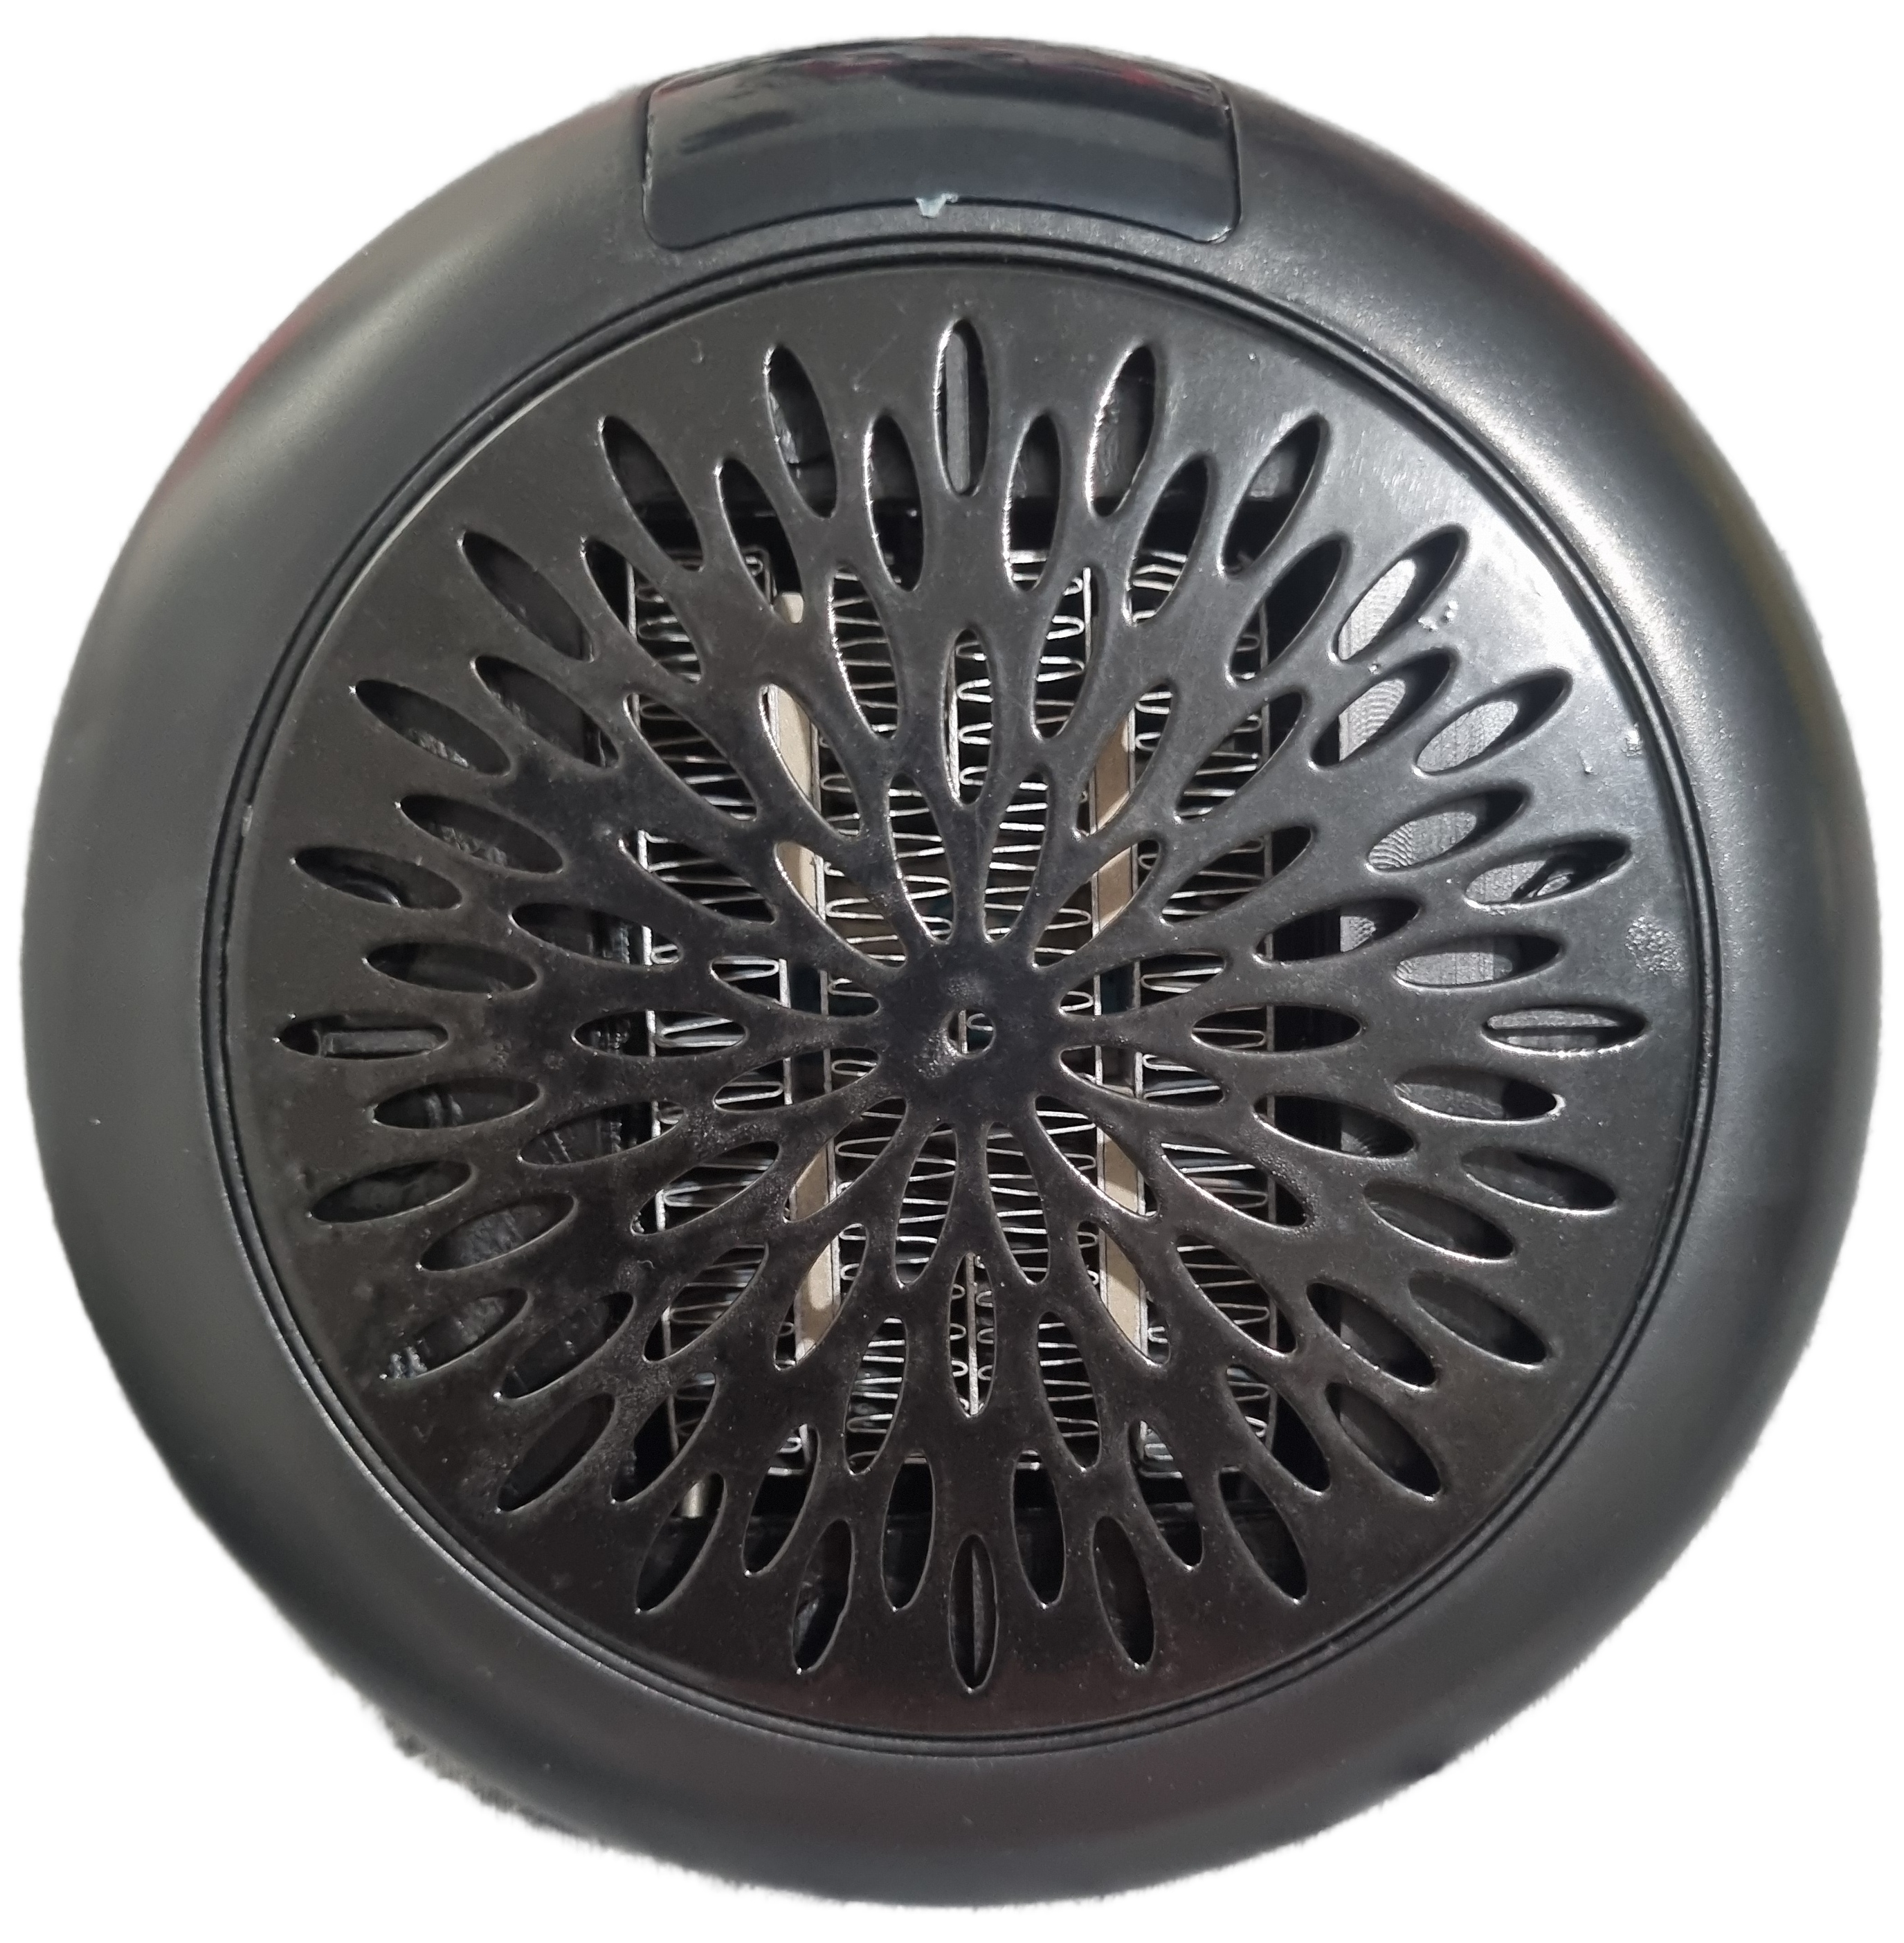
A warm air blower is an electronic device designed to emit a stream of warm air for the purpose of heating or drying. It is commonly used in a variety of applications such as space heating, drying paint or adhesives, and warming components in industrial processes. The warm air blower operates by drawing in air, heating it with an internal element, and then expelling the warmed air through a nozzle or vent.
Explore Projects Built with warm air blower
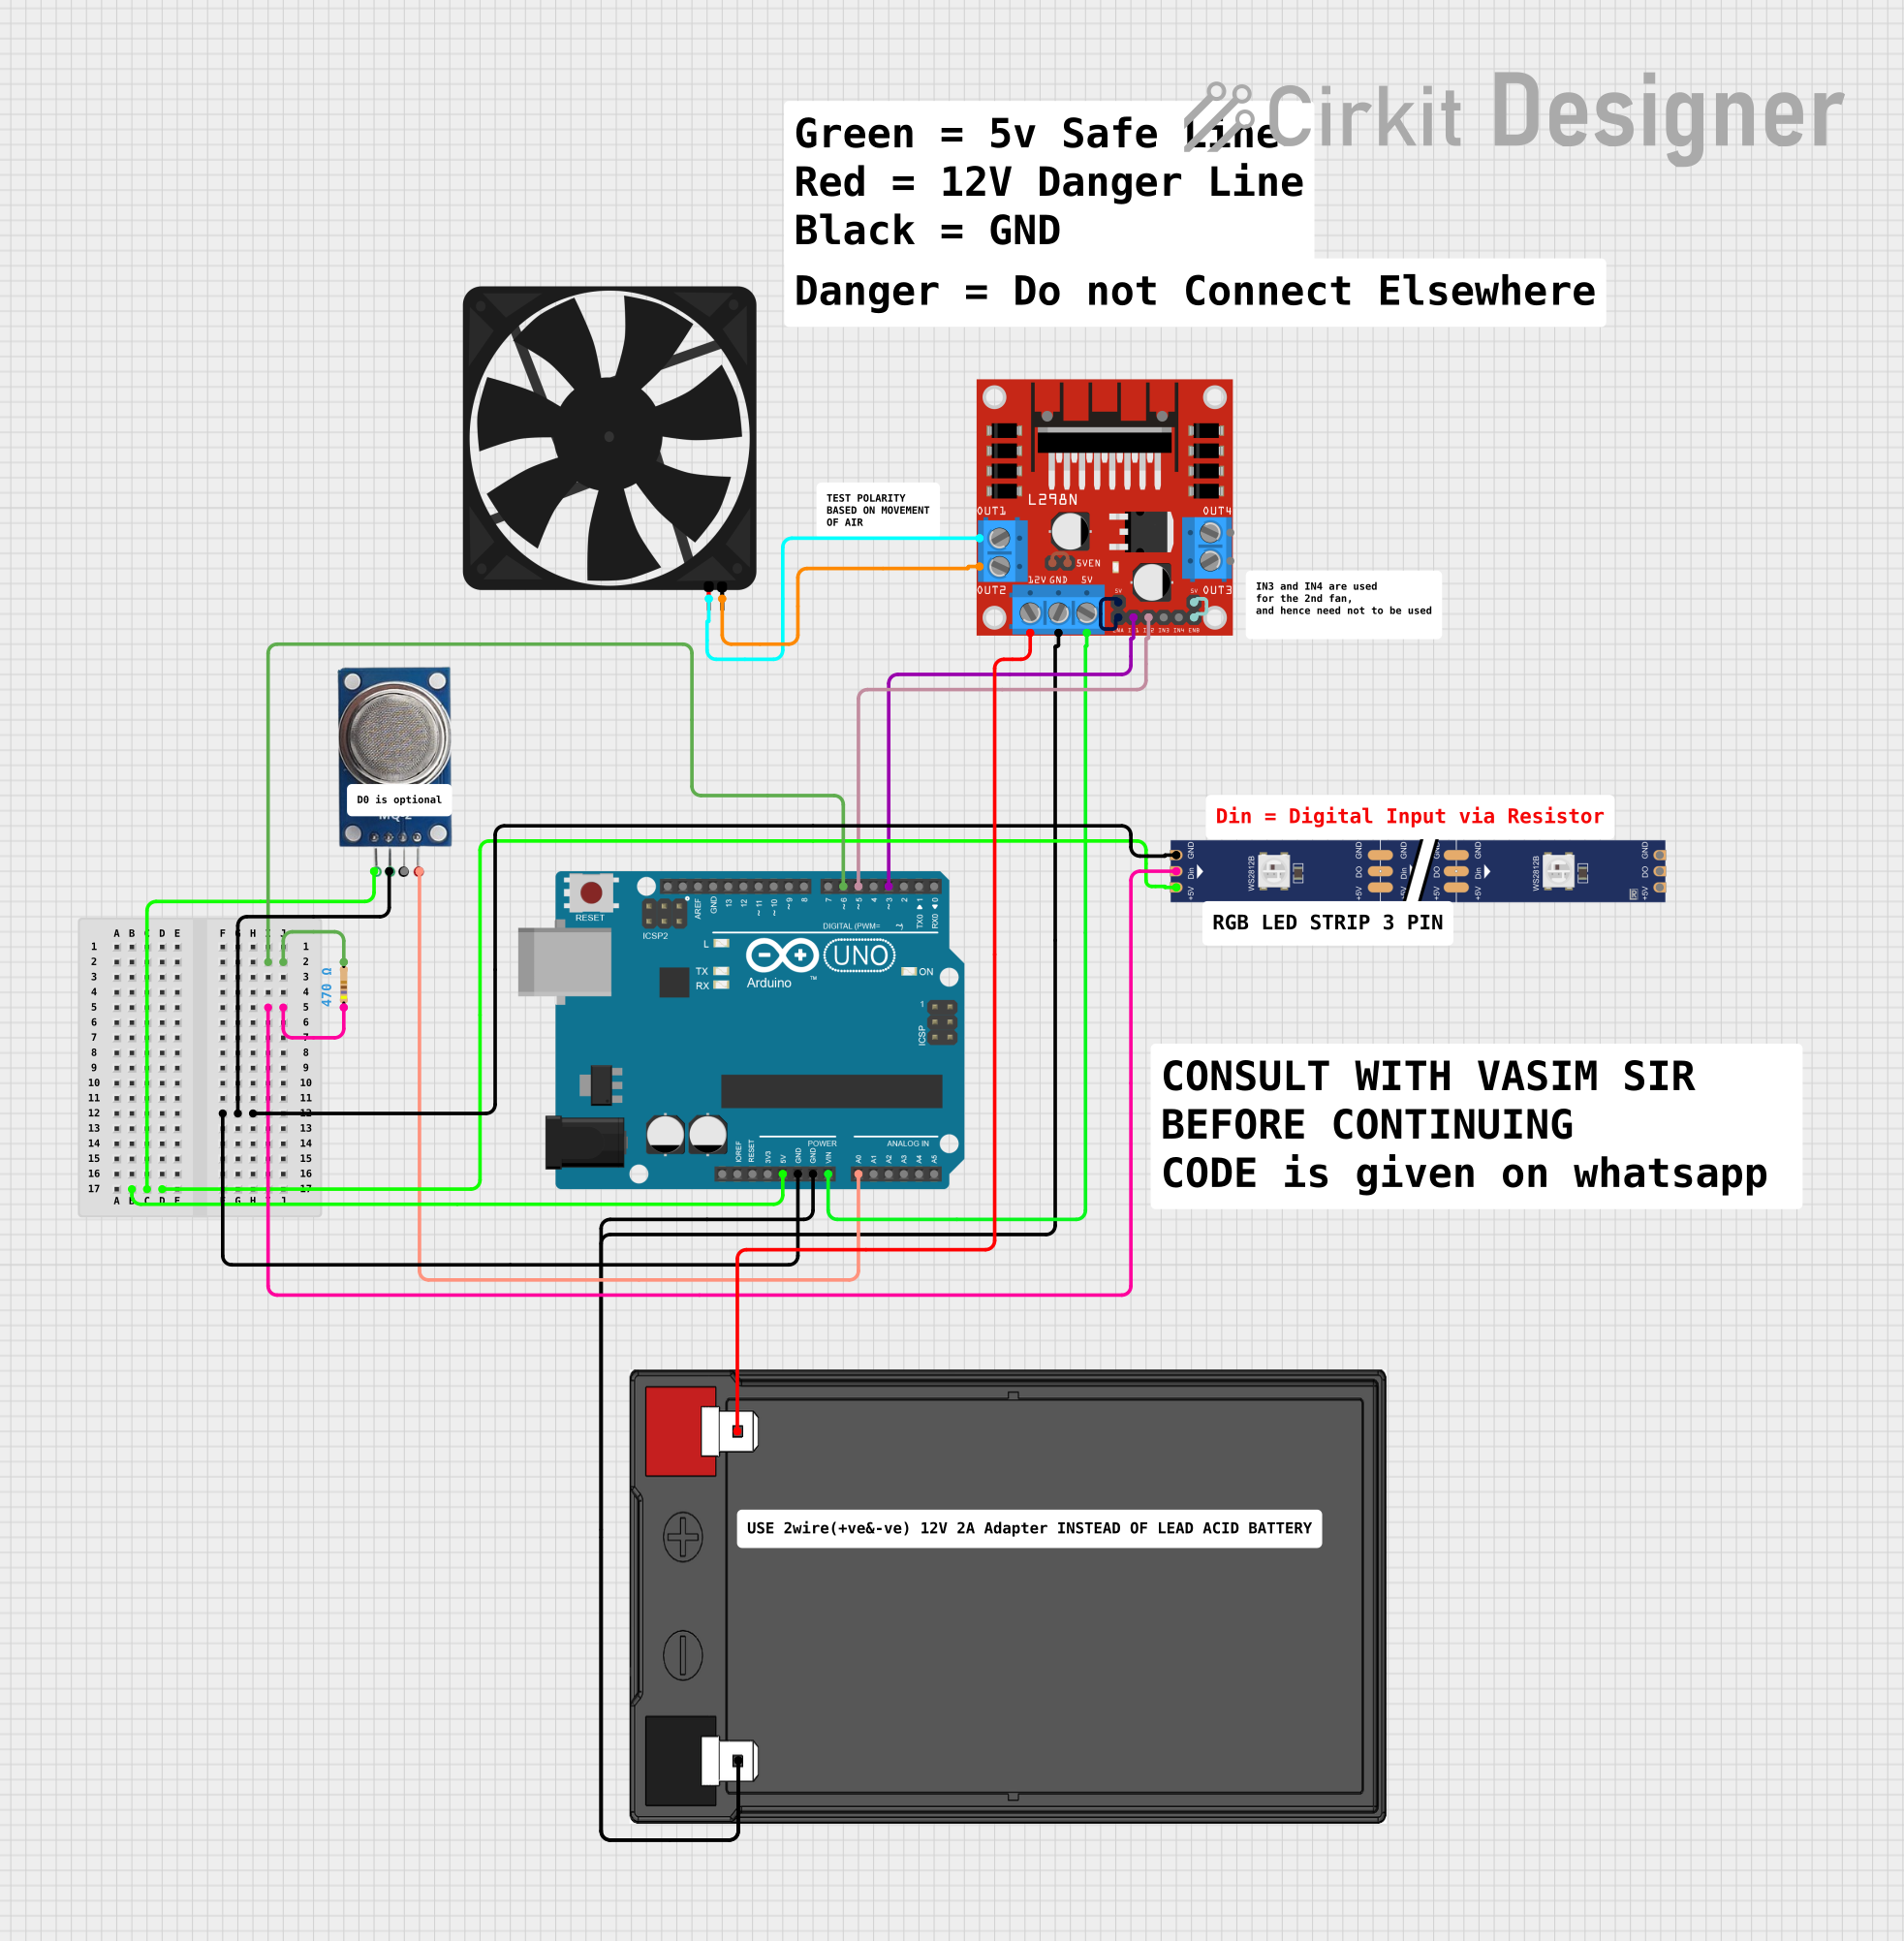
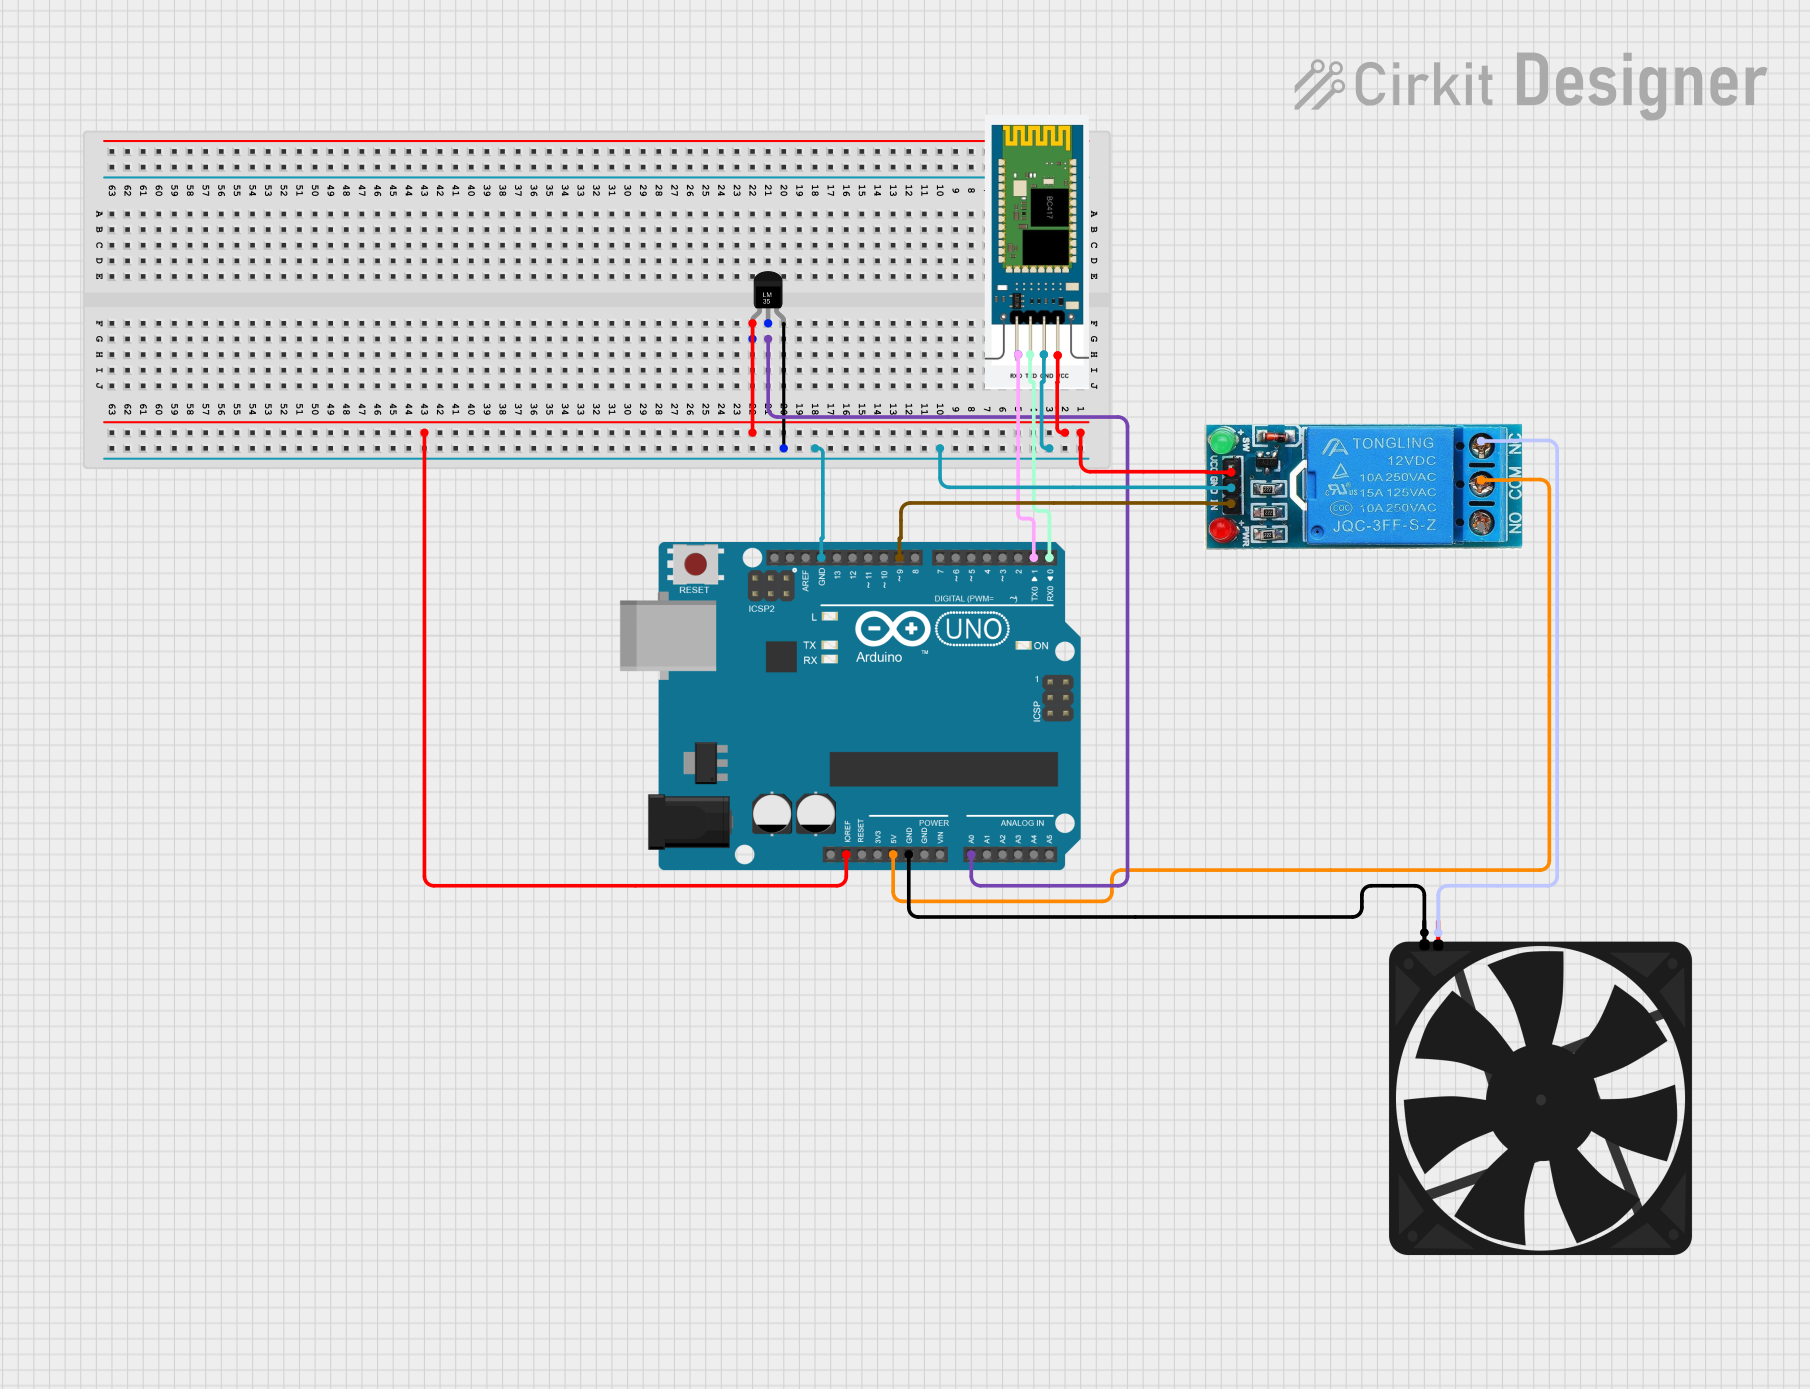
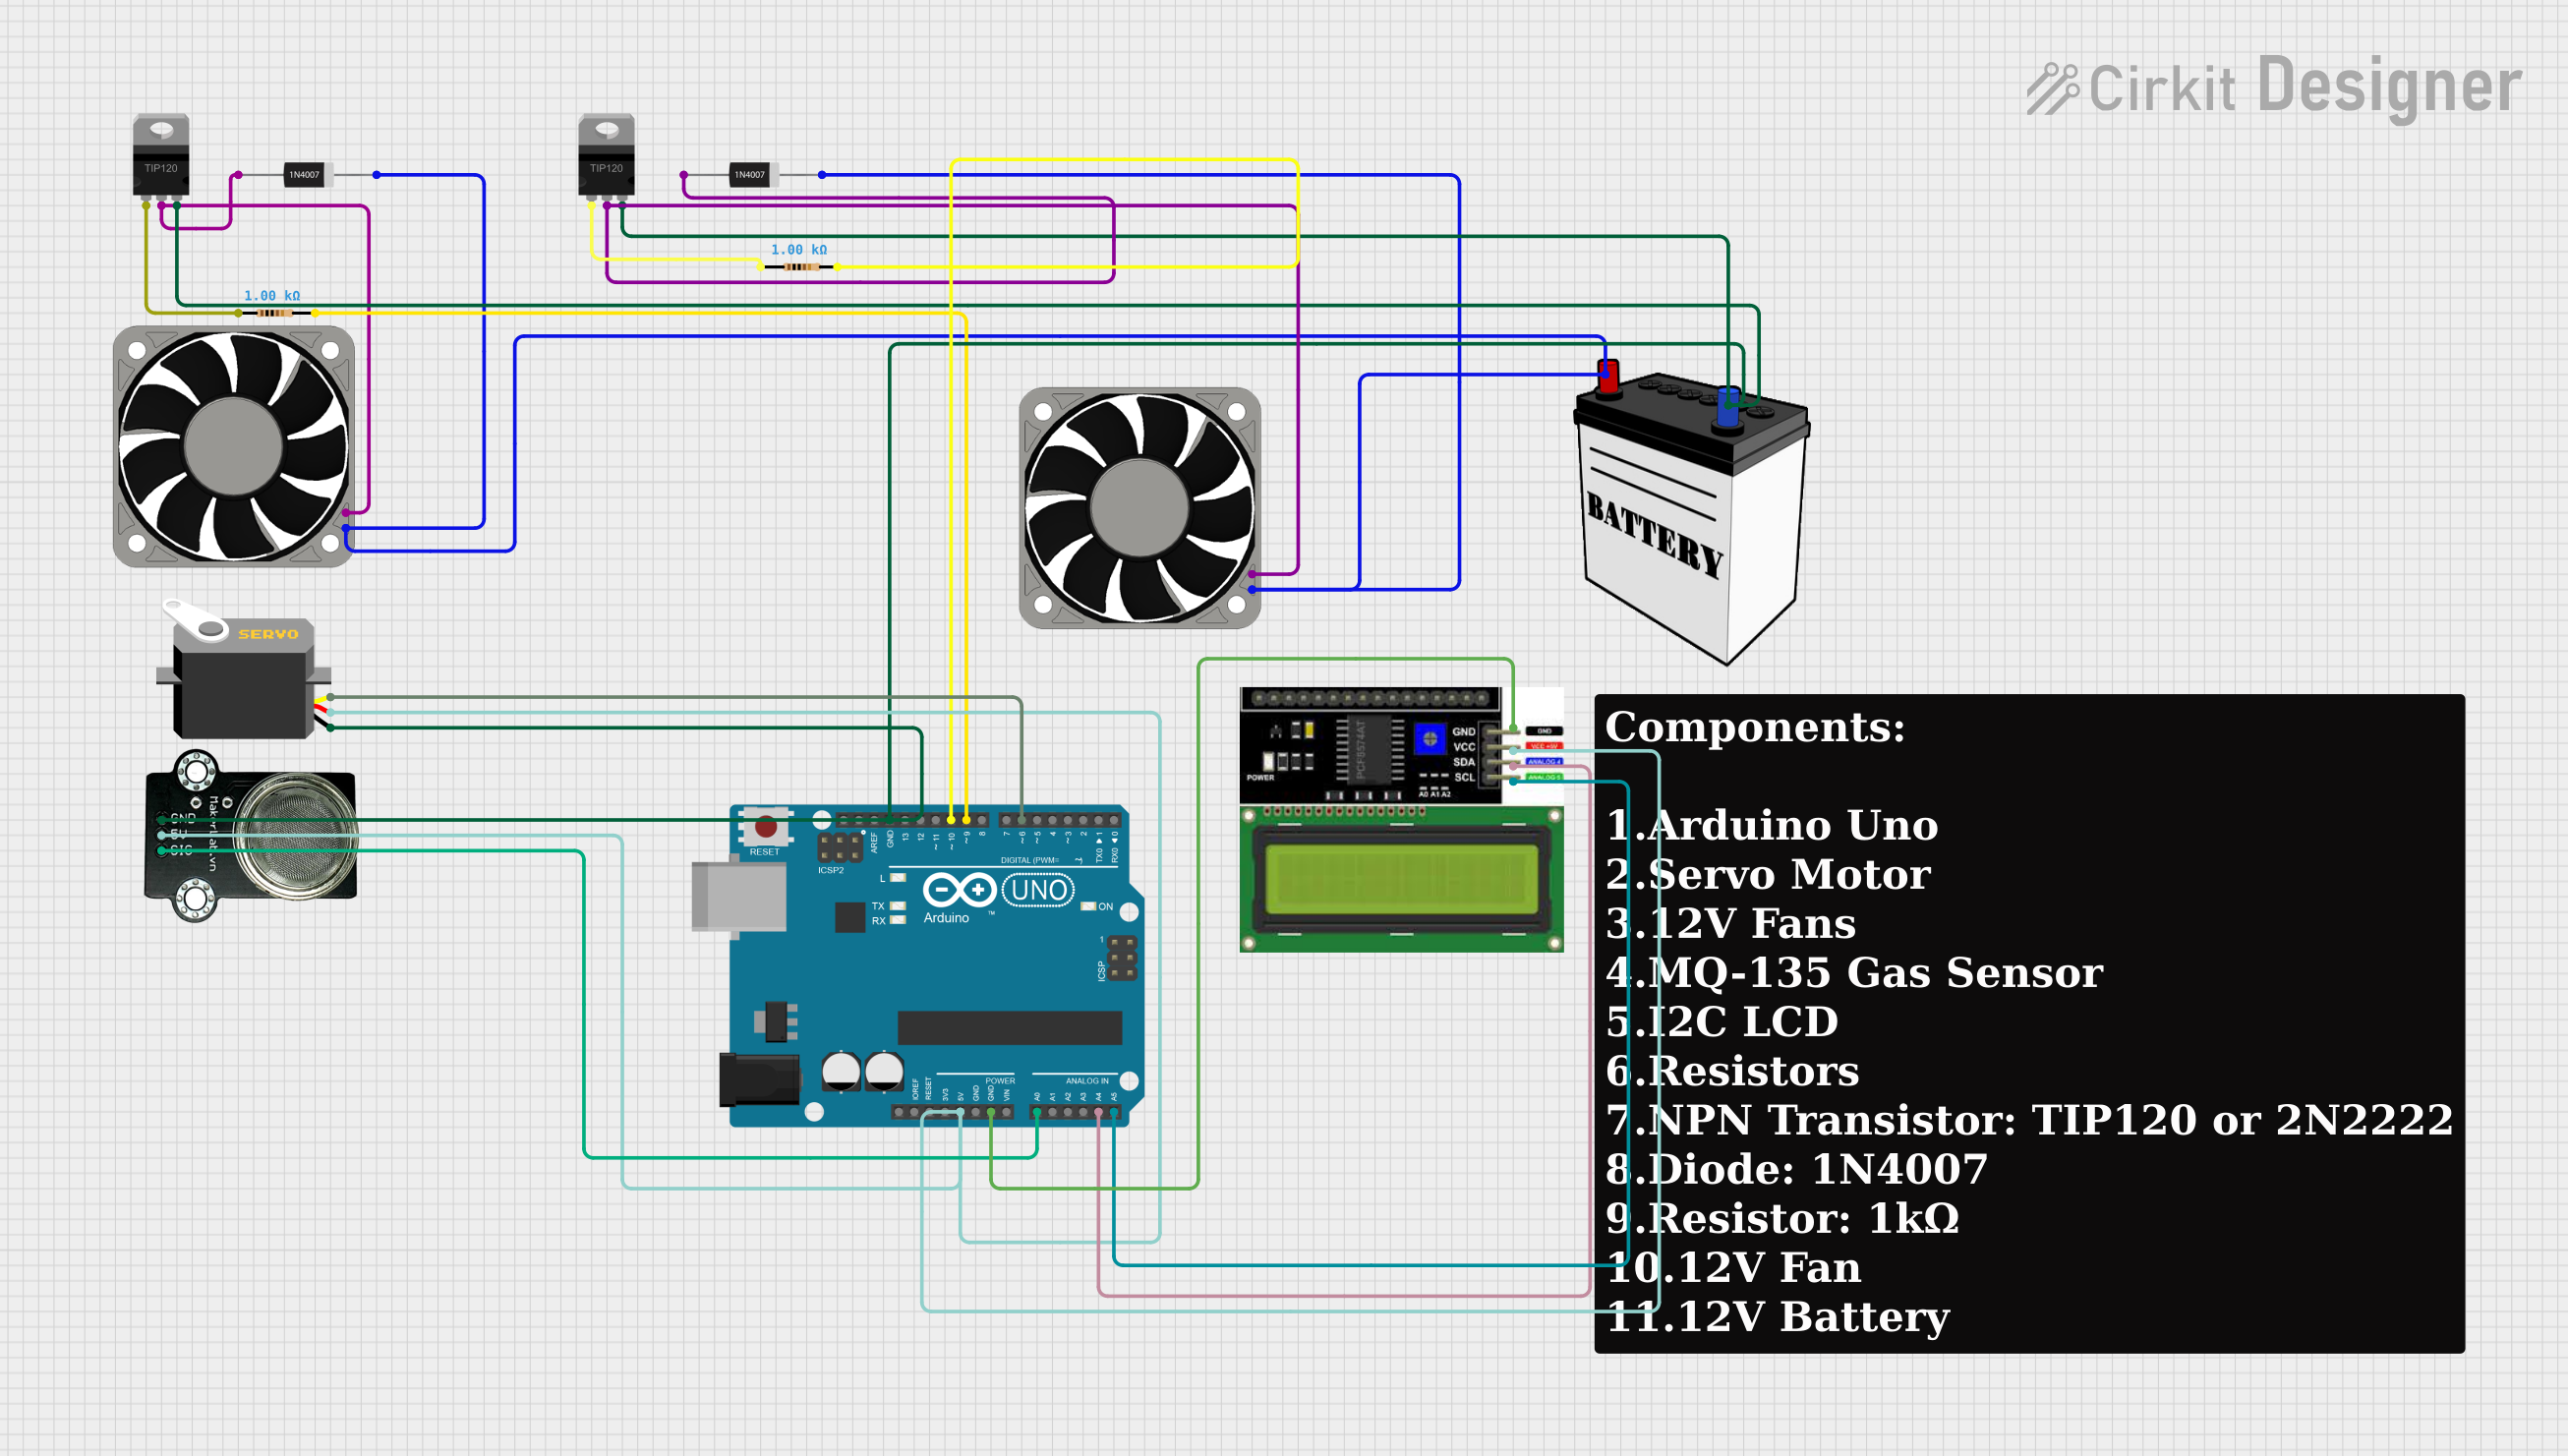
Explore Projects Built with warm air blower
Common Applications and Use Cases
- Space Heating: Providing warmth in small to medium-sized rooms or localized areas.
- Drying: Accelerating the drying process for paints, varnishes, and adhesives.
- Electronics and PCBs: Safely heating electronic components for soldering or desoldering tasks.
- Industrial Processes: Assisting in material handling, packaging, and manufacturing processes that require controlled heat application.
Technical Specifications
Key Technical Details
| Specification | Value/Description |
|---|---|
| Voltage Rating | 110V/220V AC (depending on model) |
| Current Rating | 5A (typical) |
| Power Consumption | 500W - 1500W (depending on model) |
| Operating Frequency | 50/60 Hz |
| Temperature Range | 30°C to 120°C (adjustable) |
| Air Flow Rate | 100 - 500 L/min (depending on model) |
| Control Interface | Variable speed and temperature dials/switches |
Pin Configuration and Descriptions
Since a warm air blower typically plugs into a standard AC outlet, it does not have a pin configuration in the same way that a microcontroller or integrated circuit would. However, it may have a control interface with various switches or dials. For the purpose of this documentation, we will assume a simple model with a power switch and a temperature control dial.
| Control Element | Description |
|---|---|
| Power Switch | Turns the blower on and off |
| Temperature Dial | Adjusts the temperature of the air being expelled |
Usage Instructions
How to Use the Component in a Circuit
- Power Connection: Ensure the warm air blower is connected to an AC power source with the appropriate voltage rating.
- Switching On: Use the power switch to turn on the blower.
- Temperature Setting: Adjust the temperature dial to the desired heat setting.
- Air Flow Direction: Position the blower so that the warm air is directed towards the target area or object.
Important Considerations and Best Practices
- Safety: Always operate the warm air blower in a well-ventilated area to prevent overheating and ensure proper air circulation.
- Surface Clearance: Maintain a safe distance between the blower and any flammable materials to prevent fire hazards.
- Handling: Do not touch the nozzle or any internal components while the blower is in operation or shortly after it has been turned off, as these parts can become extremely hot.
- Maintenance: Regularly clean the intake and exhaust vents to prevent dust accumulation, which can affect performance and safety.
Troubleshooting and FAQs
Common Issues
- Blower Not Turning On: Check the power cord and outlet for any signs of damage or tripped circuit breakers.
- Insufficient Heat: Ensure the temperature dial is set correctly. If the setting is correct, the heating element may need to be inspected or replaced.
- Reduced Air Flow: Clean any debris from the intake and exhaust vents. If the problem persists, the internal fan or motor may require servicing.
Solutions and Tips for Troubleshooting
- Always disconnect the blower from the power source before attempting any maintenance or troubleshooting.
- If the blower is not heating properly, consult the manufacturer's warranty or service guide for instructions on replacing the heating element.
- For persistent operational issues, contact the manufacturer's customer support for assistance or consider taking the blower to a professional for repair.
FAQs
Q: Can I use the warm air blower for extended periods? A: Yes, but it is recommended to periodically turn off the blower to prevent overheating and to ensure longevity of the device.
Q: Is it possible to control the blower with a microcontroller like an Arduino UNO? A: While the blower itself is not designed to be directly controlled by a microcontroller, you can use a relay module interfaced with an Arduino to turn the blower on and off. Direct control of the temperature setting would require additional hardware modifications.
Q: How do I clean the warm air blower? A: Unplug the blower, allow it to cool down, and then use a soft brush or cloth to gently remove dust from the vents and exterior surfaces. Avoid using water or liquid cleaners inside the blower.
Q: What should I do if the blower emits a burning smell? A: Turn off the blower immediately and unplug it. Check for any obstructions or debris in the vents. If the smell persists, do not use the blower and consult a professional for inspection.
Note: The above documentation is a generic guide for a warm air blower and may not cover all models or specific features. Always refer to the manufacturer's manual for model-specific information.