How to Use StrobeIT Anti-Collision Drone Light: Examples, Pinouts, and Specs
Introduction
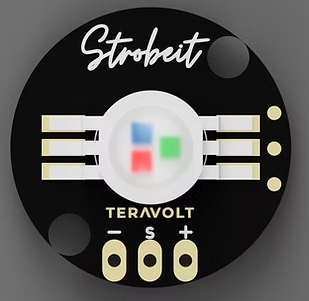
The StrobeIT Anti-Collision Drone Light by Teravolt (Part ID: PWM LED) is a high-visibility LED light designed to enhance drone safety during flight. This component is particularly useful in low-light or nighttime conditions, where visibility is critical. It features multiple flashing modes to alert other airspace users, reducing the risk of mid-air collisions. The compact design and efficient power consumption make it ideal for drones of all sizes.
Explore Projects Built with StrobeIT Anti-Collision Drone Light
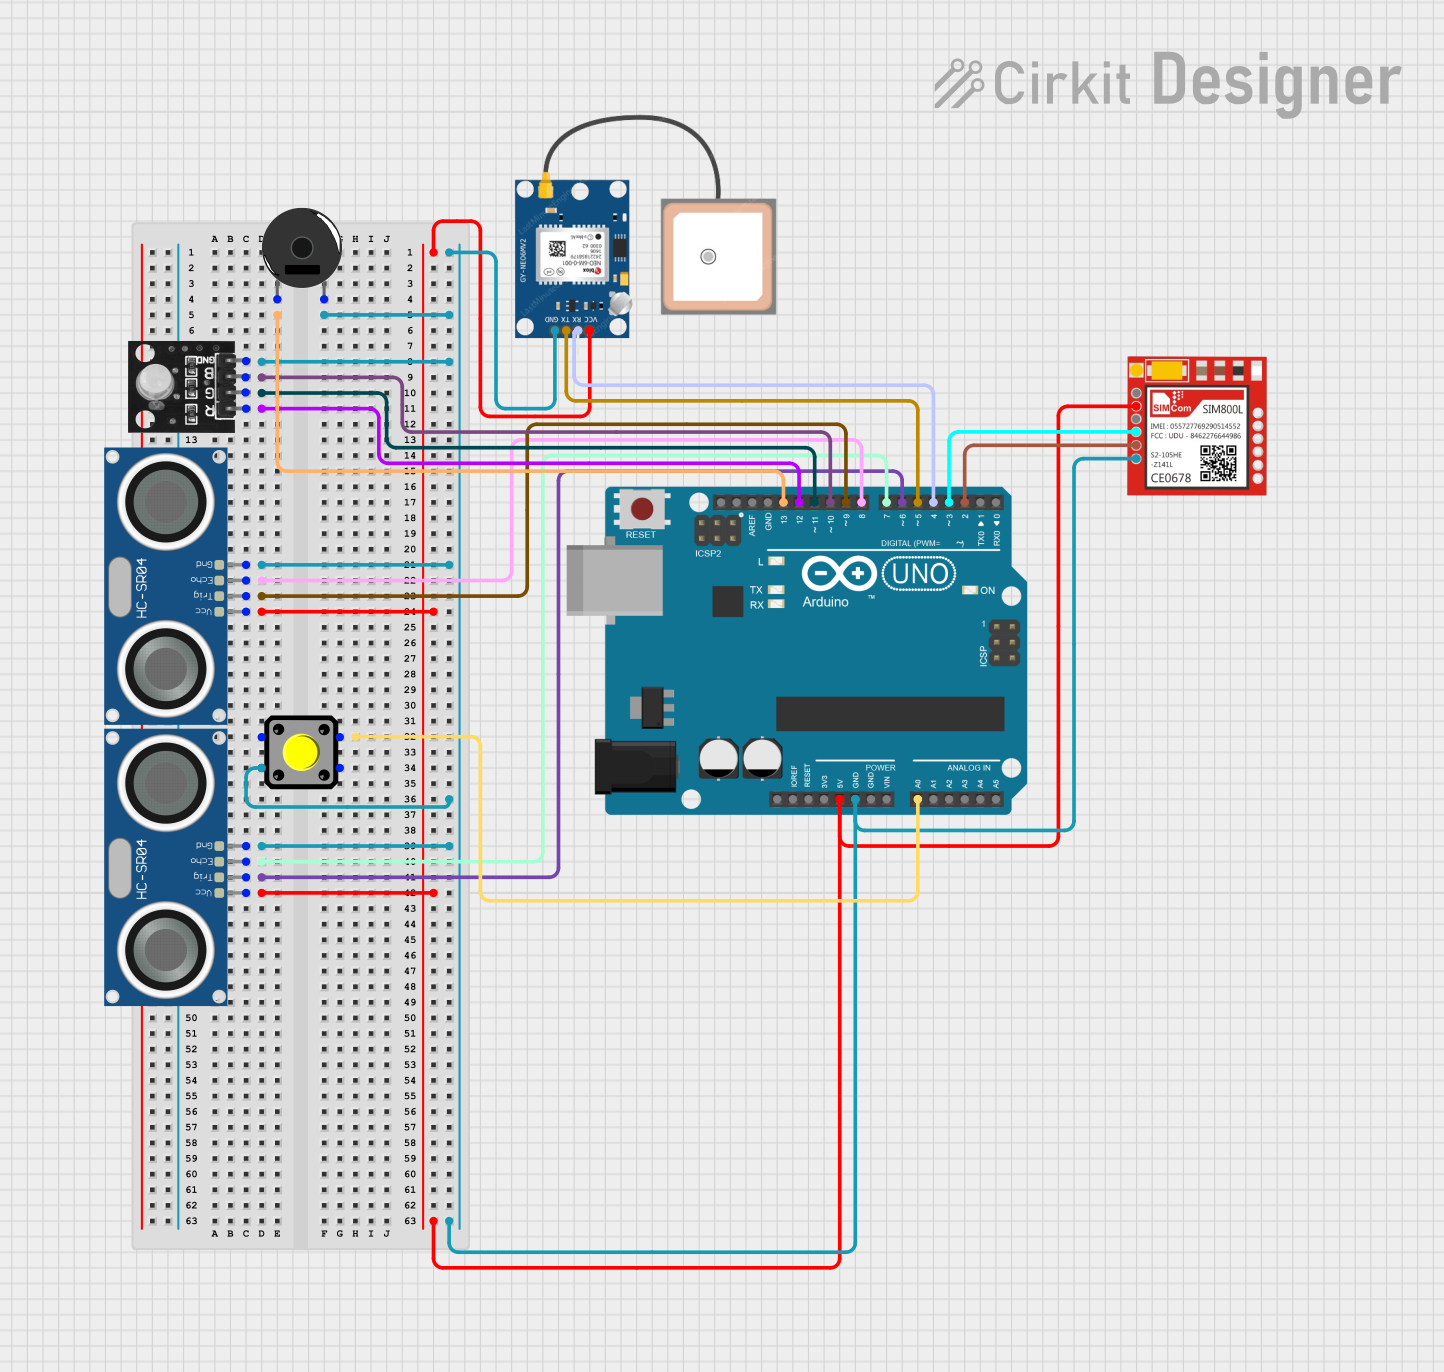

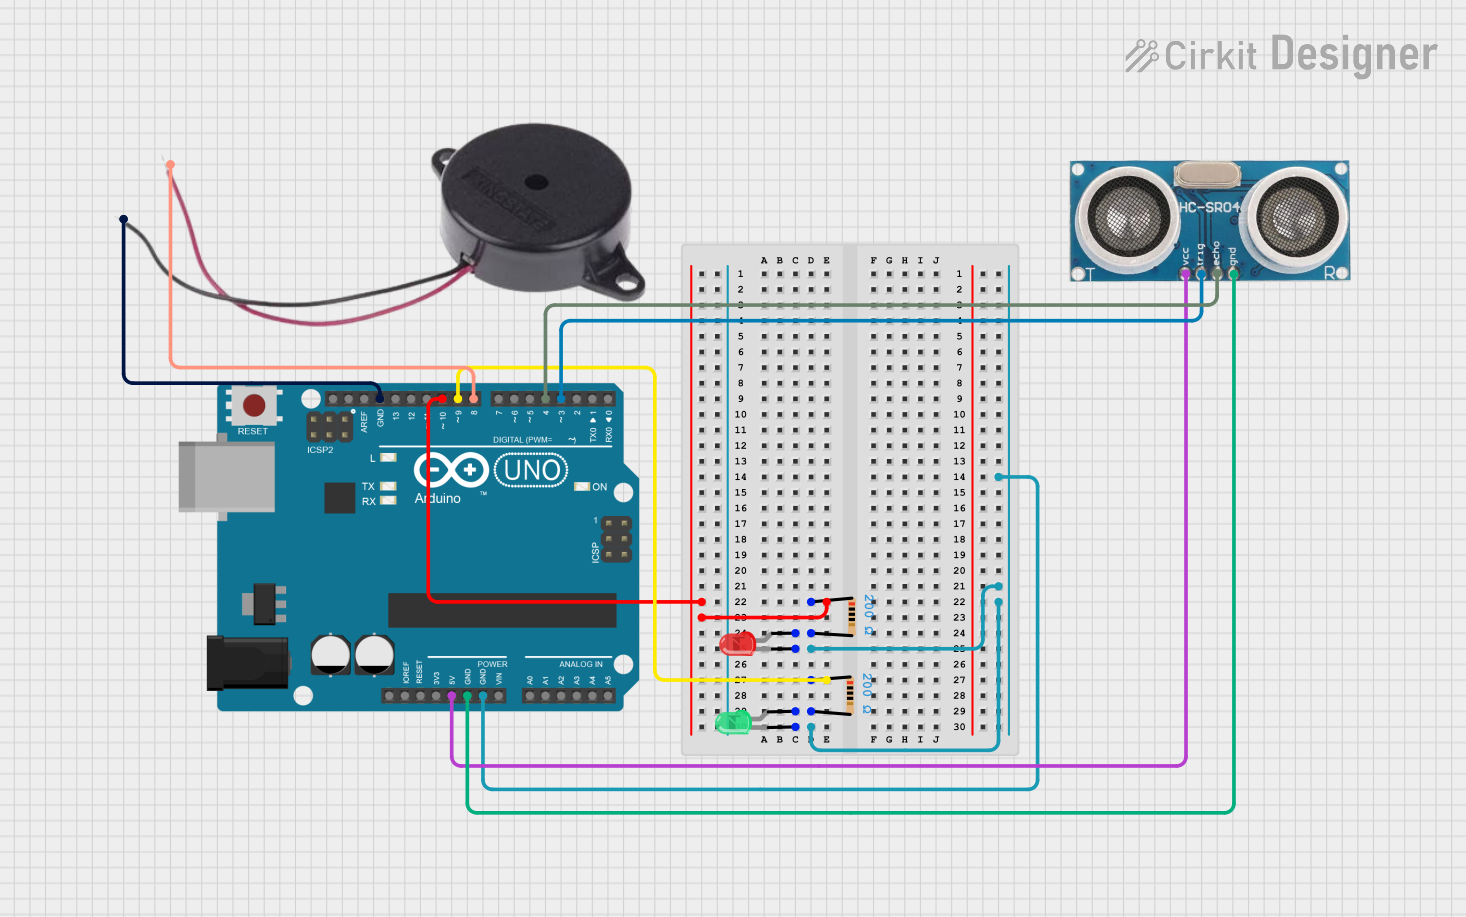
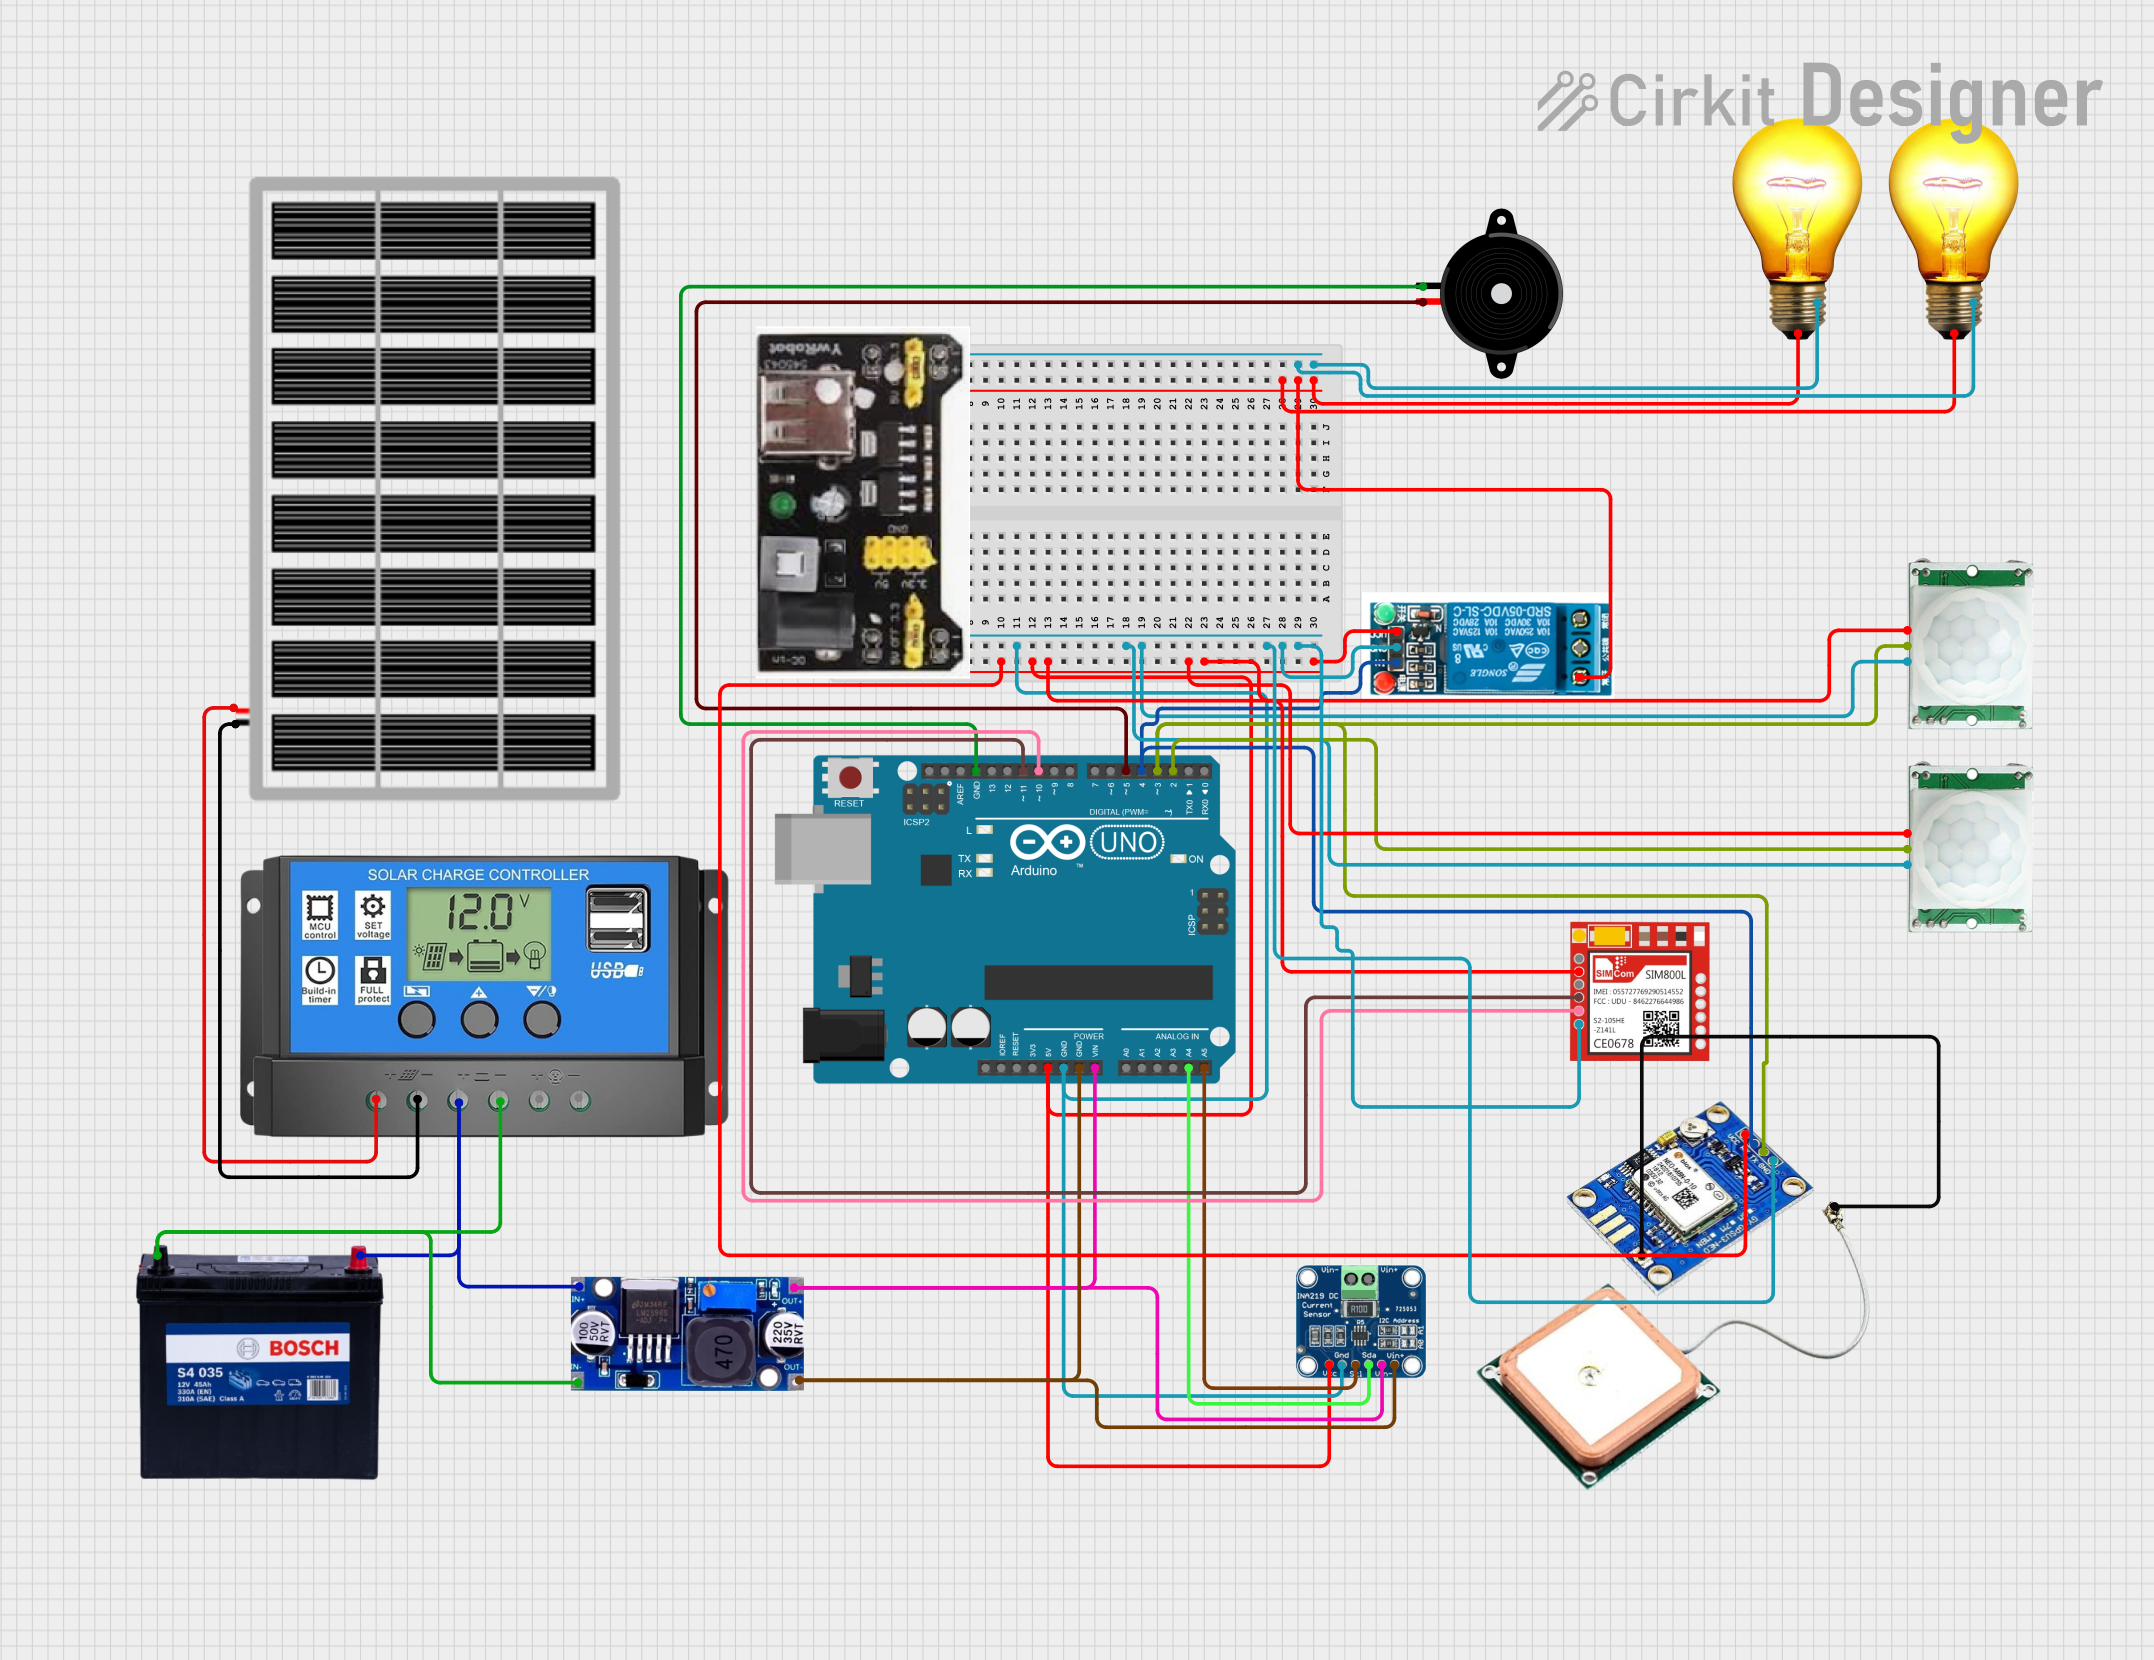
Explore Projects Built with StrobeIT Anti-Collision Drone Light
Common Applications and Use Cases
- Enhancing drone visibility during nighttime or low-light operations.
- Compliance with aviation safety regulations for unmanned aerial vehicles (UAVs).
- Use in search-and-rescue drones to improve visibility in challenging environments.
- Recreational drone flights to ensure safety in shared airspace.
Technical Specifications
Key Technical Details
| Parameter | Value |
|---|---|
| Operating Voltage | 3.7V - 6.0V |
| Current Consumption | 50mA (steady mode) |
| Flashing Modes | Steady, Slow Flash, Fast Flash |
| Light Intensity | 300 lumens |
| LED Color | White (default) |
| Dimensions | 20mm x 10mm x 5mm |
| Weight | 5 grams |
| Operating Temperature | -10°C to 50°C |
Pin Configuration and Descriptions
| Pin Name | Pin Type | Description |
|---|---|---|
| VCC | Power Input | Connect to the positive terminal of the power source (3.7V - 6.0V). |
| GND | Ground | Connect to the ground terminal of the power source. |
| PWM | Signal Input | Accepts a PWM signal to control flashing modes. |
Usage Instructions
How to Use the Component in a Circuit
- Power Connection: Connect the VCC pin to a power source within the operating voltage range (3.7V - 6.0V). Connect the GND pin to the ground of the power source.
- PWM Signal: Use the PWM pin to control the flashing mode. A PWM signal with varying duty cycles can be used to switch between steady, slow flash, and fast flash modes.
- Mounting: Secure the StrobeIT light to your drone using adhesive or screws, ensuring it is visible from all angles.
Important Considerations and Best Practices
- Ensure the power source provides a stable voltage within the specified range to avoid damaging the component.
- Use heat-resistant adhesive or mounting hardware to prevent detachment during operation.
- Avoid direct exposure to water or moisture, as the component is not waterproof.
- When connecting to a microcontroller (e.g., Arduino UNO), use a resistor if necessary to limit current to the PWM pin.
Example Code for Arduino UNO
The following code demonstrates how to control the StrobeIT Anti-Collision Drone Light using an Arduino UNO. The code cycles through steady, slow flash, and fast flash modes.
// Define the PWM pin connected to the StrobeIT light
const int pwmPin = 9;

void setup() {
  pinMode(pwmPin, OUTPUT); // Set the PWM pin as an output
}

void loop() {
  // Steady mode: 100% duty cycle
  analogWrite(pwmPin, 255); // Full brightness
  delay(5000); // Stay in steady mode for 5 seconds

  // Slow flash mode: 50% duty cycle
  for (int i = 0; i < 10; i++) {
    analogWrite(pwmPin, 255); // Turn on
    delay(500); // On for 500ms
    analogWrite(pwmPin, 0);   // Turn off
    delay(500); // Off for 500ms
  }

  // Fast flash mode: 25% duty cycle
  for (int i = 0; i < 20; i++) {
    analogWrite(pwmPin, 255); // Turn on
    delay(100); // On for 100ms
    analogWrite(pwmPin, 0);   // Turn off
    delay(100); // Off for 100ms
  }
}
Troubleshooting and FAQs
Common Issues and Solutions
The LED does not turn on:
- Ensure the power source is within the operating voltage range (3.7V - 6.0V).
- Check all connections, especially the VCC and GND pins.
- Verify that the PWM signal is being sent correctly from the microcontroller.
Flashing modes do not change:
- Confirm that the PWM signal is configured correctly. Use an oscilloscope or multimeter to check the signal.
- Ensure the PWM pin is connected securely to the microcontroller.
The light is dim or flickering:
- Check the power source for stability. A low or fluctuating voltage can cause dimming or flickering.
- Inspect the wiring for loose connections or damaged cables.
FAQs
Q: Can I use the StrobeIT light with a 12V power source?
A: No, the maximum operating voltage is 6.0V. Using a higher voltage may damage the component.
Q: Is the StrobeIT light waterproof?
A: No, the component is not waterproof. Avoid exposing it to water or moisture.
Q: Can I change the default LED color?
A: The default LED color is white. Customization may require replacing the LED, which is not recommended as it may void the warranty.
Q: How do I mount the light on my drone?
A: Use heat-resistant adhesive or screws to secure the light. Ensure it is mounted in a location visible from all angles.
This concludes the documentation for the StrobeIT Anti-Collision Drone Light. For further assistance, refer to the manufacturer's support resources or contact Teravolt directly.