How to Use Screen: Examples, Pinouts, and Specs
Introduction
A screen is a display device that visually presents information, images, or video output from a computer or electronic device. Screens are essential components in modern electronics, enabling users to interact with devices and access information in a visual format. They come in various types, such as LCD, OLED, and TFT, each suited for specific applications.
Common applications and use cases include:
- User interfaces for embedded systems
- Displaying data in IoT devices
- Visual output for computers, smartphones, and tablets
- Video playback and gaming
- Industrial control panels and instrumentation
Explore Projects Built with Screen


Explore Projects Built with Screen
Technical Specifications
The technical specifications of a screen can vary depending on its type and intended use. Below are general specifications for a typical LCD or TFT screen module commonly used in electronics projects:
General Specifications
| Parameter | Value |
|---|---|
| Display Type | LCD, TFT, or OLED |
| Resolution | 128x64, 320x240, or higher |
| Operating Voltage | 3.3V or 5V |
| Current Consumption | 20mA to 200mA (varies by type) |
| Interface | SPI, I2C, or Parallel |
| Backlight | LED (adjustable brightness) |
| Viewing Angle | 120° (typical) |
| Operating Temperature | -20°C to 70°C |
Pin Configuration (Example: 16x2 LCD Module)
| Pin No. | Name | Description |
|---|---|---|
| 1 | VSS | Ground (0V) |
| 2 | VDD | Power supply (5V or 3.3V) |
| 3 | V0 | Contrast adjustment (connect to potentiometer) |
| 4 | RS | Register Select (Command/Data selection) |
| 5 | RW | Read/Write control (set to LOW for write mode) |
| 6 | E | Enable signal (triggers data read/write) |
| 7-14 | D0-D7 | Data pins (used for 4-bit or 8-bit communication) |
| 15 | LED+ | Backlight anode (connect to power via resistor) |
| 16 | LED- | Backlight cathode (connect to ground) |
Usage Instructions
To use a screen in a circuit, follow these steps:
- Power the Screen: Connect the VDD pin to a 3.3V or 5V power source and the VSS pin to ground.
- Adjust Contrast: Use a potentiometer connected to the V0 pin to adjust the screen's contrast.
- Connect Control Pins: Connect the RS, RW, and E pins to the appropriate GPIO pins on your microcontroller.
- Data Communication: For 4-bit mode, connect D4-D7 to the microcontroller. For 8-bit mode, connect all data pins (D0-D7).
- Backlight: Connect the LED+ pin to power through a current-limiting resistor and the LED- pin to ground.
- Initialize the Screen: Use the appropriate library or commands to initialize the screen and send data.
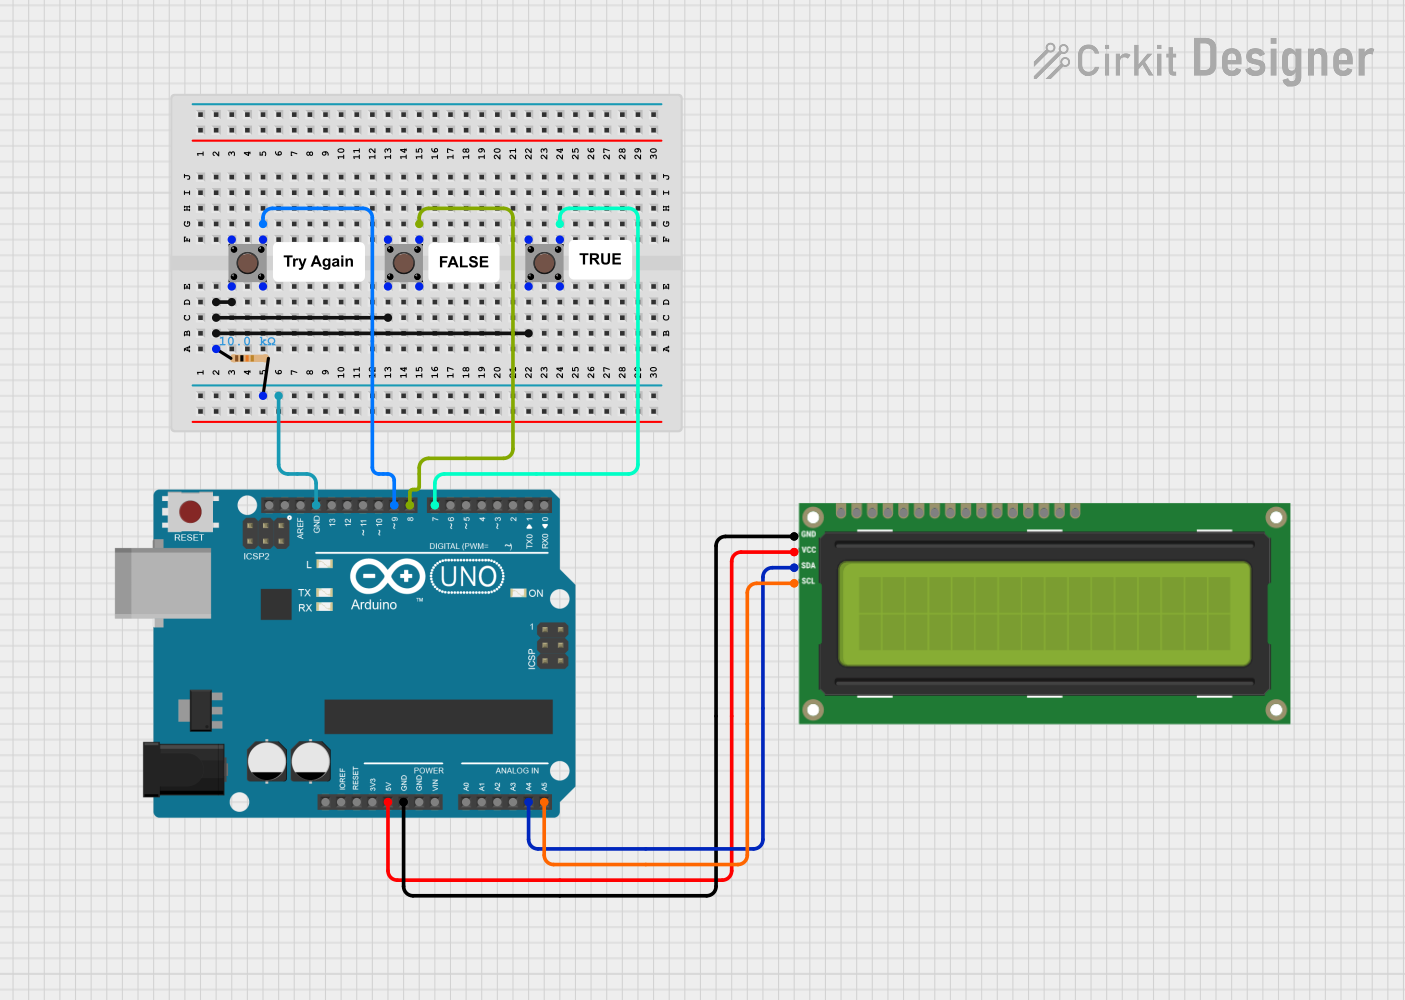
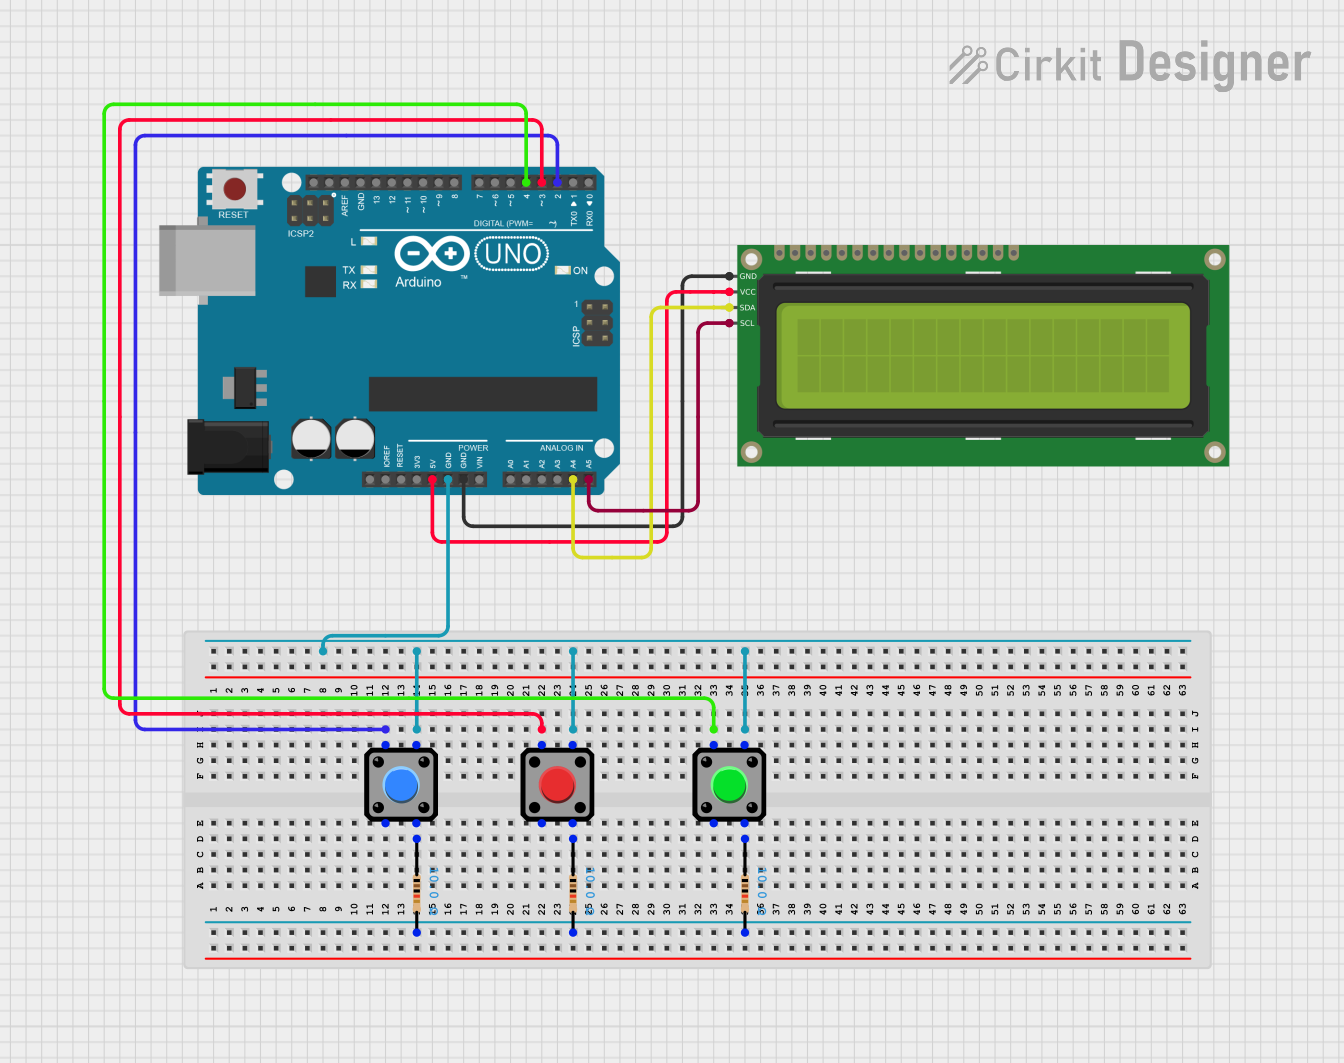
Example: Connecting a 16x2 LCD to Arduino UNO
Below is an example of how to connect and program a 16x2 LCD screen using the Arduino UNO:
Wiring Diagram
| LCD Pin | Arduino Pin |
|---|---|
| VSS | GND |
| VDD | 5V |
| V0 | Potentiometer (middle pin) |
| RS | Pin 12 |
| RW | GND |
| E | Pin 11 |
| D4 | Pin 5 |
| D5 | Pin 4 |
| D6 | Pin 3 |
| D7 | Pin 2 |
| LED+ | 5V (via 220Ω resistor) |
| LED- | GND |
Arduino Code
#include <LiquidCrystal.h>

// Initialize the library with the numbers of the interface pins
LiquidCrystal lcd(12, 11, 5, 4, 3, 2);

void setup() {
  lcd.begin(16, 2); // Set up the LCD's number of columns and rows
  lcd.print("Hello, World!"); // Print a message to the LCD
}

void loop() {
  // Move the cursor to the second line and print a message
  lcd.setCursor(0, 1);
  lcd.print("Arduino LCD Demo");
  delay(1000); // Wait for 1 second
  lcd.clear(); // Clear the screen
  lcd.print("Enjoy Coding!");
  delay(1000); // Wait for 1 second
}
Best Practices
- Use a current-limiting resistor for the backlight to prevent damage.
- Avoid exposing the screen to extreme temperatures or humidity.
- Use a level shifter if the screen operates at 3.3V and your microcontroller operates at 5V.
- Securely mount the screen to prevent physical damage.
Troubleshooting and FAQs
Common Issues
Screen Not Displaying Anything
- Ensure the power connections (VDD and VSS) are correct.
- Check the contrast adjustment (V0 pin).
- Verify the connections to the control and data pins.
Flickering or Unstable Display
- Check for loose connections or poor soldering.
- Ensure the power supply is stable and sufficient.
Incorrect Characters or Garbled Text
- Verify the data pin connections.
- Ensure the correct communication mode (4-bit or 8-bit) is configured in the code.
Backlight Not Working
- Check the LED+ and LED- connections.
- Ensure the current-limiting resistor is properly connected.
FAQs
Q: Can I use a screen with a Raspberry Pi?
A: Yes, most screens with SPI or I2C interfaces can be used with a Raspberry Pi. Use the appropriate libraries, such as lcd or Adafruit_Python_CharLCD.
Q: How do I clean the screen?
A: Use a soft, lint-free cloth slightly dampened with water or a screen-safe cleaning solution. Avoid using abrasive materials.
Q: Can I use the screen outdoors?
A: Some screens are designed for outdoor use, but standard screens may not perform well in direct sunlight or extreme weather conditions. Check the specifications for outdoor compatibility.
By following this documentation, you can effectively integrate and troubleshoot a screen in your electronic projects.