How to Use PAM8610: Examples, Pinouts, and Specs
Introduction
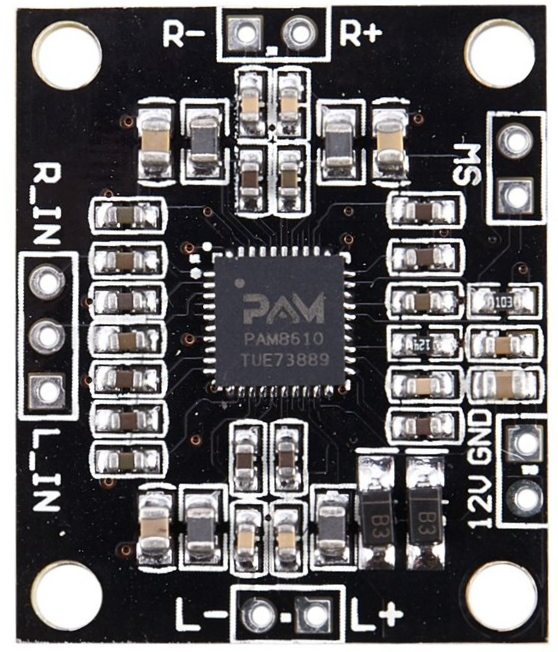
The PAM8610 is a high-efficiency Class D audio amplifier designed for driving speakers in portable and compact audio applications. Manufactured by "a" with the part ID "PAM," this amplifier delivers high output power while maintaining low power consumption. Its compact design and built-in protection mechanisms make it ideal for battery-operated devices such as portable speakers, soundbars, and multimedia systems.
Explore Projects Built with PAM8610


Explore Projects Built with PAM8610
Common Applications
- Portable Bluetooth speakers
- Soundbars and home audio systems
- Multimedia devices
- Battery-powered audio systems
- DIY audio amplifier projects
Technical Specifications
Key Technical Details
- Amplifier Type: Class D
- Output Power: Up to 2 x 15W (stereo) at 8Ω with 10% THD+N
- Operating Voltage Range: 7V to 15V DC
- Efficiency: Up to 90%
- Input Impedance: 20kΩ
- Output Load: 4Ω to 8Ω
- Total Harmonic Distortion + Noise (THD+N): 0.1% at 1W, 8Ω
- Signal-to-Noise Ratio (SNR): ≥ 90dB
- Built-in Features:
- Over-temperature protection
- Over-current protection
- Short-circuit protection
- Pop noise suppression
- Package Type: 24-pin SOP (Small Outline Package)
Pin Configuration and Descriptions
The PAM8610 has 24 pins, with the following configuration:
| Pin Number | Pin Name | Description |
|---|---|---|
| 1 | INL+ | Left channel positive input |
| 2 | INL- | Left channel negative input |
| 3 | AVDD | Analog power supply |
| 4 | AGND | Analog ground |
| 5 | INL | Left channel input |
| 6 | INL | Left channel input |
| 7 | OUTL+ | Left channel positive output |
| 8 | OUTL- | Left channel negative output |
| 9 | OUTR+ | Right channel positive output |
| 10 | OUTR- | Right channel negative output |
| 11 | PVDD | Power supply for the output stage |
| 12 | PGND | Power ground |
| 13 | INL | Left channel input |
| 14 | INL | Left channel input |
| 15 | OUTL+ | Left channel positive output |
| 16 | OUTL- | Left channel negative output |
| 17 | OUTR+ | Right channel positive output |
| 18 | OUTR- | Right channel negative output |
| 19 | PVDD | Power supply for the output stage |
| 20 | PGND | Power ground |
| 21 | INL | Left channel input |
| 22 | INL | Left channel input |
| 23 | OUTL+ | Left channel positive output |
| 24 | OUTL- | Left channel negative output |
Usage Instructions
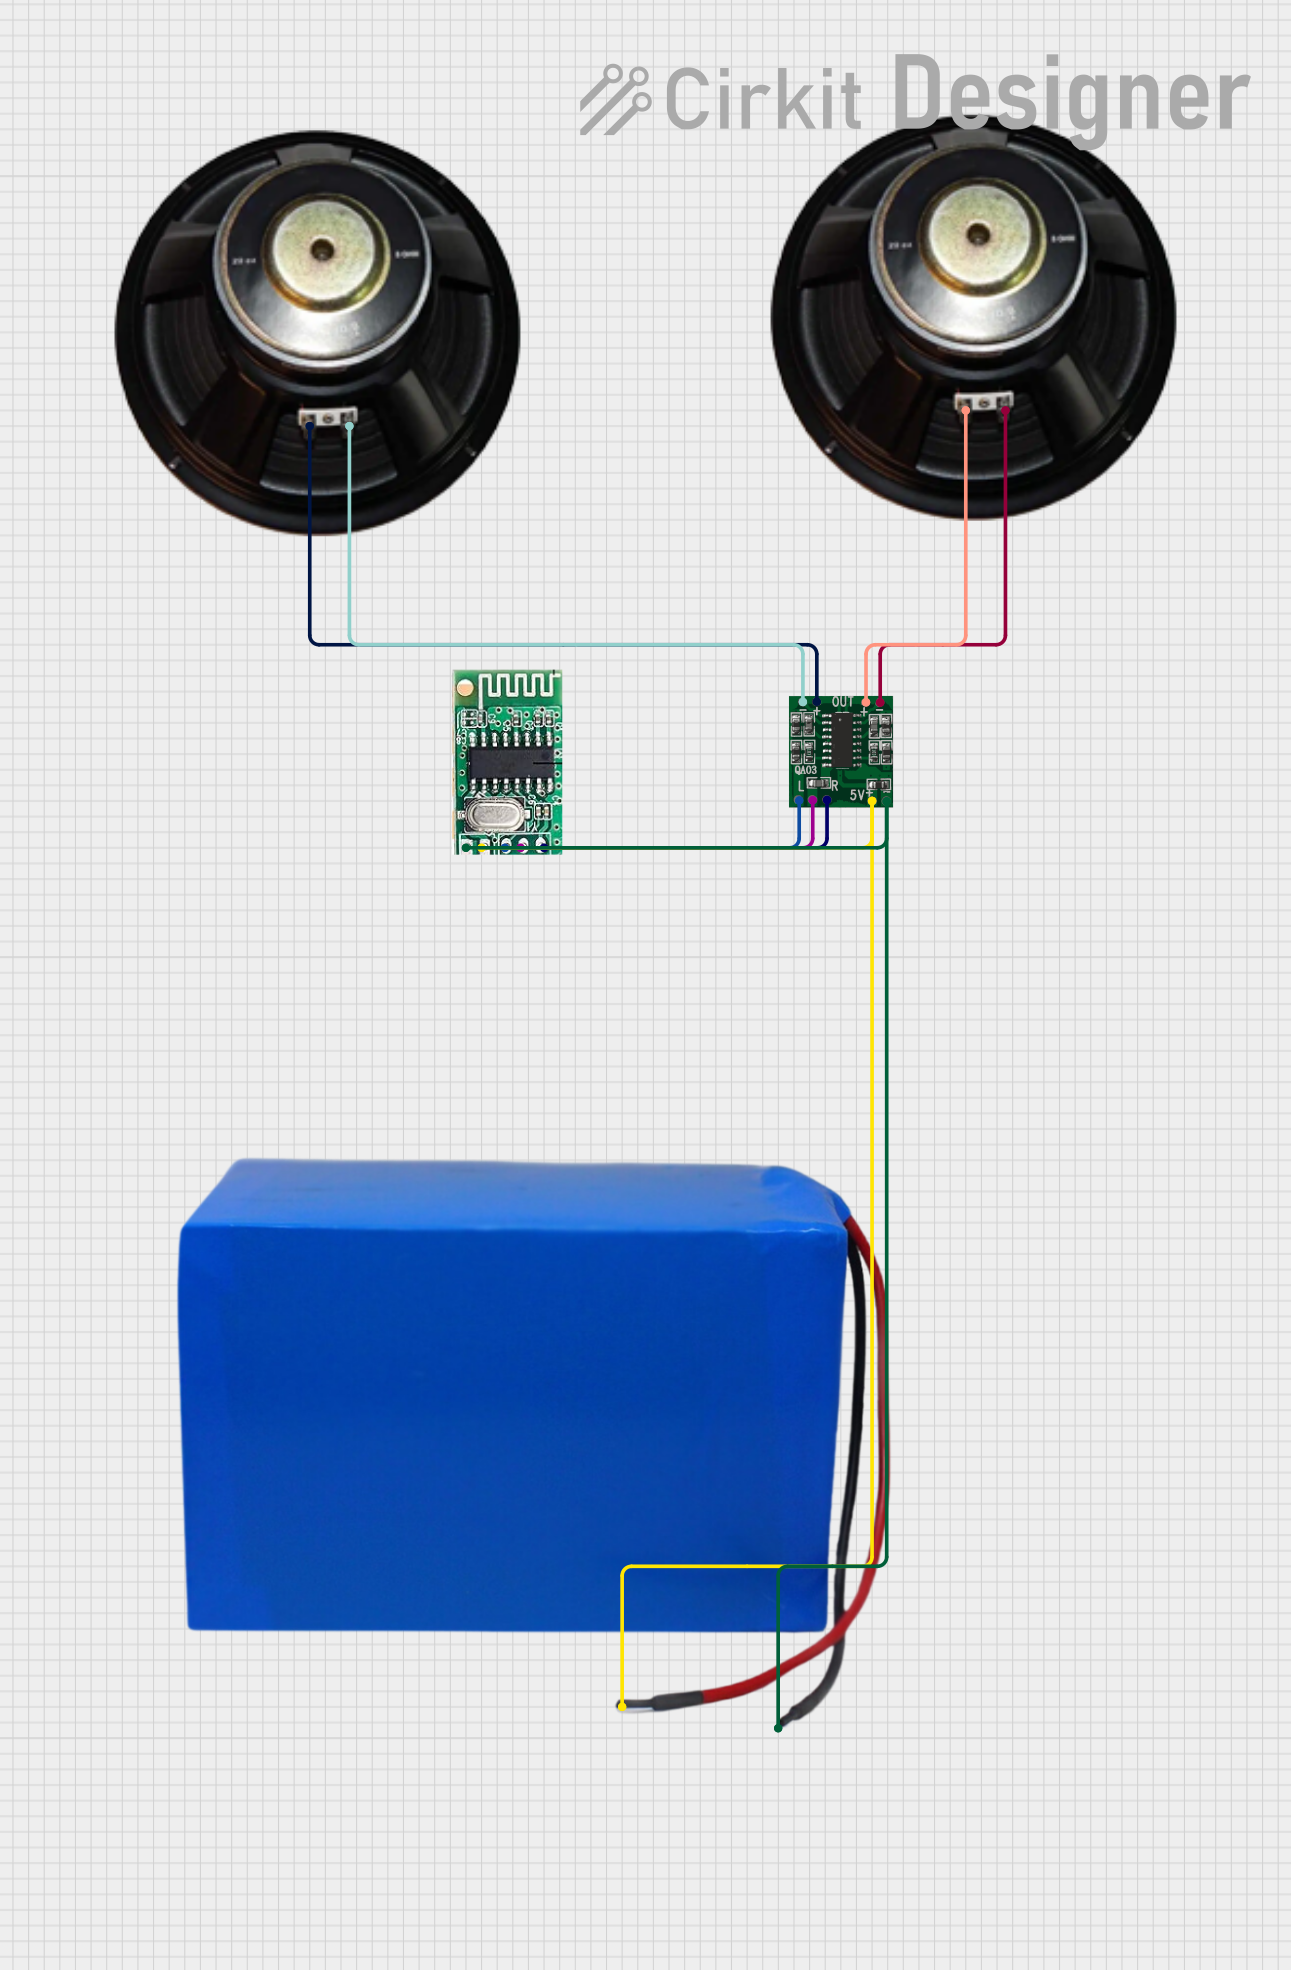
How to Use the PAM8610 in a Circuit
- Power Supply: Connect a DC power supply (7V to 15V) to the PVDD pin. Ensure the power supply can provide sufficient current for the desired output power.
- Input Signal: Connect the audio input signal to the INL+ and INL- pins for the left channel, and INR+ and INR- pins for the right channel. Use capacitors to block DC offset if necessary.
- Speaker Connection: Connect the left and right speakers to the OUTL+/- and OUTR+/- pins, respectively. Ensure the speakers have an impedance of 4Ω to 8Ω.
- Grounding: Connect the AGND and PGND pins to the ground of the power supply and input signal.
- Bypass Capacitor: Place a bypass capacitor (e.g., 100µF) close to the PVDD pin to stabilize the power supply.
- Heat Dissipation: Ensure proper heat dissipation by mounting the PAM8610 on a PCB with adequate thermal management.
Important Considerations
- Speaker Impedance: Use speakers with an impedance of 4Ω to 8Ω for optimal performance.
- Power Supply: Avoid exceeding the maximum voltage rating of 15V to prevent damage.
- Noise Suppression: Use proper grounding and shielding techniques to minimize noise and interference.
- Heat Management: Ensure adequate ventilation or heat sinking to prevent overheating during operation.
Example: Connecting PAM8610 to an Arduino UNO
The PAM8610 can be used with an Arduino UNO to amplify audio signals. Below is an example of how to connect and control the amplifier:
Circuit Connections
- Connect the audio signal output from the Arduino (e.g., PWM pin) to the INL+ and INR+ pins of the PAM8610.
- Connect the ground of the Arduino to the AGND and PGND pins of the PAM8610.
- Connect the speakers to the OUTL+/- and OUTR+/- pins.
- Power the PAM8610 with a 12V DC power supply.
Arduino Code Example
// Example code to generate a PWM audio signal for the PAM8610 amplifier
// Connect the PWM output pin to the PAM8610 audio input pins (INL+ or INR+)

const int pwmPin = 9; // PWM output pin

void setup() {
  pinMode(pwmPin, OUTPUT); // Set the PWM pin as output
}

void loop() {
  // Generate a simple square wave for testing
  analogWrite(pwmPin, 128); // 50% duty cycle (midpoint)
  delay(500);               // Wait for 500ms
  analogWrite(pwmPin, 0);   // 0% duty cycle (low)
  delay(500);               // Wait for 500ms
}
Troubleshooting and FAQs
Common Issues and Solutions
No Sound Output:
- Verify that the power supply voltage is within the operating range (7V to 15V).
- Check the speaker connections and ensure they are properly connected to the output pins.
- Ensure the input signal is present and properly connected to the input pins.
Distorted Audio:
- Reduce the input signal amplitude to avoid overdriving the amplifier.
- Check the speaker impedance and ensure it is within the recommended range (4Ω to 8Ω).
- Verify that the power supply can provide sufficient current for the desired output power.
Overheating:
- Ensure proper heat dissipation by using a heat sink or improving ventilation.
- Check for short circuits or excessive load on the output pins.
Noise or Interference:
- Use proper grounding and shielding techniques to minimize noise.
- Add decoupling capacitors to the power supply lines to reduce noise.
FAQs
Q: Can the PAM8610 drive headphones?
A: The PAM8610 is designed for driving speakers with an impedance of 4Ω to 8Ω. It is not suitable for directly driving headphones.
Q: What is the maximum output power of the PAM8610?
A: The PAM8610 can deliver up to 2 x 15W of output power at 8Ω with 10% THD+N.
Q: Can I use the PAM8610 with a 5V power supply?
A: No, the minimum operating voltage for the PAM8610 is 7V. Using a 5V power supply will not provide sufficient power for proper operation.
Q: How can I reduce pop noise during power-on?
A: The PAM8610 includes a built-in pop noise suppression feature. Ensure proper grounding and use a stable power supply to minimize noise further.